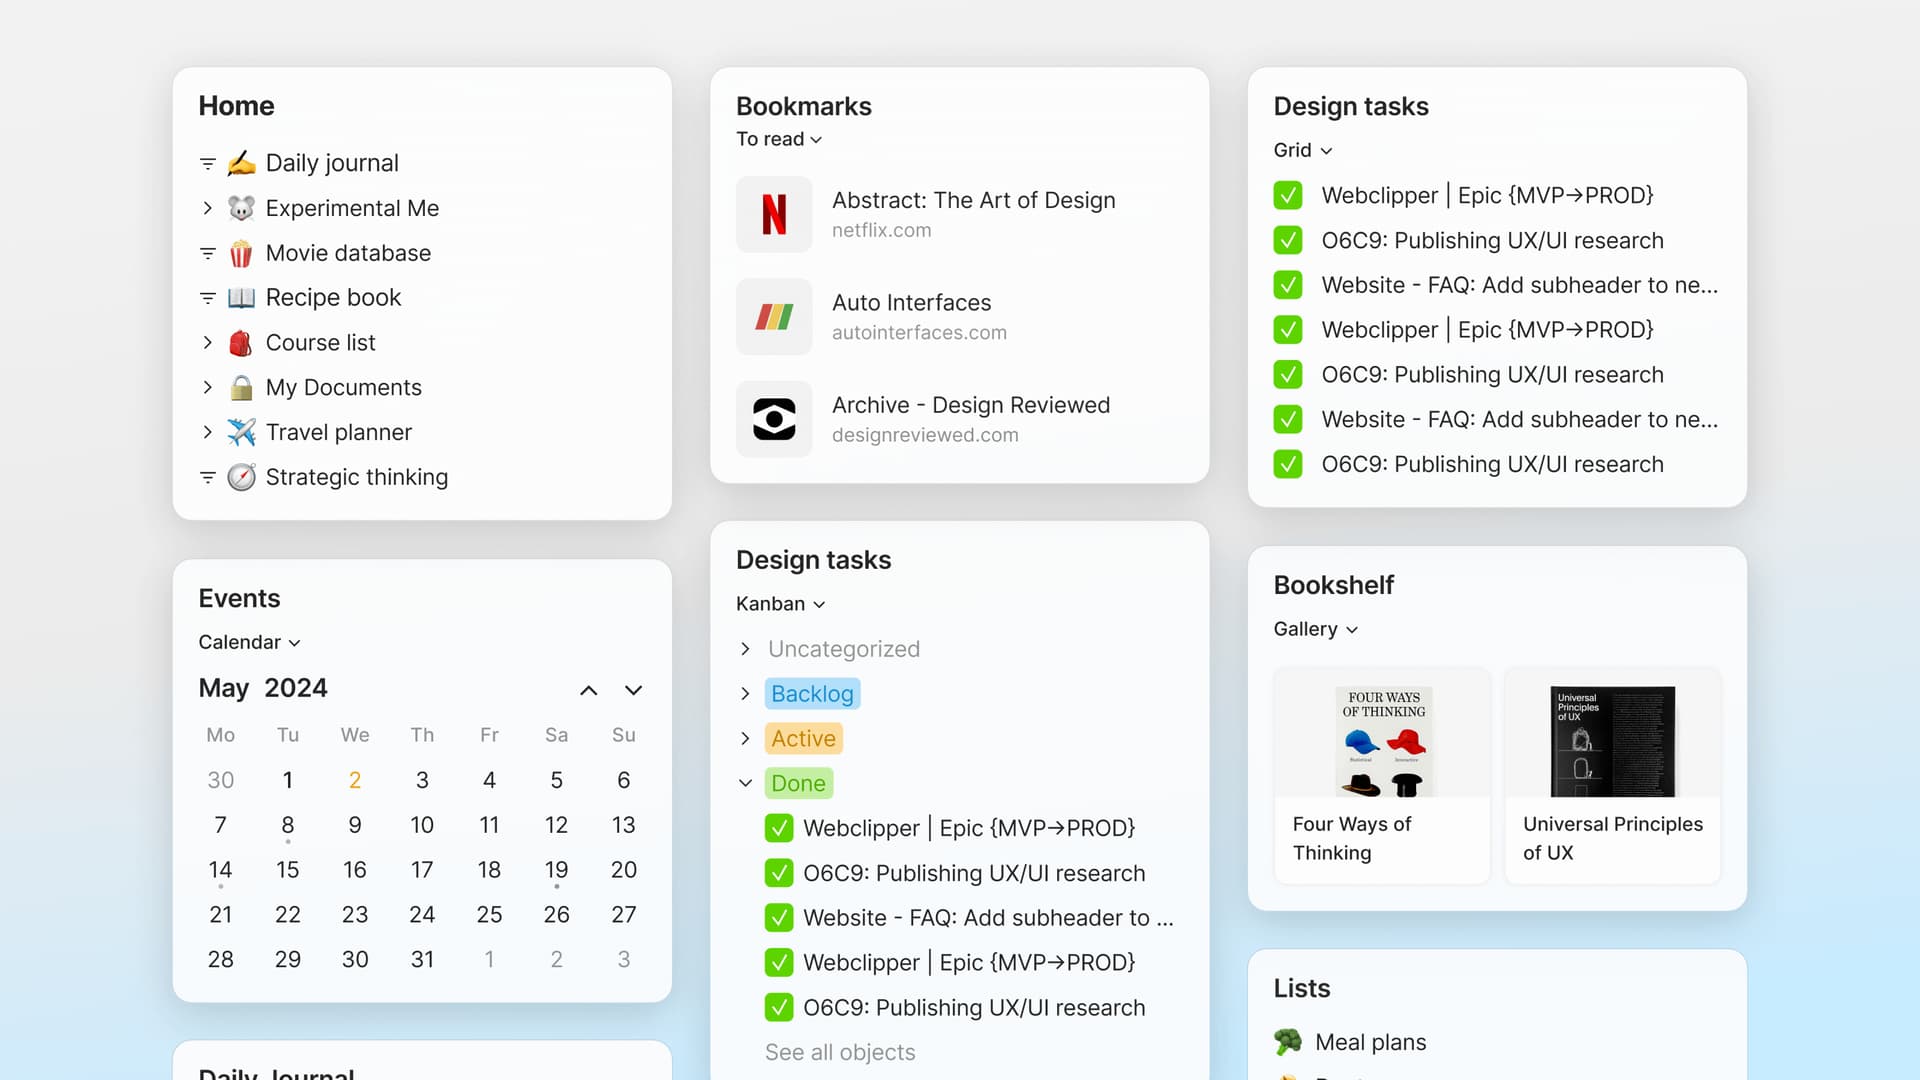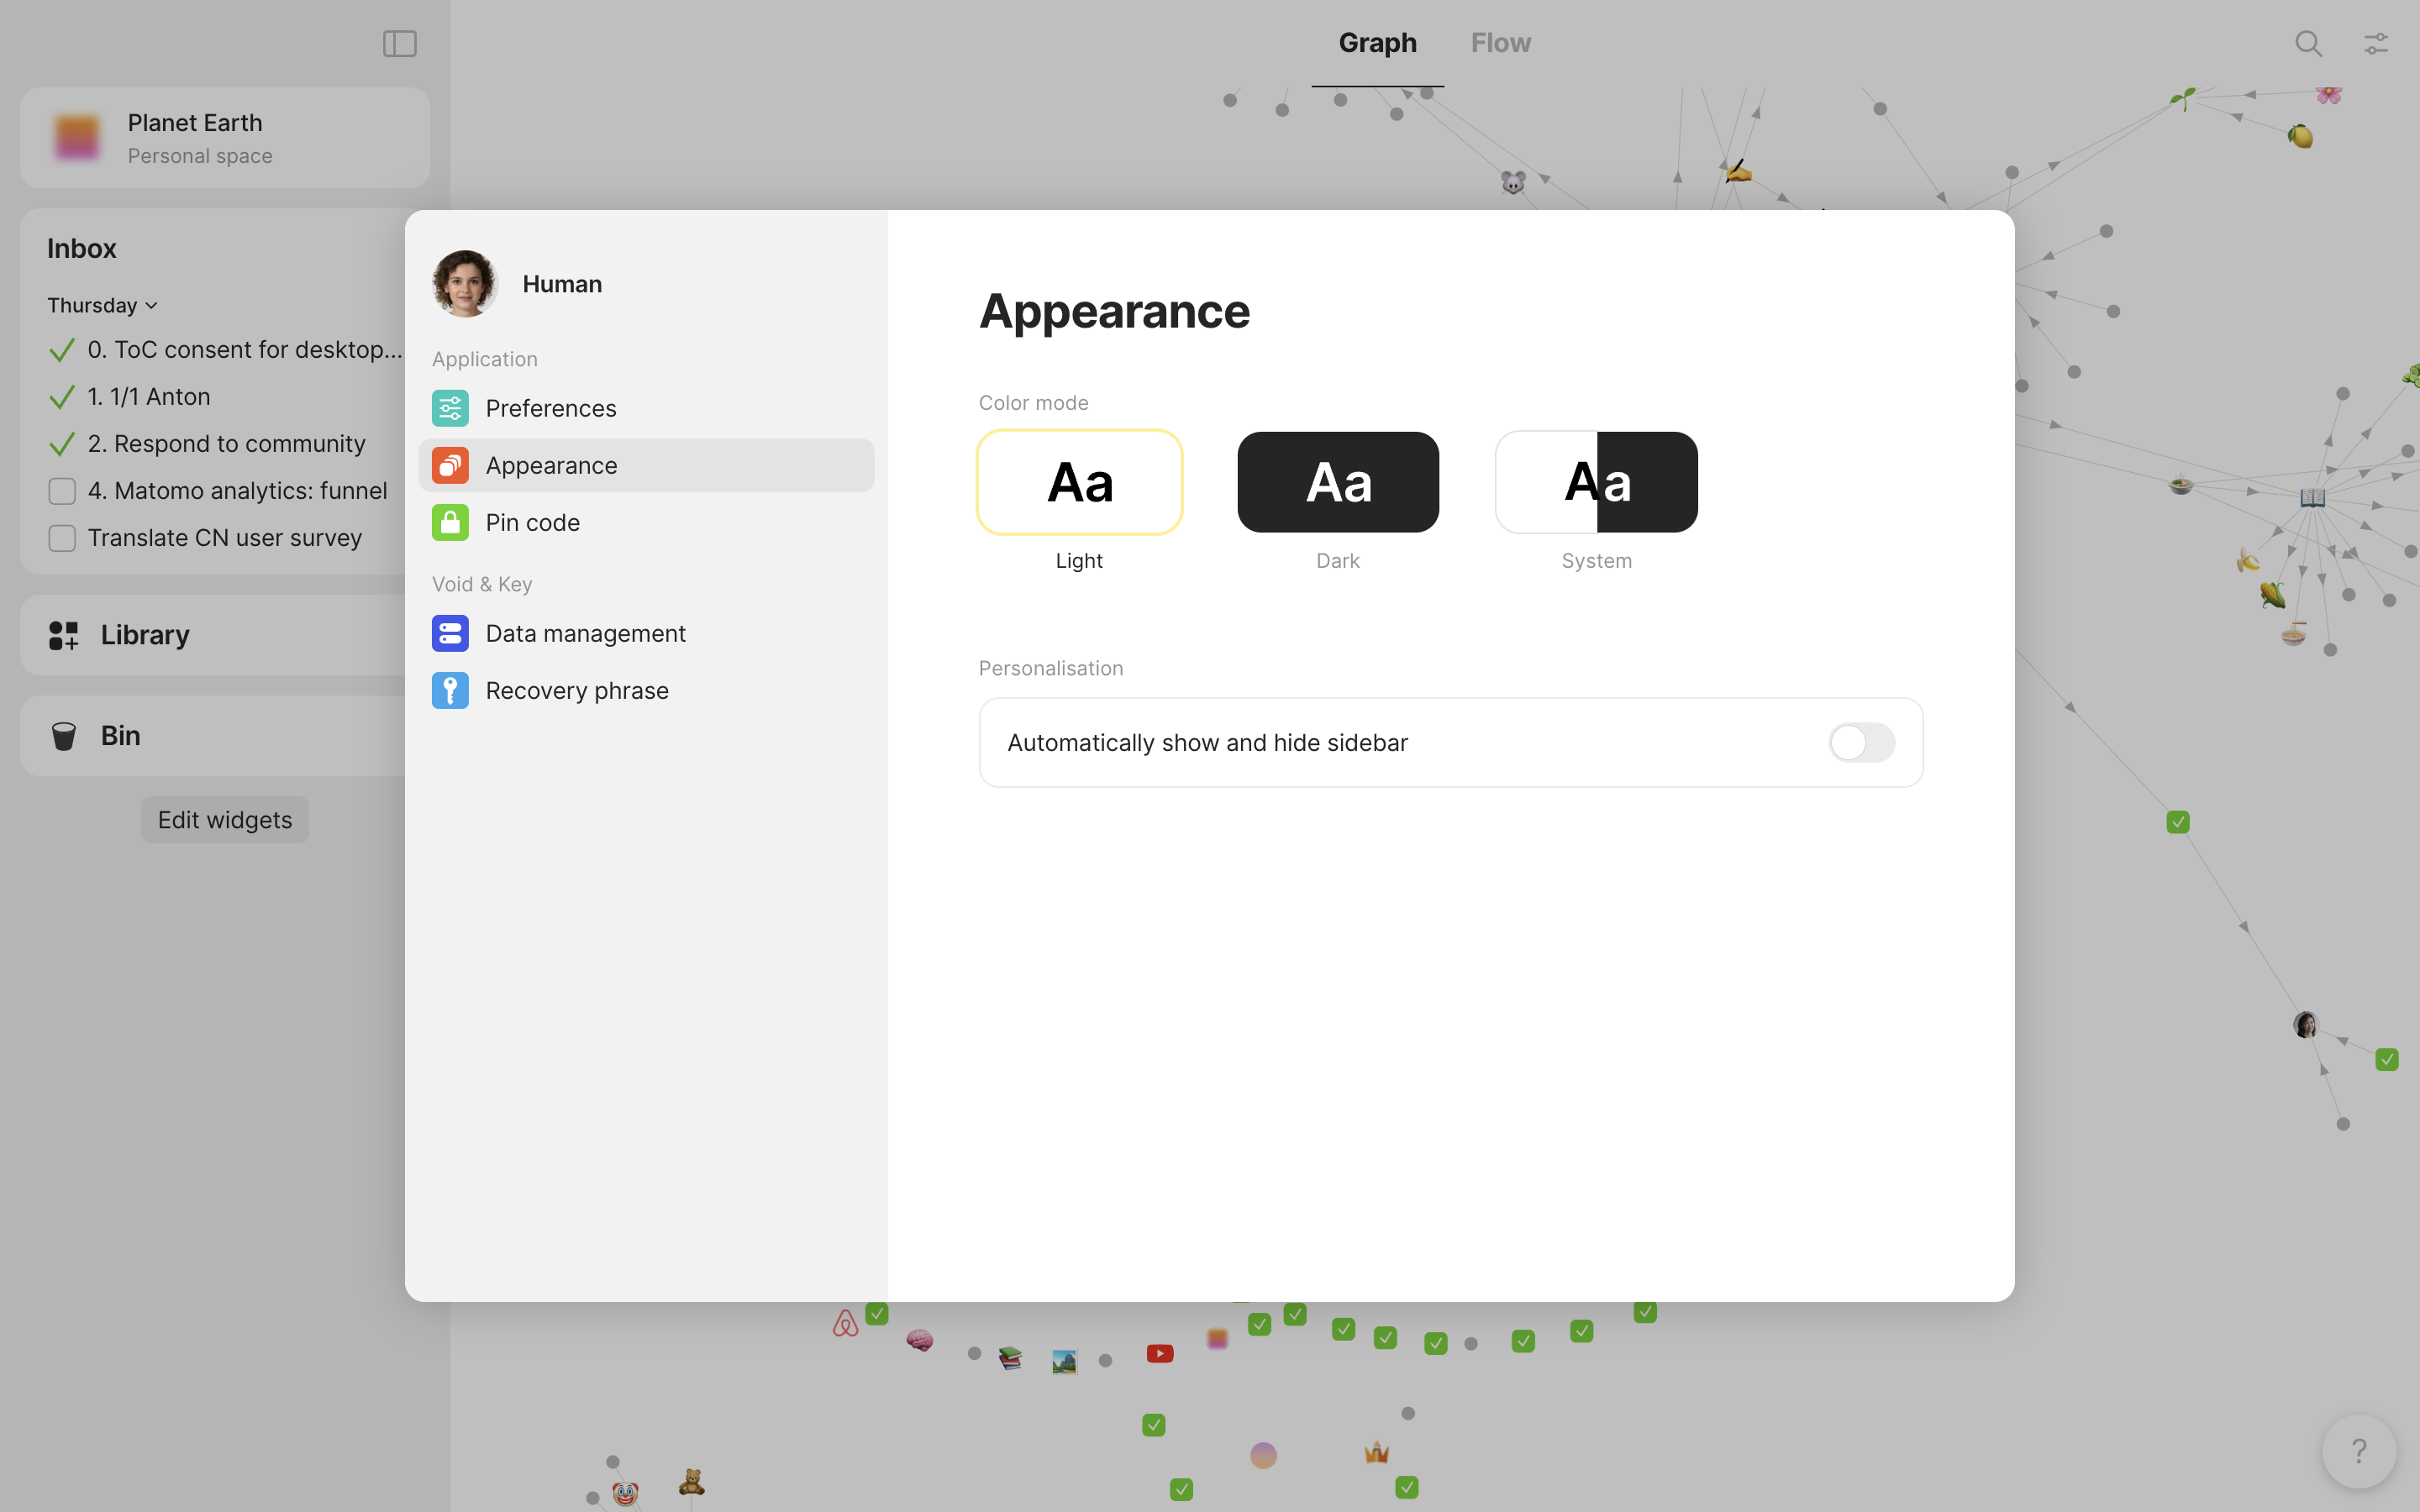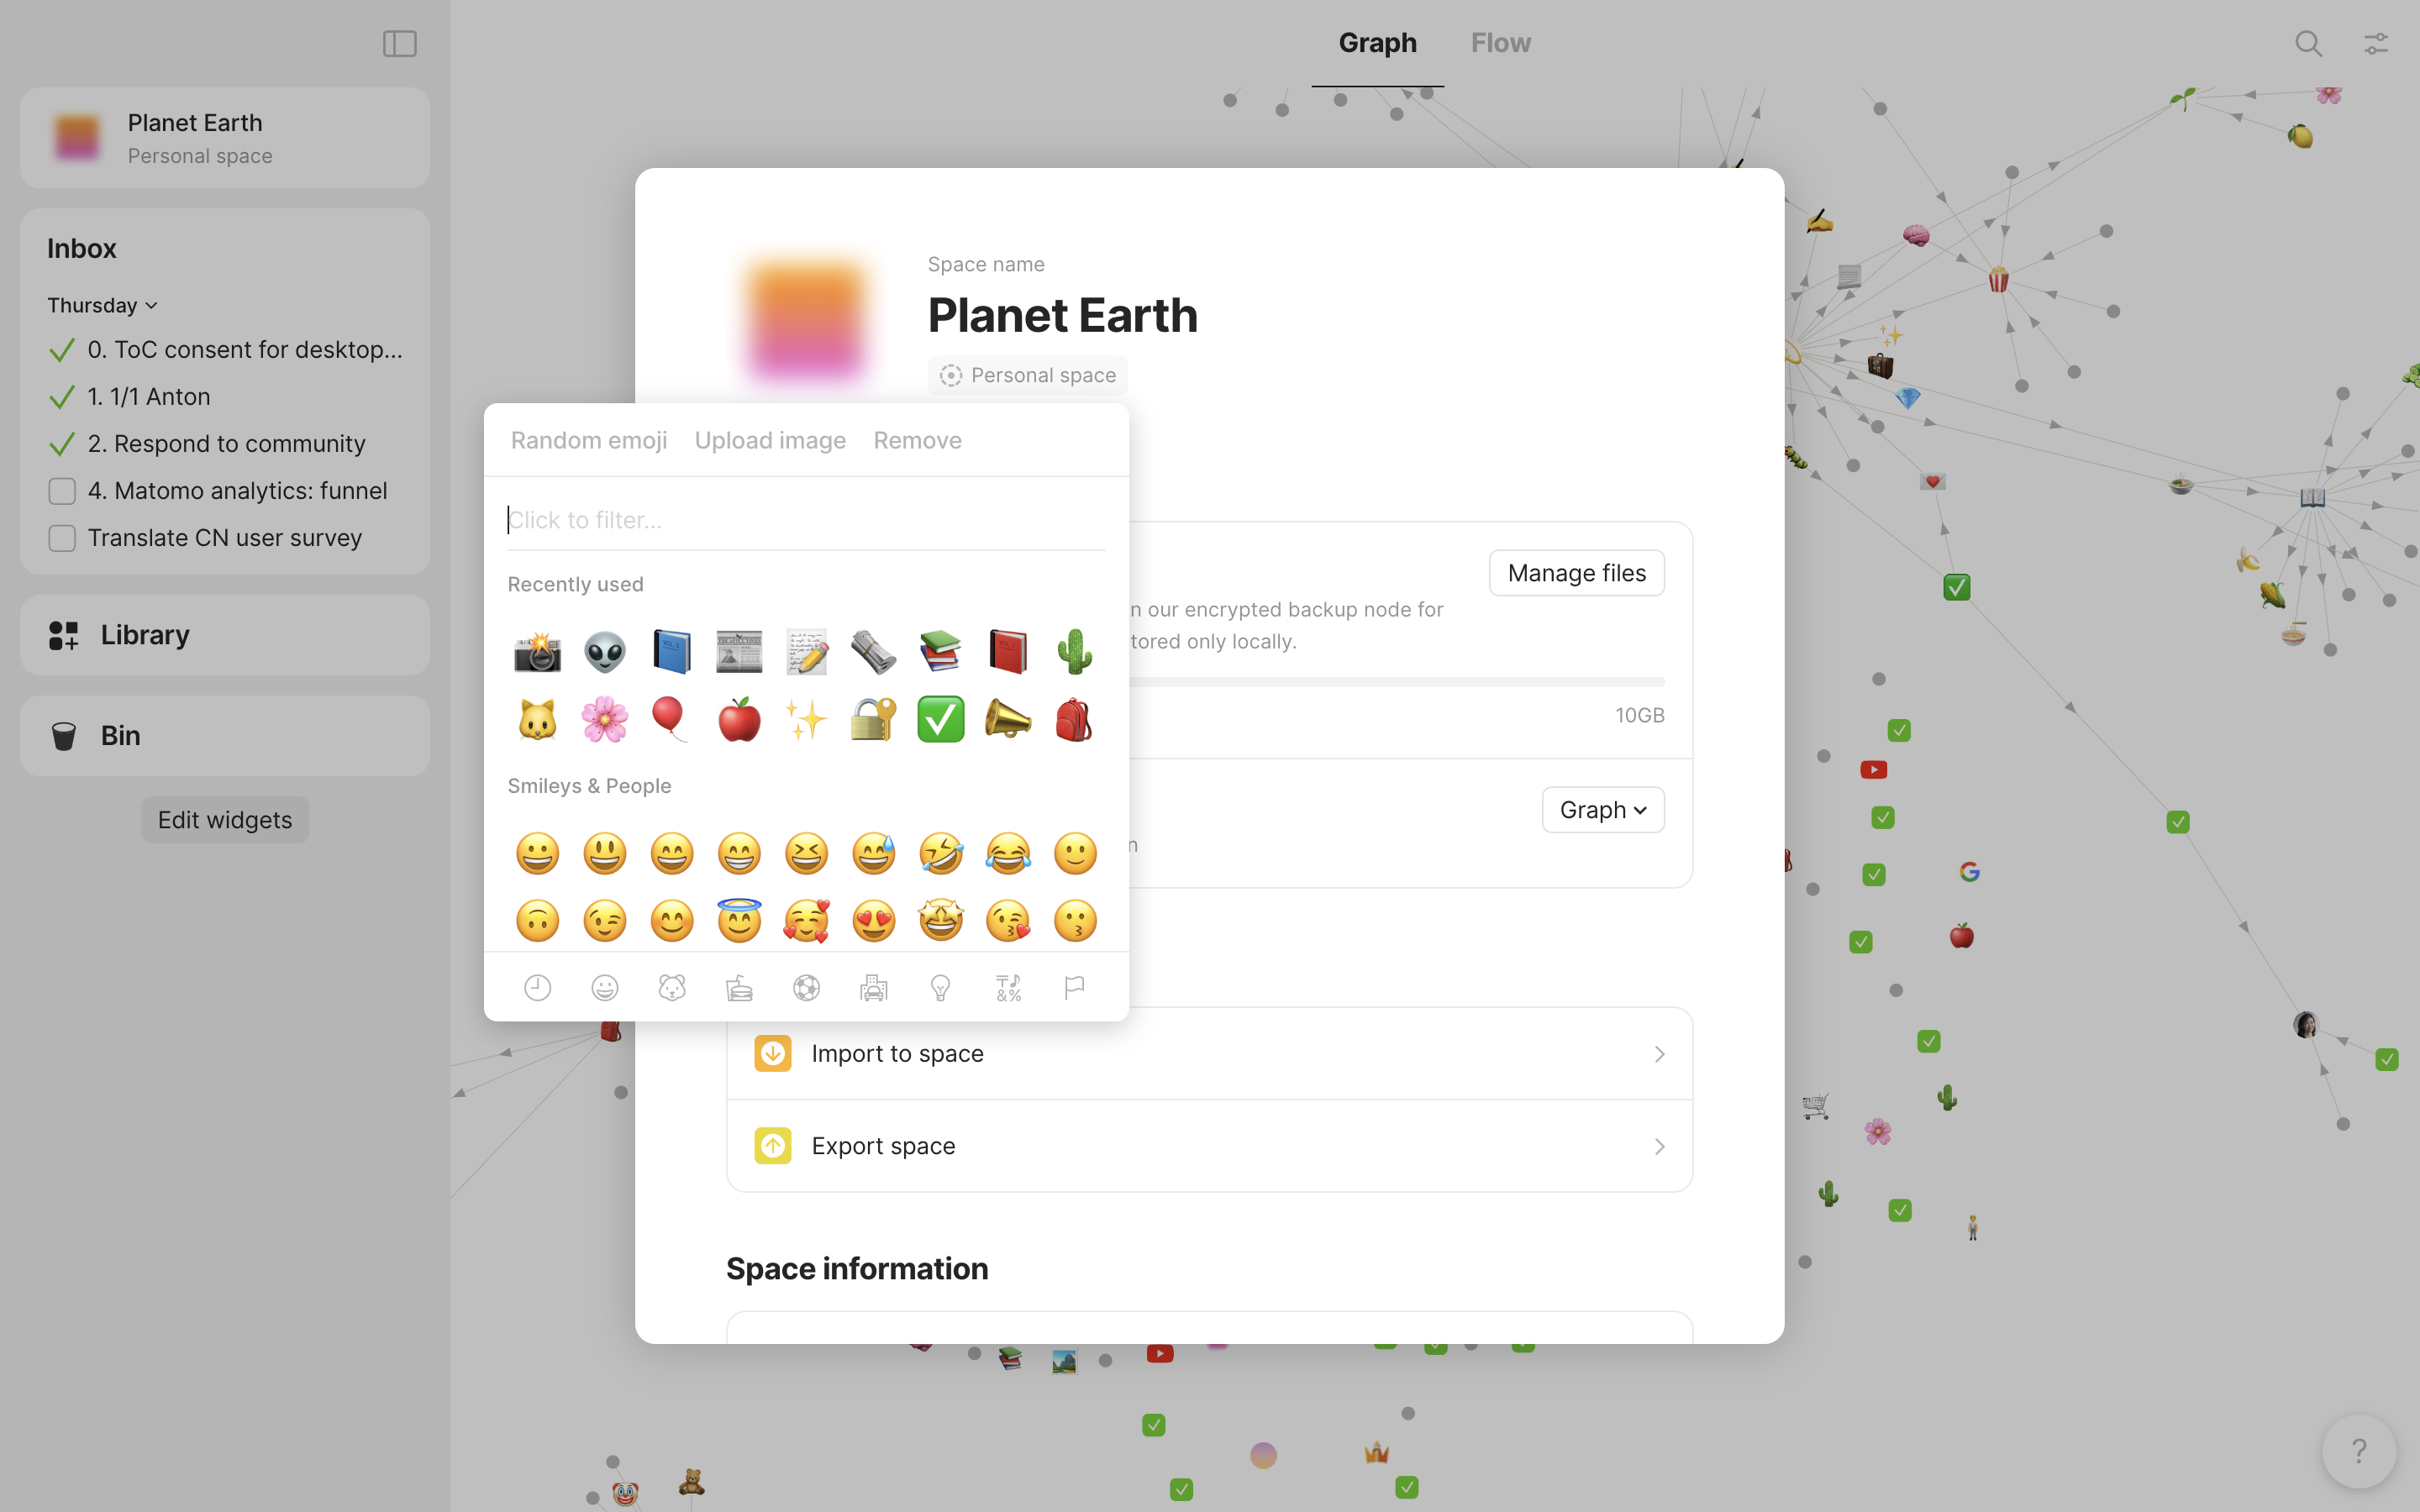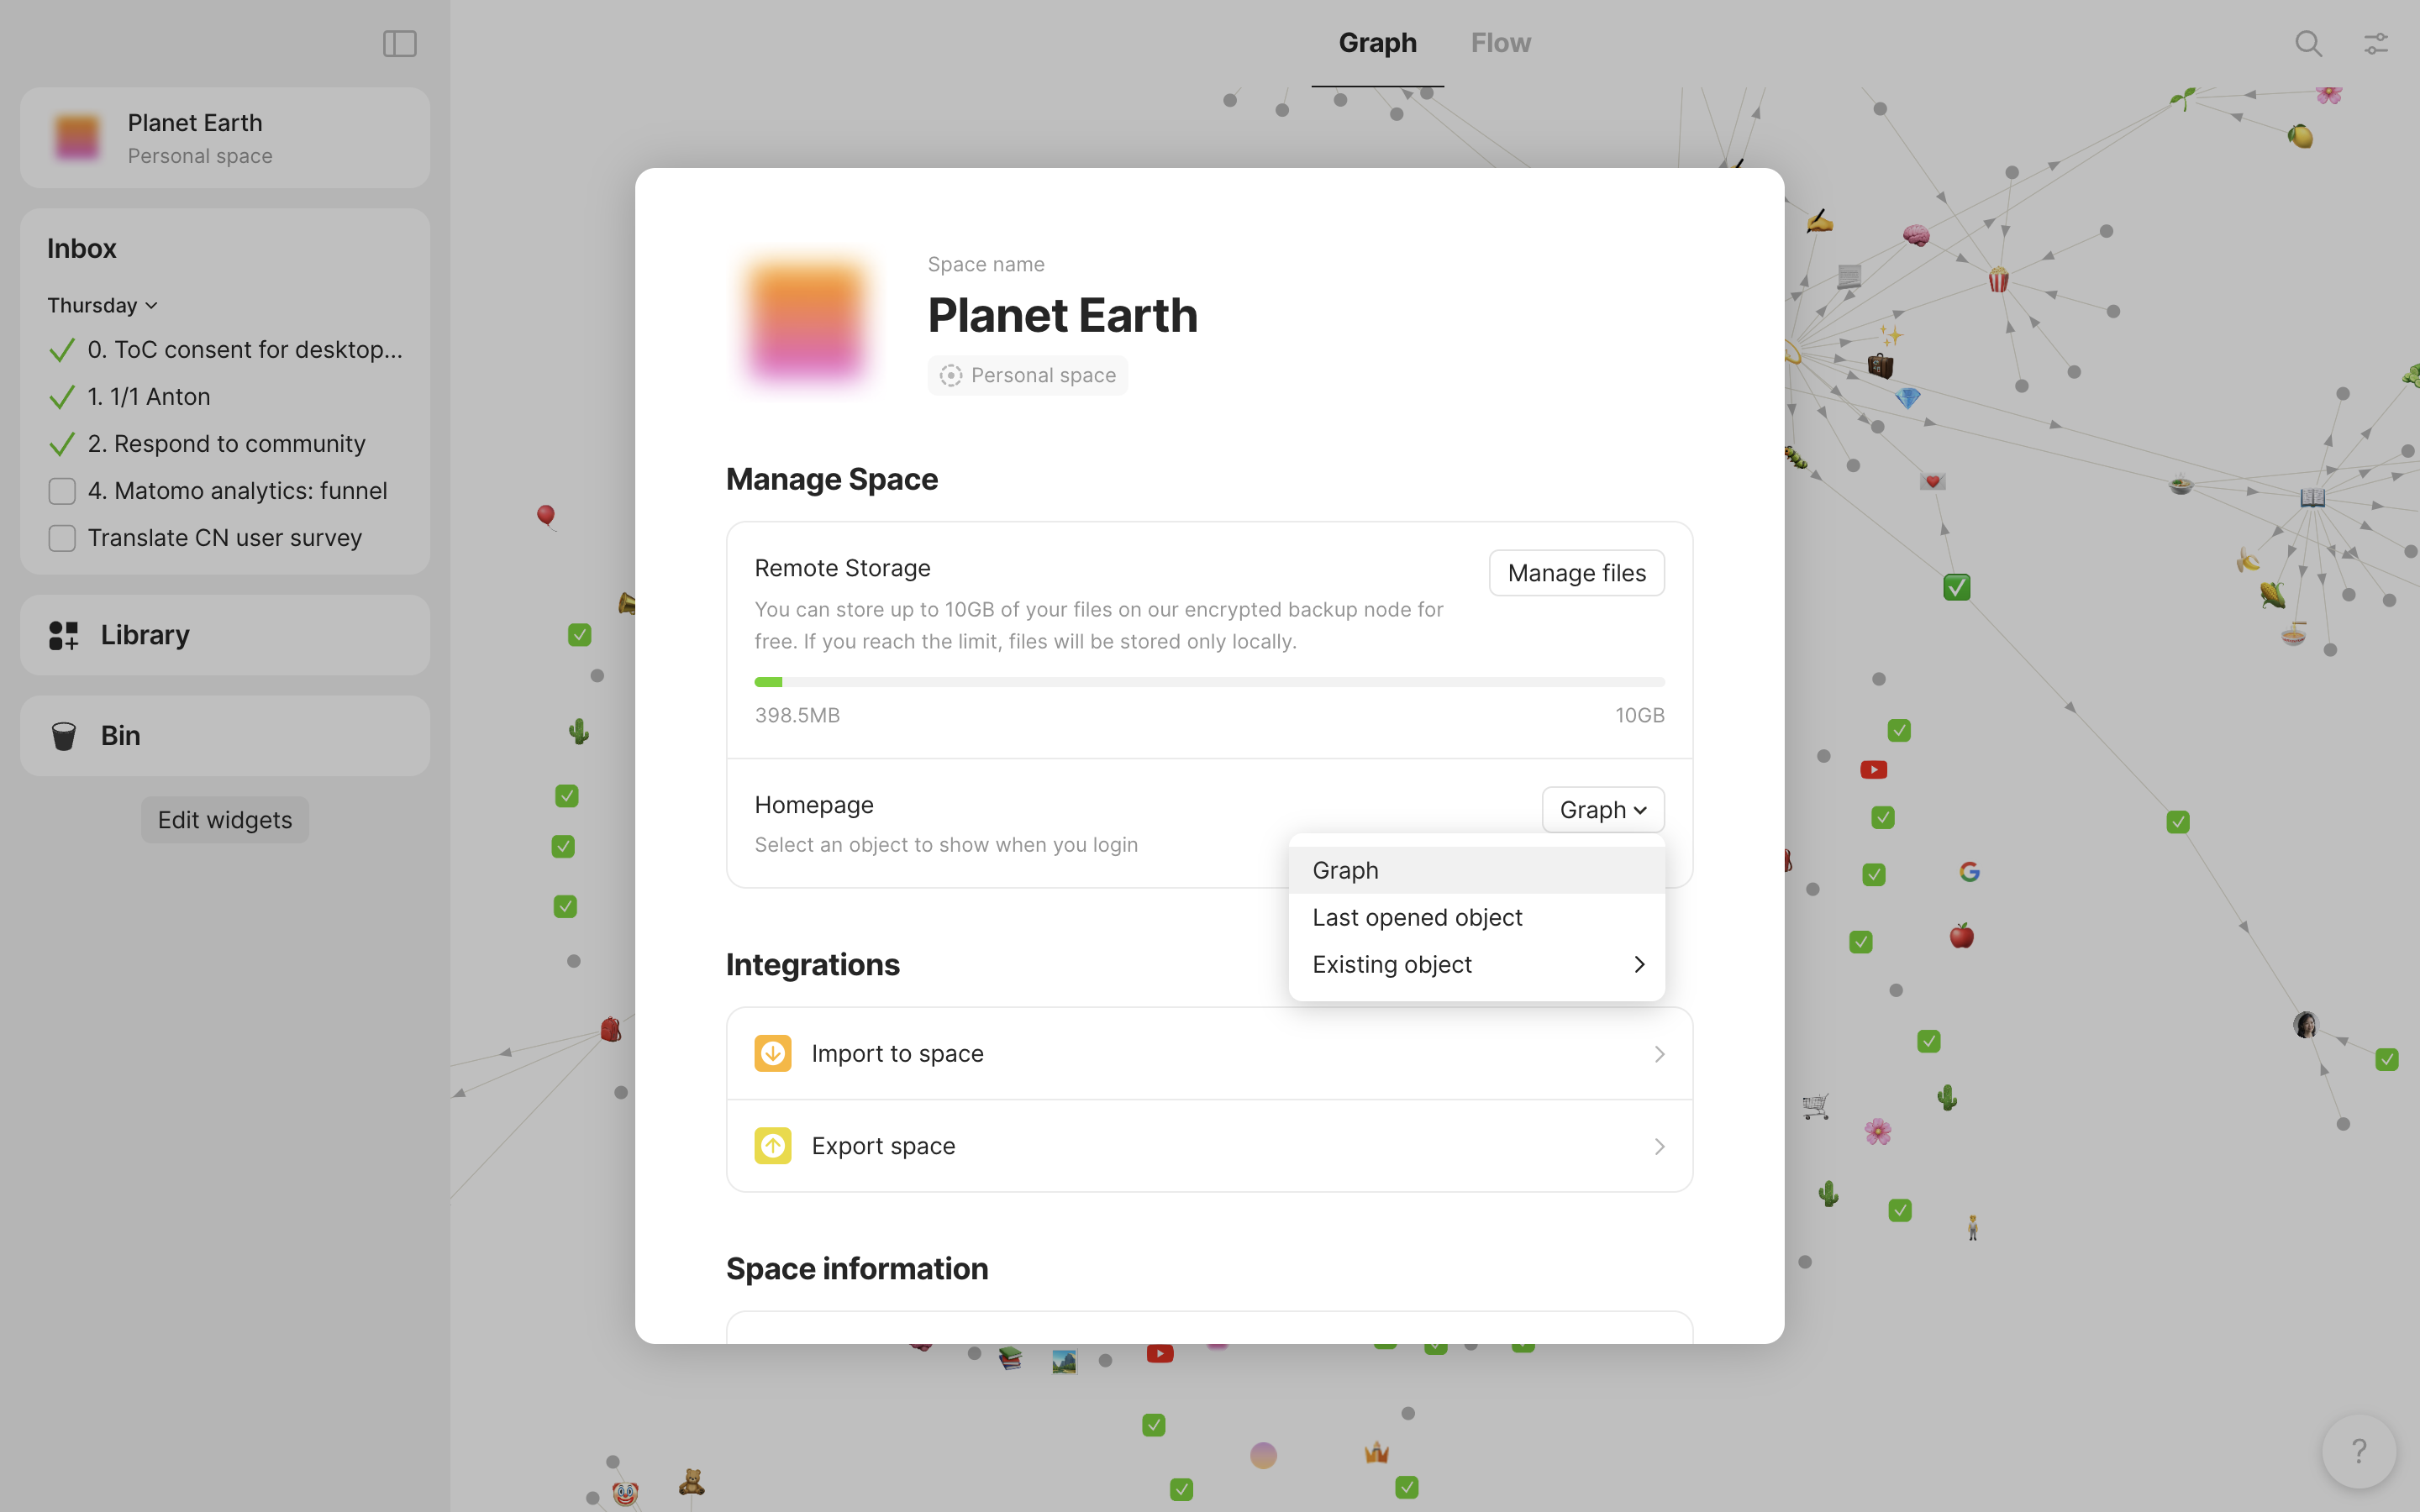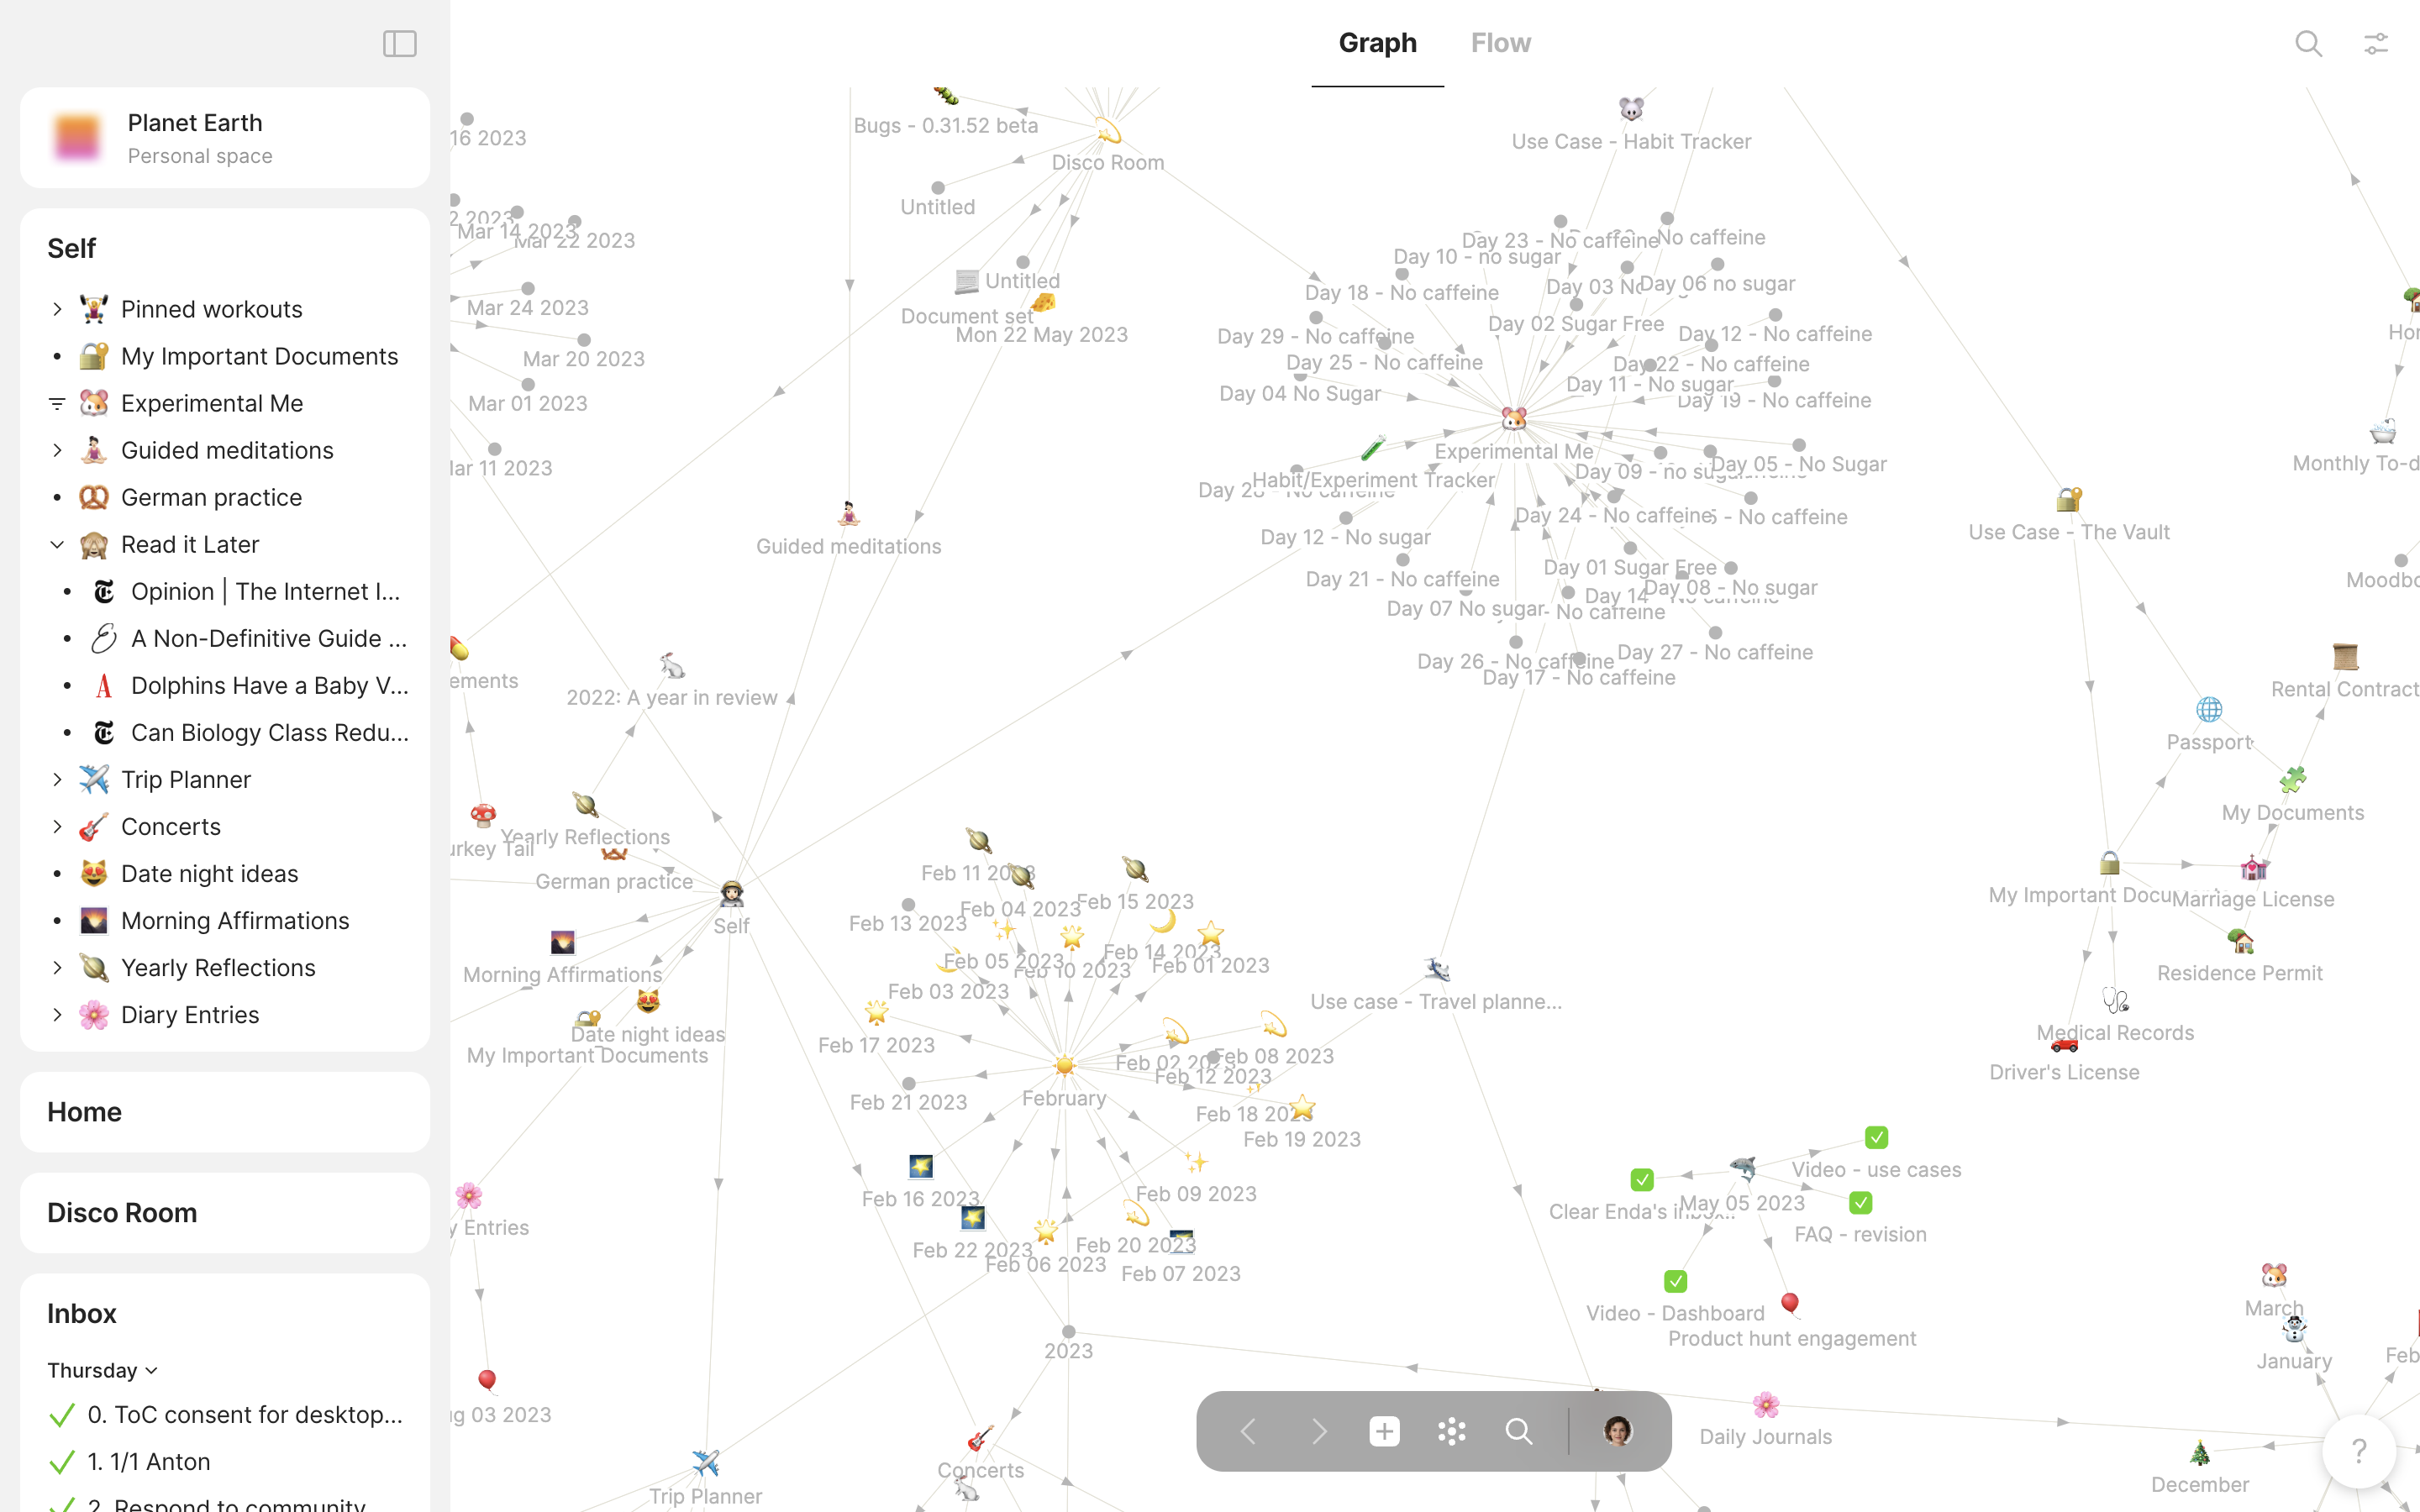
# Welcome

Anytype is an **encrypted, local-first alternative** to the cloud-based Internet.

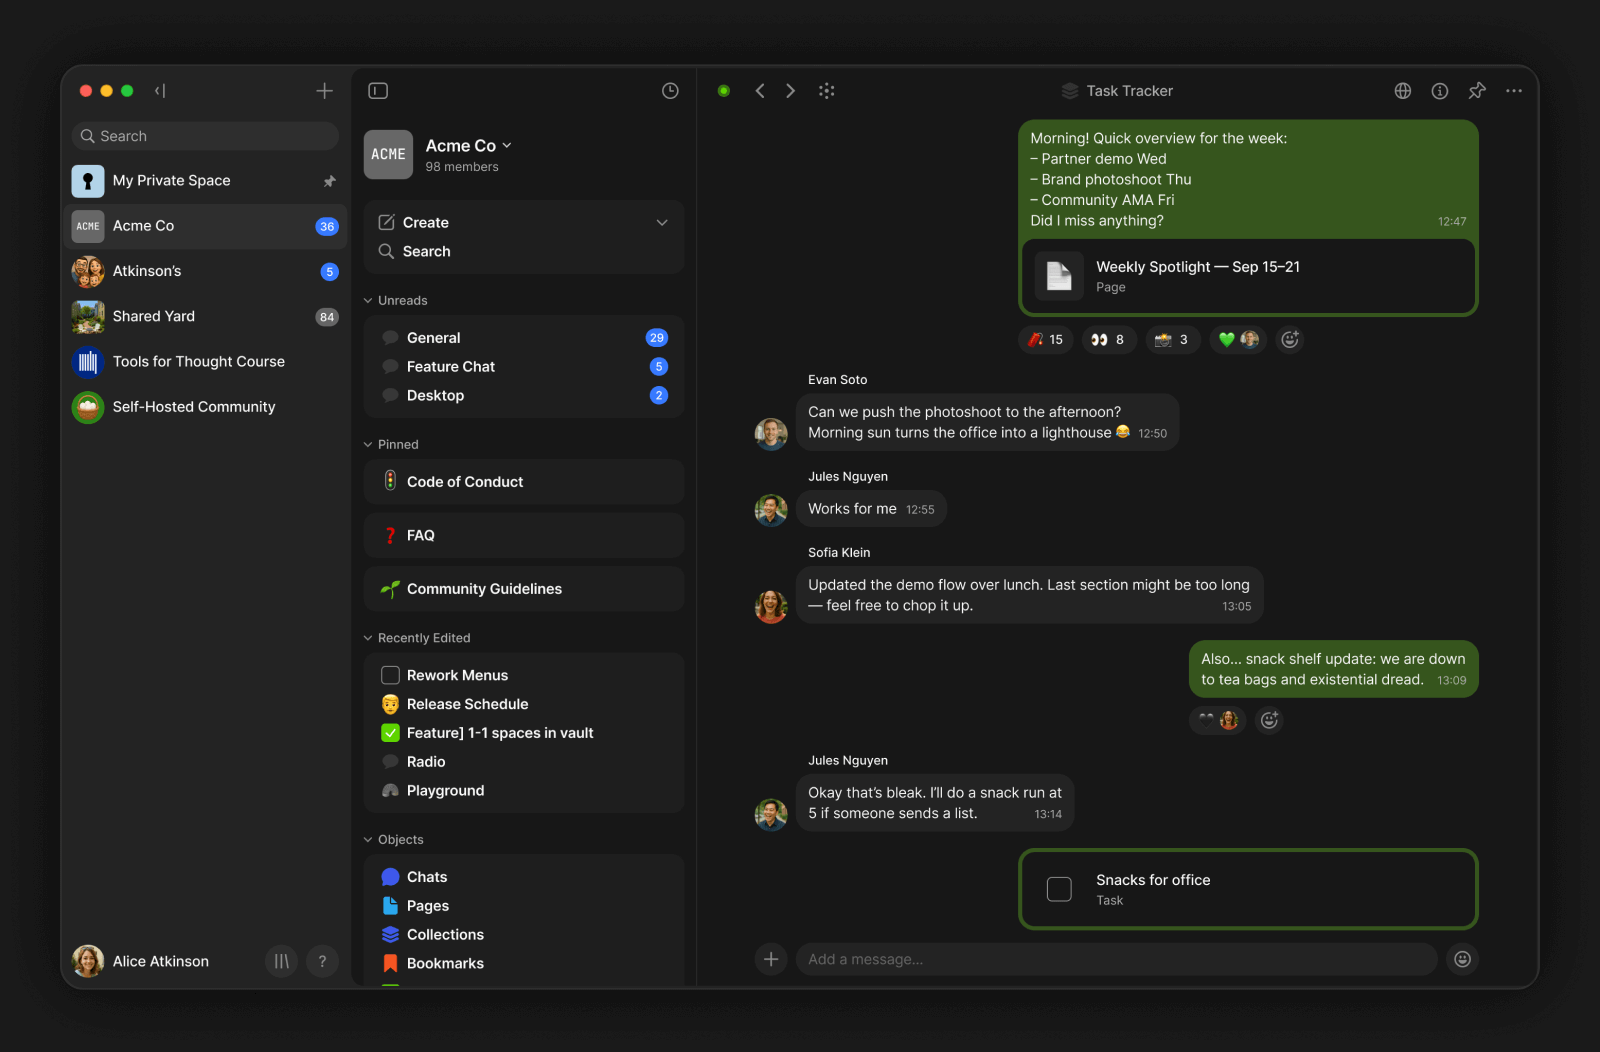
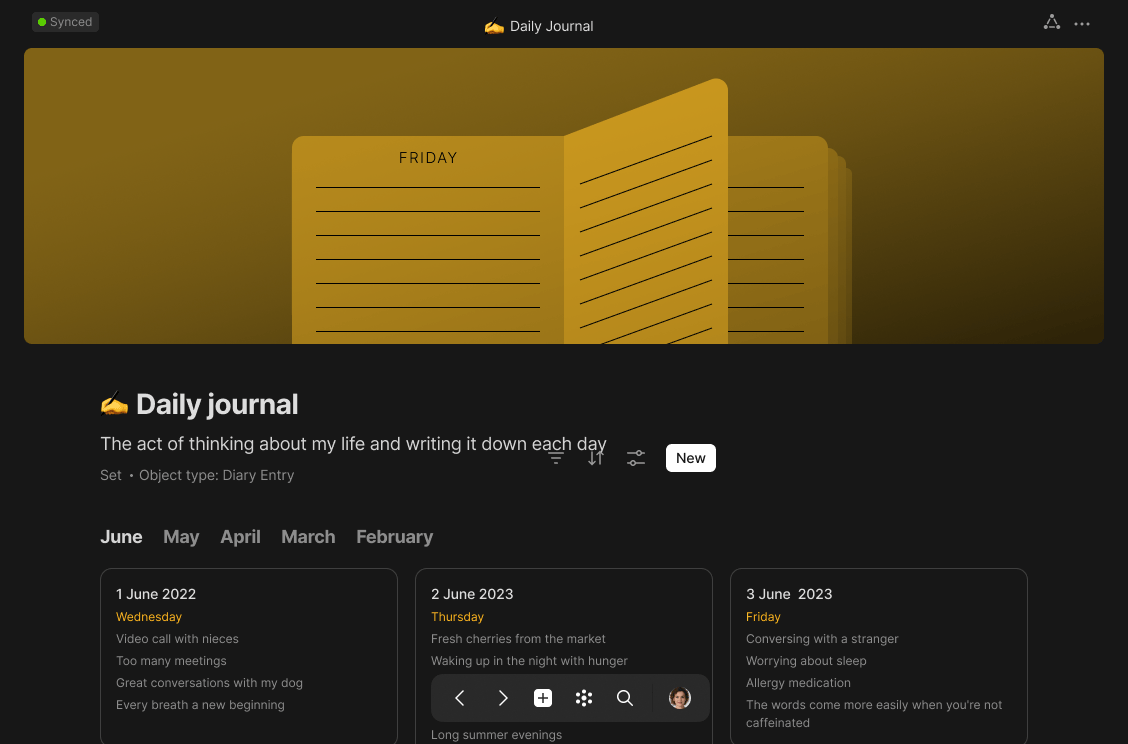
With Anytype, you can build digital [Channels](/anytype-docs/getting-started/vault-and-key/space) around your interests. These spaces can be personal - for diaries, ideas and drafts, or shared - with your family, small communities, teams, neighbors and people with similar interests.

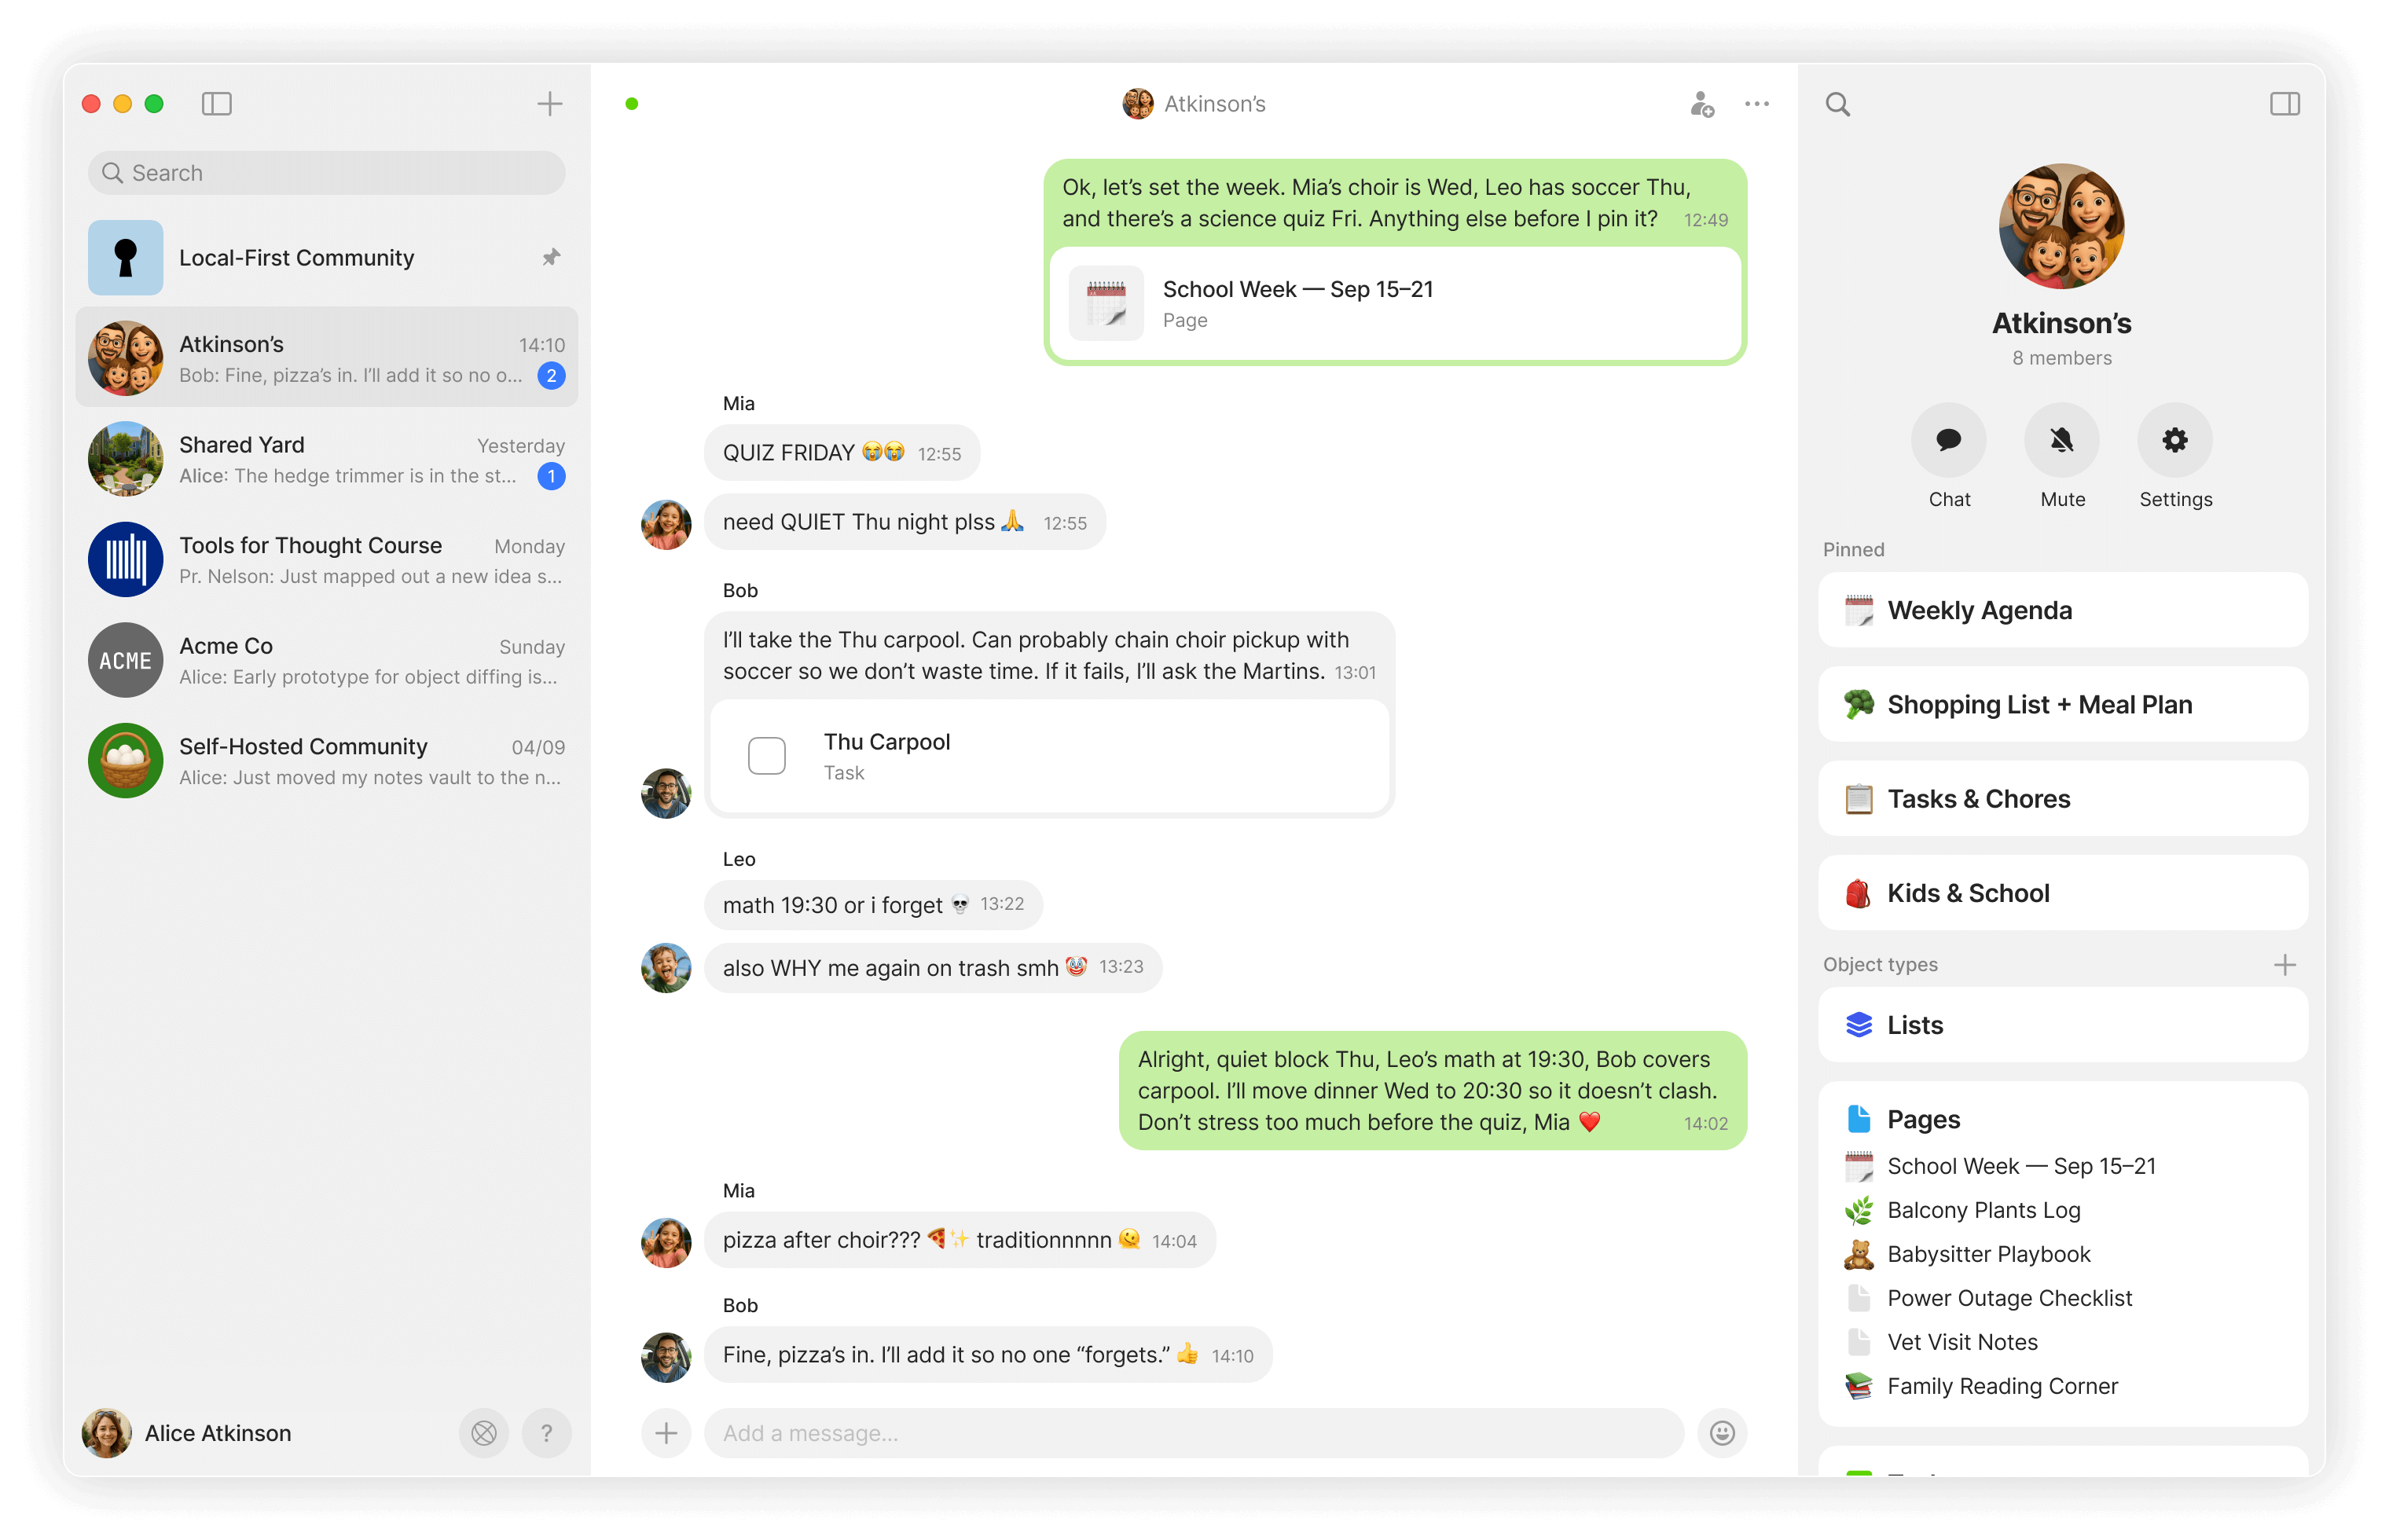
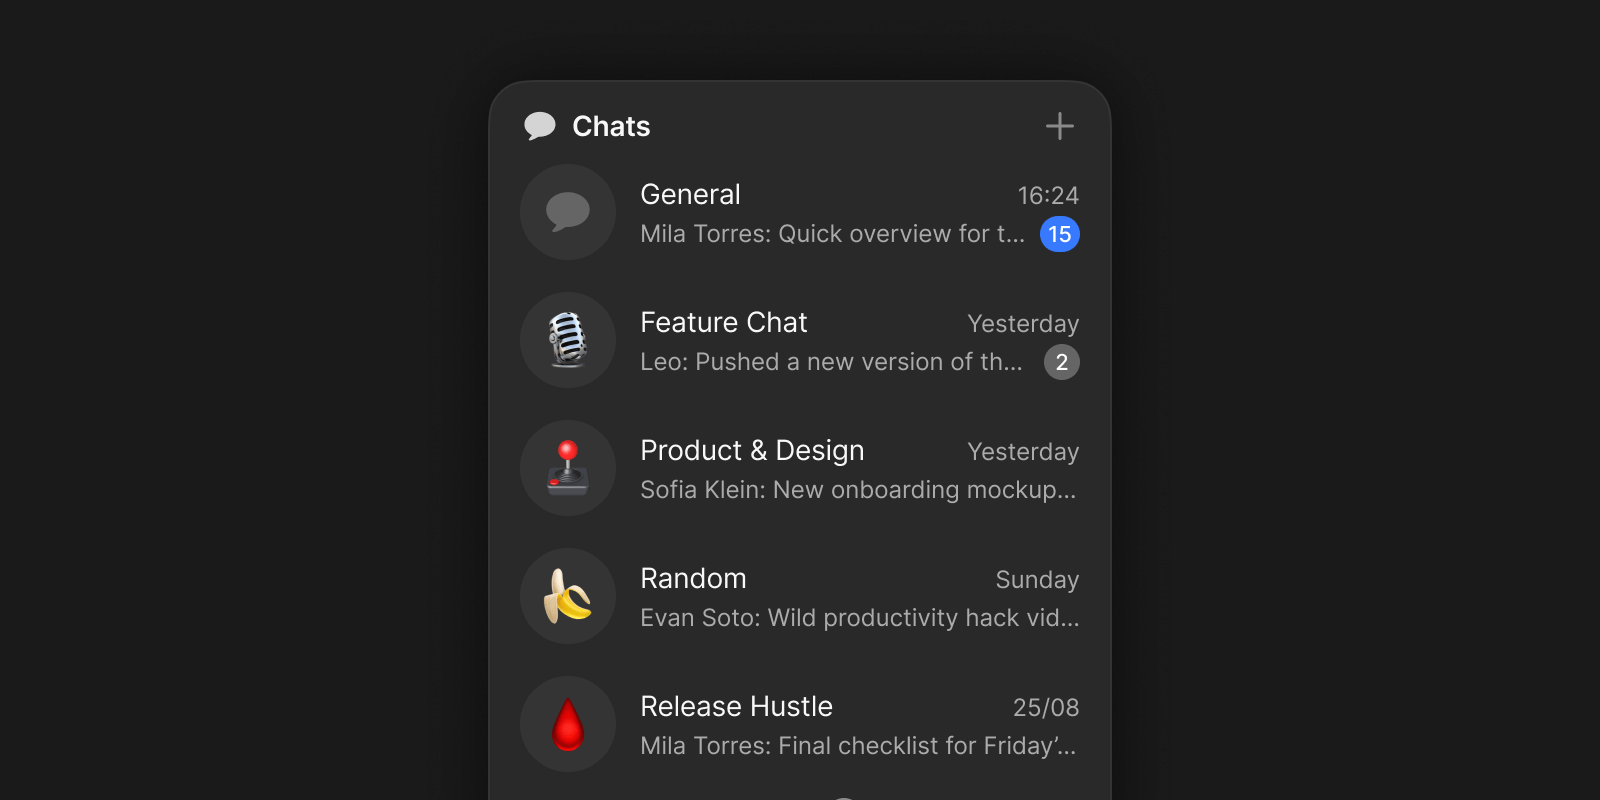
You can now also connect through [Chats](/anytype-docs/getting-started/chats), which make it easy to hold conversations inside your spaces. Chats live alongside your notes, documents, and media, so discussions stay private and contextually linked to the things you care about.

{% embed url="<https://www.youtube.com/watch?v=DpPEl8VTPjg>" %}

Unlike cloud applications, Anytype puts the control of encryption keys firmly in your hands, so you own your data and your social graph. Spaces you create are local first - they can be created offline and can sync peer-to-peer in local networks.

Anytype is supported by [AnySync](https://tech.anytype.io/any-sync/overview) - an open-source protocol that supports high-performant collaboration over encrypted data and creators’ controlled keys. You can find our codebase [here](https://github.com/anyproto).

With every architectural choice, we aim to make [fundamental digital freedoms](https://youtu.be/6Hyr881Xi8A?si=tVftb8x9V5koMt0U) unconditional. Here you can read more of our thoughts on[ cloud vs. local first Internet.](https://blog.anytype.io/from-cloud-to-local-first/)

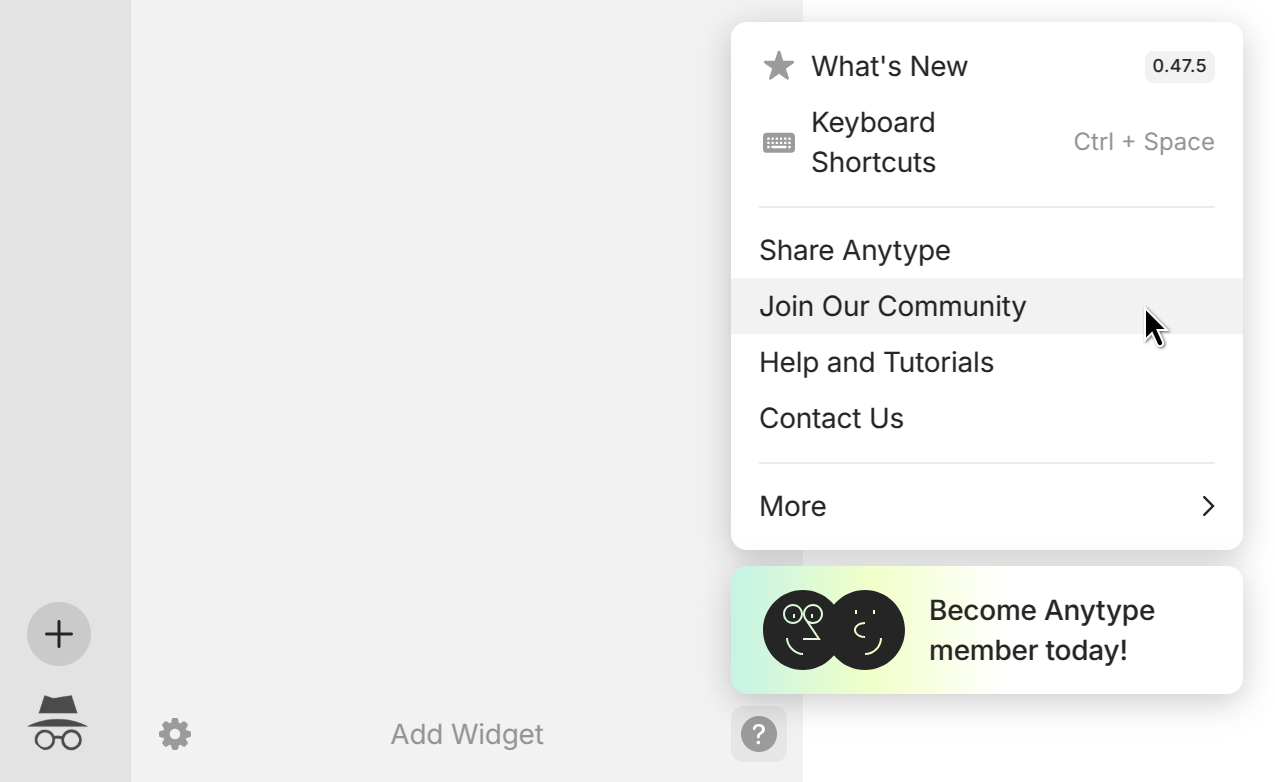
If you have questions, feedback, and ideas join us in our [community forum](/anytype-docs/advanced/community/community-forum). If you want to contribute, [here's where you can do so](/anytype-docs/advanced/community/join-the-open-source-project).

You can also explore pre-made templates and experiences from our community in our [Experience Gallery](/anytype-docs/advanced/community/any-experience-gallery).


# Mission

<figure><img src="/files/4ss2UtgkYUxJEWcPxqk9" alt=""><figcaption></figcaption></figure>

### Why are we building Anytype

We imagine a world where our fundamental digital freedoms are sacred: the privacy of thought; the freedom to connect with those we trust; and, the freedom to participate in the governance of our digital creations.

We believe that these freedoms are as important to the world of bits, as fundamental human rights are to the world of atoms.

{% hint style="info" %}

#### We’re building an alternative for those who value freedom and trust — for ourselves.

{% endhint %}

The current web and much of the software we use do not respect these digital freedoms. In the architecture of the current web, application developers are the keepers of our keys; they control the keys to users’ accounts.

As the gatekeepers of our accounts, they determine who has access, who does not, and how information is distributed.

With so much of our lives lived online, we are driven to construct an alternative.

### Cooperation as a magic wand

Cooperation is our superpower - our remarkable ability to advance our knowledge and well-being by working together. It has enabled us, an unassuming species from sub-Saharan Africa, to inhabit locations all across the planet, build the pyramids, discover atoms and DNA, and even venture into space.

We believe that tools for thought, freedom, and trust are what have enabled us to create all the art, science, technologies, devices, and structures we see around us. They allowed us to build cities and reach for the stars.

{% hint style="info" %}

#### Our mission is to empower sustainable cooperation by building tools for thought, freedom and trust.

{% endhint %}

To achieve this level of cooperation, we mastered language. Language was a tool for thought that allowed us to create stories, some of which are social innovations - powerful inter-subjective realities that exist only when enough people believe in them. Humans found a way to use these stories to build trust and freedom at the same time. To achieve greater cooperation, we need both. If we have trust but lack freedom, it results in a dictatorship; if we have a lot of freedom but lack trust, it leads to anarchy.

We see the web as the main tool for thought, freedom and trust today and our aim is to upgrade it:

* as a tool for thought by bringing graph as a universal language of data
* as a tool for freedom by embedding universal digital freedoms
* as a tool for trust by building a decentralized layer of trust that supports governance of the positive sum game that the web creates

We are of the view that with better tools for thought, freedom, and trust, we could accomplish even more. We could chart a course towards true sustainability, with cooperation at its core.


# Install

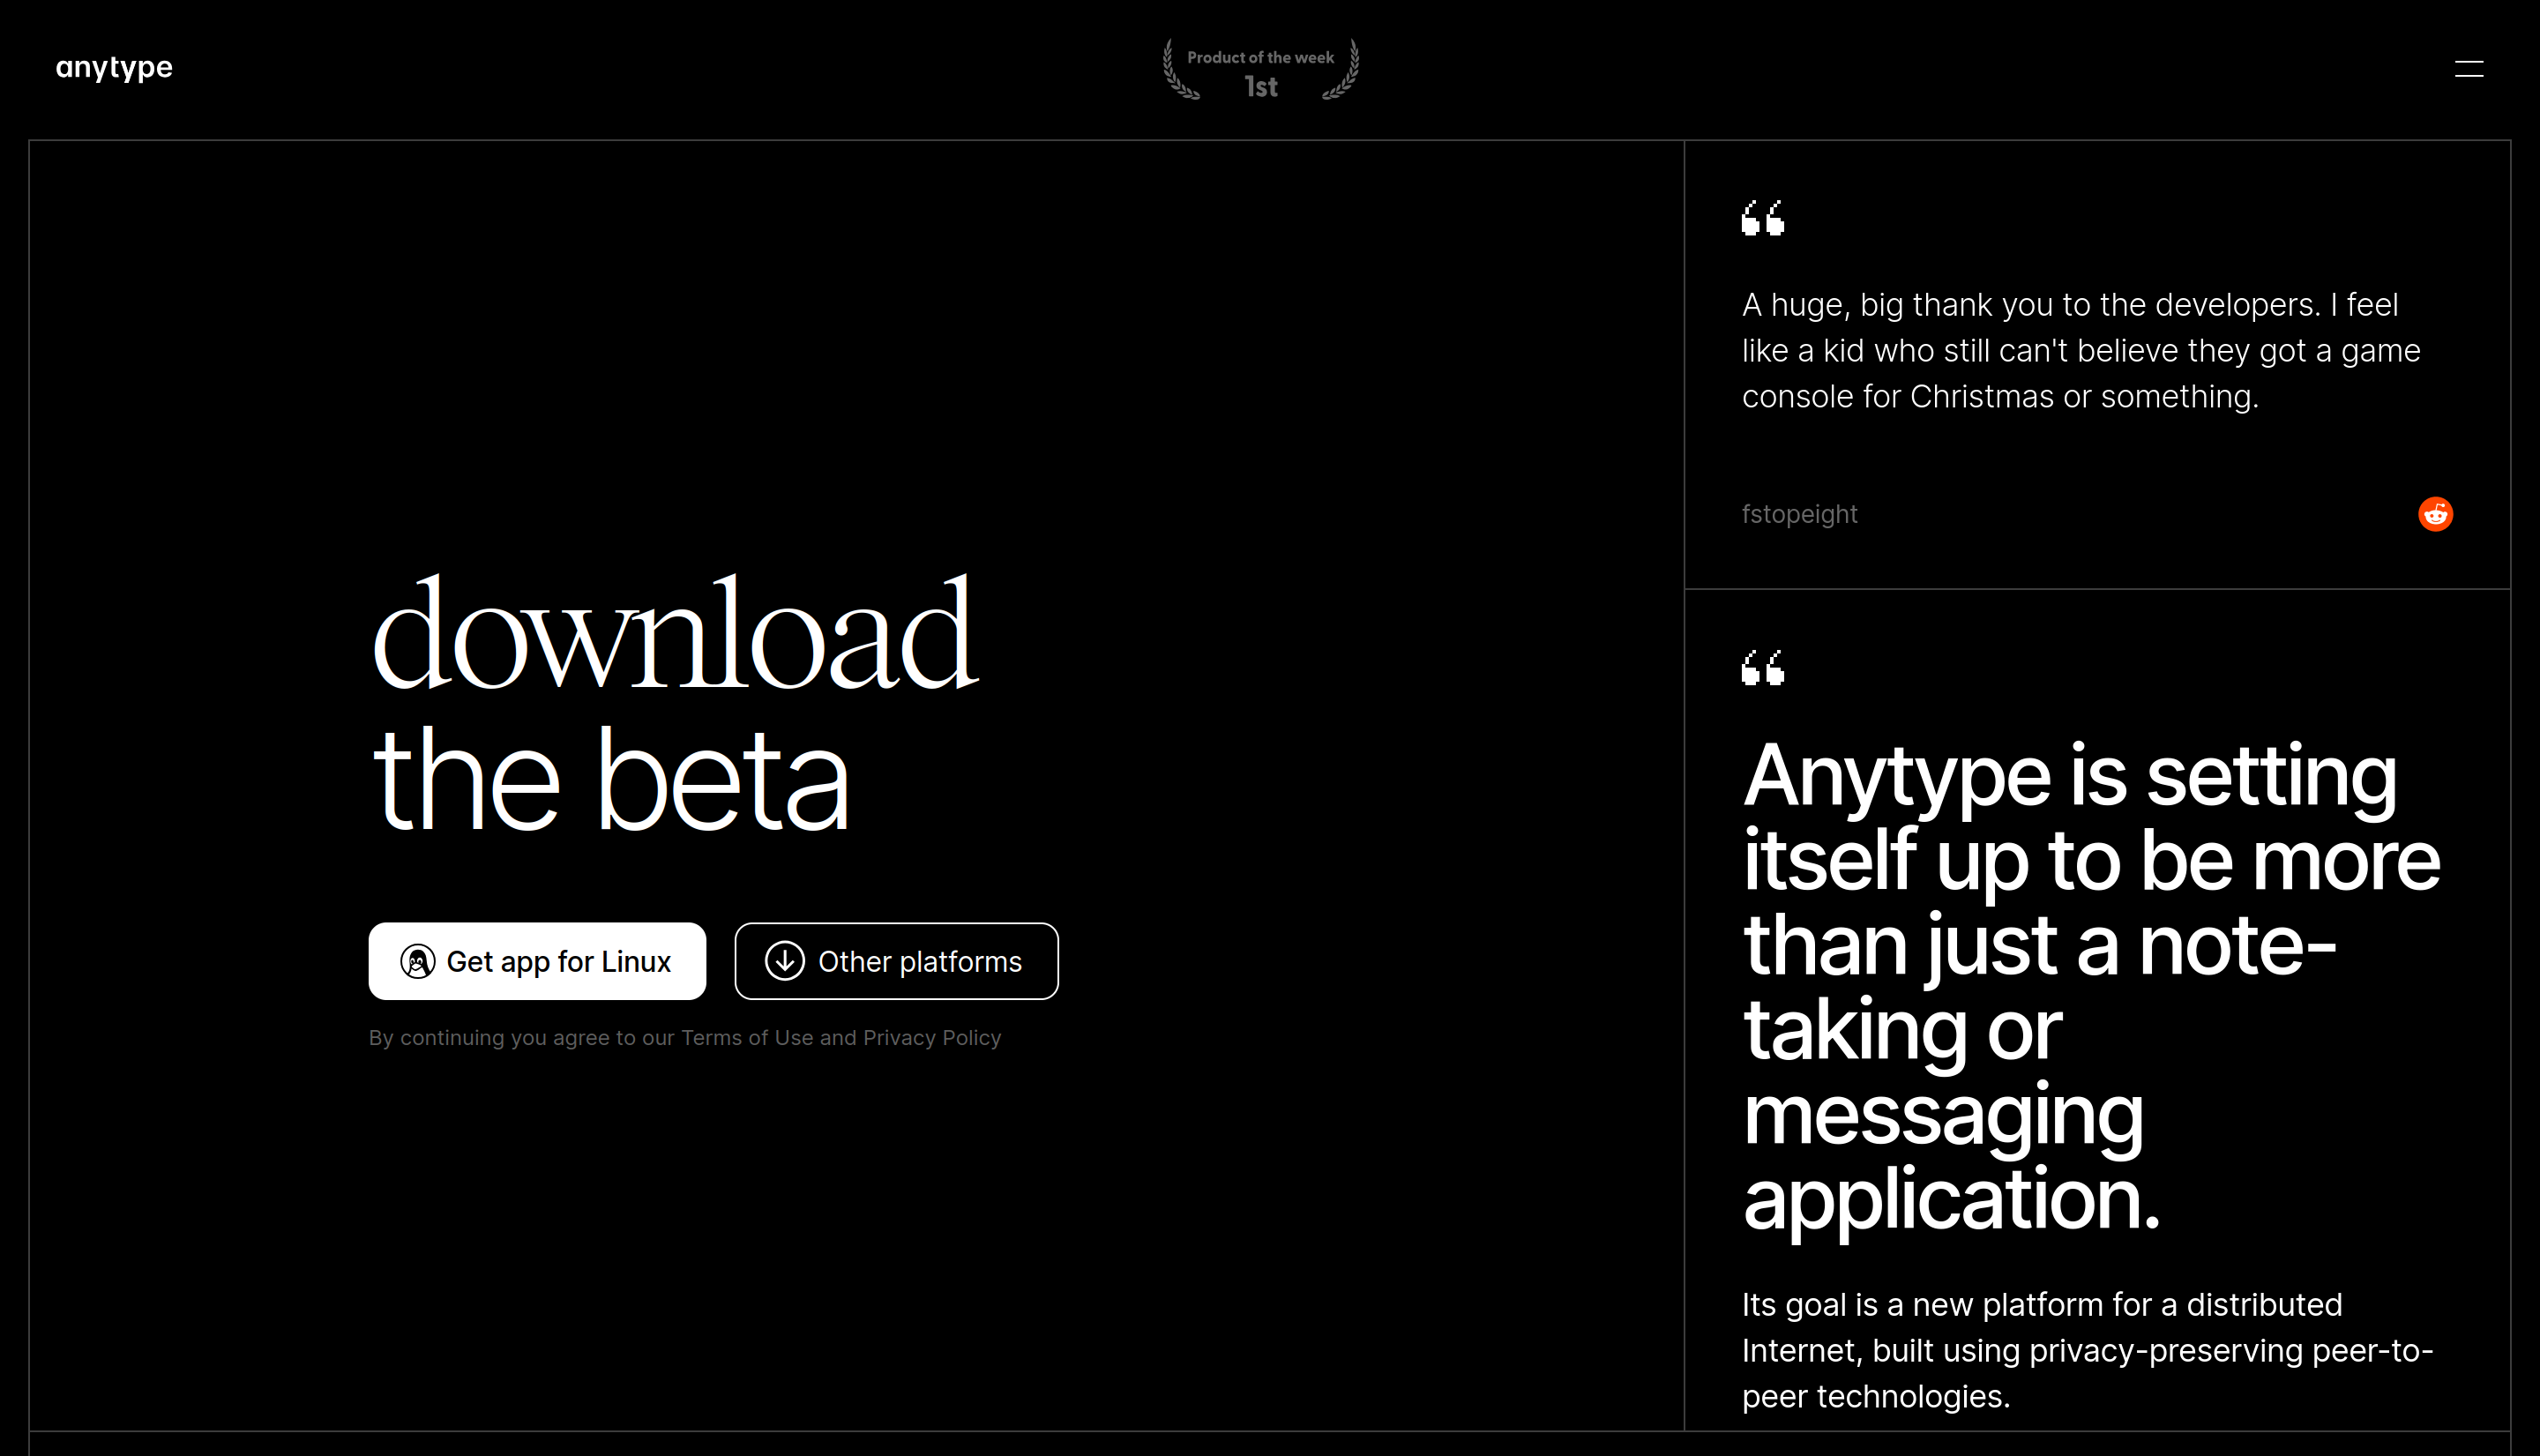
You can download the latest version of Anytype for your device at [download.anytype.io](https://download.anytype.io).

<figure><img src="/files/FkflWsYYNNLP5VnIytxu" alt="" width="563"><figcaption></figcaption></figure>

### Create your vault

<figure><img src="/files/ArDjATNkvXI31fNohAL5" alt=""><figcaption></figcaption></figure>

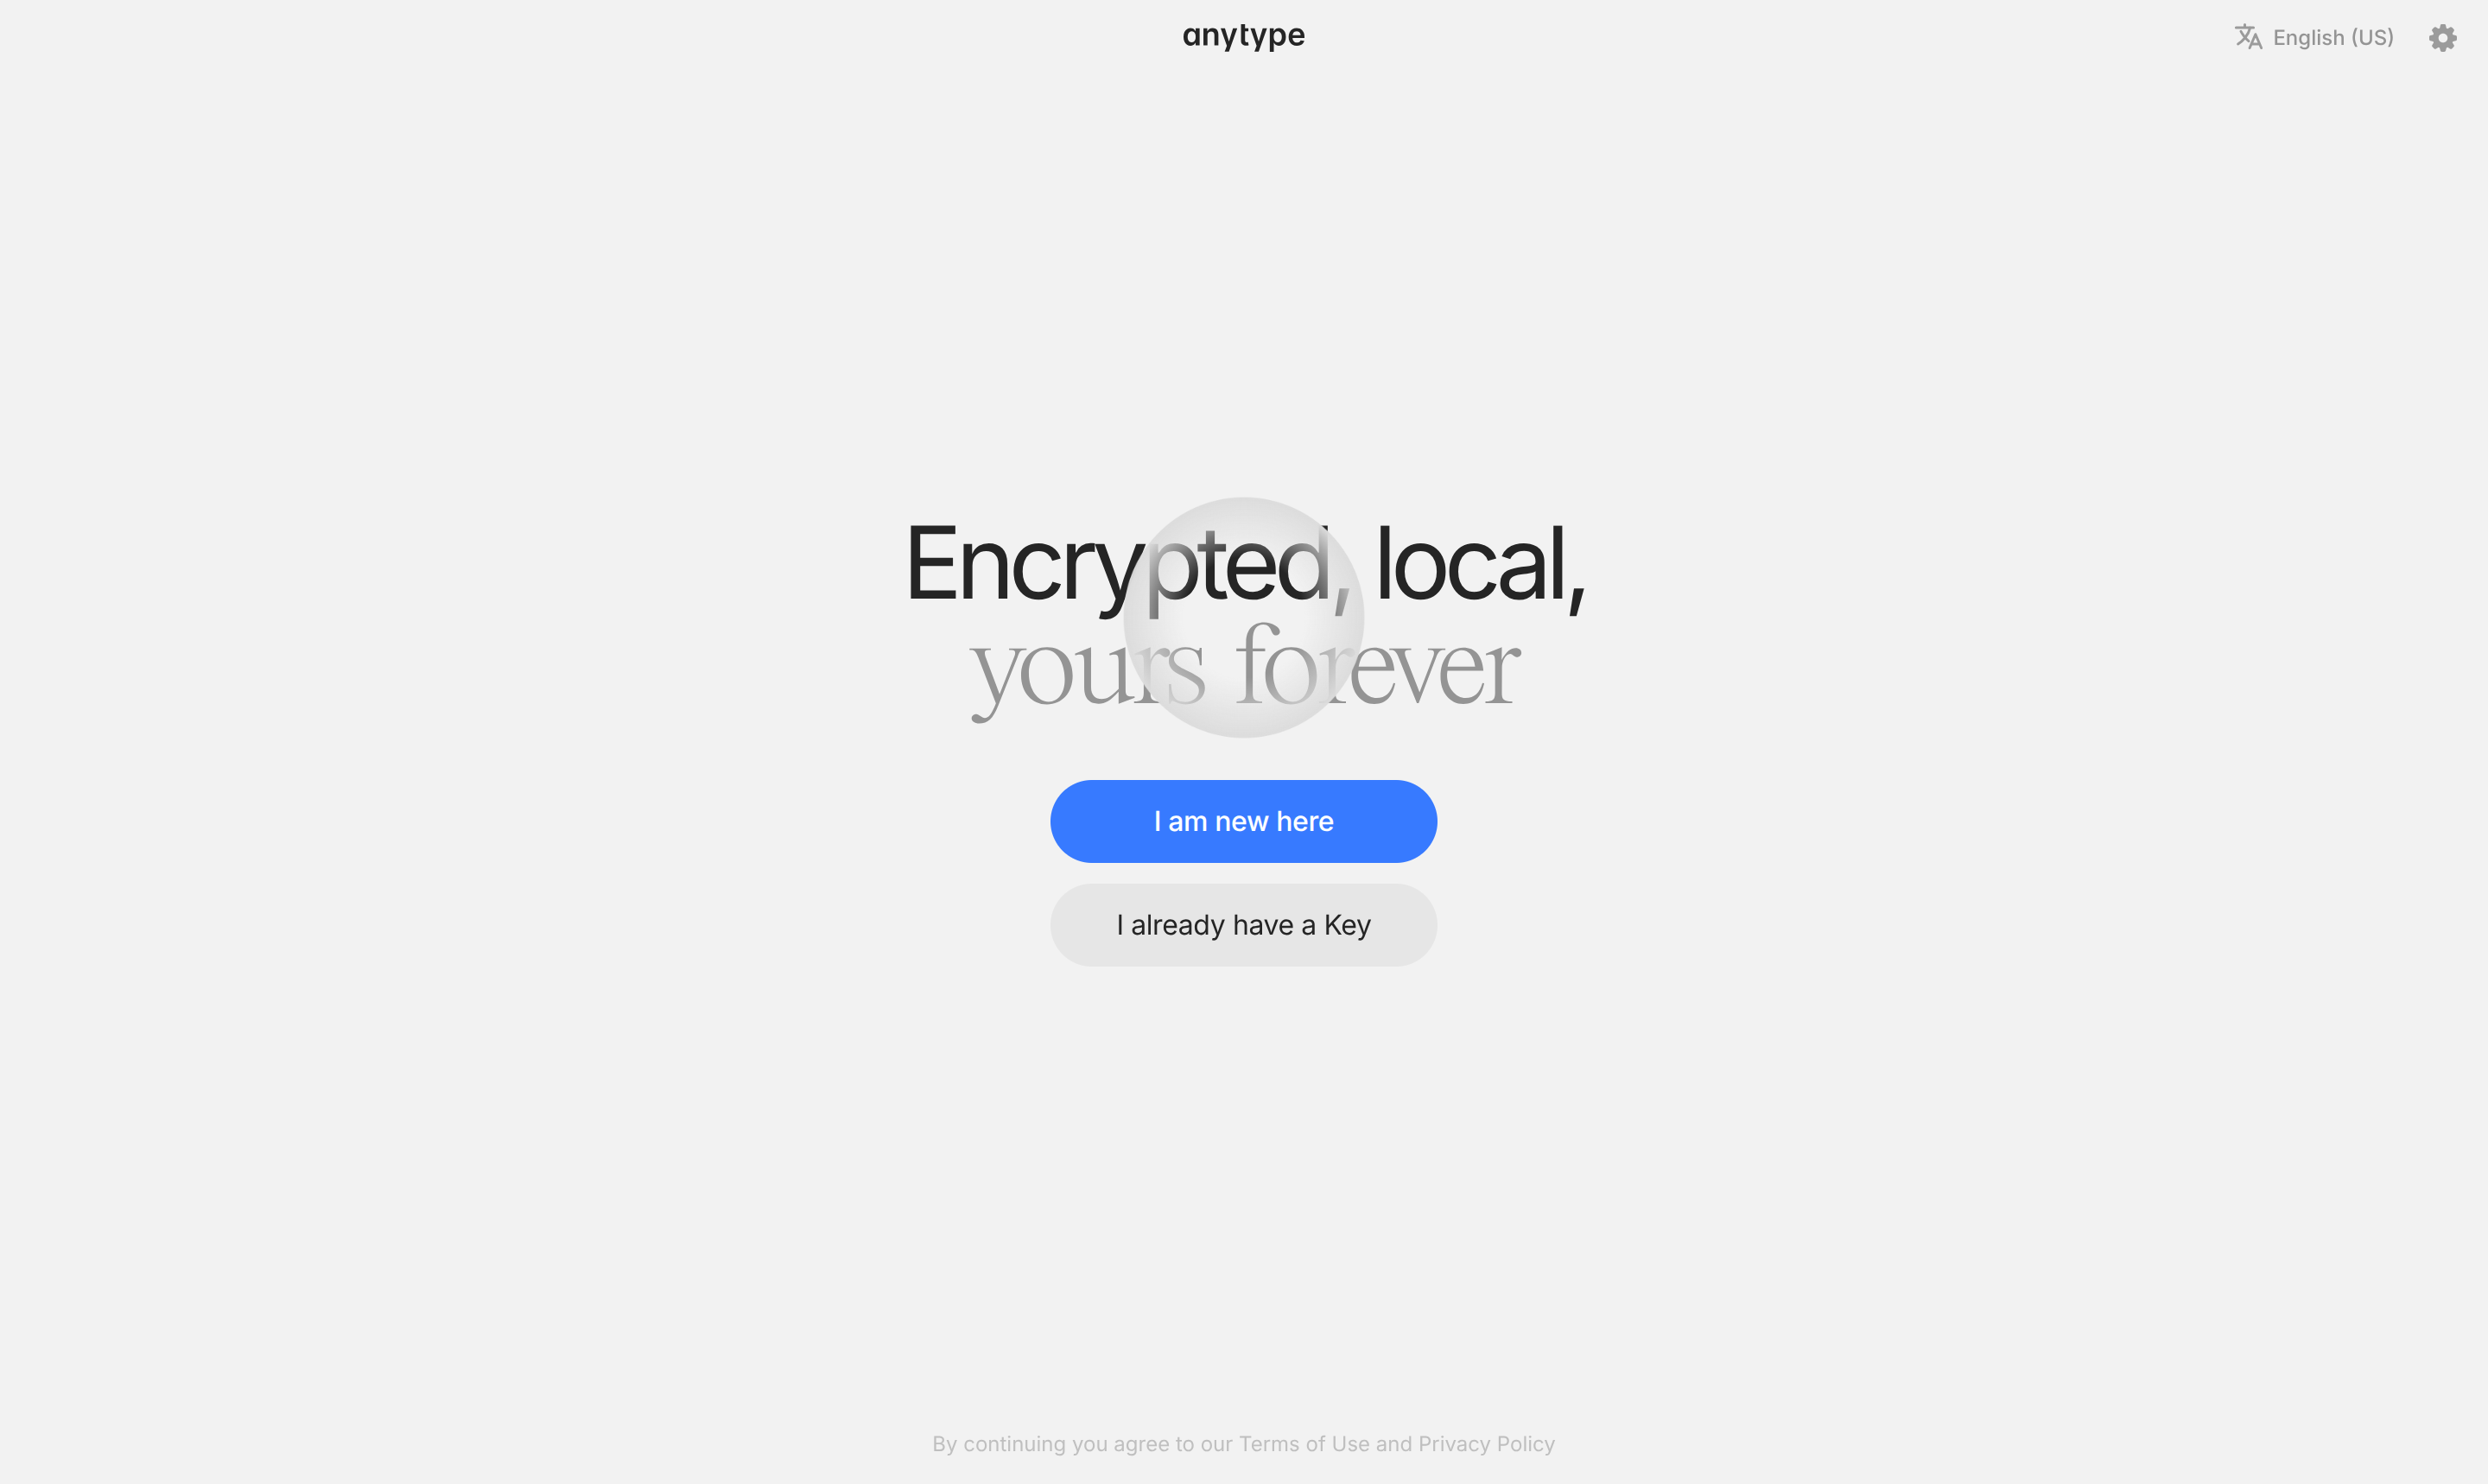
If you haven't created a vault yet, you can easily create one by clicking on `I am new here` and then following the provided instructions.

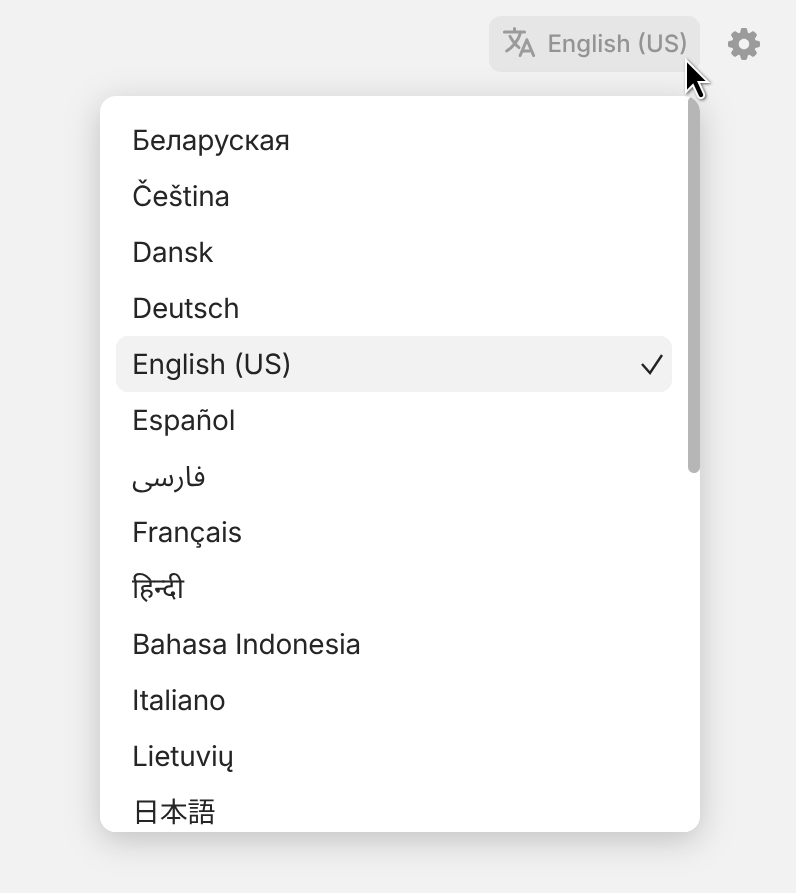
**Language:** If you would like to use a language other than English for the interface, you can select it in the top right corner.

<figure><img src="/files/ejSGBuyJvaiCKb7NbGAk" alt="" width="375"><figcaption></figcaption></figure>

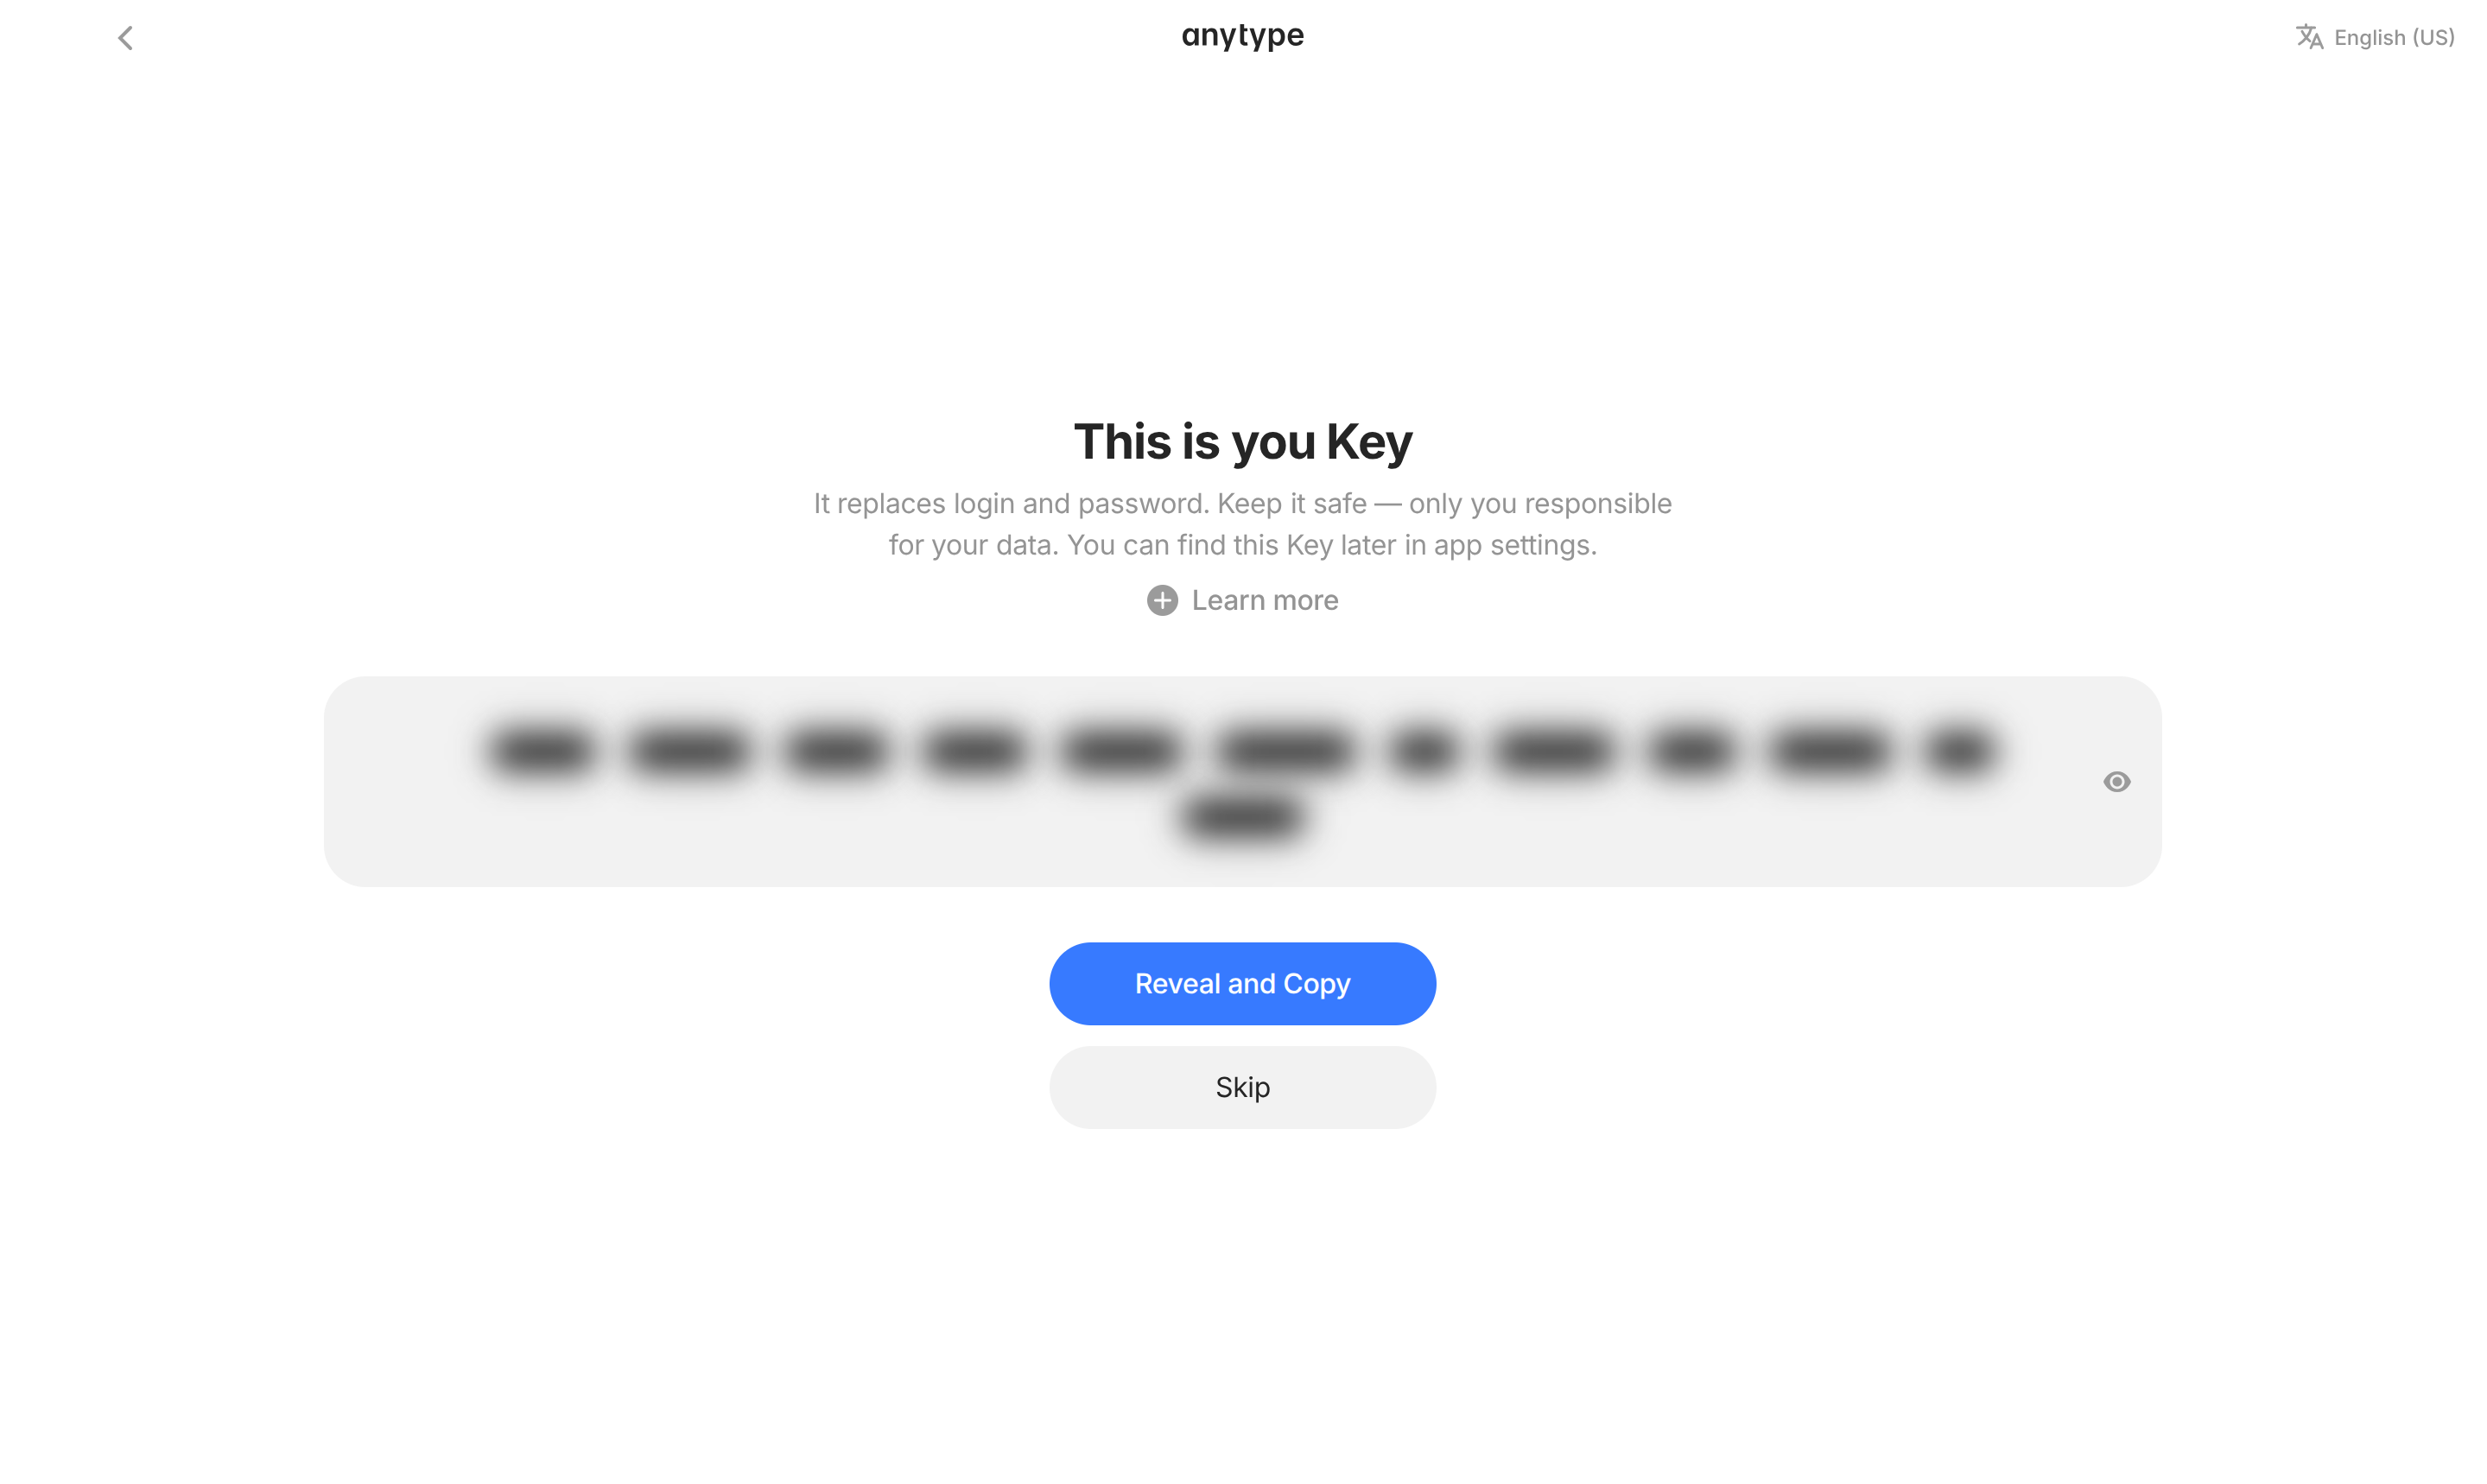
#### Save your Key!

{% hint style="danger" %}
Make sure you store your [Key](/anytype-docs/getting-started/vault-and-key/key) somewhere safe, and try not to share it with anyone who can't be trusted!
{% endhint %}

<figure><img src="/files/BadeaitbxNFnzO5UYKkQ" alt=""><figcaption></figcaption></figure>

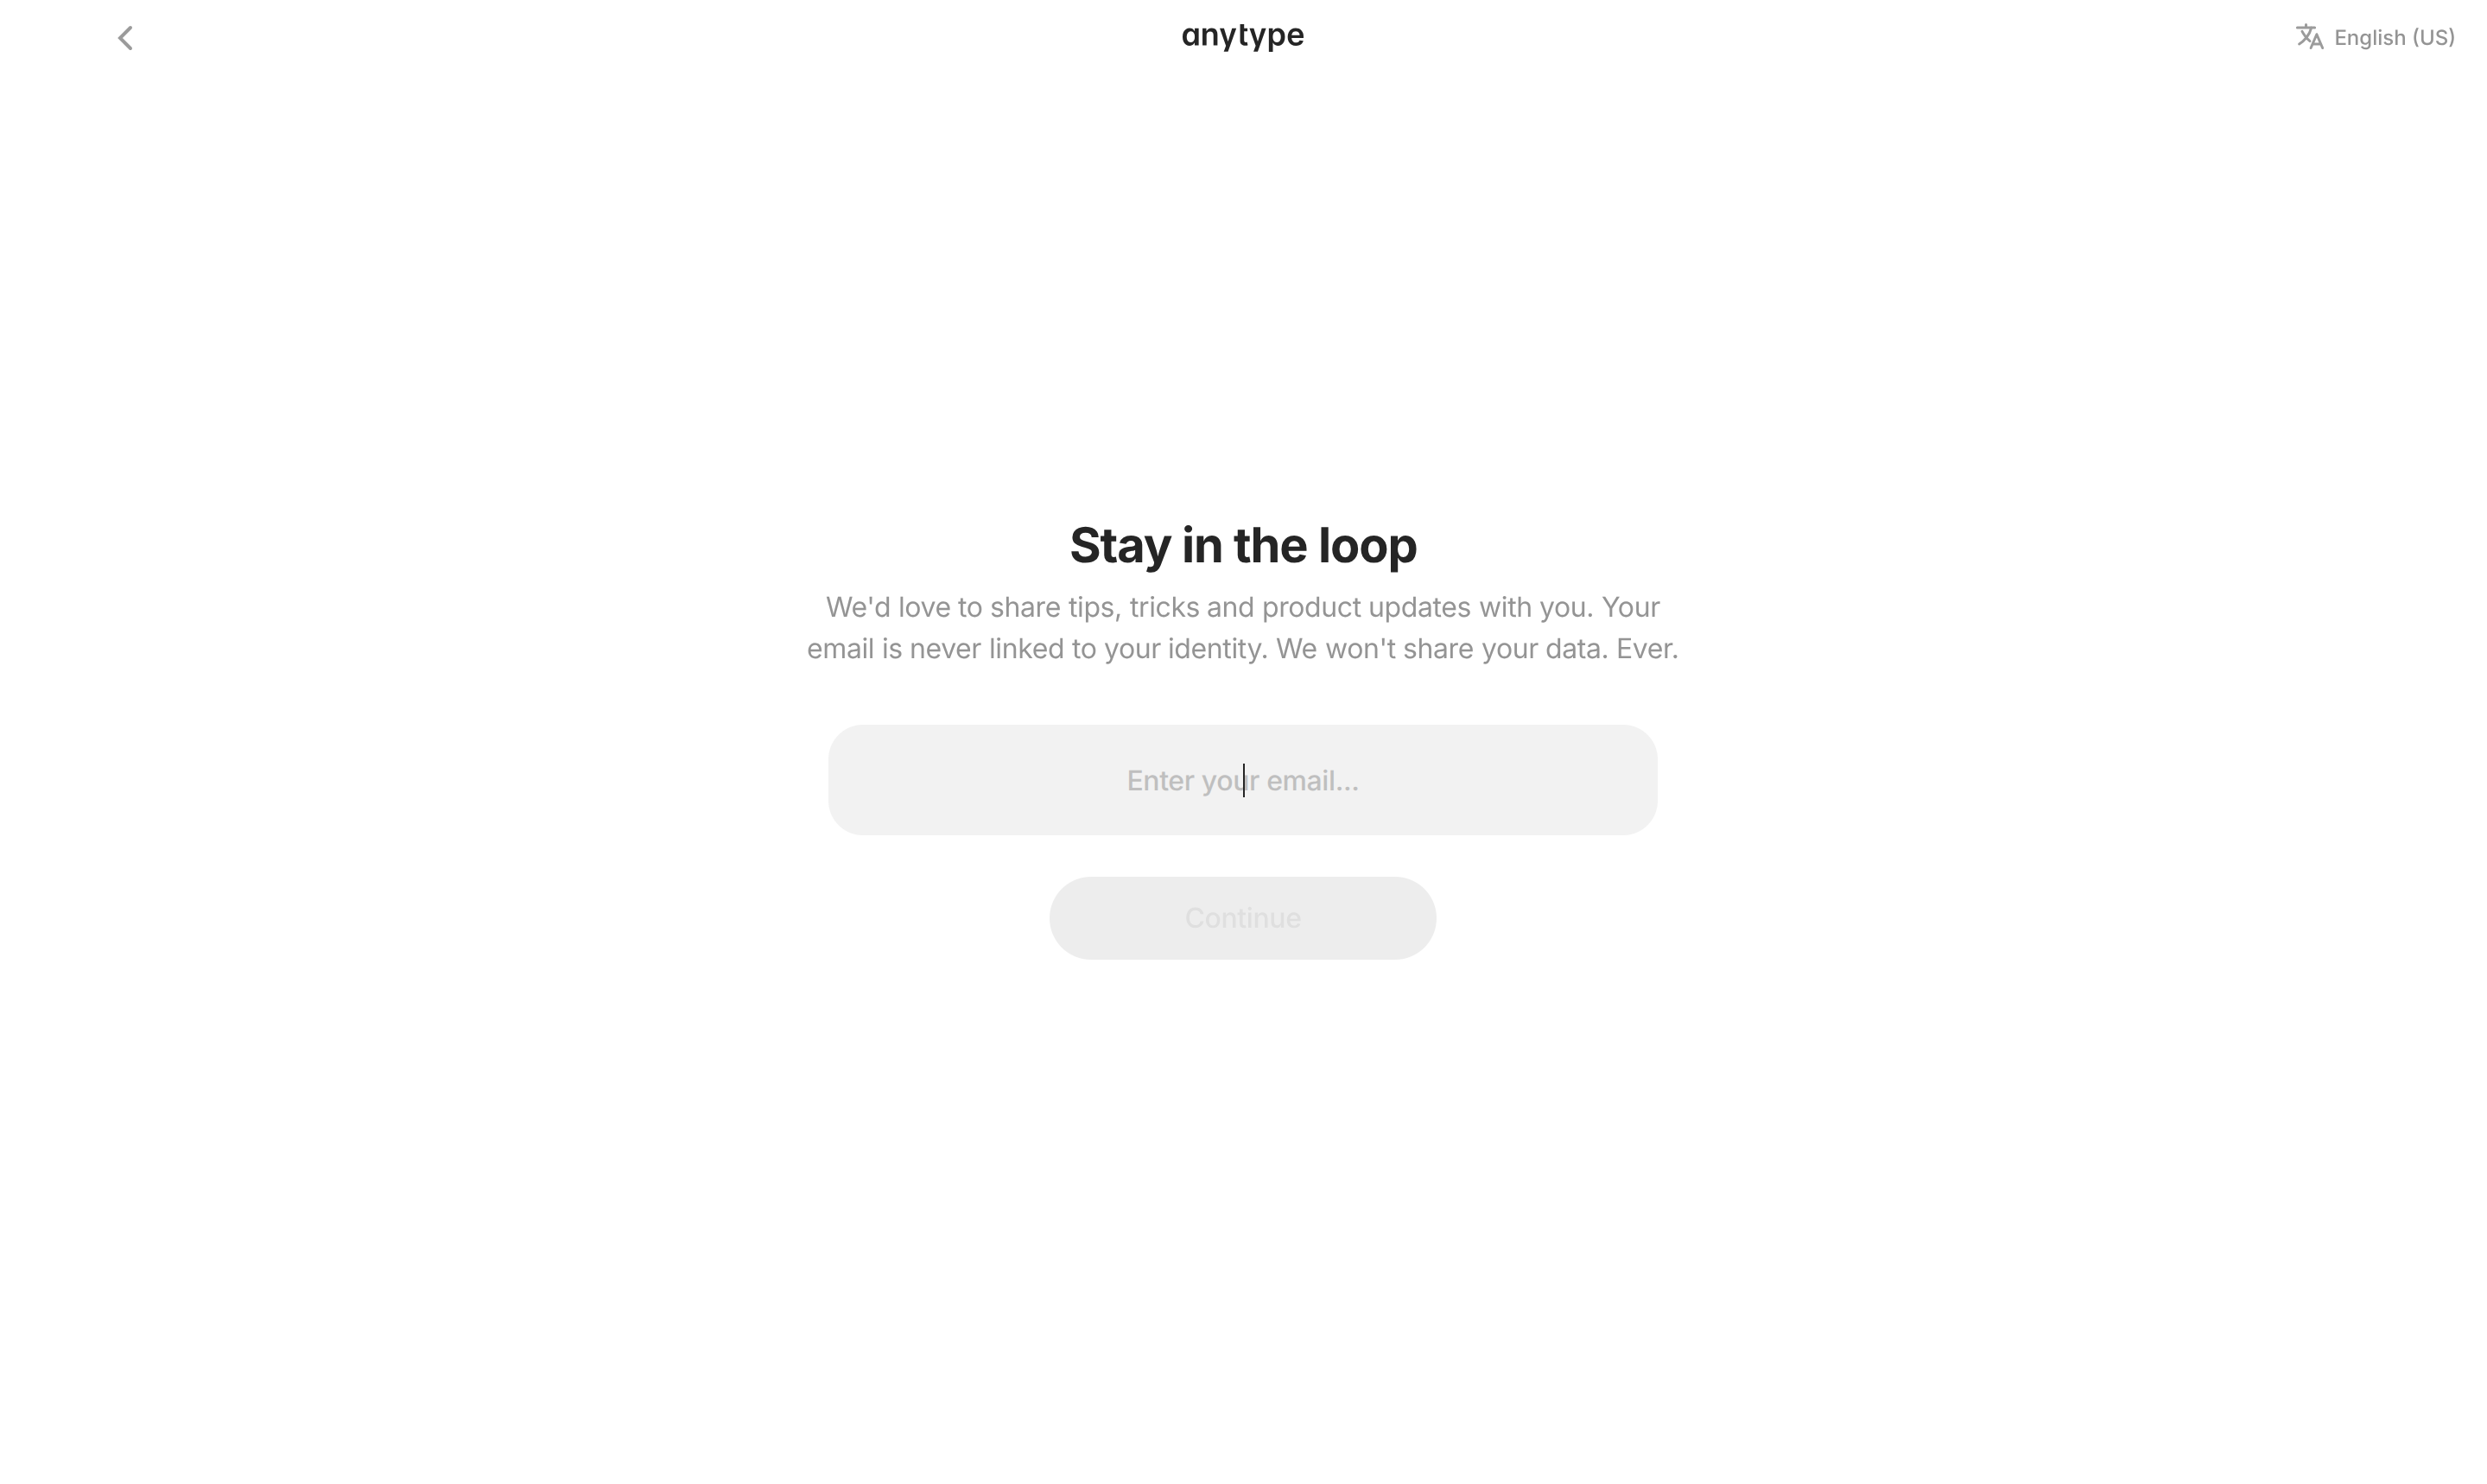
#### Stay in the loop

Enter your email address to receive tips and tricks from the Anytype team.

<figure><img src="/files/6sffk7wgeQdOlLFh8hn4" alt=""><figcaption></figcaption></figure>

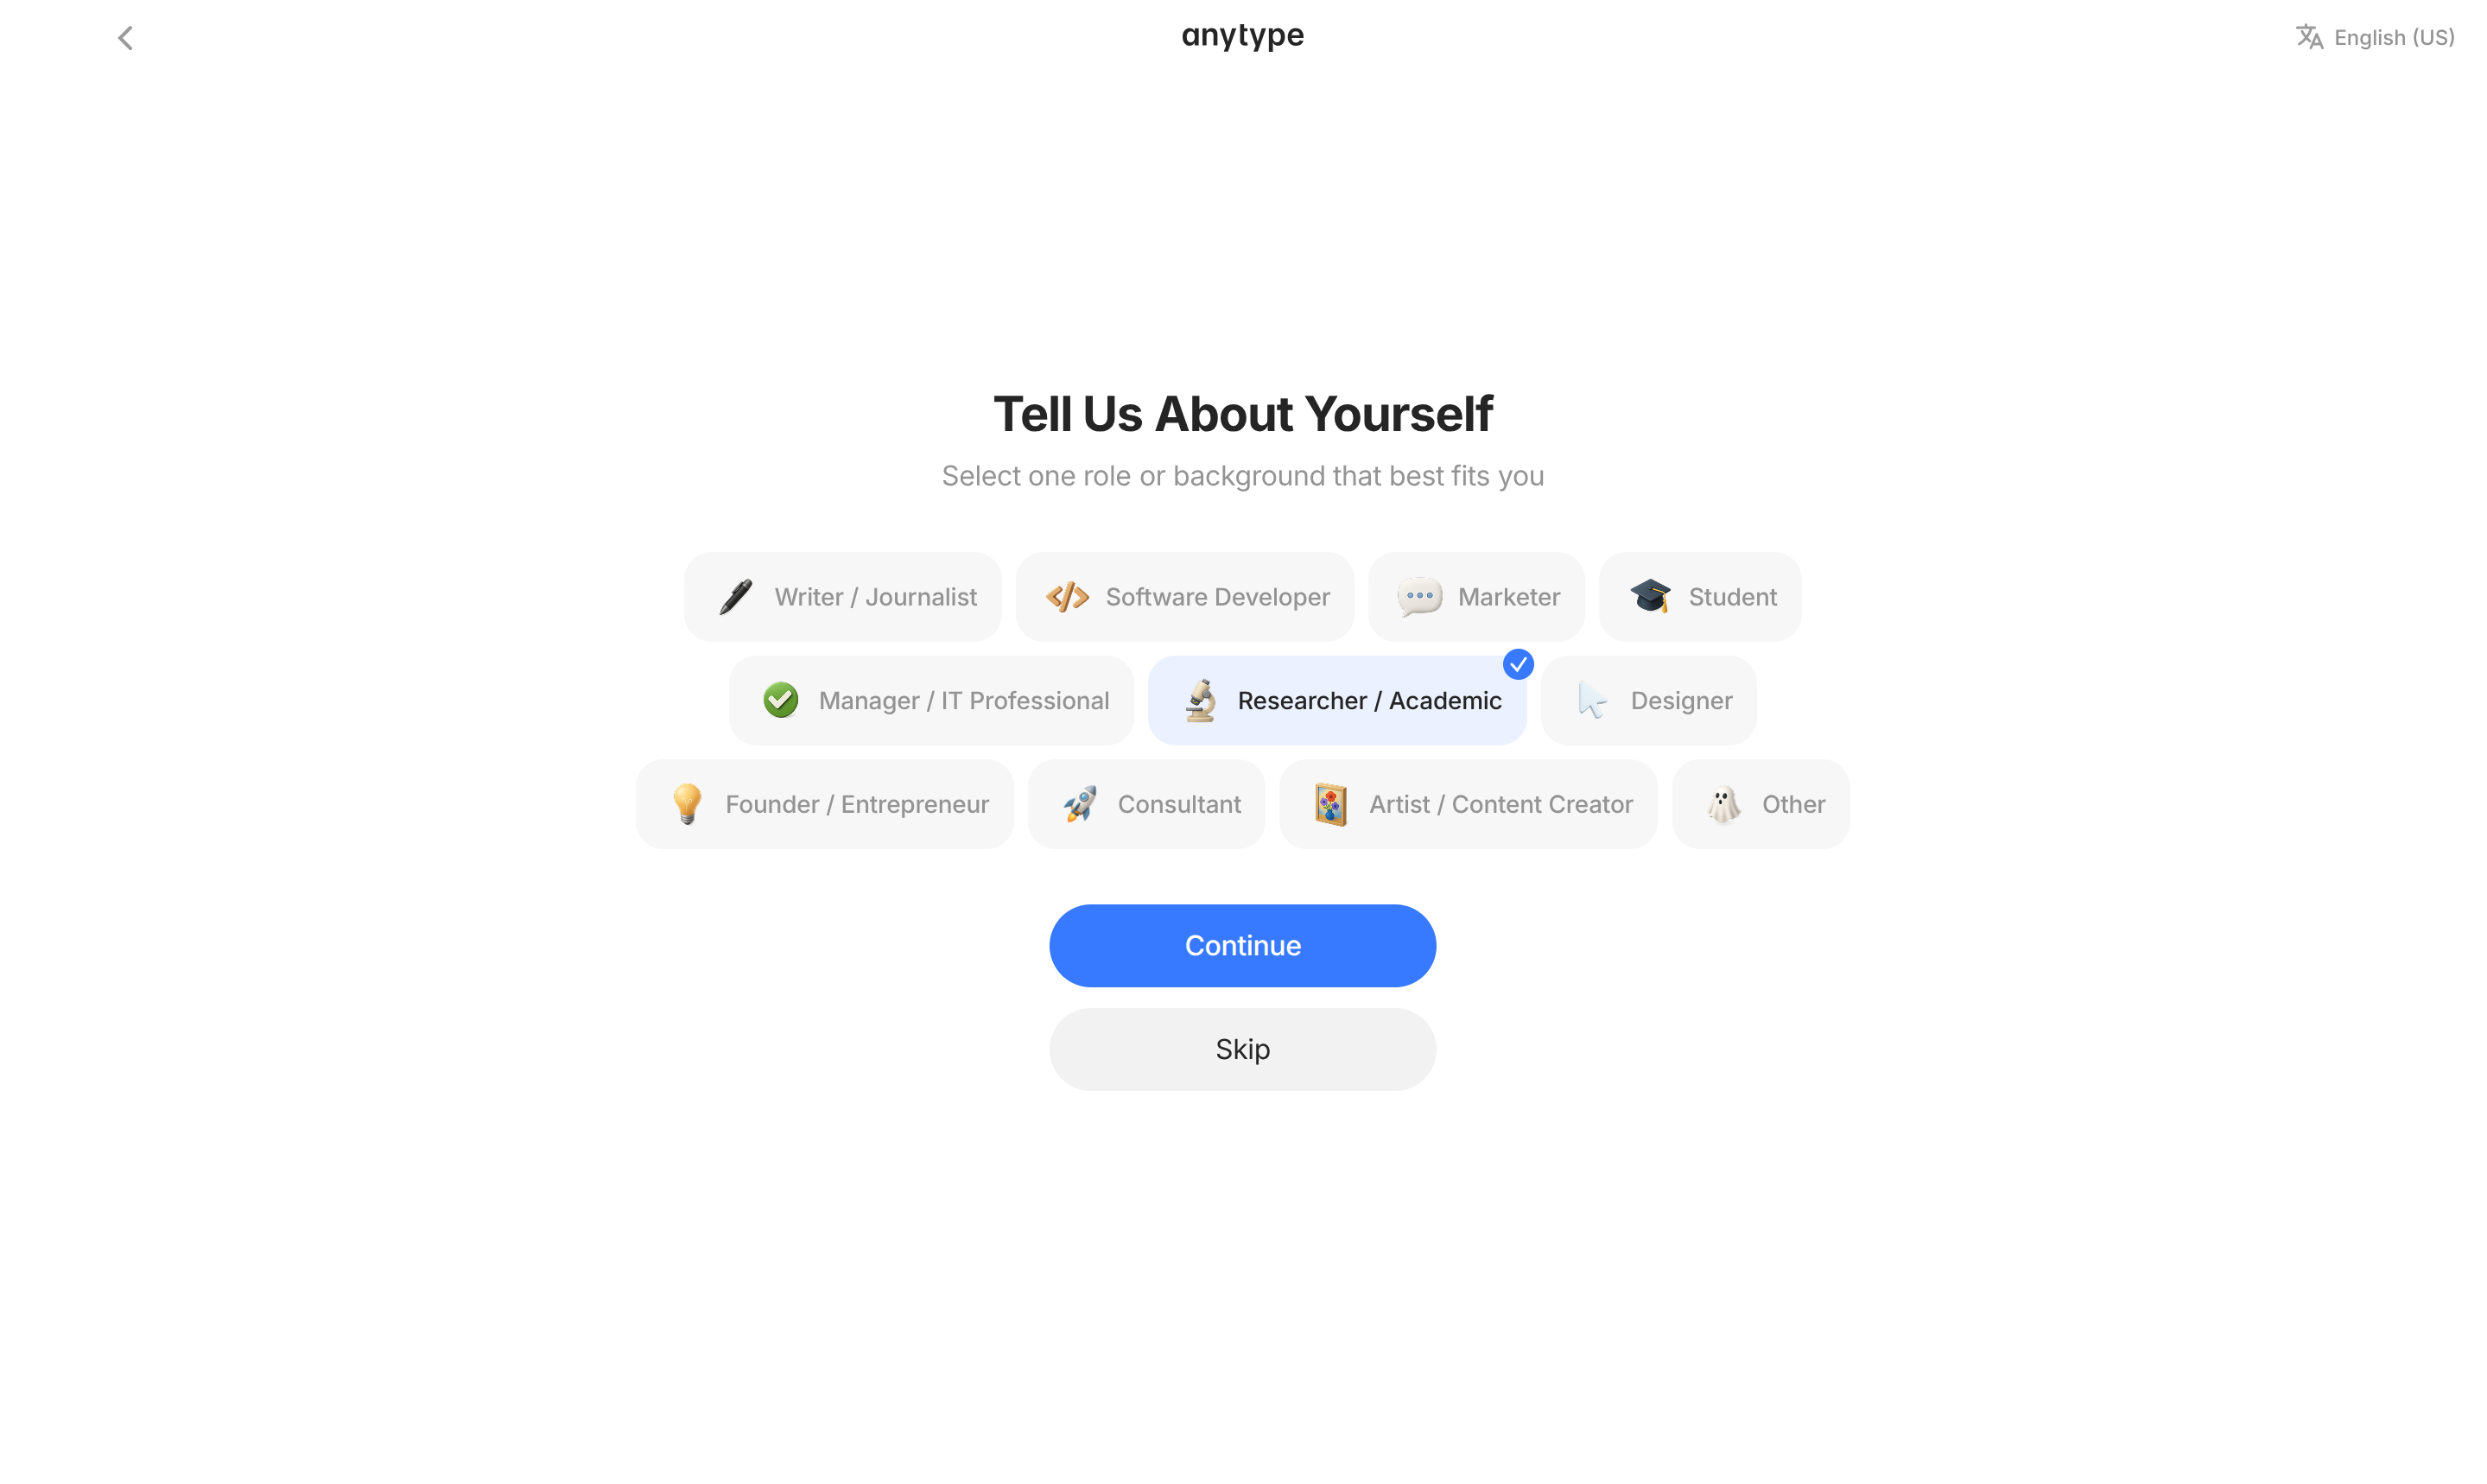
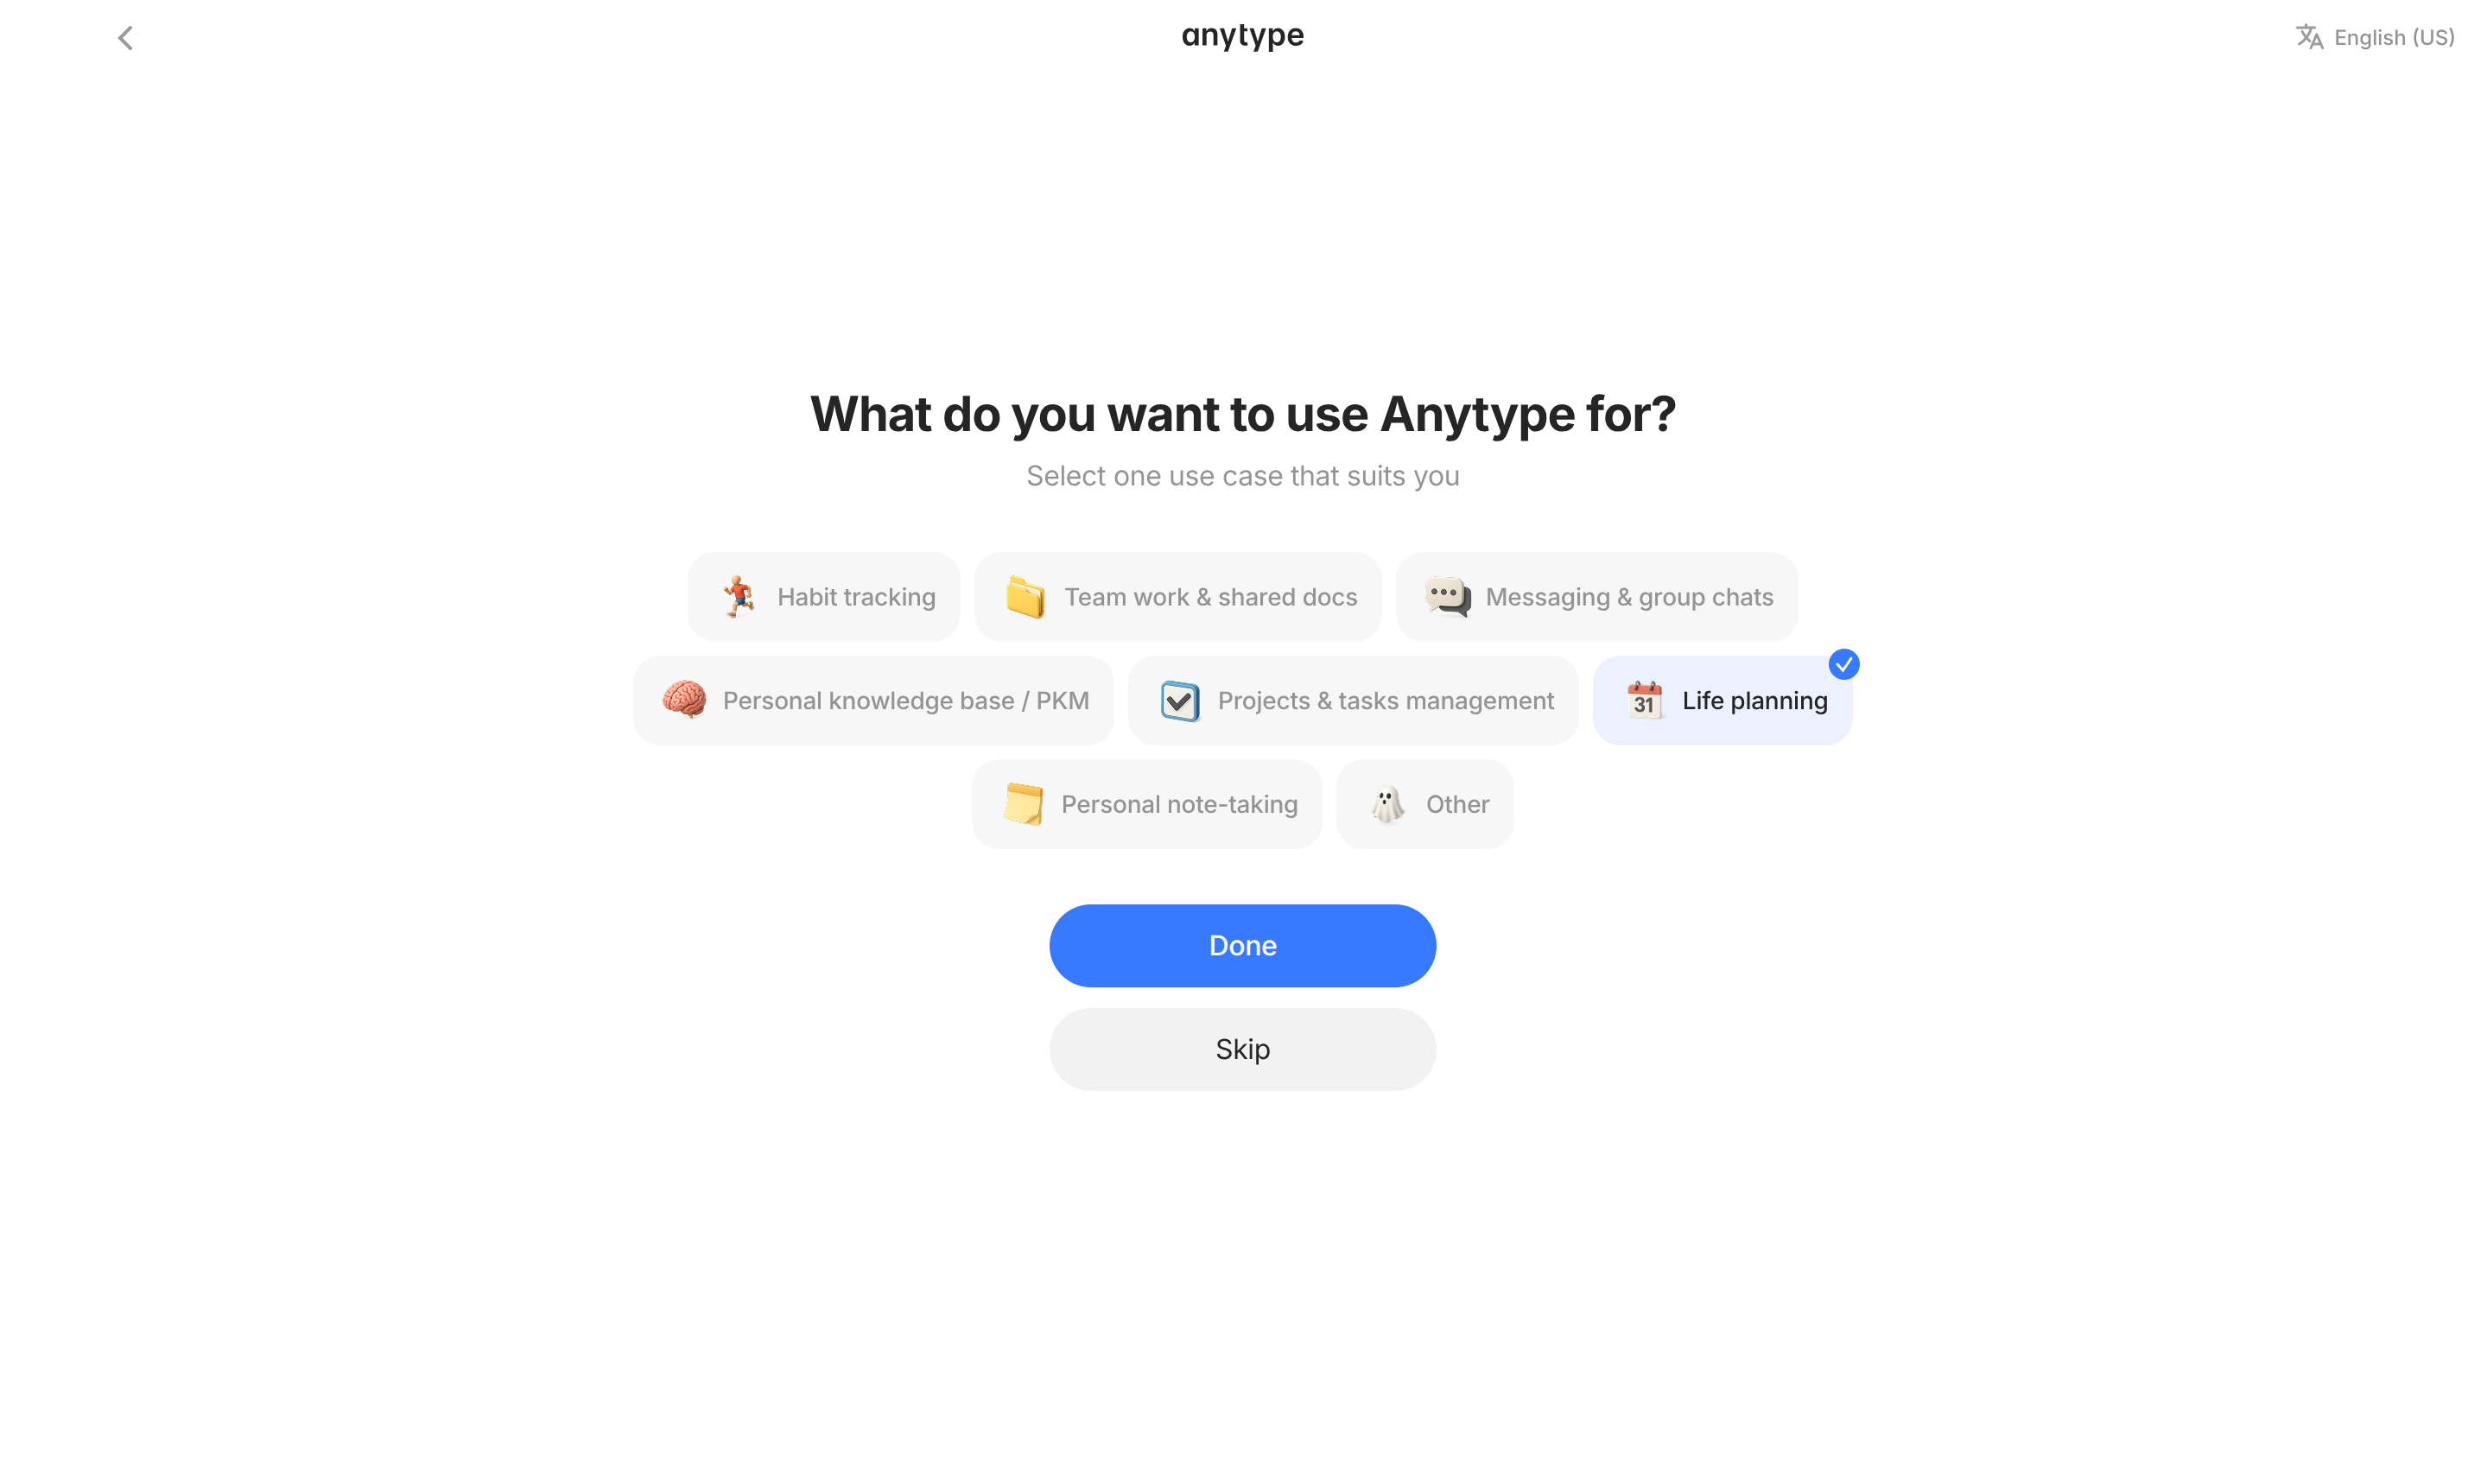
#### Share a bit about yourself

Help us build and improve Anytype by telling us how you plan to use it.

<div><figure><img src="/files/UkDY7CU0fNMdILV08Lii" alt=""><figcaption></figcaption></figure> <figure><img src="/files/8T1jShxfEdjqJi7QLFAK" alt=""><figcaption></figcaption></figure></div>

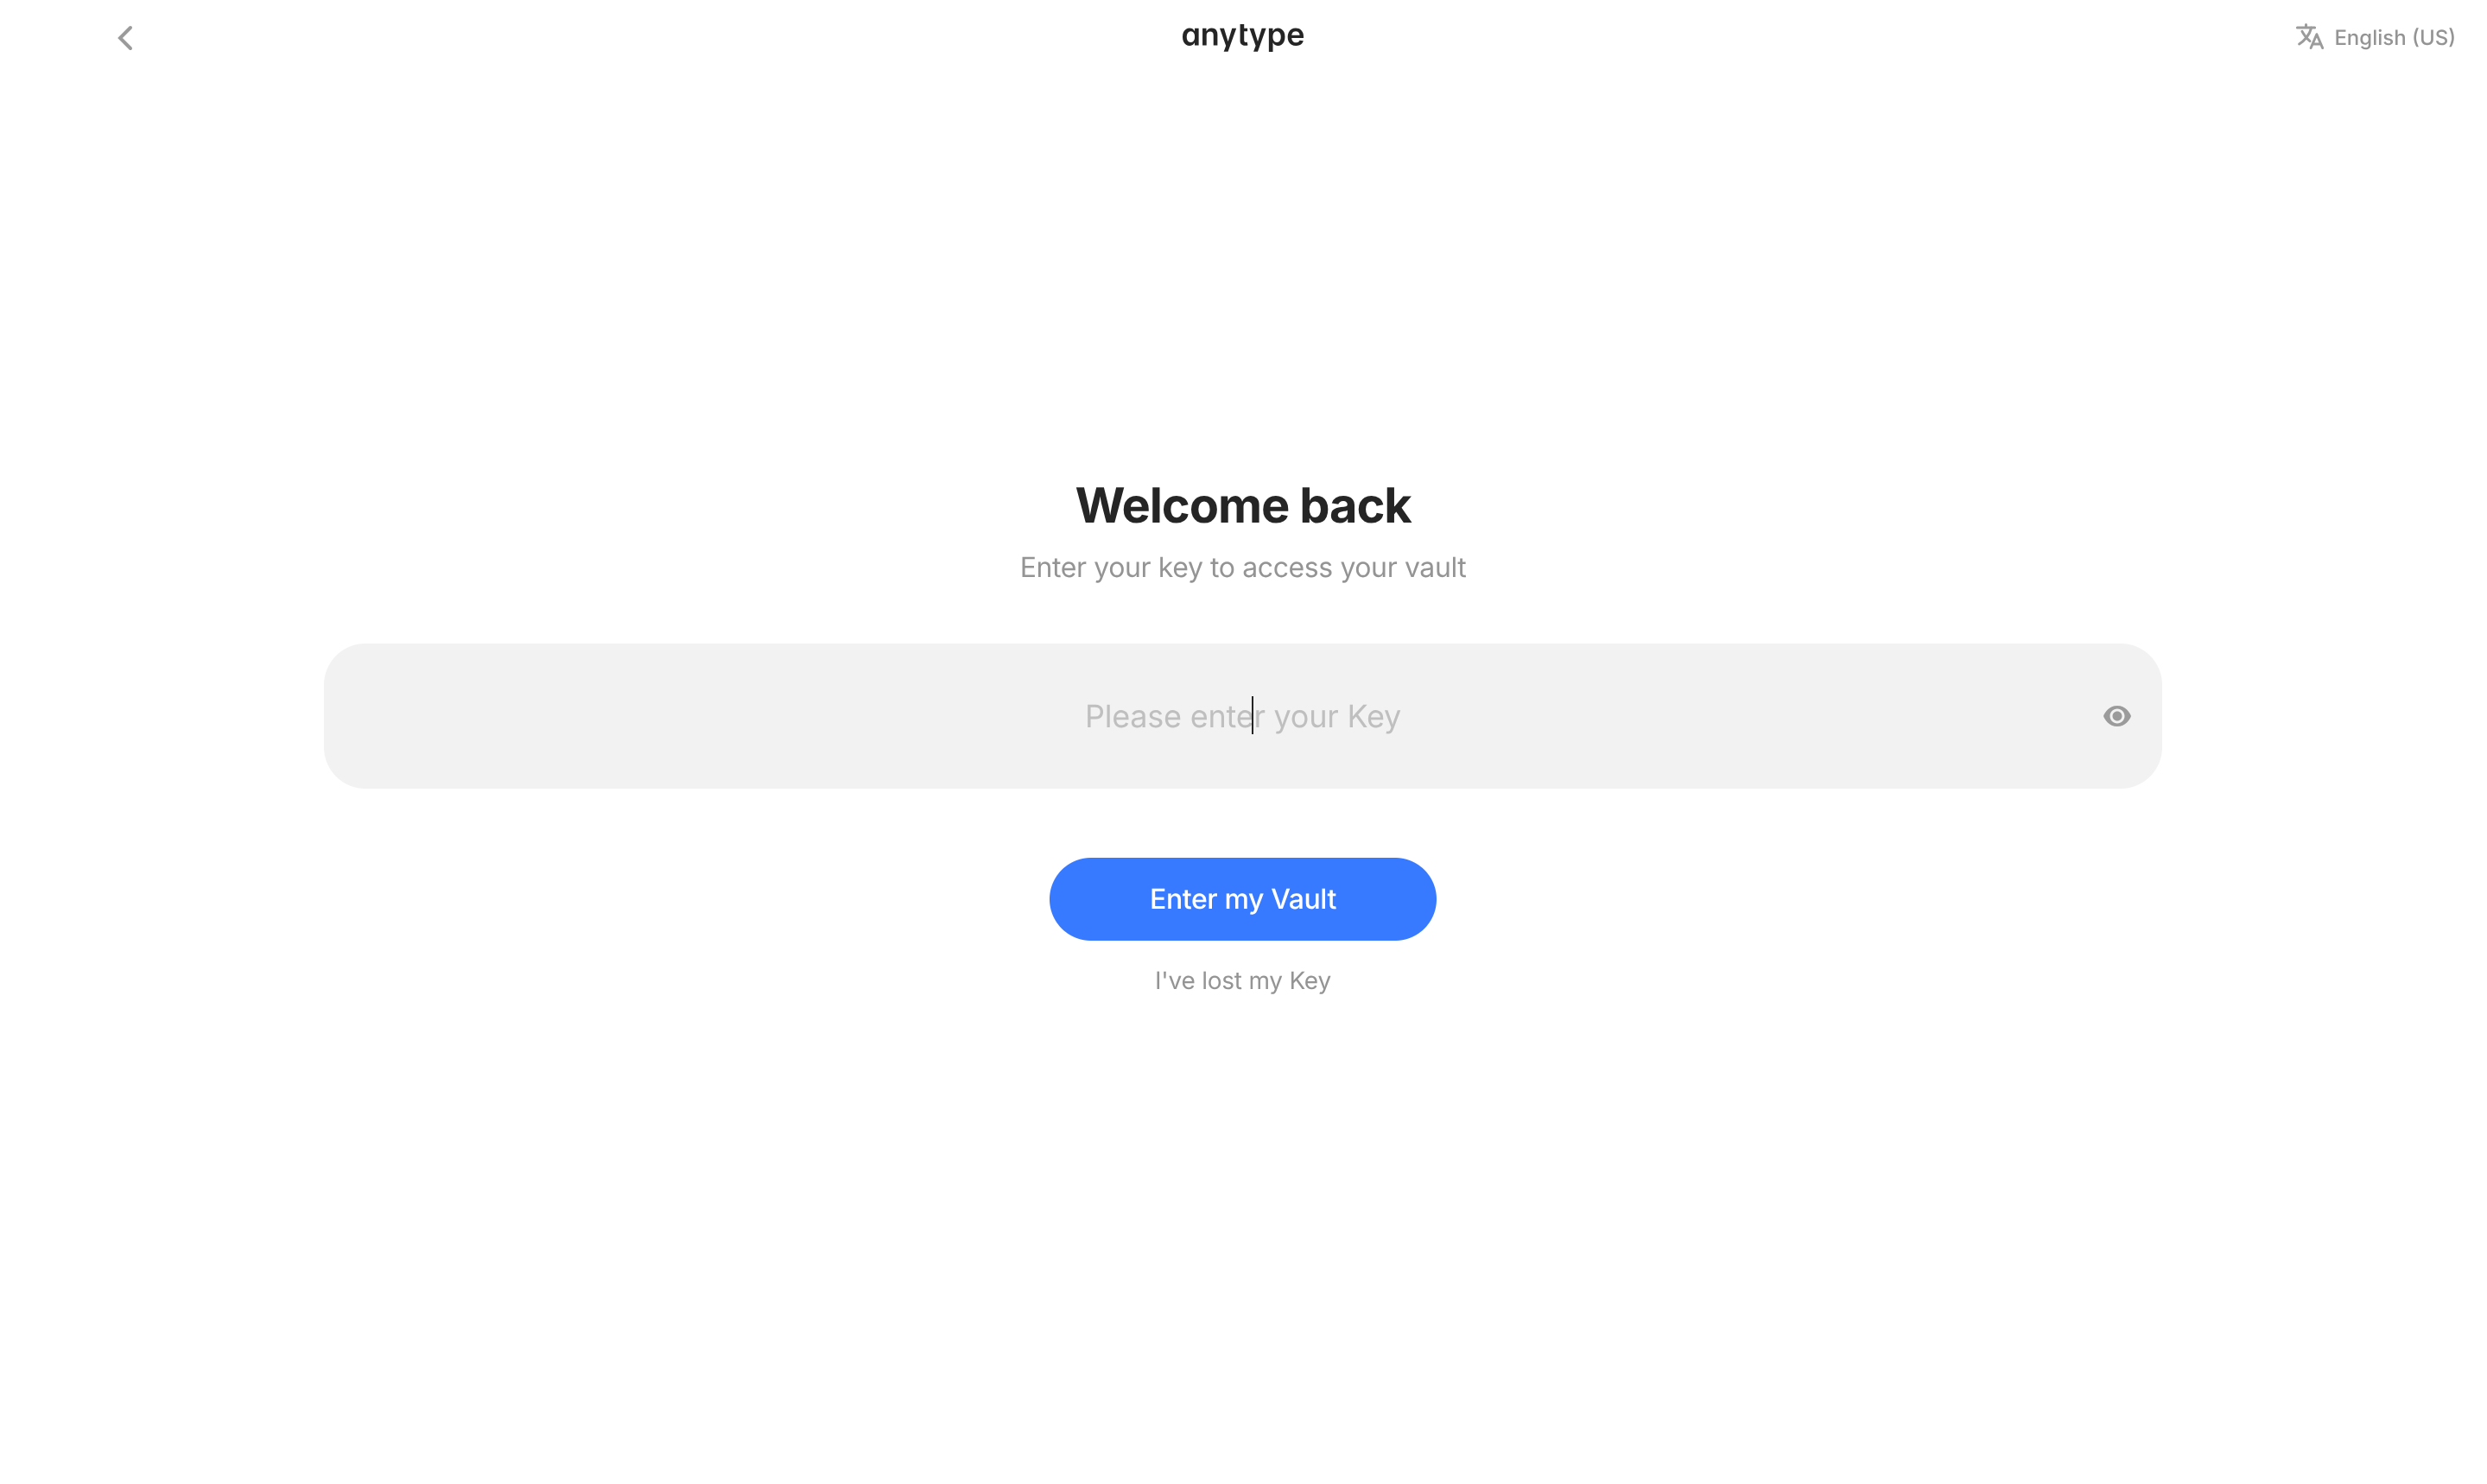
### Log-in using your Key

On the contrary, if you already have a vault, click on `I already have a Key` and enter your [Key](/anytype-docs/getting-started/vault-and-key/key) to proceed.

<figure><img src="/files/K8UUuJ6L0B3Mq9xYKZb4" alt=""><figcaption></figcaption></figure>

#### Log-in using the QR code

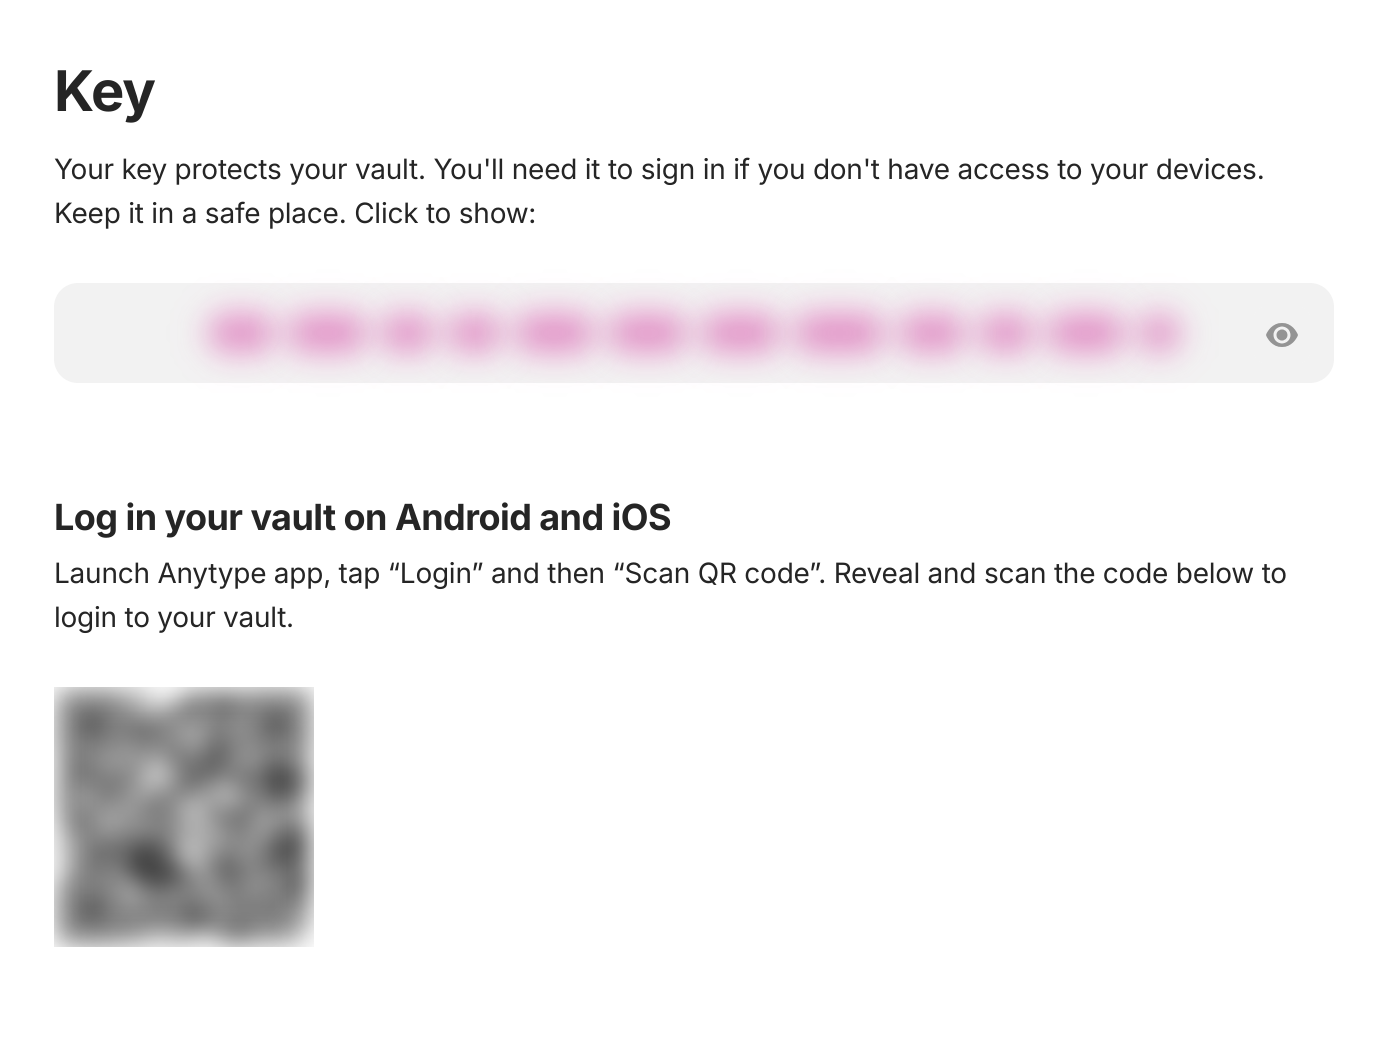
In addition to using your [Key](/anytype-docs/getting-started/vault-and-key/key) to log in, you can also use the QR code to login faster if your desktop is close by.

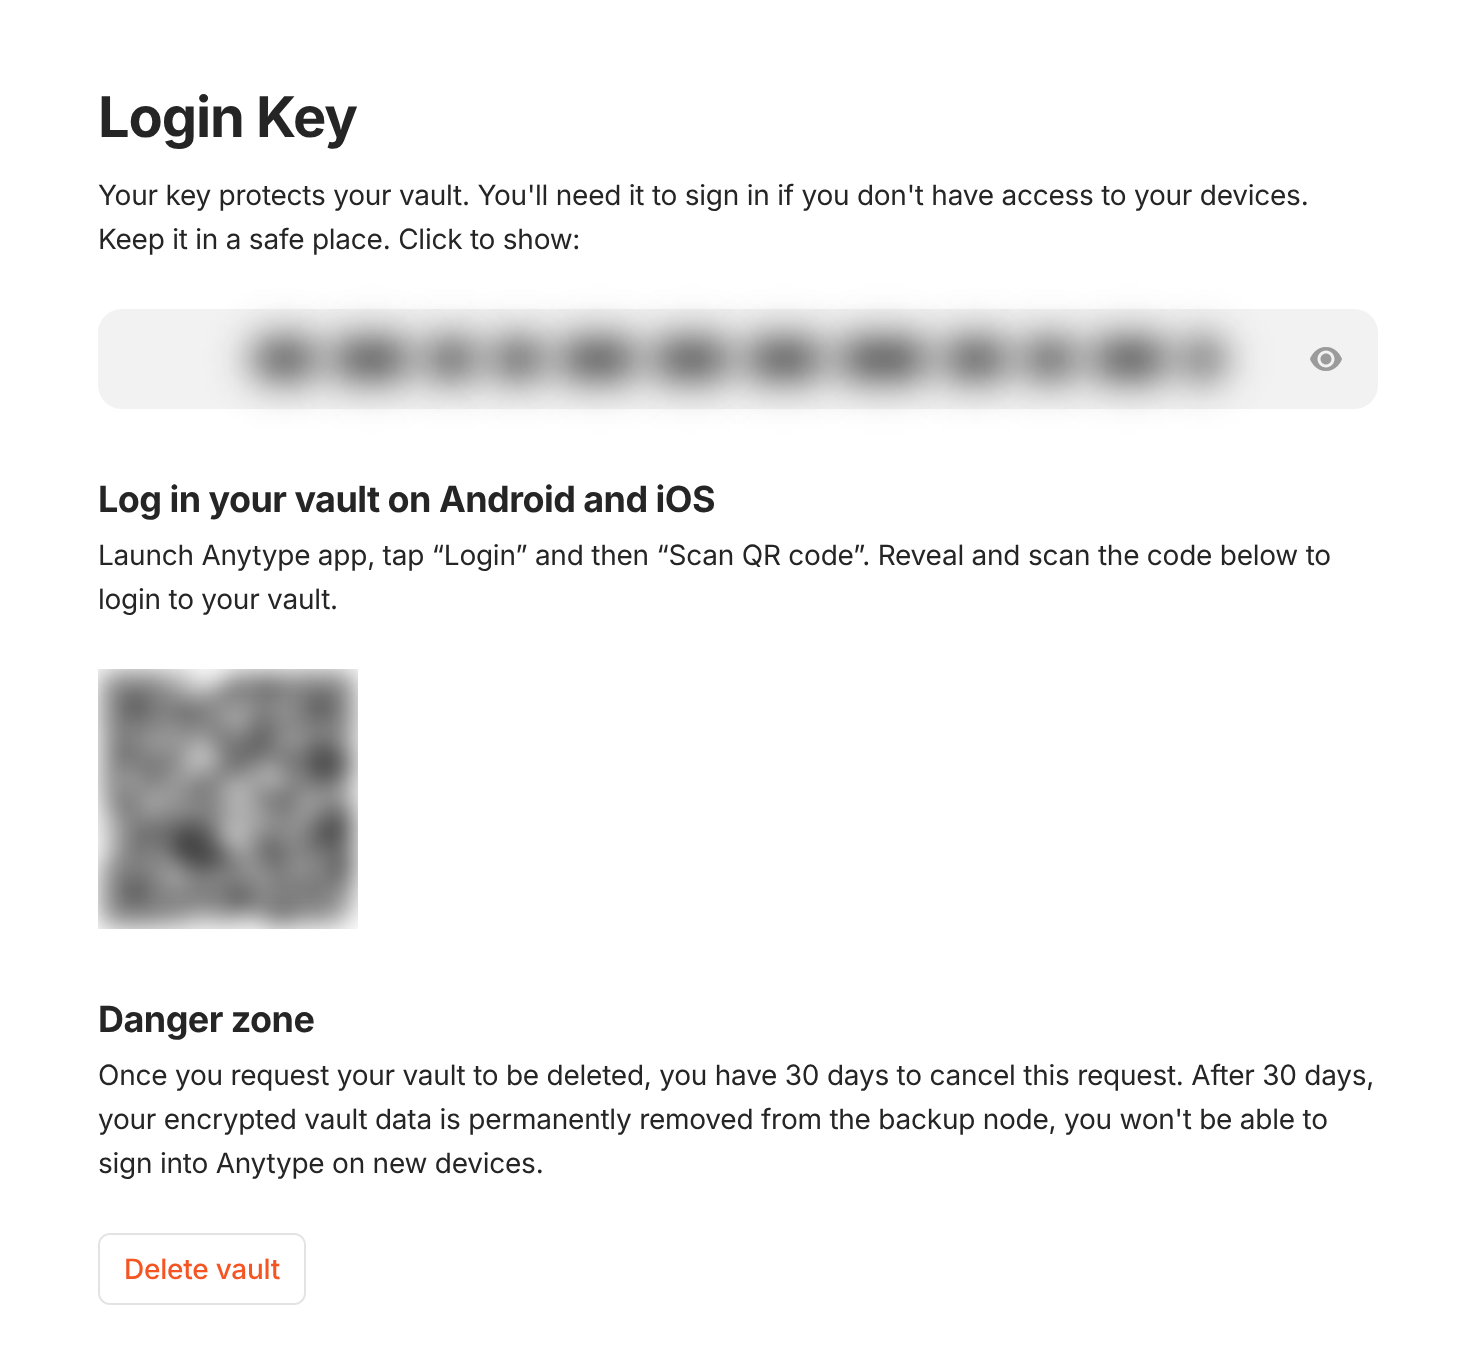
To log in using the QR code, simply navigate to [Vault Settings](/anytype-docs/advanced/settings/account-and-data#login-key) in your Vault Settings.

<figure><img src="/files/SqEw5Yo6cOSkiX3dyXzy" alt=""><figcaption></figcaption></figure>

### Import

If you would like to import some of your existing data into your Space, you can find the instructions on how to do so in [Import & Export](/anytype-docs/advanced/data-and-security/import-export#import).


# Vault

A **Vault** is an encrypted box stored on your device, which holds your information. It allows you to send, receive, and store information with full privacy and ownership over what you create.

All the [Channels](/anytype-docs/getting-started/vault-and-key/space) you create and share will be stored in your Vault. Because public key cryptography is used to secure your Vault, it is unbreakable - all computational resources on earth are not enough to break into one Vault.

In order to enter your Vault, you will need to use the [Key](/anytype-docs/getting-started/vault-and-key/key) that was generated along with your Vault when you created it for the first time.

<figure><img src="/files/wFYLWc2uK4okJzwZJKNe" alt=""><figcaption></figcaption></figure>


# Key

<figure><img src="/files/hg9YR42zmkOlm4EKte05" alt="" width="563"><figcaption></figcaption></figure>

When you create your vault, you will receive your very own 12 word mnemonic phrase. This phrase is generated on-device and is the only way to access your vault and decrypt your data.

Your Key functions as your login and passphrase at the same time. This mnemonic represents your master key generated upon signup, similar to a Bitcoin wallet.

Changing it is impossible, and it's extremely important you keep it safe. You can access it at any time by navigating to the Key section in your [Vault Settings](/anytype-docs/advanced/settings/account-and-data).

### Don't forget to save it!

We do not save a copy of your key, which means that if it's lost, we are not able to assist with recovering your vault. For this reason, we recommend making a digital backup or writing it down and keeping it somewhere safe.

You will need this key each time you login on a new device.

### If you've lost your Key

Encrypted apps work in a way that puts the responsibility for your personal data entirely in your hands. Since these apps are completely anonymous, we can't identify or delete individual Vaults. Even if we could, we wouldn't be able to verify with certainty if we're talking to the actual Vault owner or someone else.

If you've been logged out of Anytype, and haven't stored your Key somewhere else, you only have two options to recover your Key:

1. If you're still logged in on another device, you might still be able to restore your Vault. Just open the app there and copy the Key from your settings.
2. You can also try recovering your Key from your [OS Key storage manager](/anytype-docs/advanced/faqs#how-to-recover-my-key-from-my-os-key-storage-manager).


# Channels

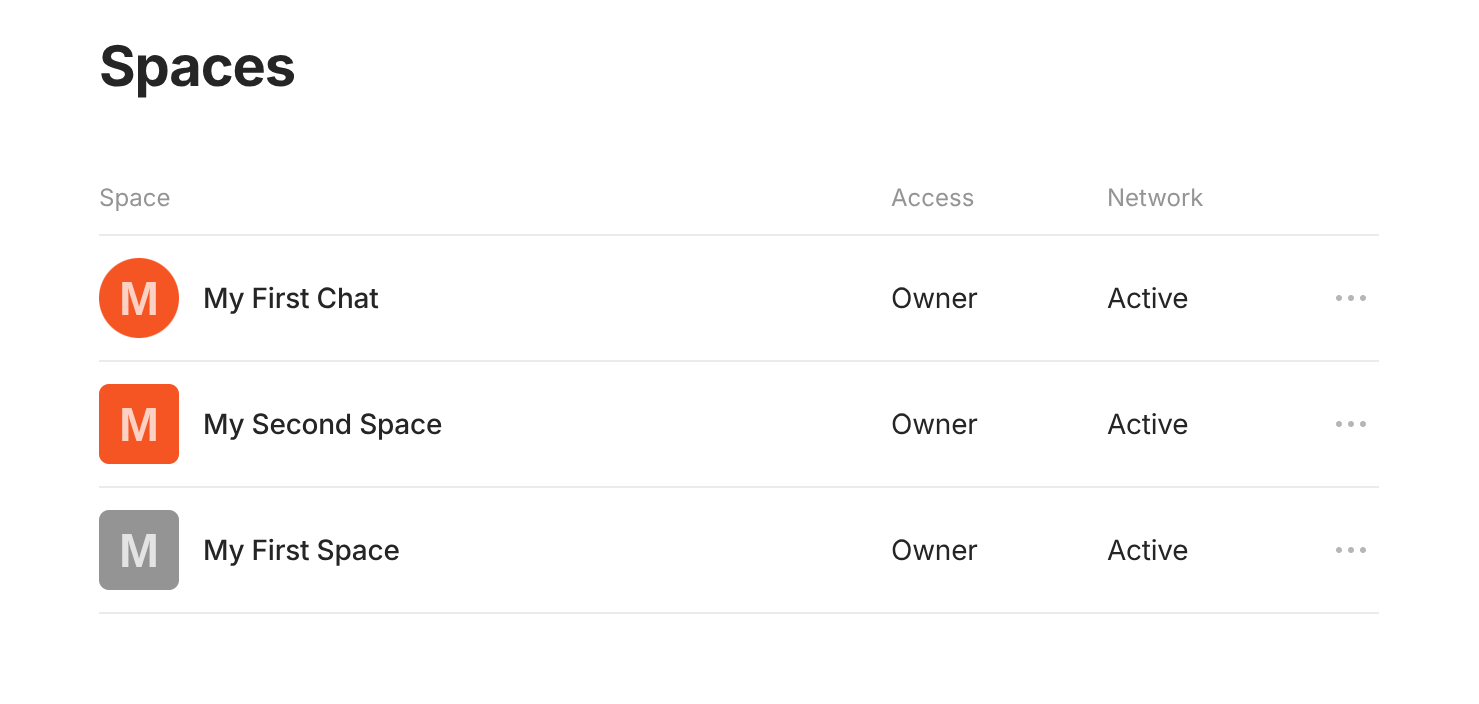
Inside your Vault, you have **Channels**. A **Channel** is a container for your graph of objects.

Similar to a vault, a channel is an encrypted container. Unlike your vault, each channel has unique access rights, you can decide who has access to each channel.

You’re able to create multiple separate channels, each with their own graph of objects, sidebar, and privacy settings.

<figure><img src="/files/XhKhyZGNkpJztk9Wf1Vl" alt=""><figcaption></figcaption></figure>

{% hint style="danger" %}
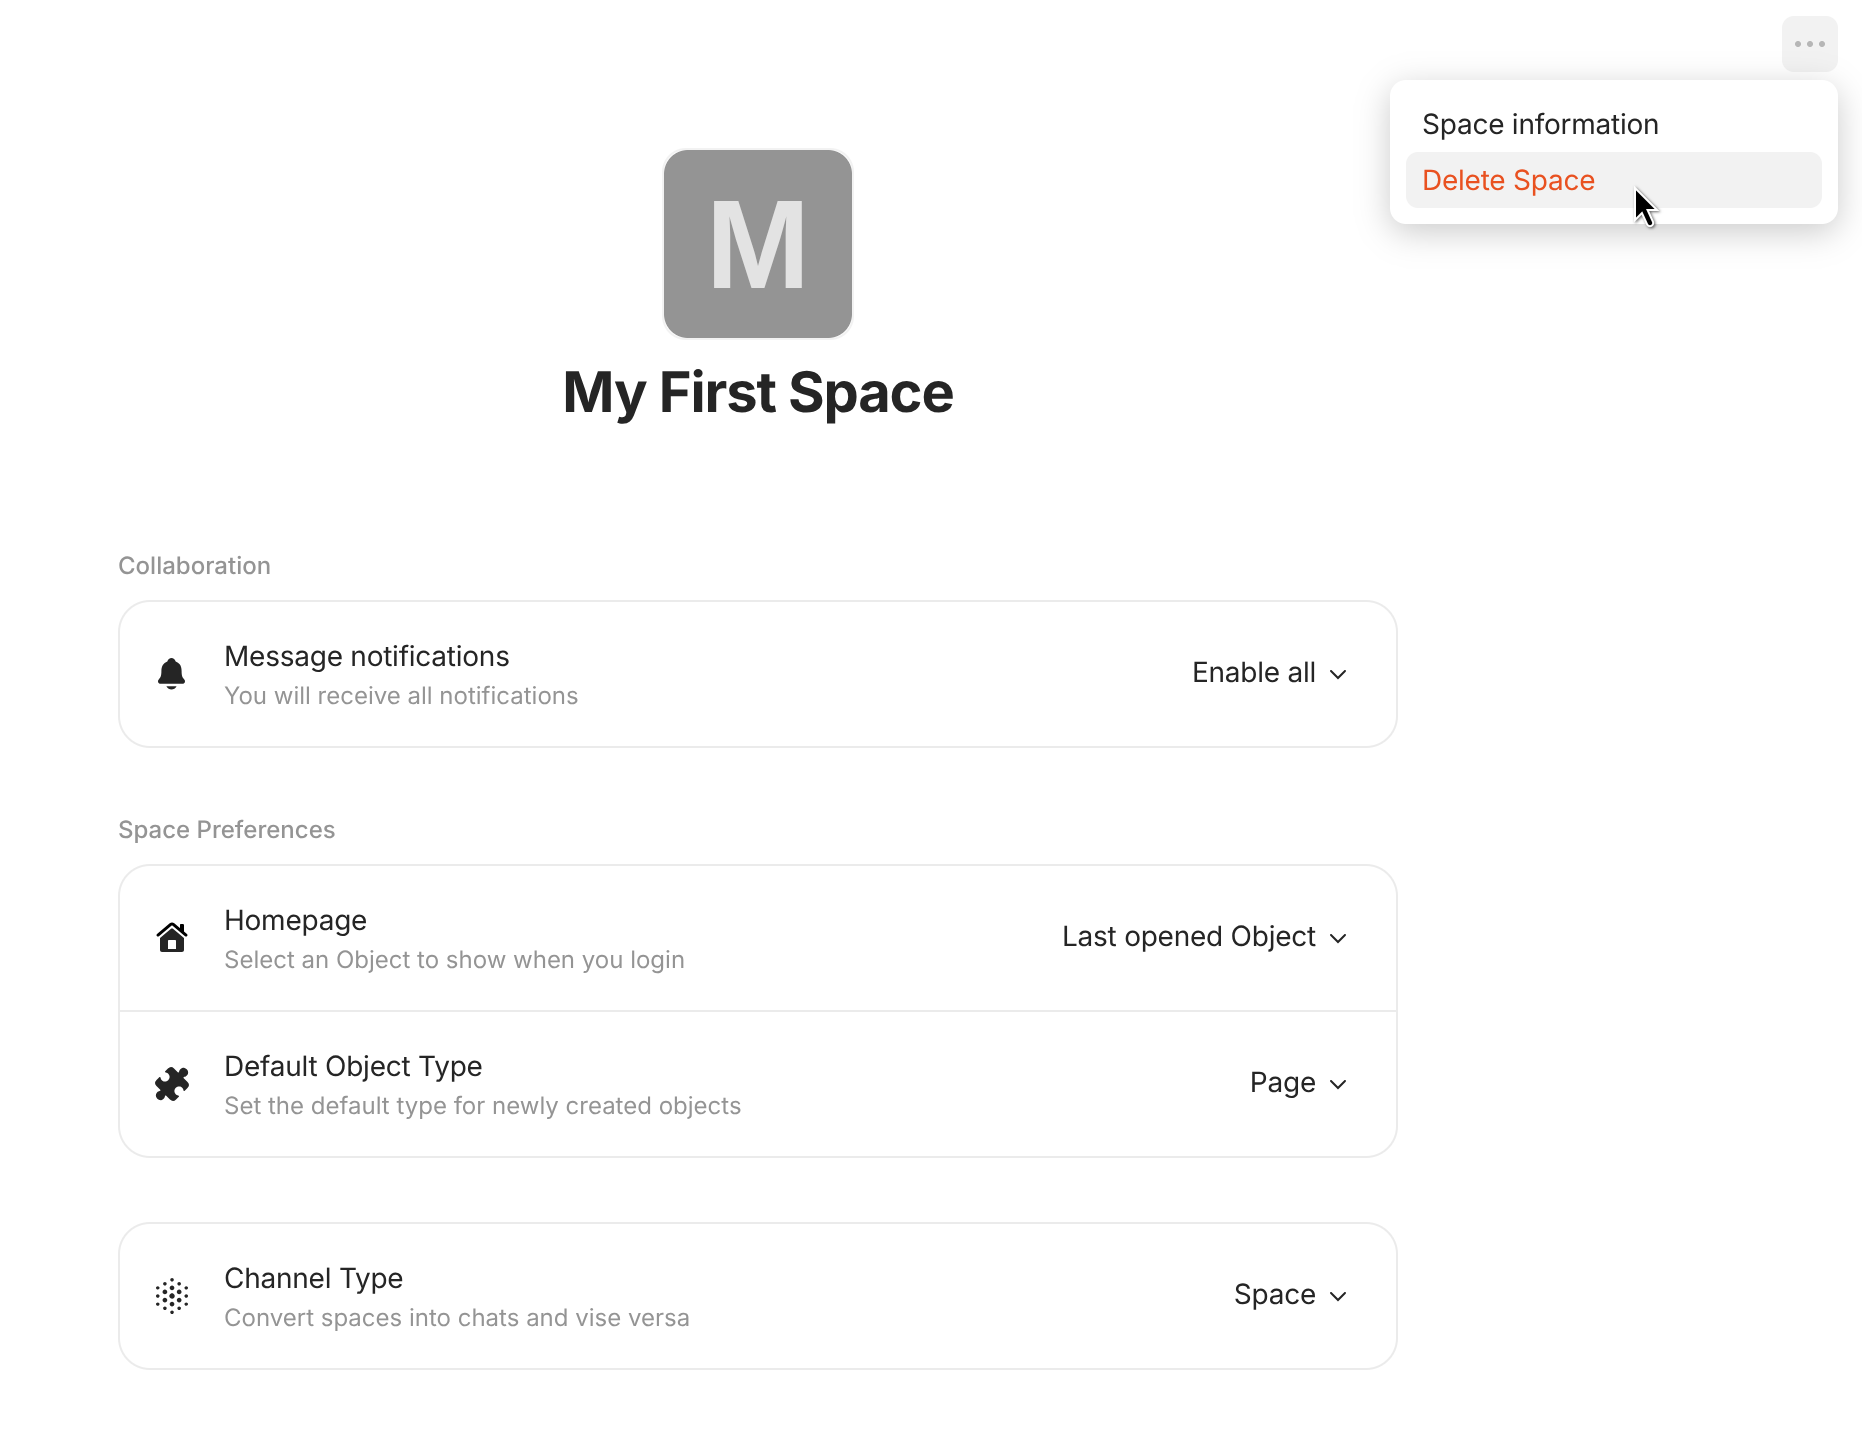
It's currently impossible to recover deleted channels unless you've previously exported them, so be careful when deleting them.
{% endhint %}

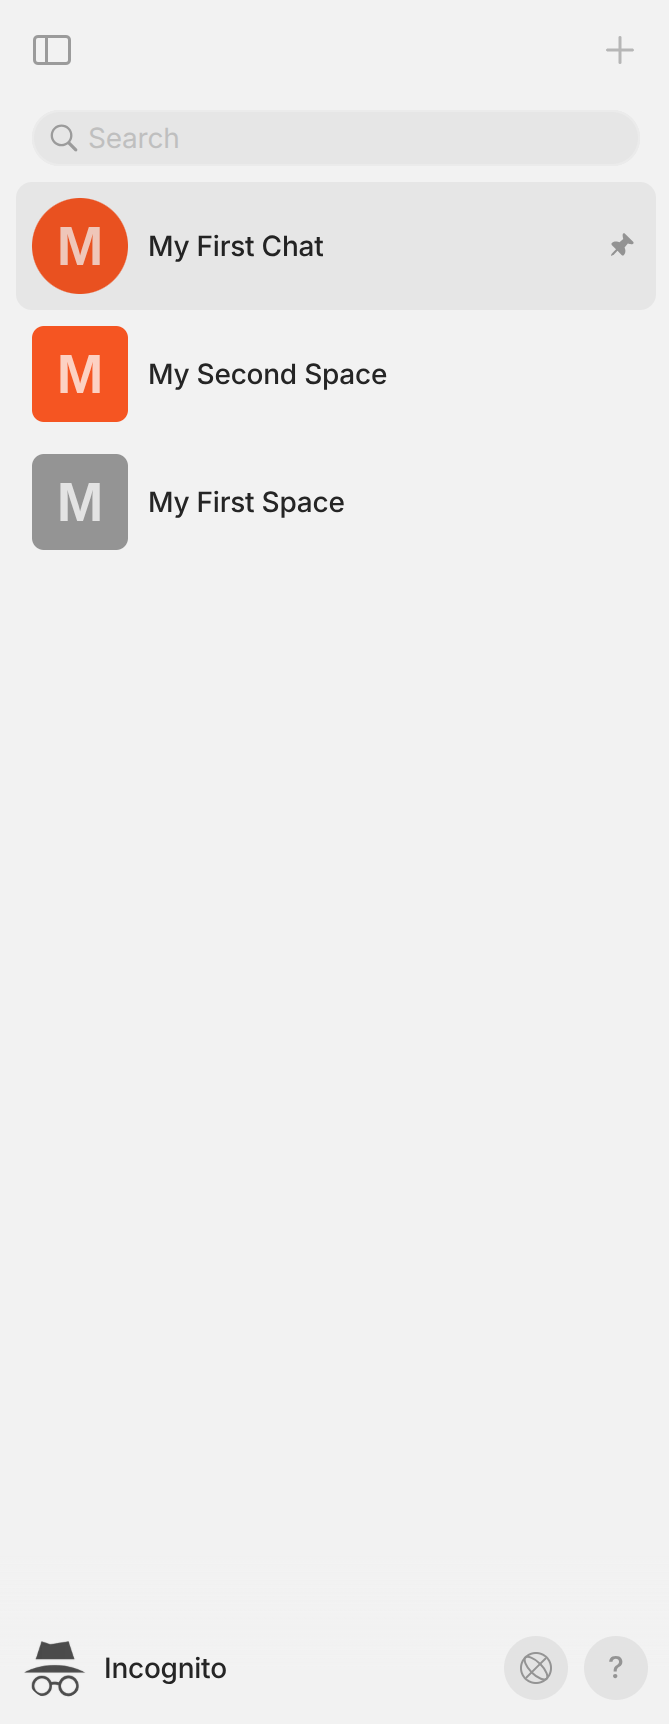
Use the vault sidebar to navigate between your existing channels.

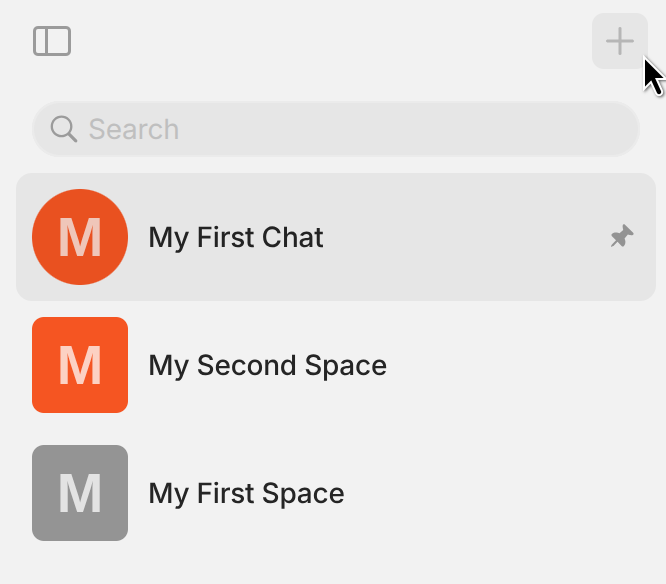
To create a new channel, simply click on the plus button in the top right corner of the channels sidebar:

<figure><img src="/files/ayTJ9gzqypZnx2AvMksU" alt="" width="333"><figcaption></figcaption></figure>

If you would like to customize or delete your channel, please take a look at [Channel Settings](/anytype-docs/advanced/settings/space-settings).


# Objects

### What is an Object?

Forget what you already know about knowledge management tools.

At Anytype we have created the concept that everything you create is an Object. Pages, Notes, Recipes, Books, Movies, Audio, Humans, *everything!*

These are all **Objects** that are organized and categorized by **Types**.

You can connect different **Types** by **Properties** and see how this is visualized on the **Graph**.

You will see in your **Settings** that you can create new Types.

In short, an Object is a generalizing term for what you are creating. If it is a page, note, or other Type that you have created.

The Object will be organized by the Type of object that it is.

It is any node in your graph. The smallest linkable unit. Still classified with types.

### Ways to Create Objects

#### Sidebar

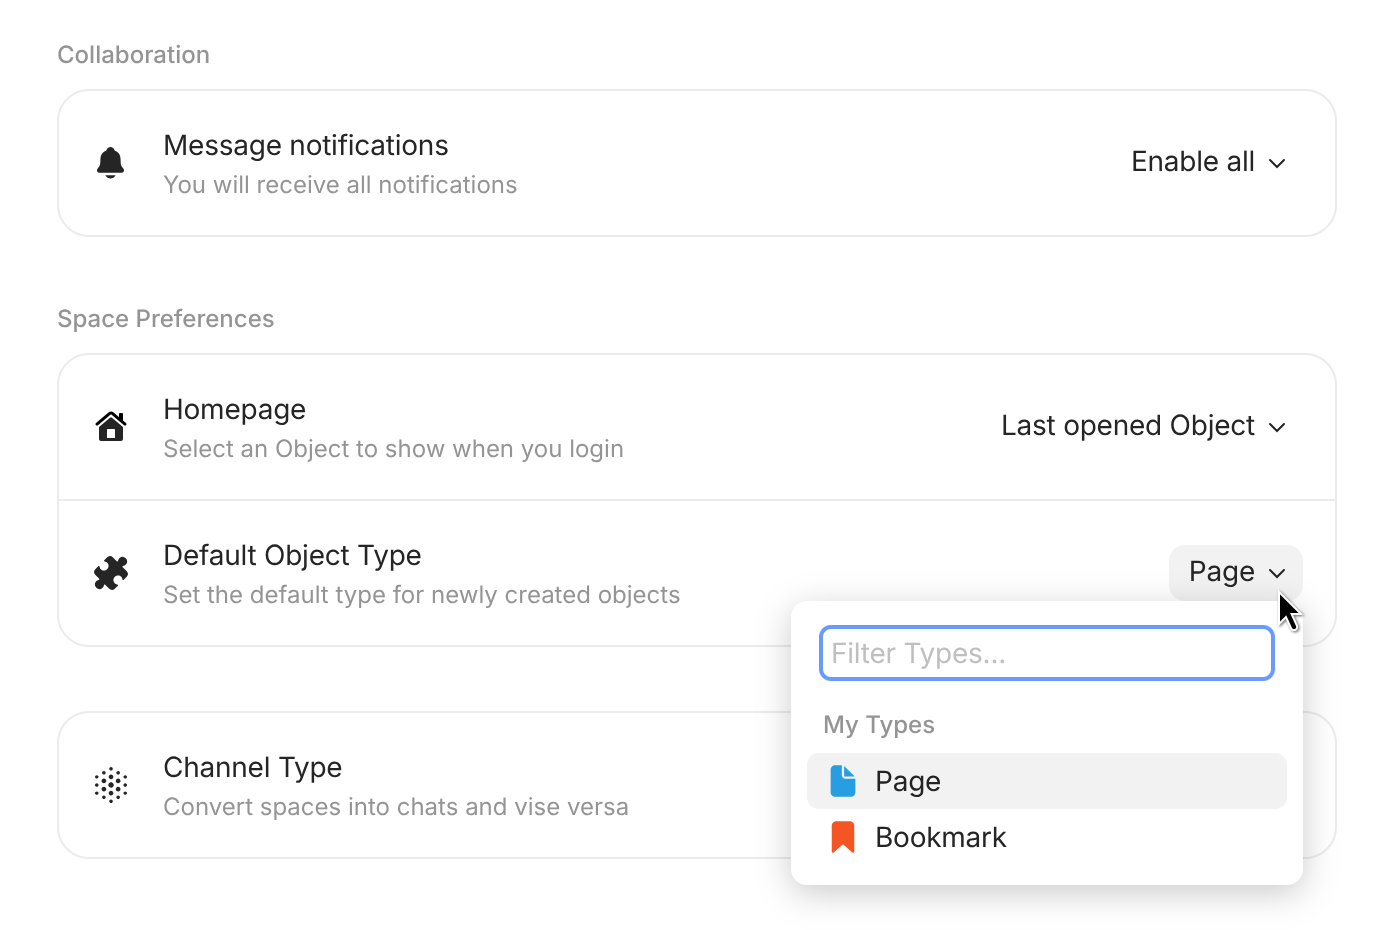
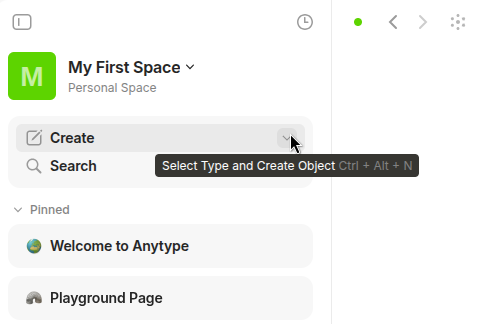
When clicking the plus button, you’ll immediately create a new object with the type that is set as your default object type in your channel settings.

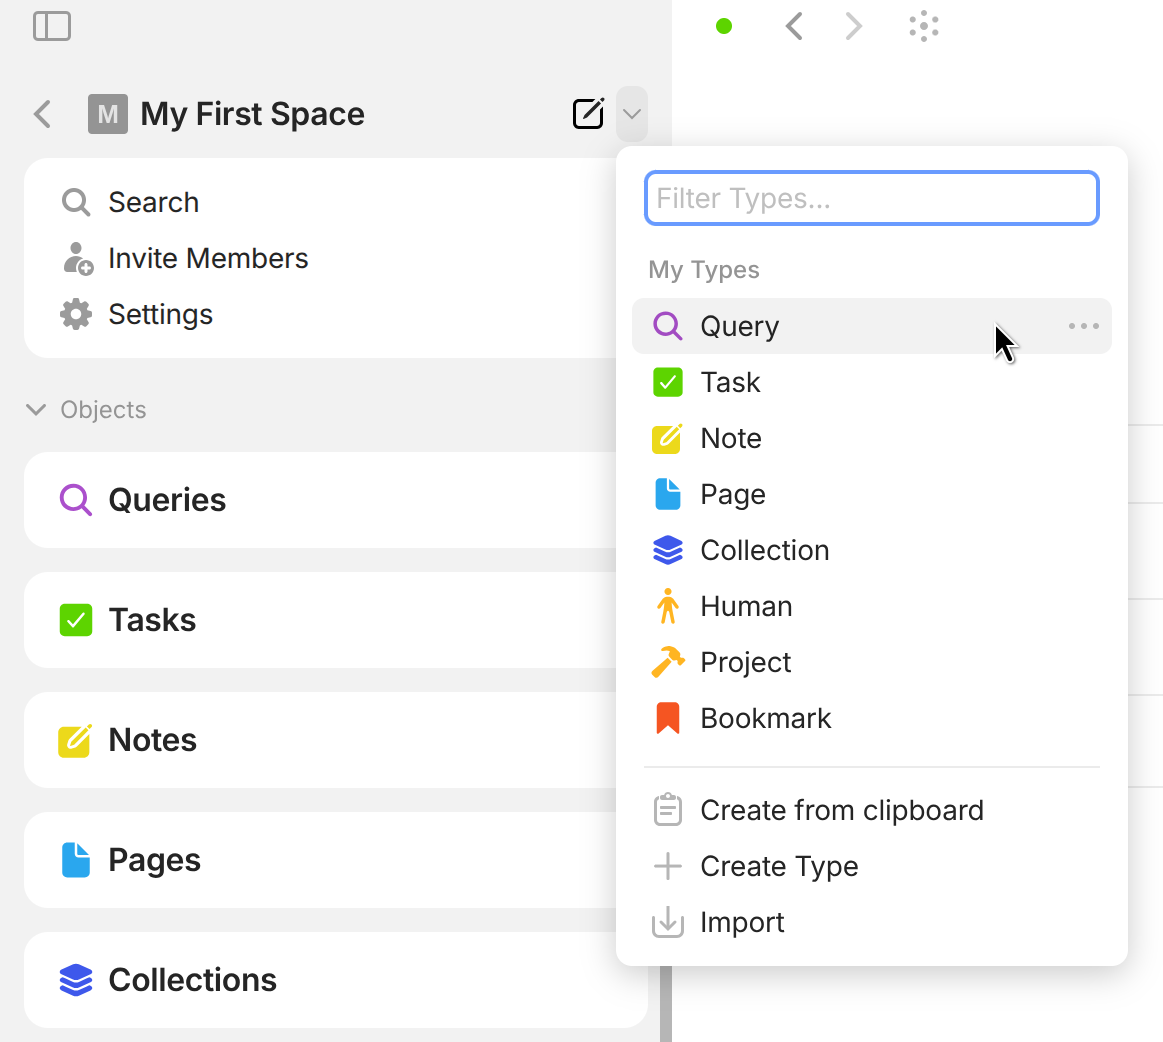
When clicking the arrow button, you'll be presented with a menu of your types which you can sort to your liking. You can then choose which one you want to create.

<div><figure><img src="/files/FfjvFQUNQW95OjOHDa8W" alt=""><figcaption></figcaption></figure> <figure><img src="/files/oBXv0X8UcB3AxVj2xDHT" alt=""><figcaption></figcaption></figure></div>

#### Command Menu

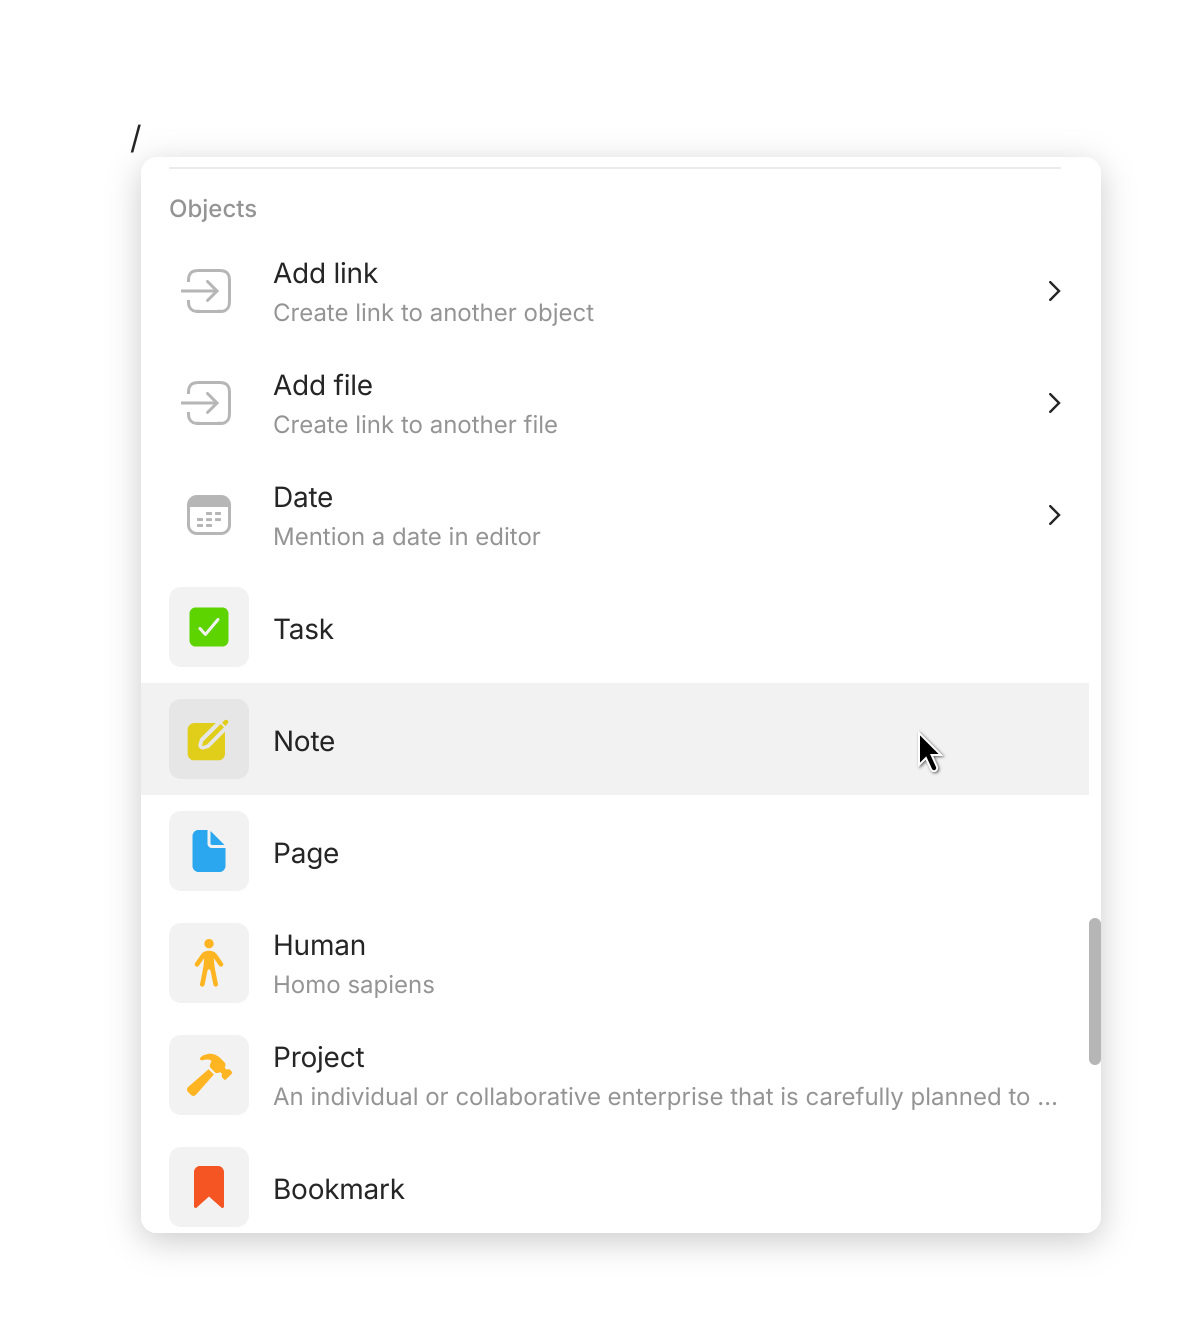
When working in the editor you can type `/` to bring up the command menu. If you already know which Type you want to use, you can just type it directly. If you're not sure which Type you want to use, you can type `Objects` instead for the below menu to appear with all of your Types listed. Simply select the Object Type you'd like to create and it will be linked at your current place.

<figure><img src="/files/J3Mme8GbQXgD2ESnDGil" alt="" width="375"><figcaption><p>Command menu > Objects</p></figcaption></figure>

#### Use a Shortcut

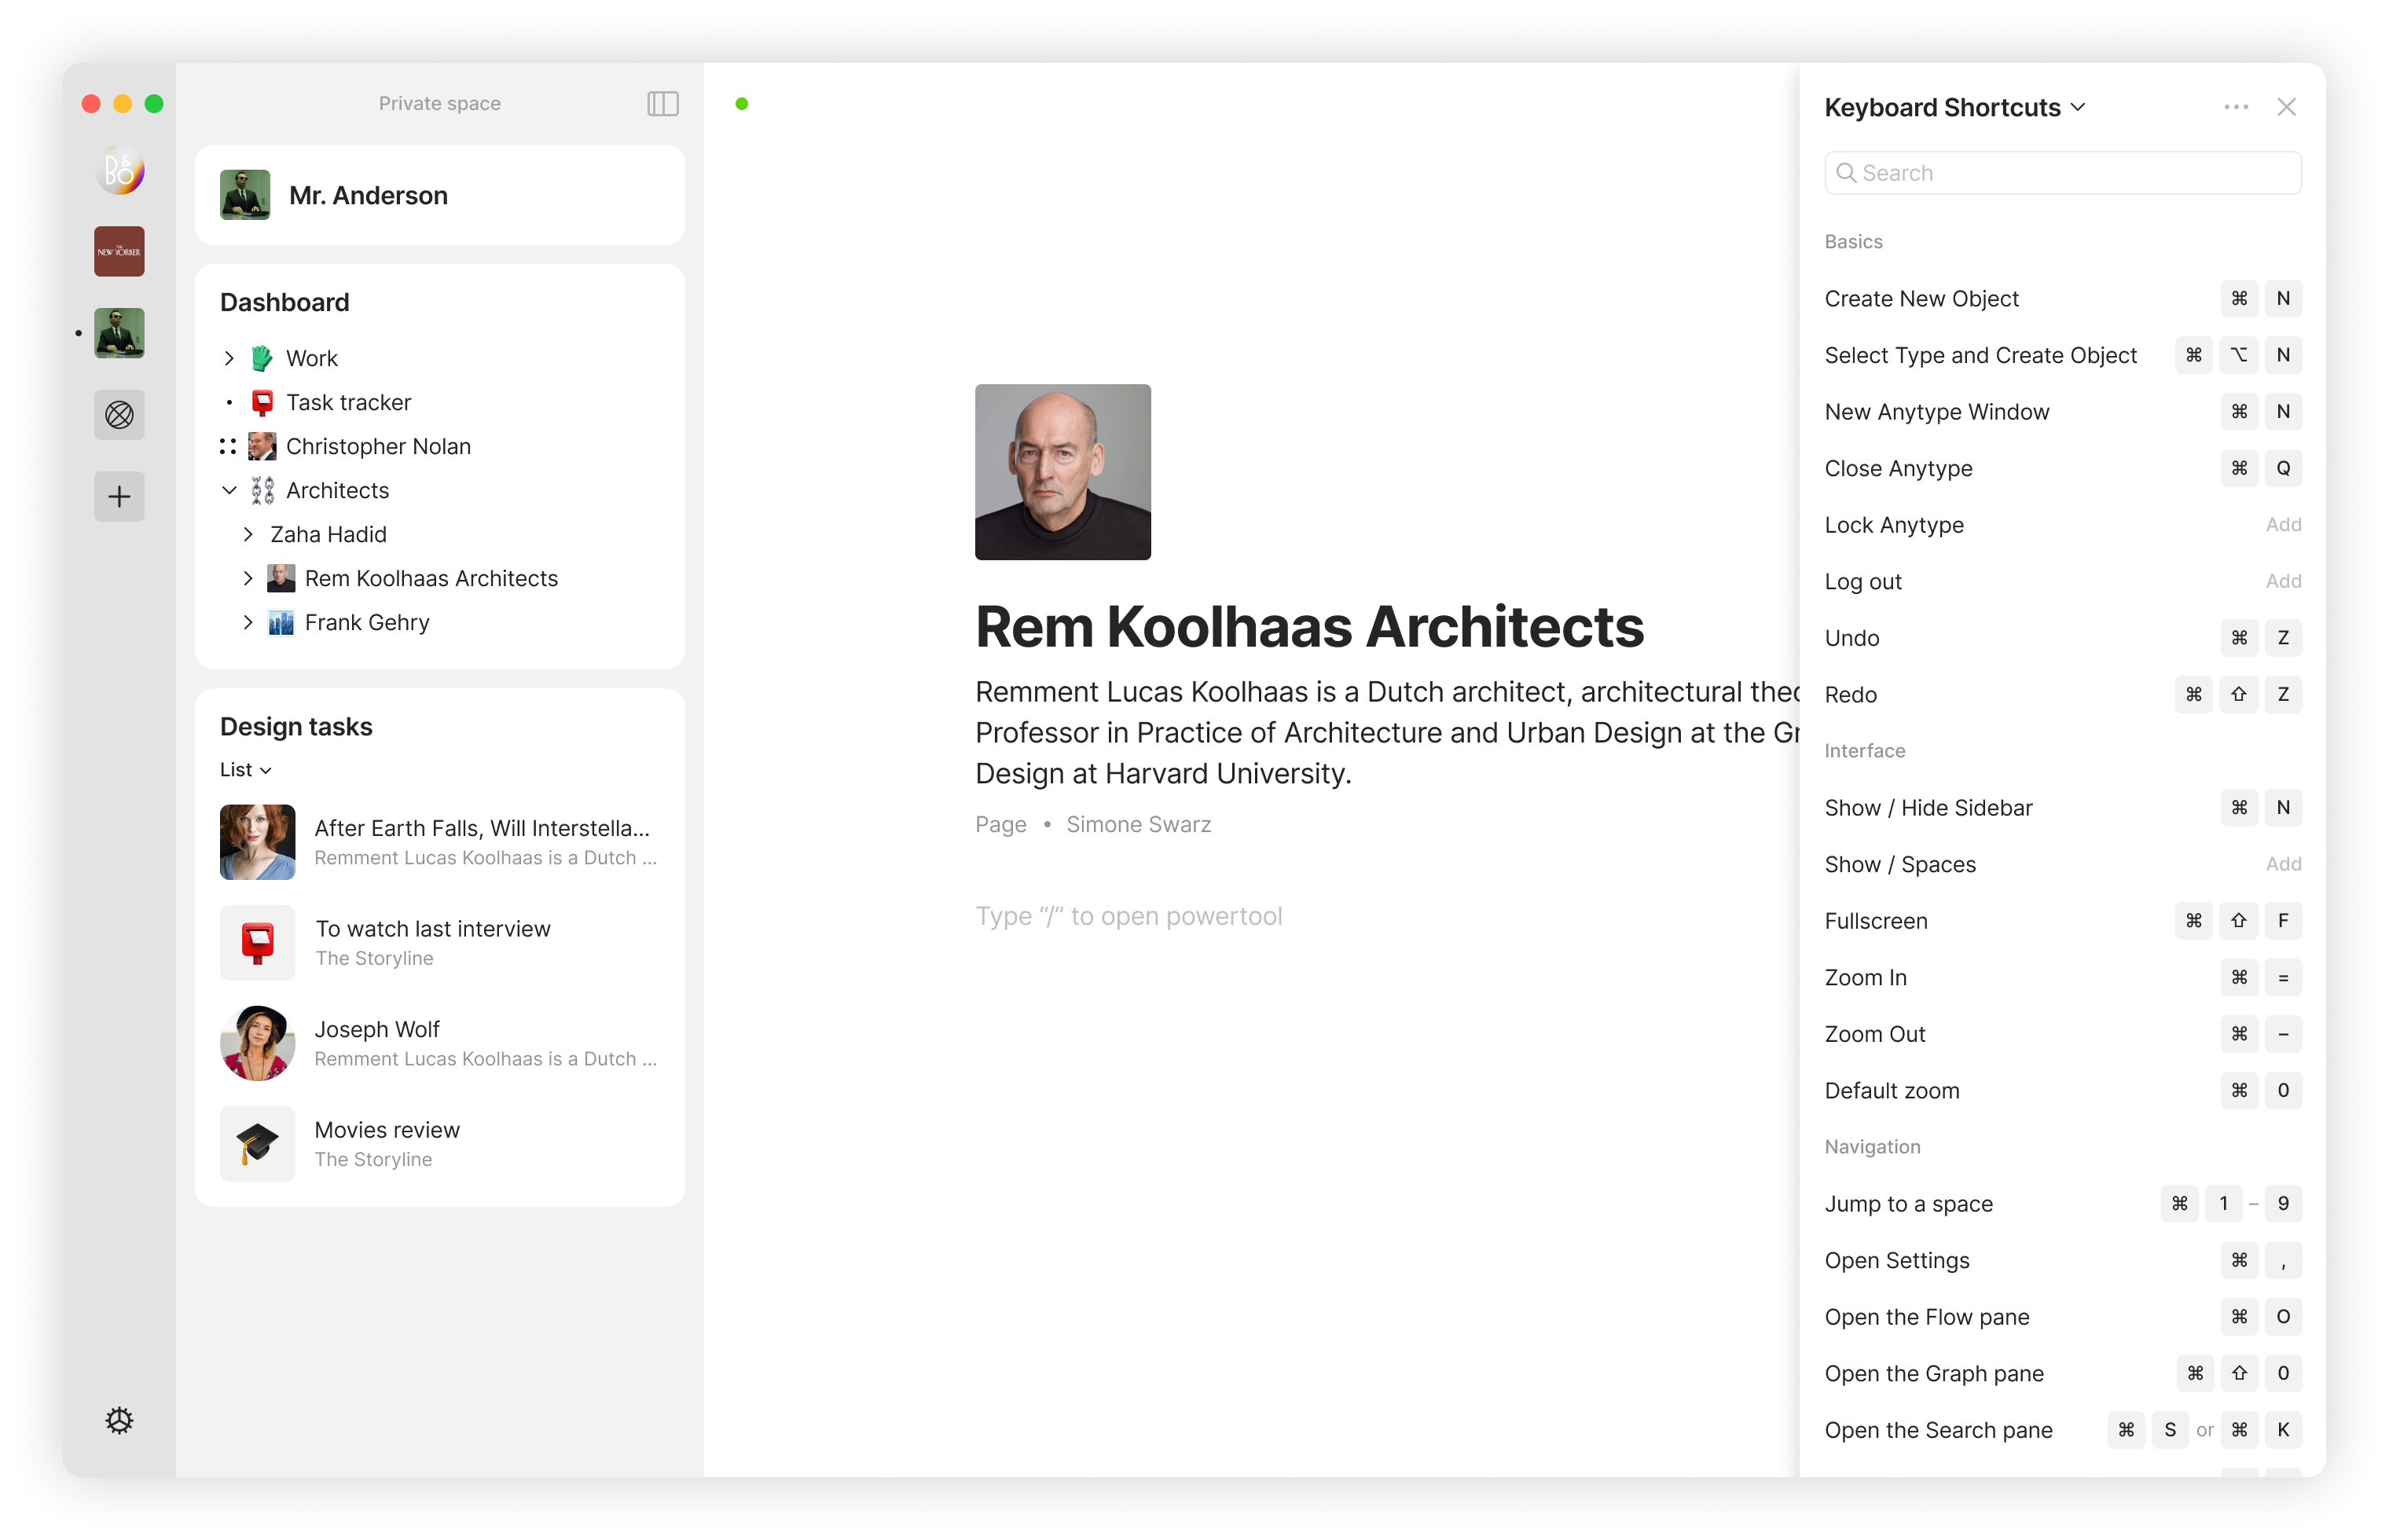
For a quick creation of a new Object, you can use this shortcut: `Cmd / Ctrl + N`

This will perform the same action as clicking the "+" sign in the sidebar.

Additionally, you can use `Cmd / Ctrl + Opt / Alt + N` to perform the same action as clicking the arrow sign in the sidebar.

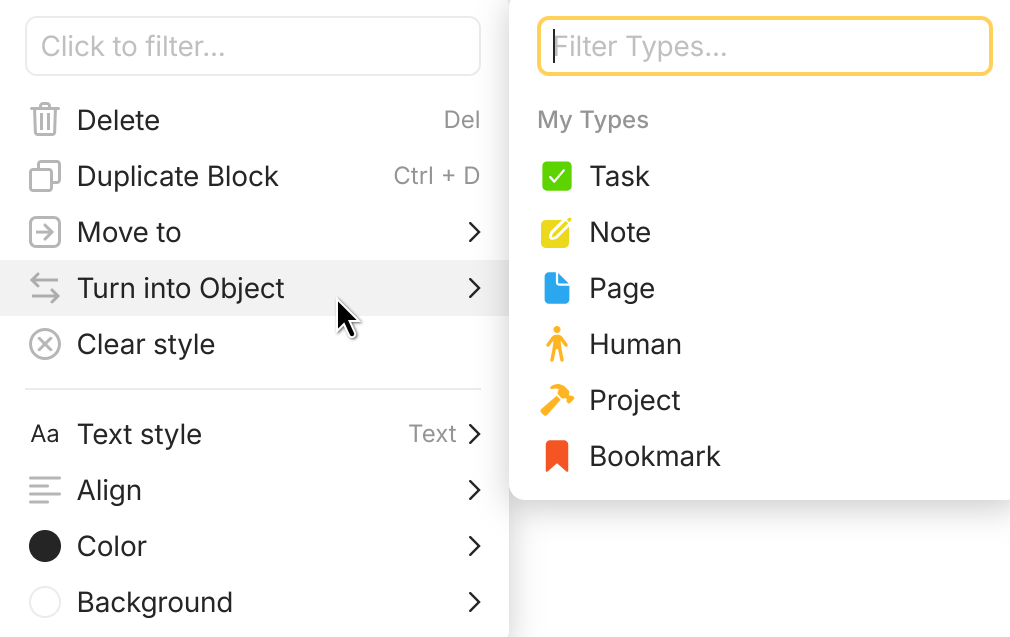
#### Turn Into Object

If you are working on something in an existing Object and would like to transform only a certain block into an Object, you can do that through the action menu by either:

1. Hovering to the left side of the block that you are working on and clicking the 3 dots.
2. Using the `Cmd / Ctrl + /` keyboard shortcut.

<figure><img src="/files/os0859xvbsU3xbrJFjUD" alt="" width="563"><figcaption><p>Action menu</p></figcaption></figure>

### Locating Your Objects

#### Sidebar

You can now find all your objects in the sidebar, grouped by type.

<figure><img src="/files/ole4pmPUWIJJMJ8uI4ED" alt=""><figcaption></figcaption></figure>

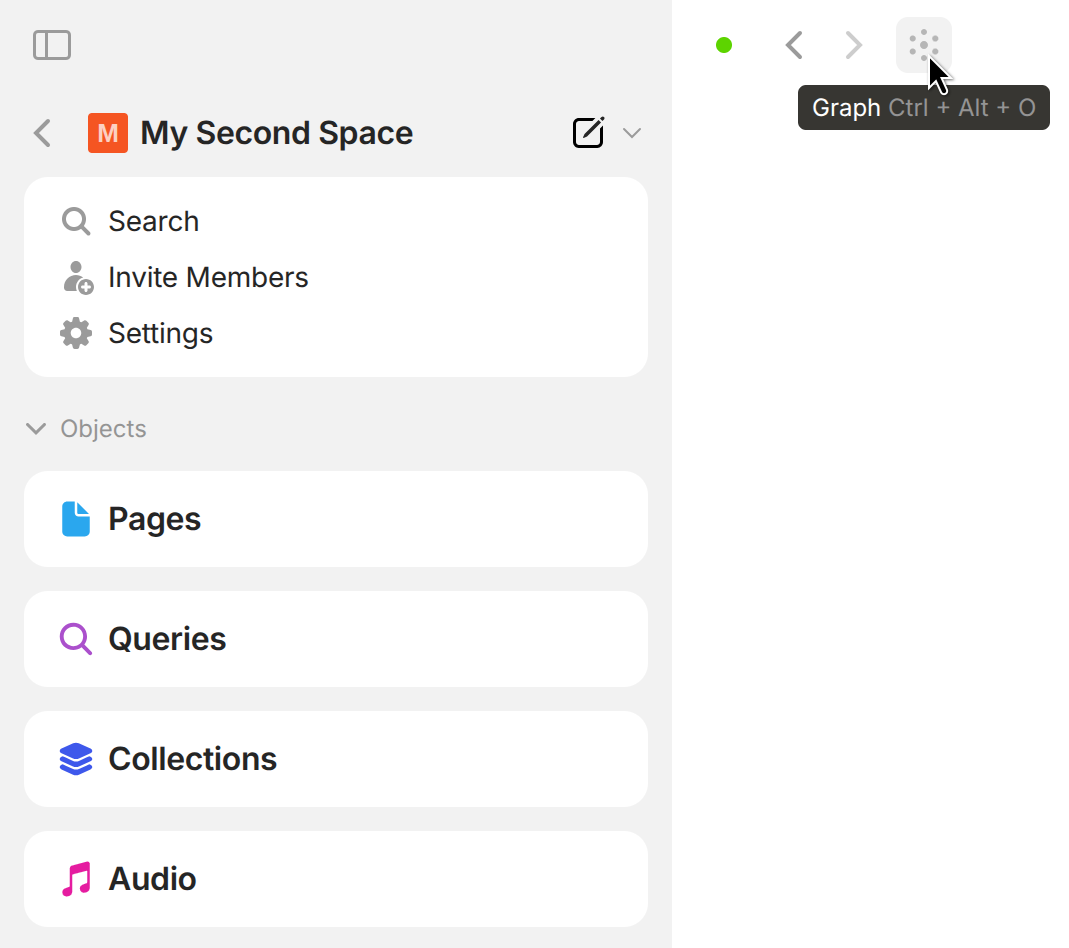
#### Graph

To find all of your objects and how they are connected, you can look to the [Graph](/anytype-docs/advanced/feature-list-by-platform/graph) for your main source of truth.

<figure><img src="/files/jZdKg6uLRR5Iciqka0P8" alt="" width="375"><figcaption></figcaption></figure>

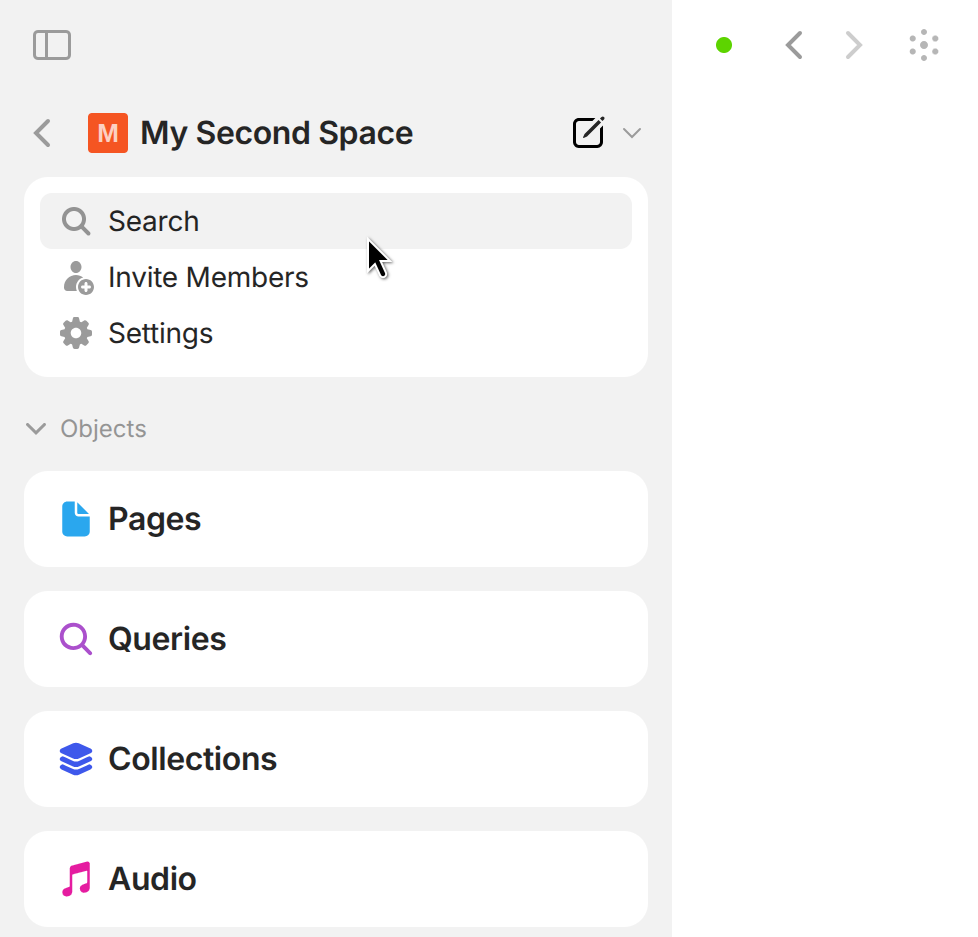
#### Search

To navigate to the search, either head to your sidebar, and click on the search button or use the `Cmd / Ctrl + K` keyboard shortcut.

<figure><img src="/files/MIvs4kQW6YduPqexaLDp" alt="" width="375"><figcaption></figcaption></figure>

#### Bin

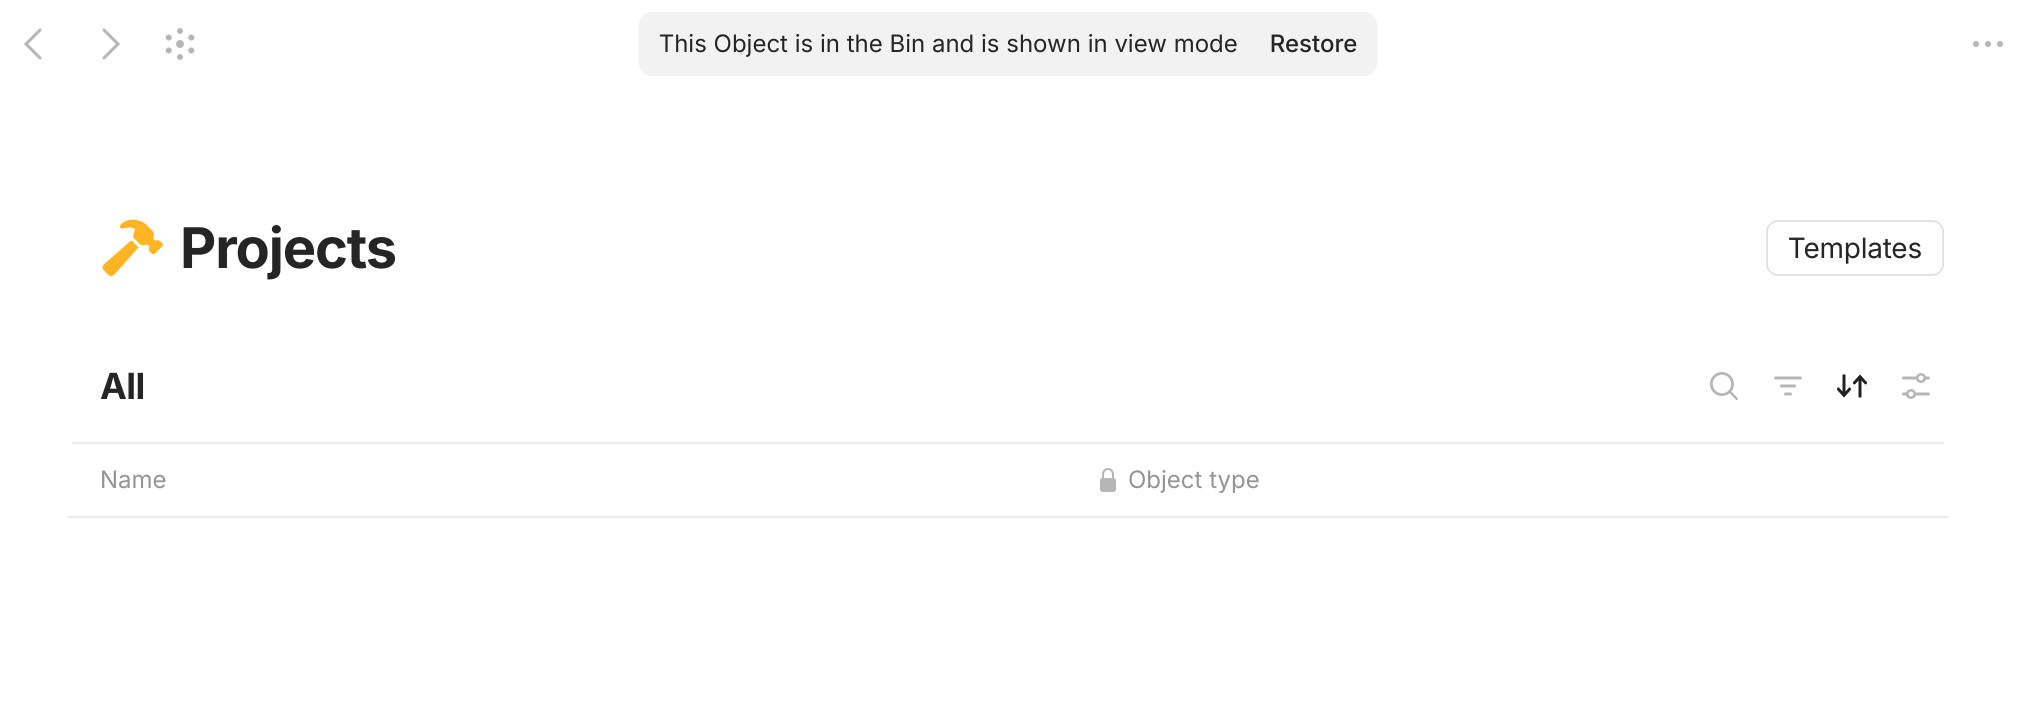
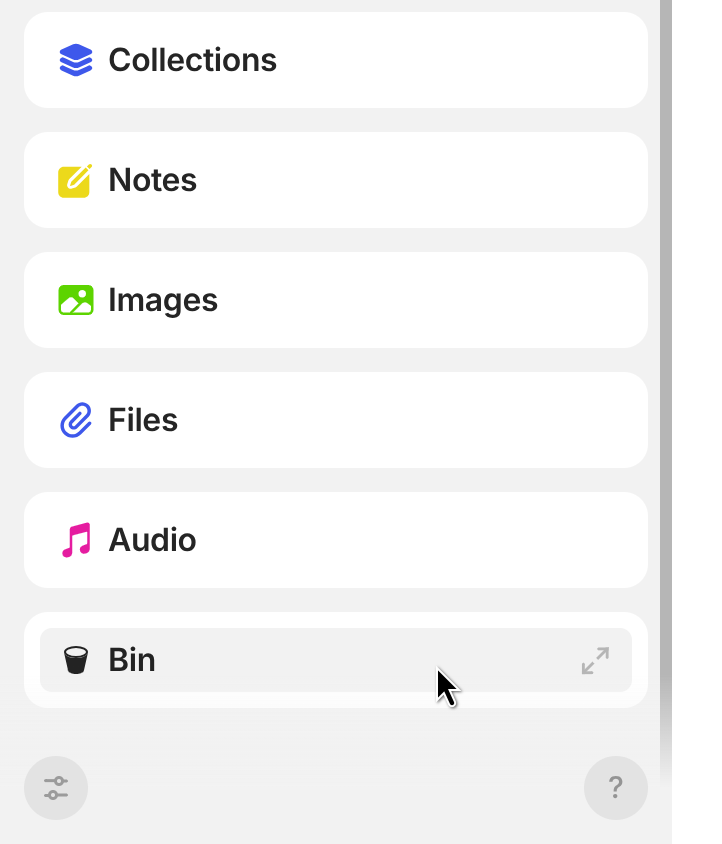
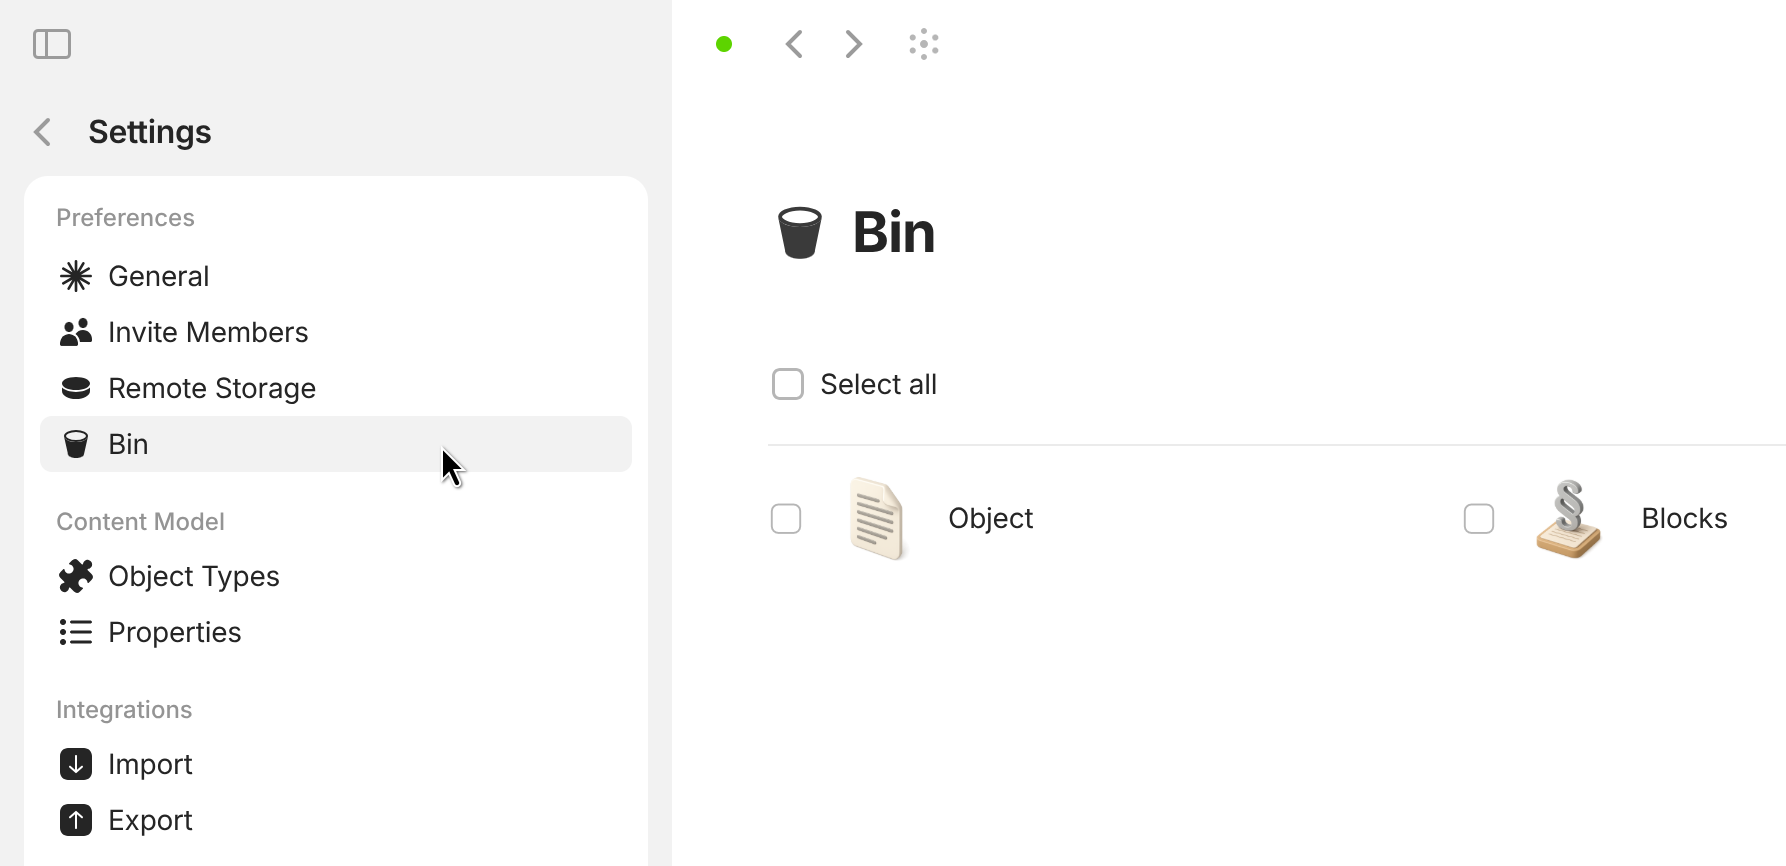
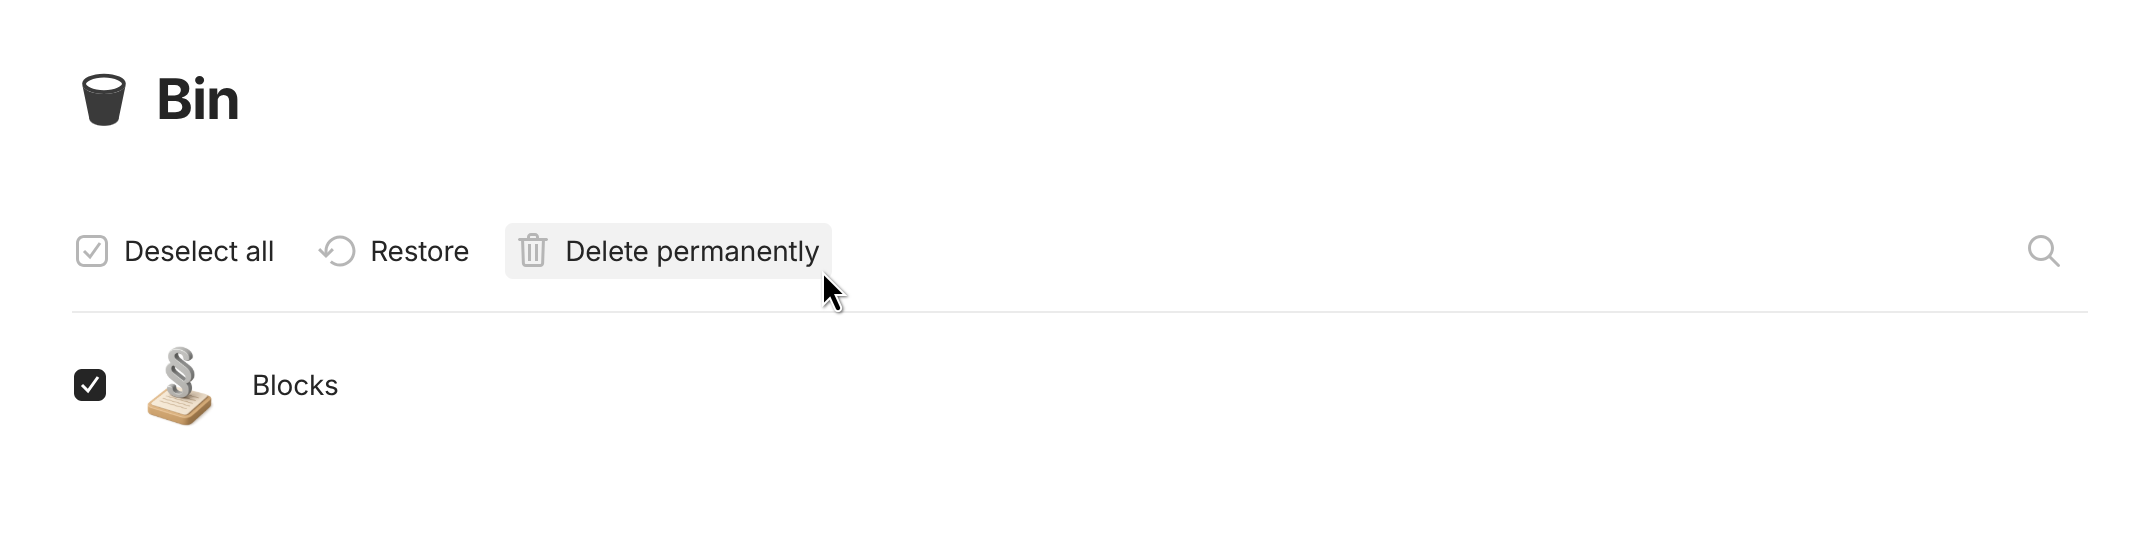
If you've previously removed some objects from your [Channels](/anytype-docs/getting-started/vault-and-key/space), they will appear in your [Bin](/anytype-docs/advanced/data-and-security/data-storage-and-deletion/finding-your-objects) unless you've already permanently deleted them.


# Blocks

Your object is made up of different types of blocks to organize your information, and the place where all of these Blocks live together is called the Canvas. Anytype's block-based editor works very similarly to that of blogging sites or website builders.

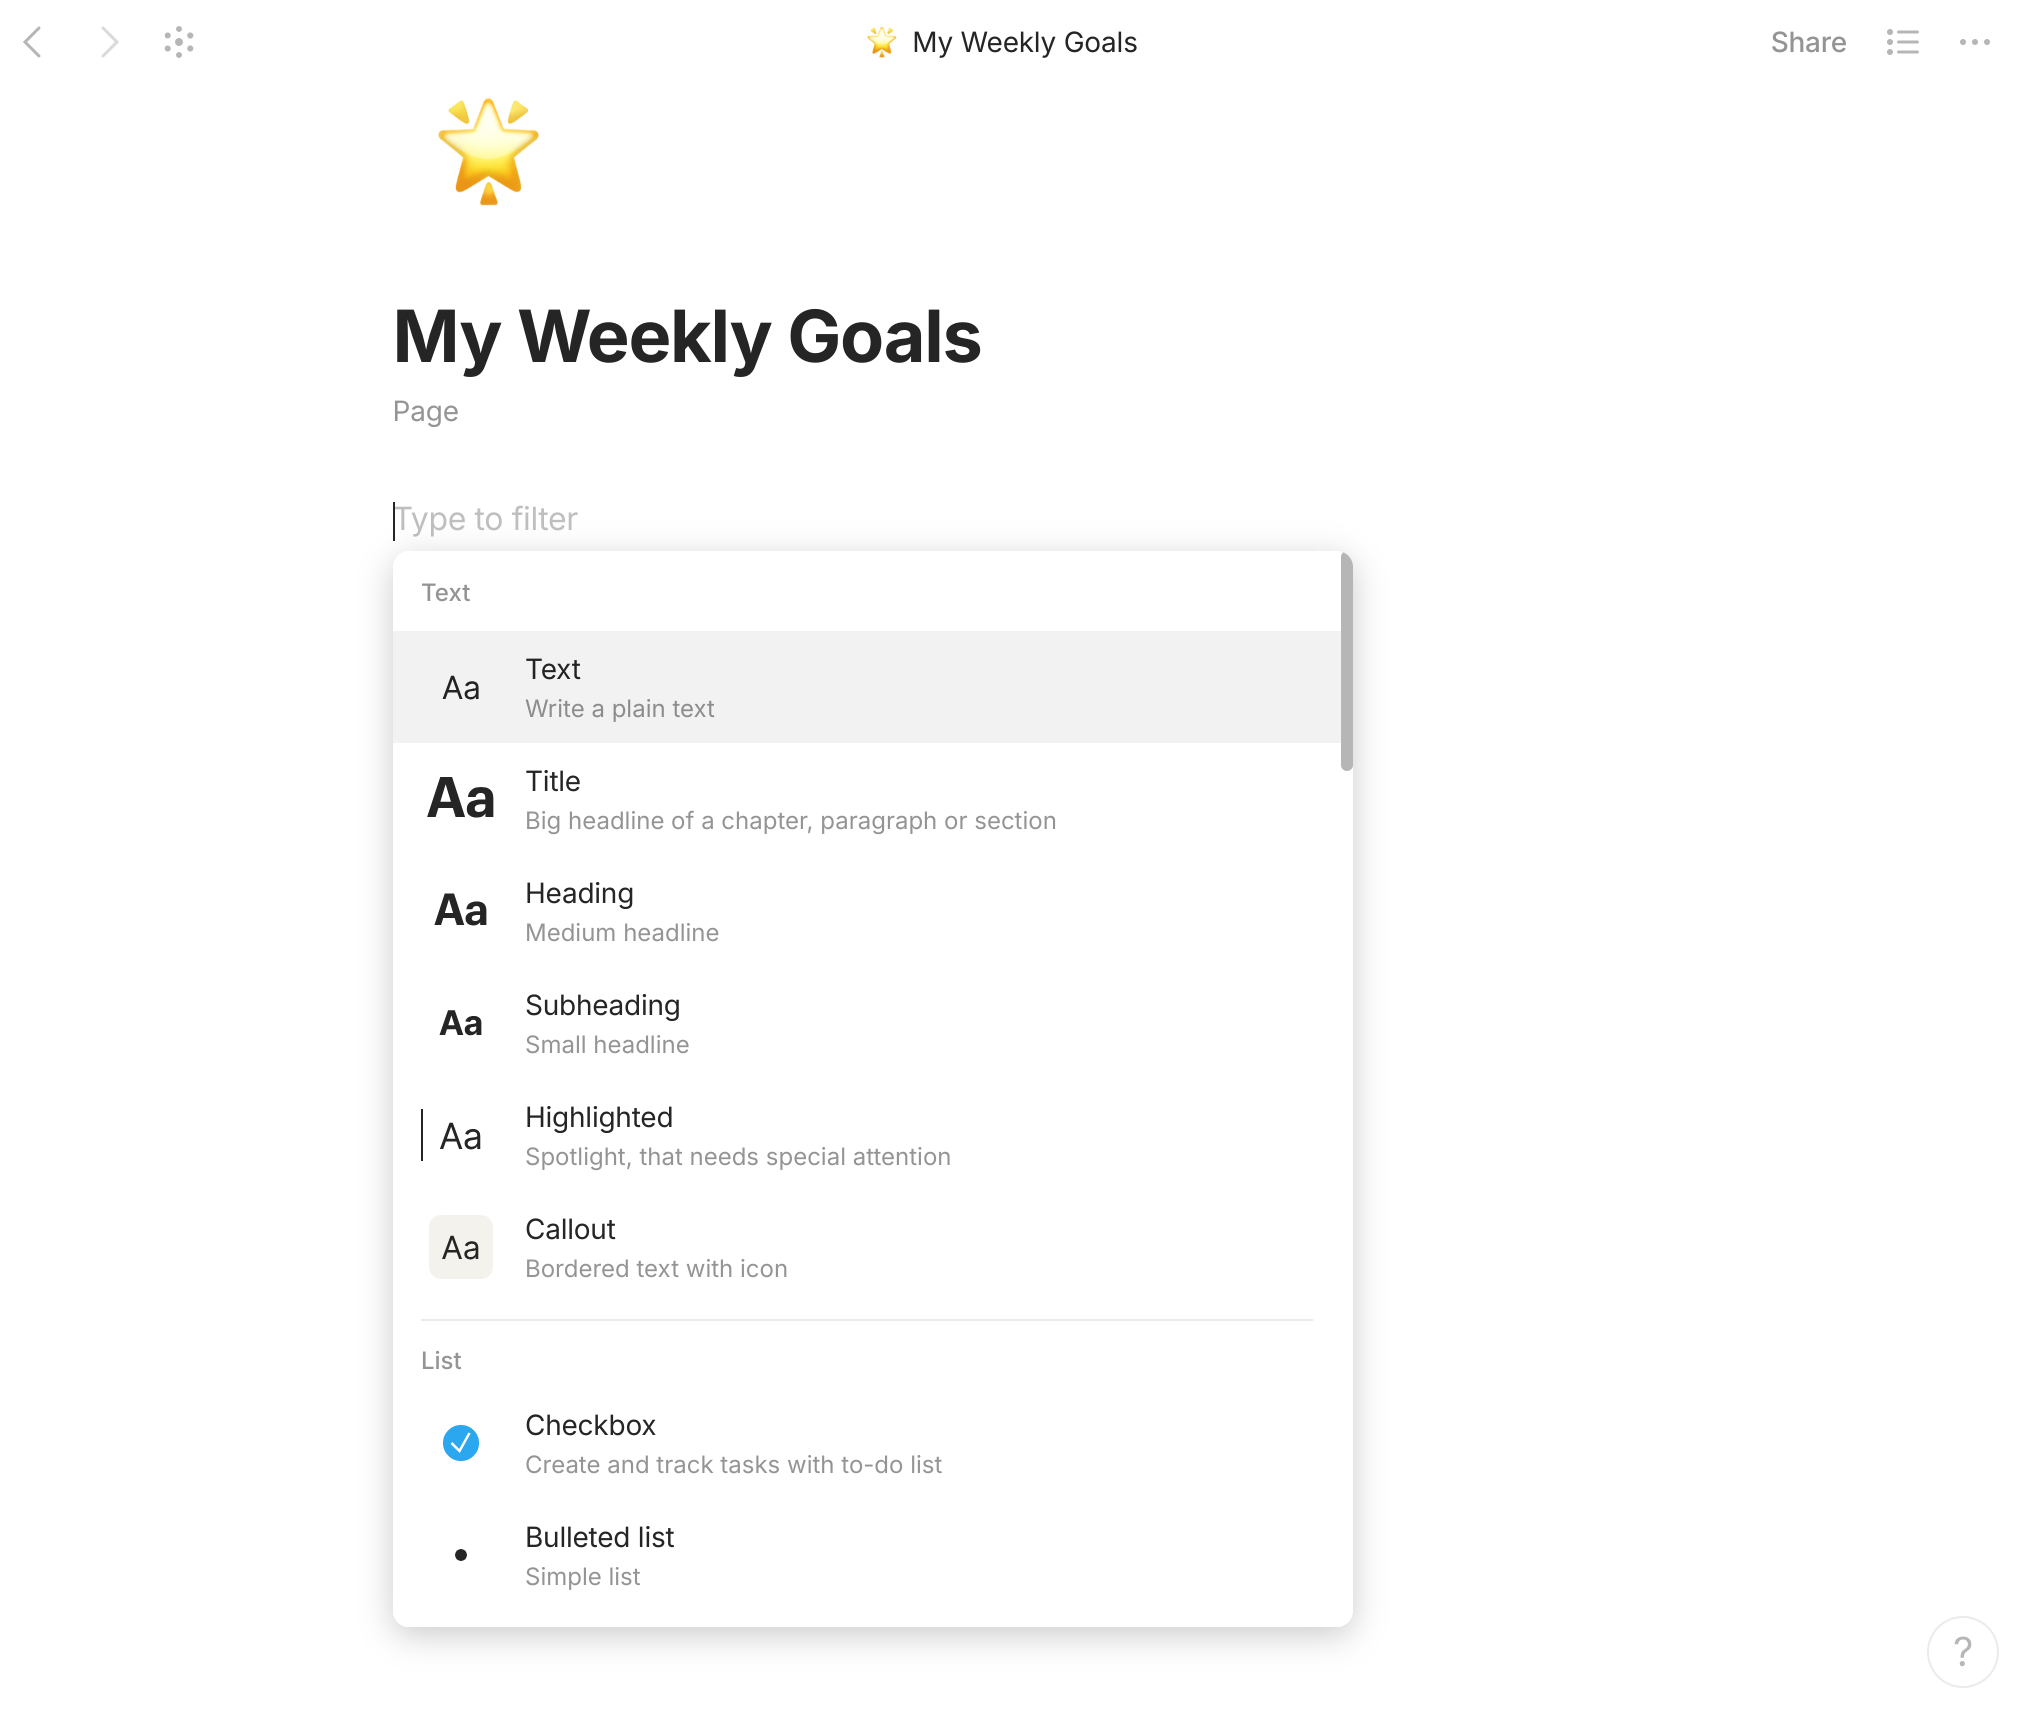
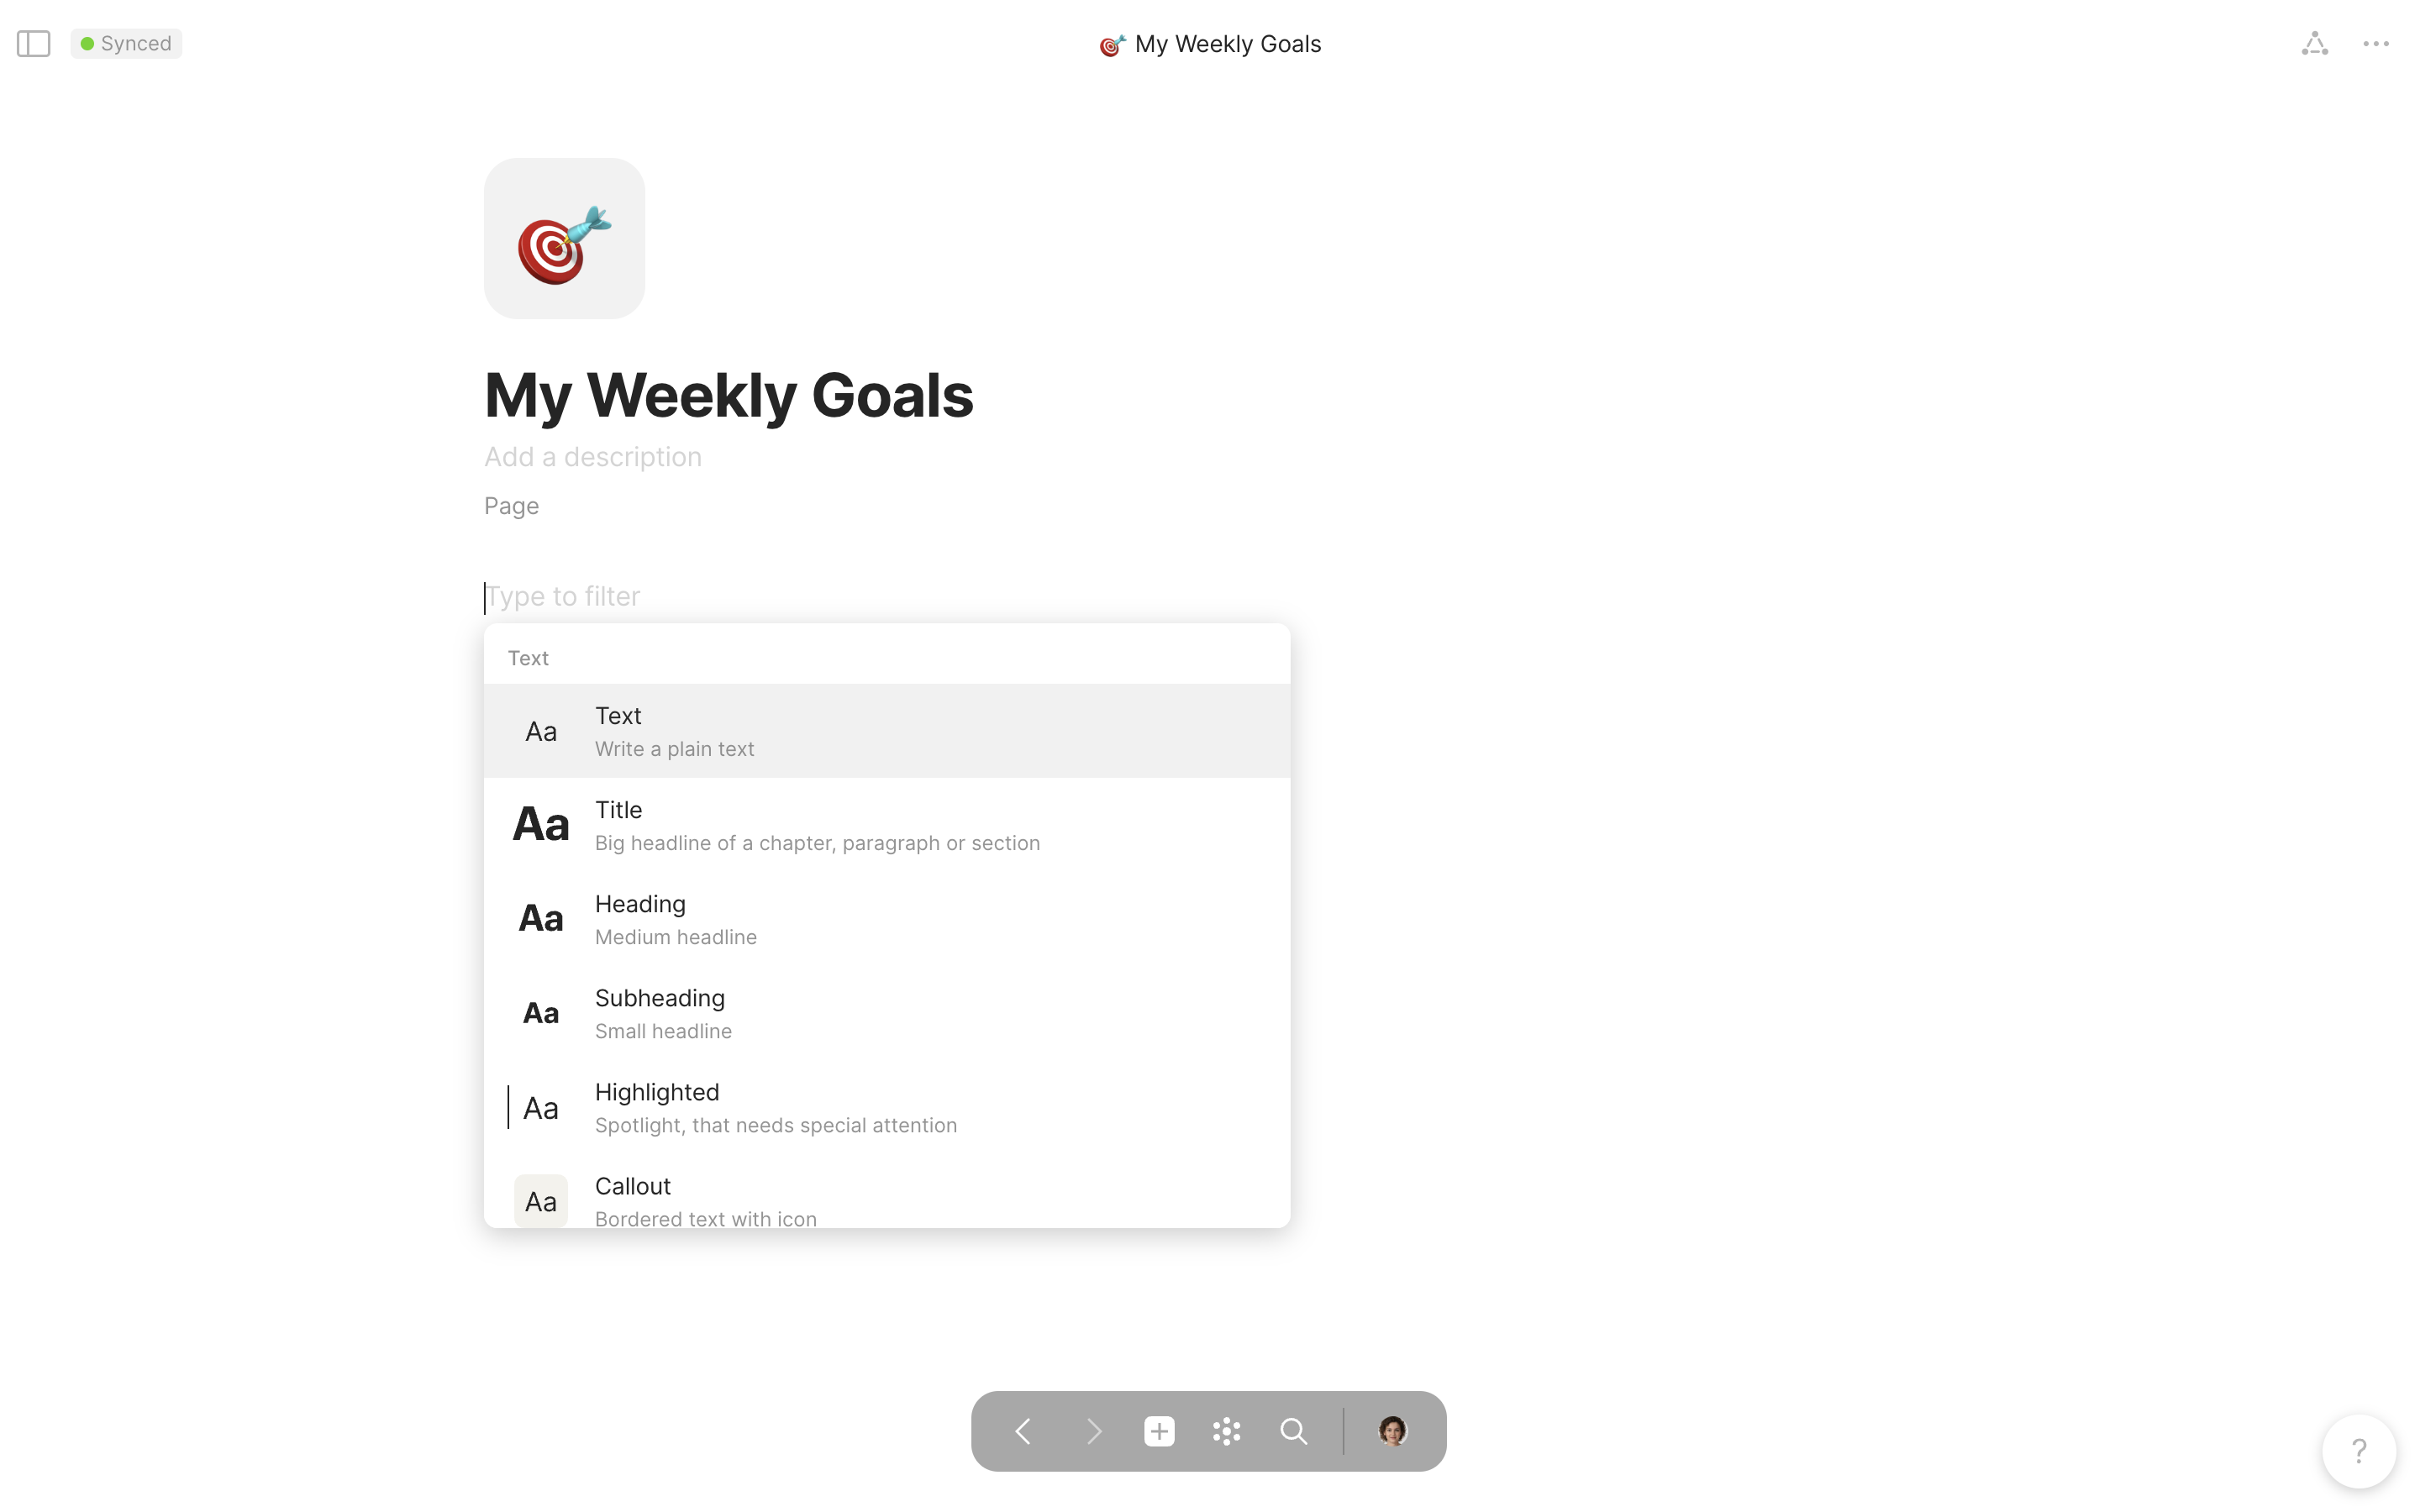
All block styles originate from the command menu, which you can access by either clicking on the orange `+` symbol on the left-hand side of your editor, or typing `/`.

<figure><img src="/files/DoV0CjAOvFVsXpbMQ3R6" alt="" width="563"><figcaption></figcaption></figure>

### Style your Blocks

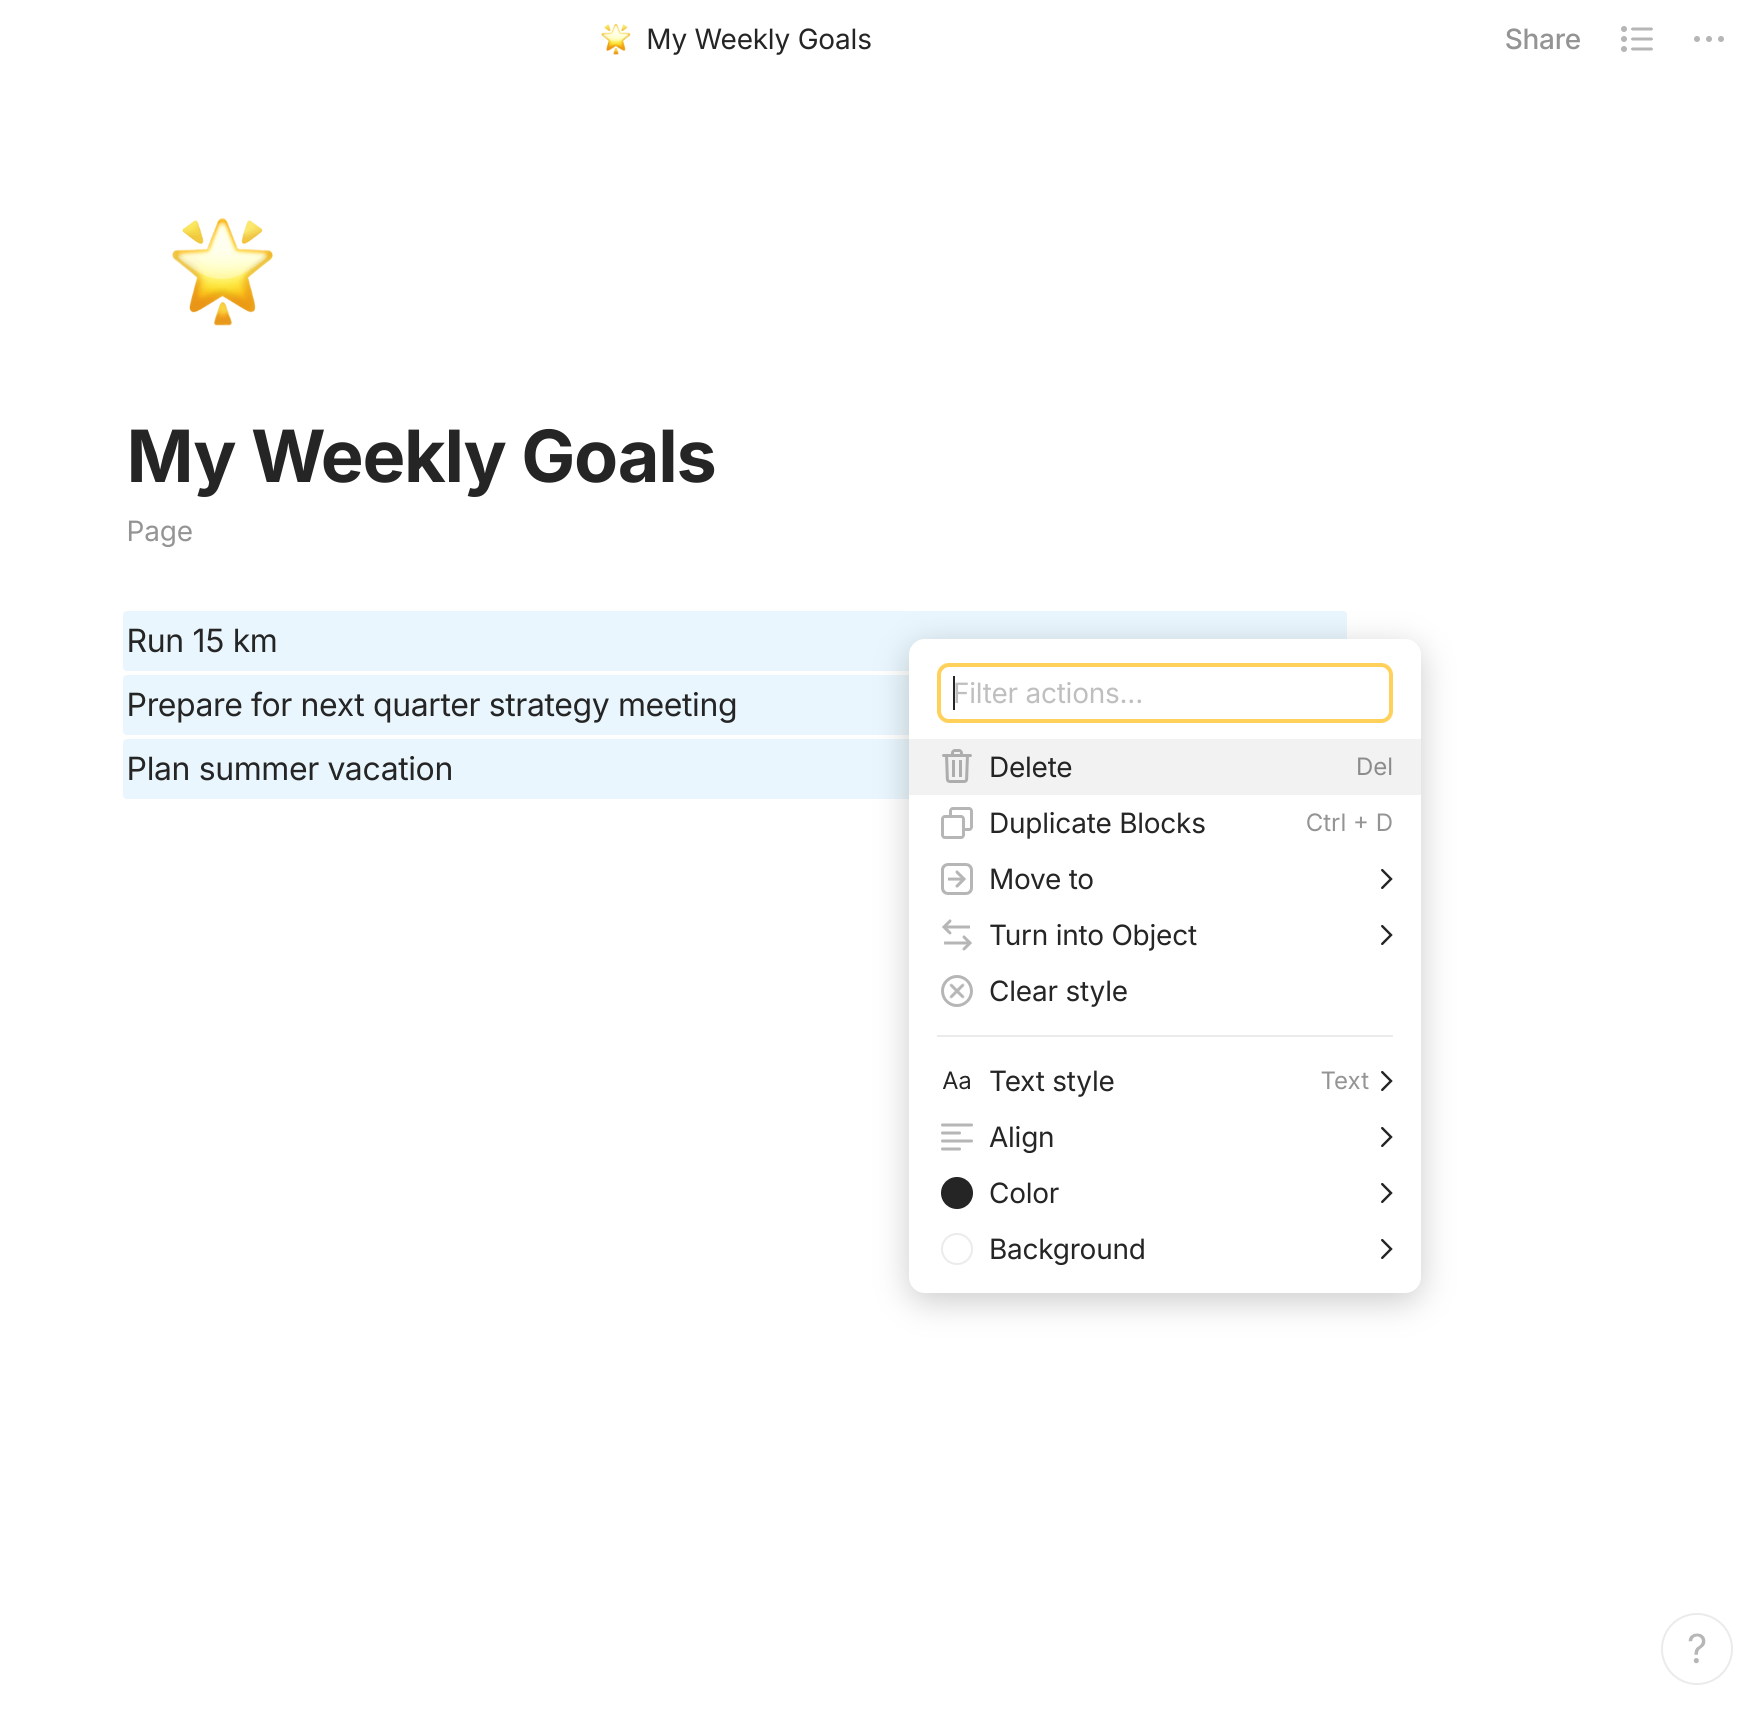
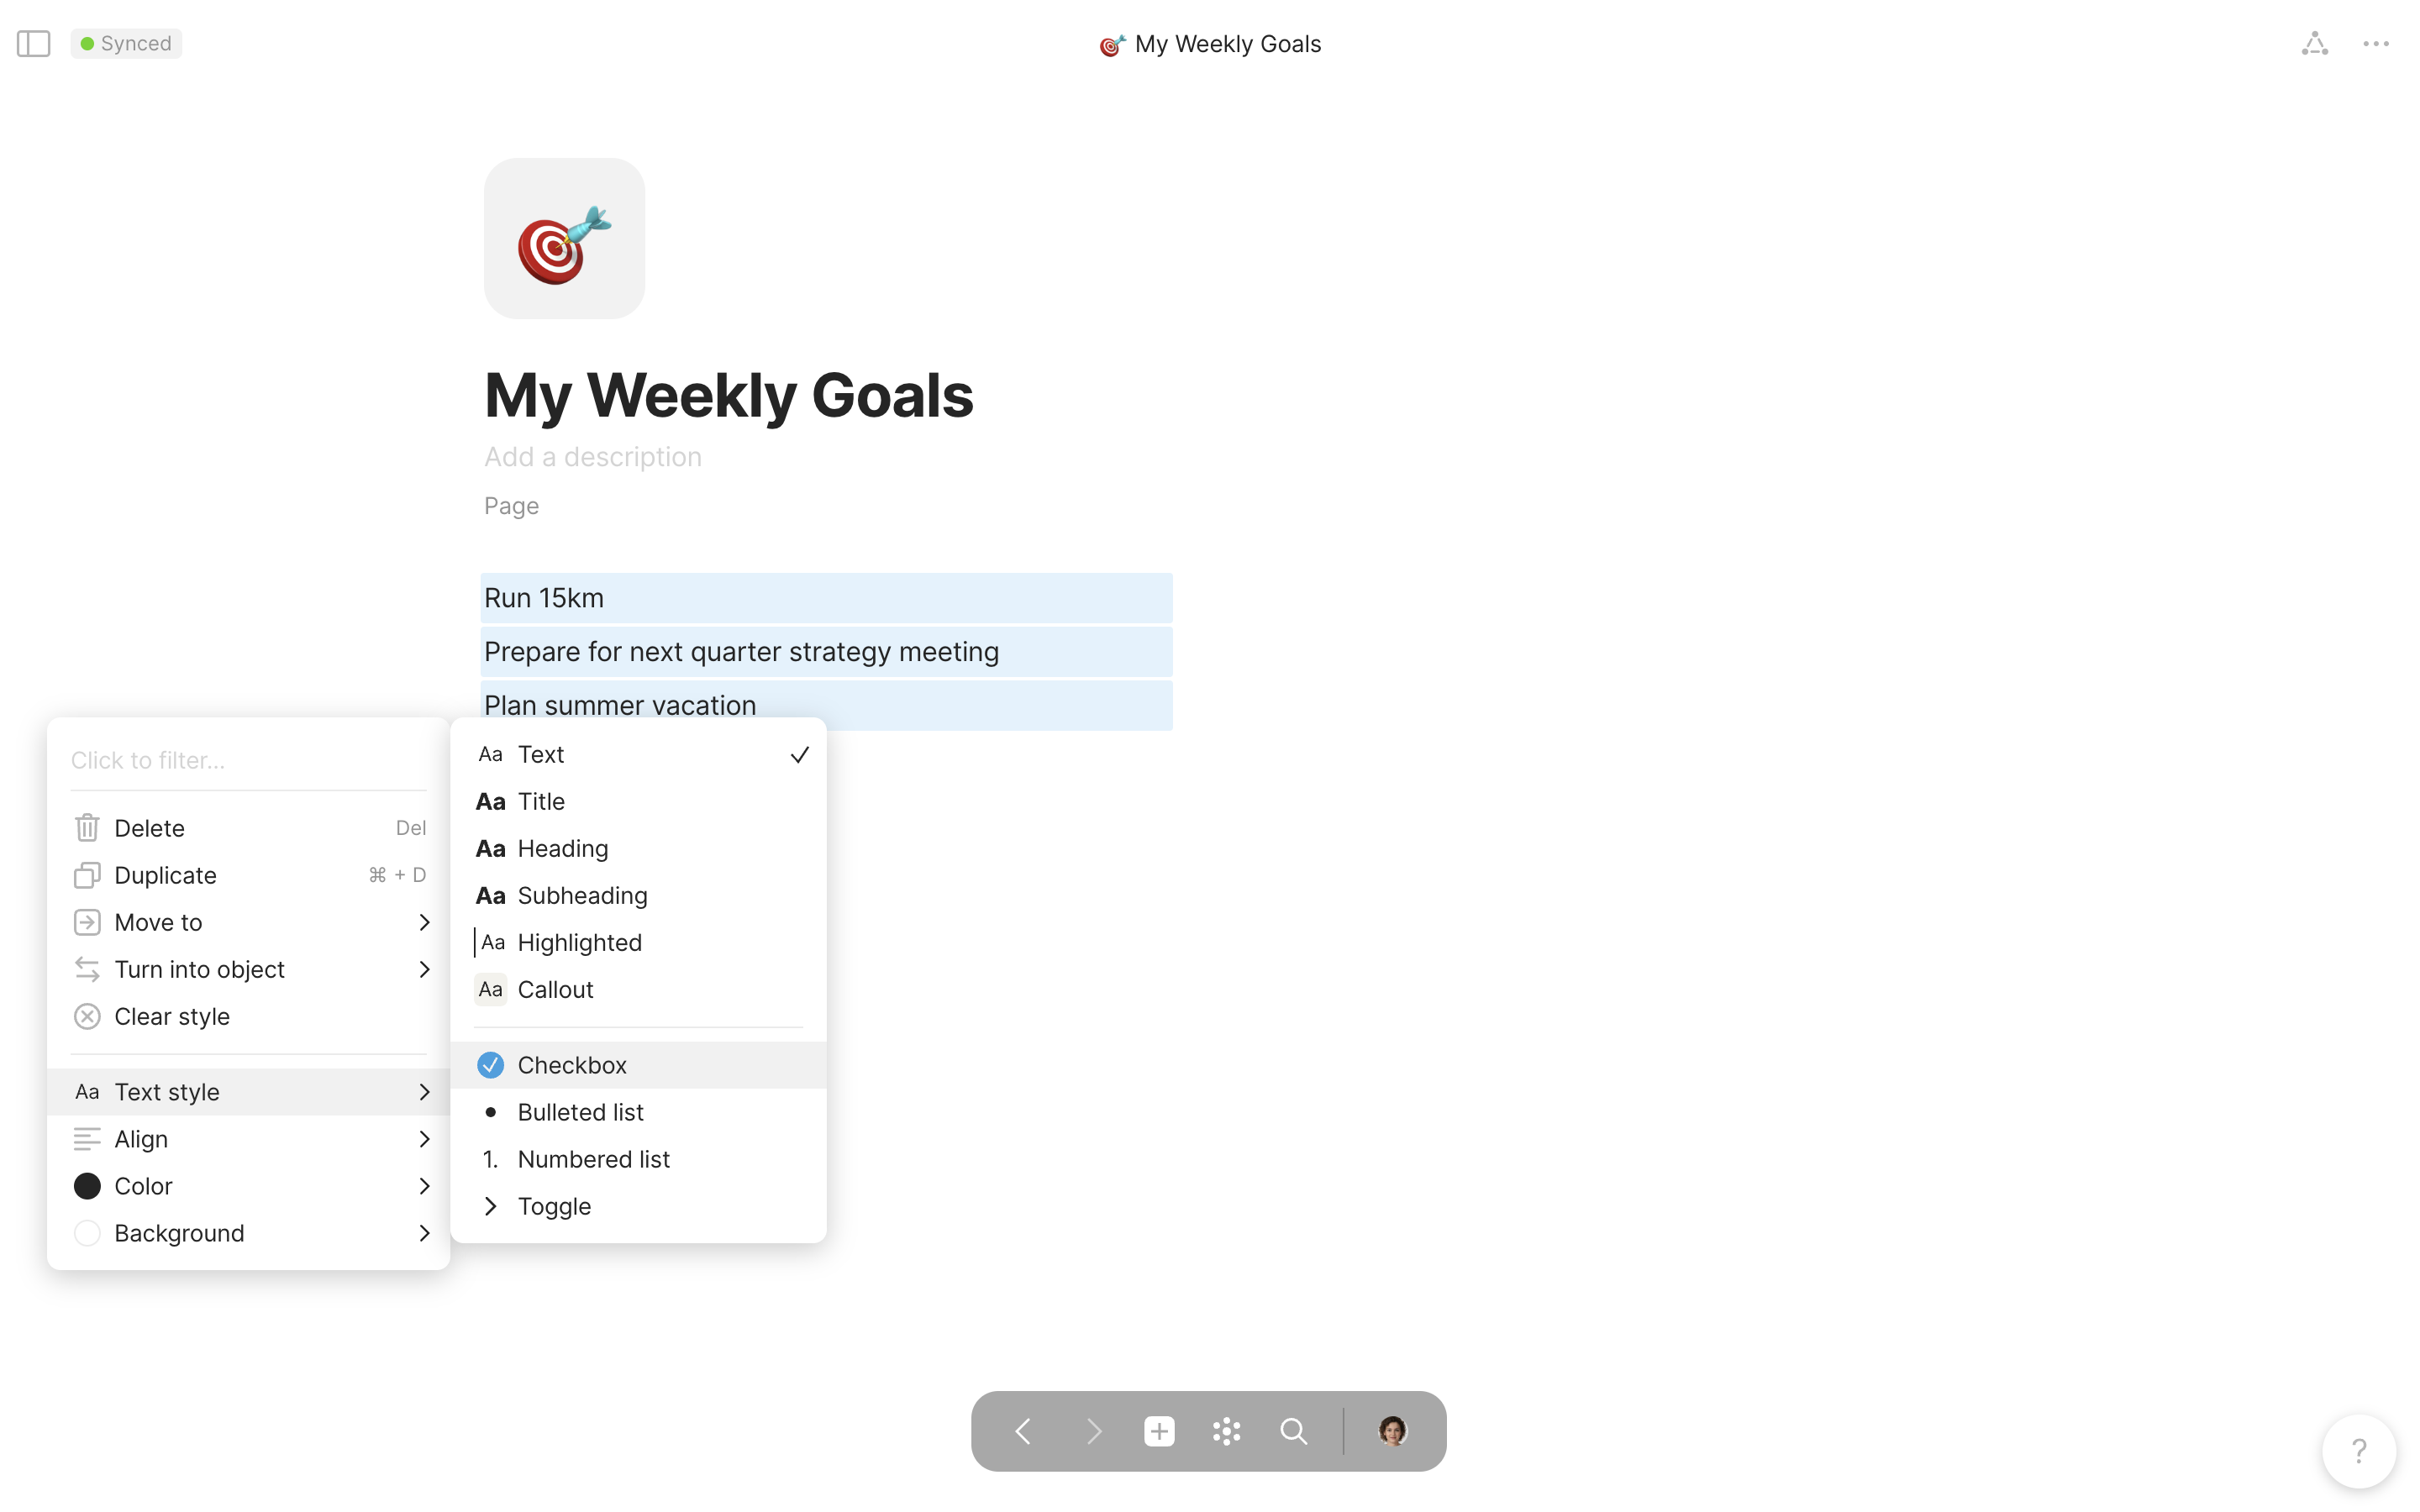
You can select one block or several at once, and batch edit to create different headings and text styles such as checkboxes, bullets, or numbers.

<figure><img src="/files/xJWR4yKOpN02BieNzL83" alt="" width="563"><figcaption></figcaption></figure>

### Inline Styling

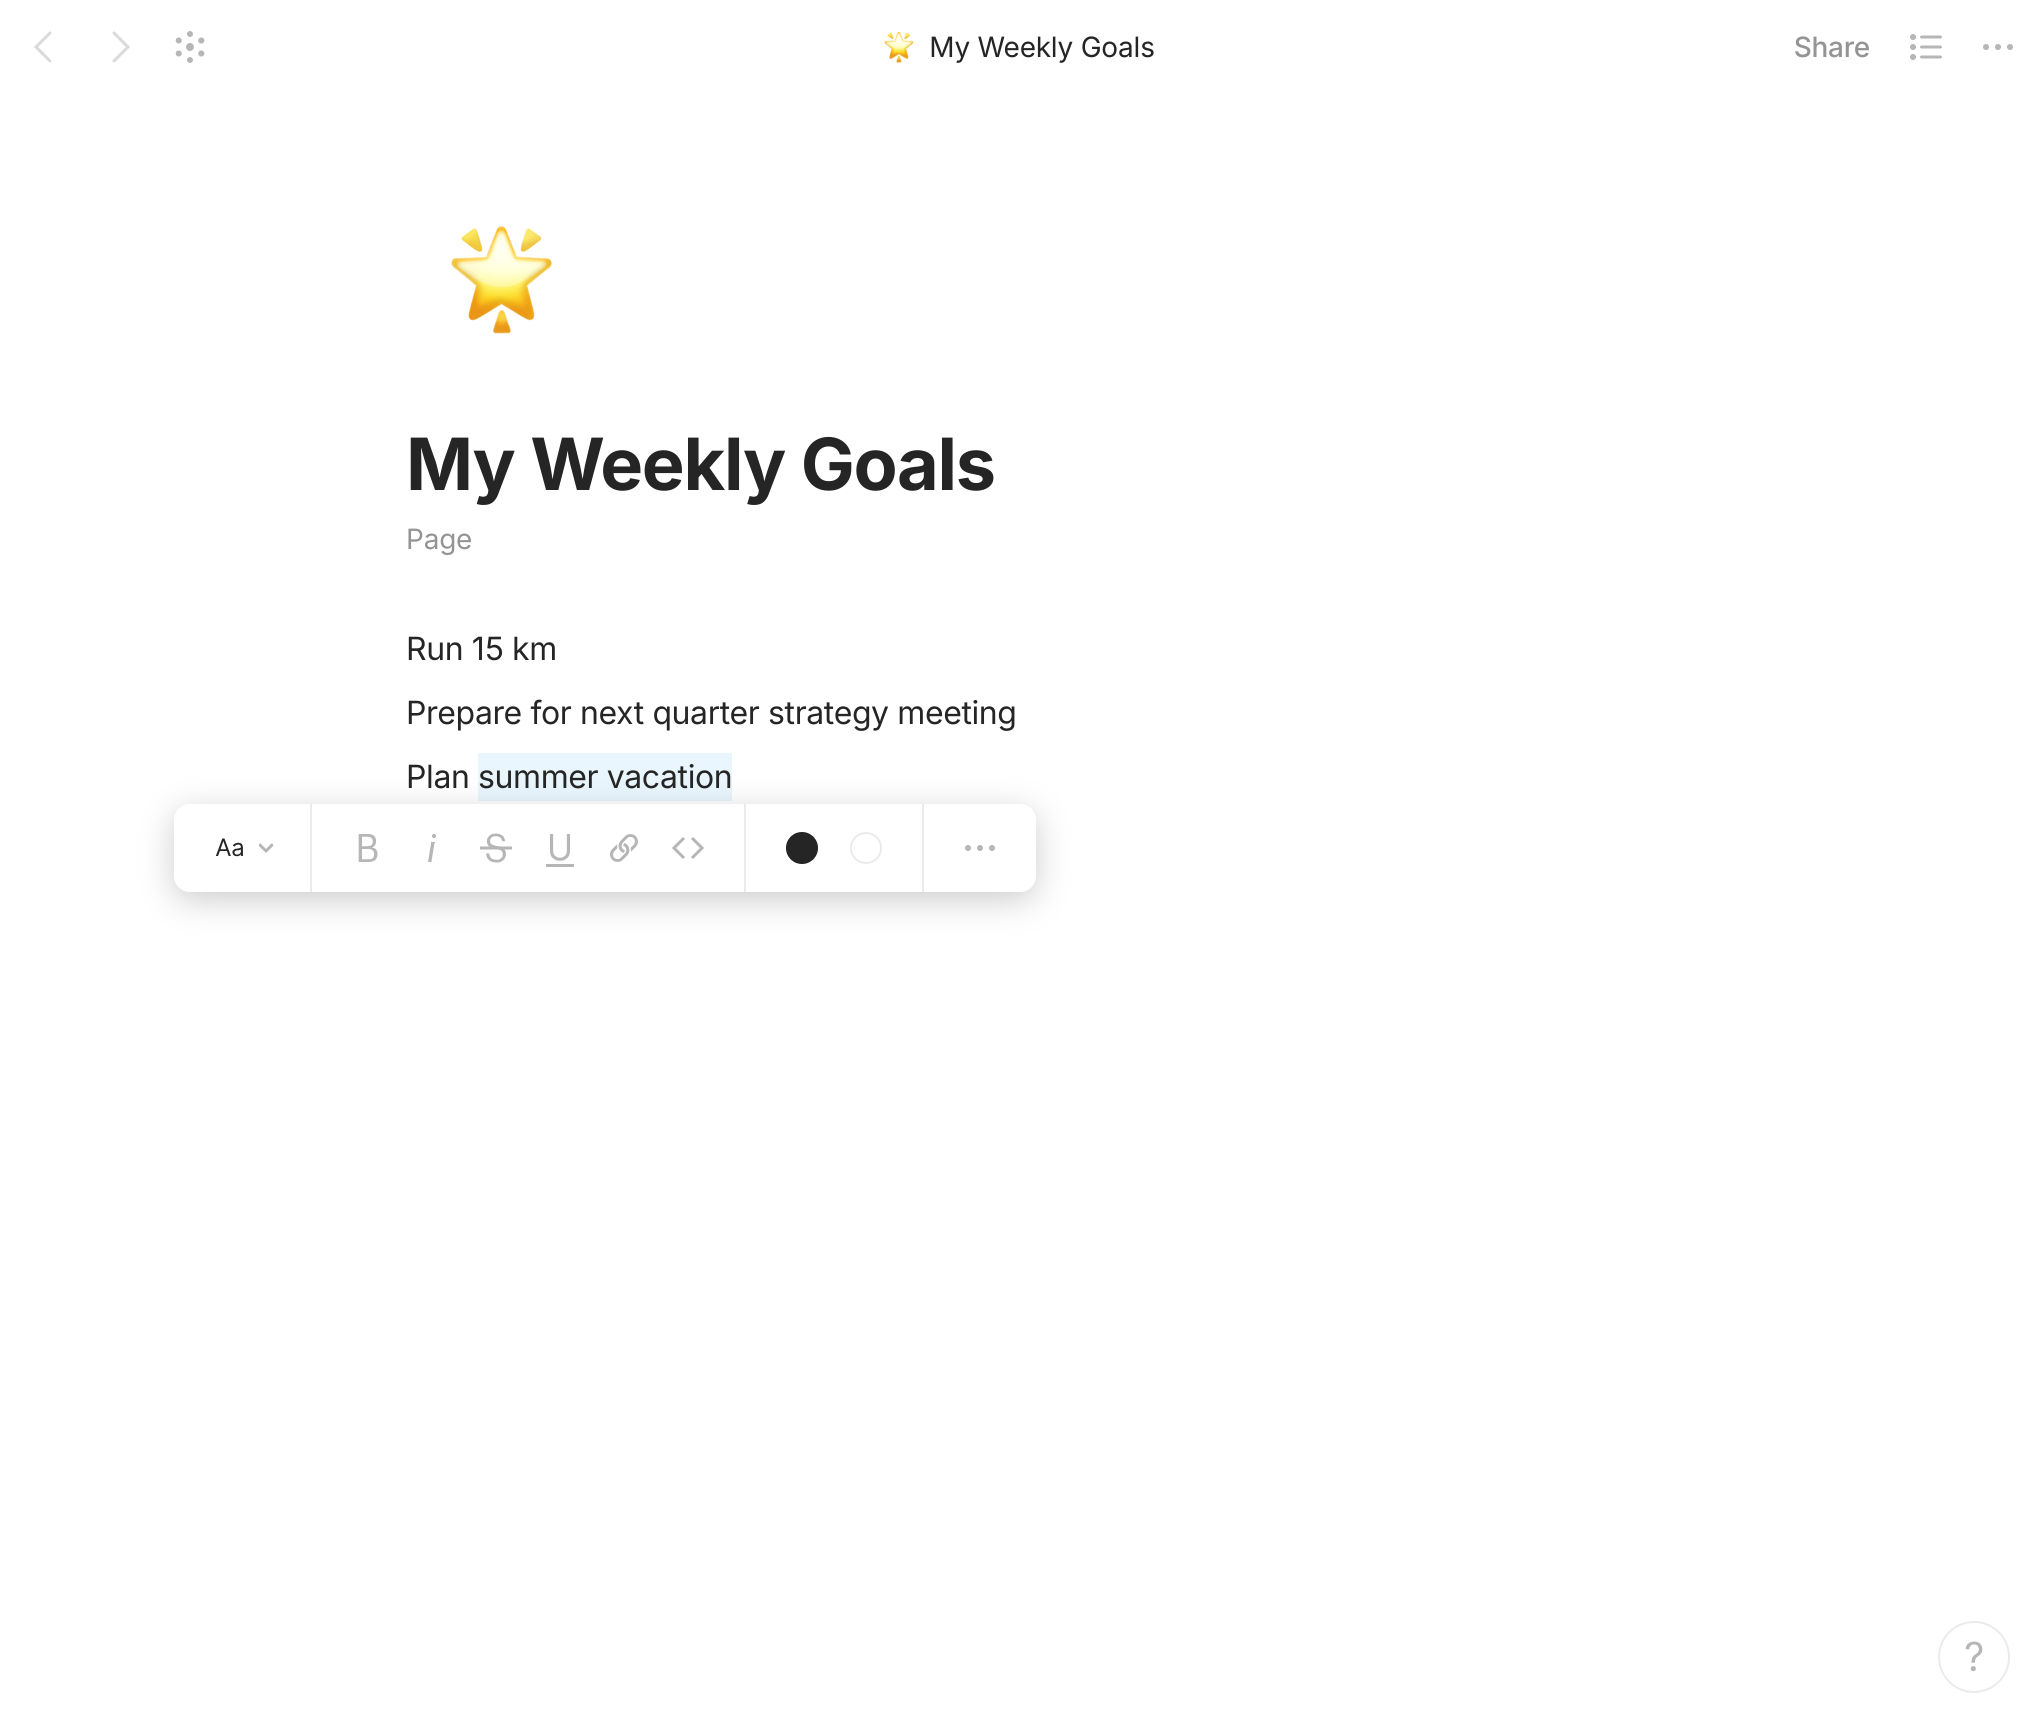
We also support styling individual characters / words inside text blocks.

<figure><img src="/files/0ipz0JbW2n6QgYnWDn9E" alt="" width="563"><figcaption></figcaption></figure>

### Columns

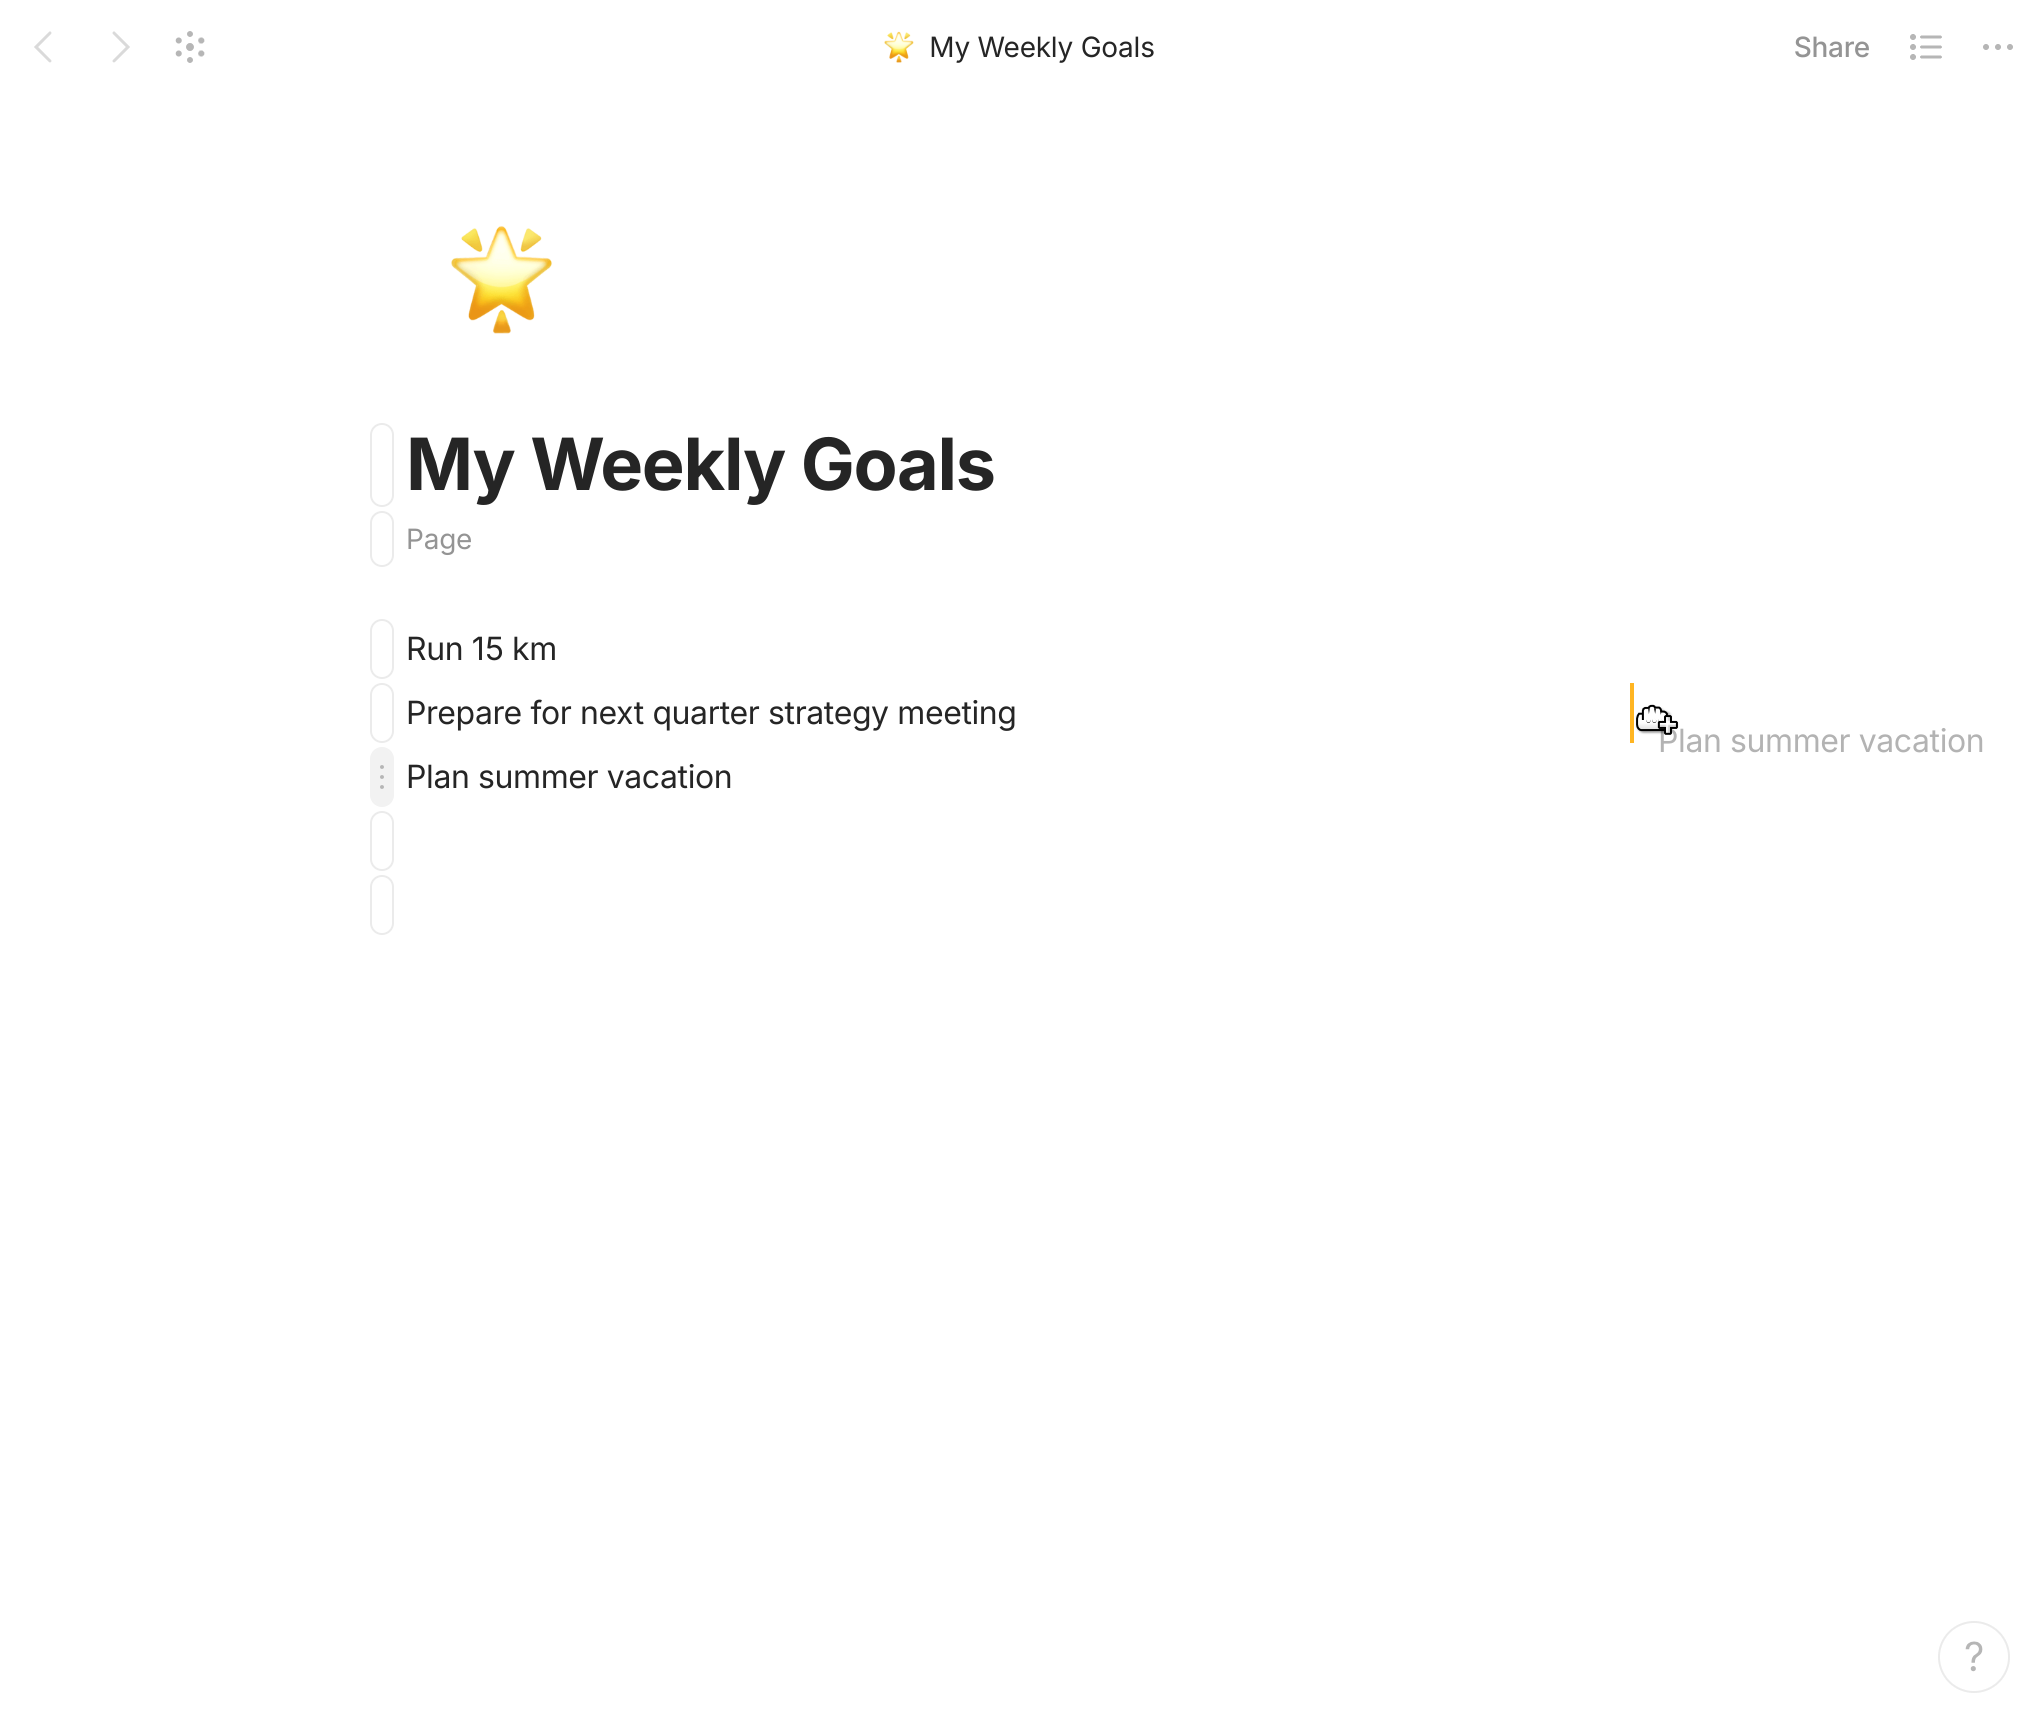
You can use the grey 'handle' to the left of each block to create parent/child blocks or new columns in your editor by dragging and dropping them.

<div><figure><img src="/files/PjnuiyQEBadKVKt1qcxC" alt=""><figcaption></figcaption></figure> <figure><img src="/files/eOstRBvHn7DJ47JjpLGL" alt=""><figcaption></figcaption></figure></div>


# Links

### Creating New Links

#### Link to another Object in Anytype

Directly through the editor by using:

1. **Block Links.** Type "/" to invoke a command bar, and then look for the `Link to Object` option in the menu. These can appear either as text or as cards.
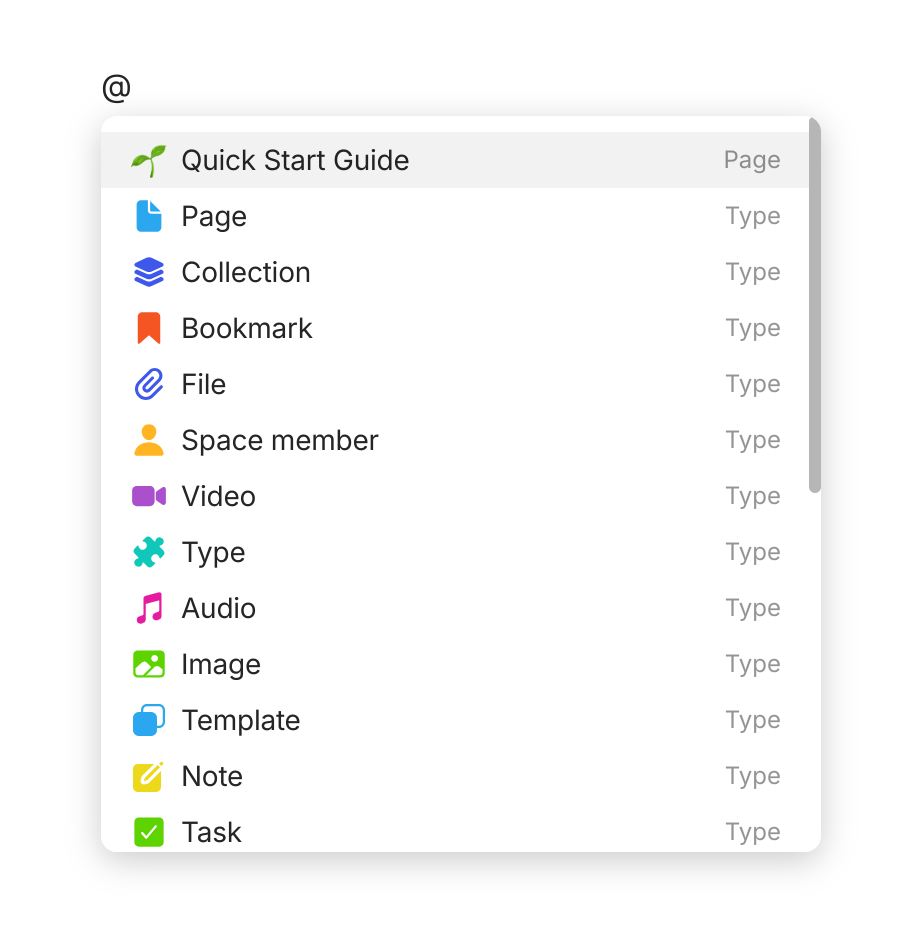
2. **Inline Links**. Type @ or \[\[ to invoke the Object picker menu.

<div><figure><img src="/files/2EA3UJZbkKezHweRLCuN" alt=""><figcaption><p>Link Blocks</p></figcaption></figure> <figure><img src="/files/DCifqZwoioy0QhbLSIHU" alt=""><figcaption><p>Inline Mentions</p></figcaption></figure></div>

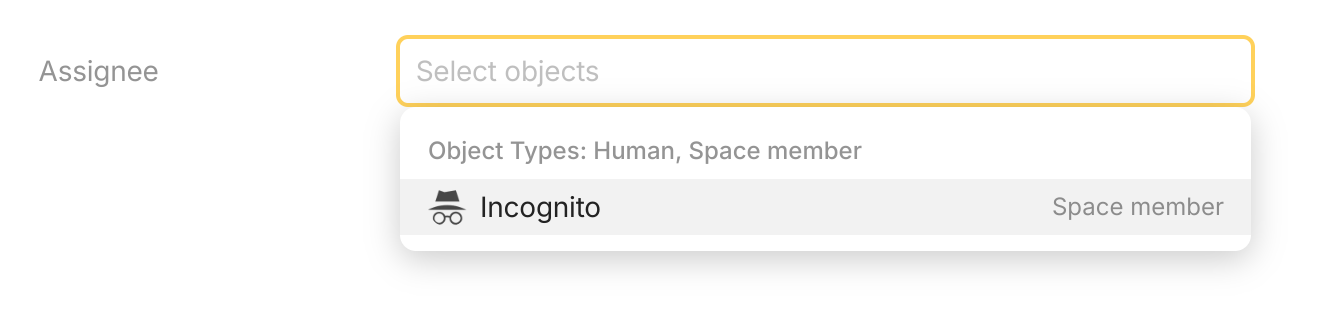
With Properties by assigning an Object Property Type in the Object menu.

<figure><img src="/files/YsECWR4at7On5bKgtzeR" alt="" width="375"><figcaption></figcaption></figure>

#### Link to external Object on your device

If you want to add a link to an external Object on your desktop, please use the links starting with **file:///** plus the local file destination. For example:

* `file:///Users/Filip/Downloads/Protocol-Berg.pdf` — to open PDFs;
* `file:///Users/Filip/Downloads/my_budget.xlsx` — to open spreadsheets (Excel, Numbers).

To add such a link, pick up "Link to website" just like when you add a new link to a website.

#### Date mentions

You can use **Inline Links** to quickly link to either absolute or relative dates.

Some examples:

* @now or @today
* @tomorrow
* @nextweek
* @nextmonth
* @24/8/2023

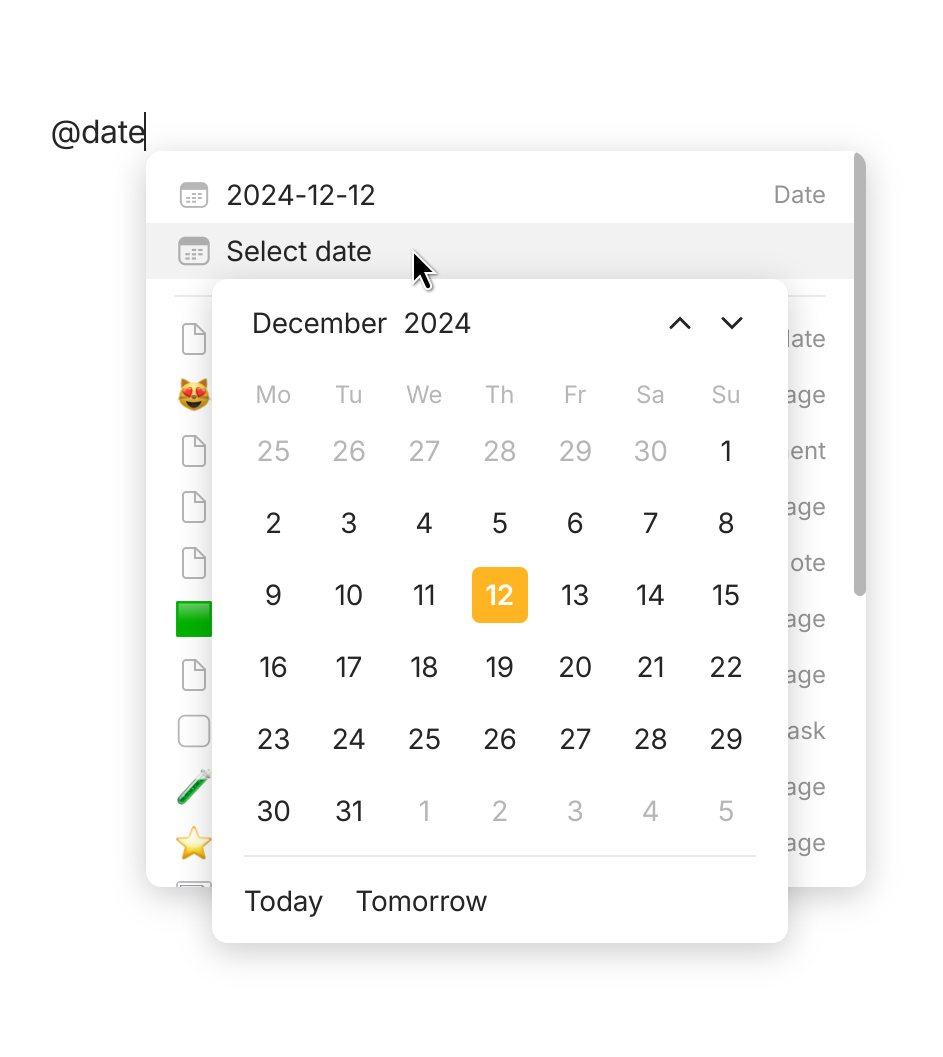
It's also possible to use `@date` or `/date` to quickly open the date selection menu.

<figure><img src="/files/X4BEjx74iVePSBwawEj8" alt="" width="375"><figcaption></figcaption></figure>

#### Link aliases

You can use regular links to link to a specific object in your space using a different name.

1. Write the name of your link first.
2. Select the name and press `Cmd / Ctrl + Shift + K`.
3. Search for the object you want to link, and select it.

### Checking Existing Links

#### Properties on the Graph

In your documents you may have multiple references or connections which could be attached to other work in your library. The Graph is the visualizer for this. Objects connected to other Objects, connected to Humans, or Tasks.

Learn more about [Properties](/anytype-docs/getting-started/types/relations) & the [Graph](/anytype-docs/advanced/feature-list-by-platform/graph) here.

#### Use the Flow

<figure><img src="/files/2gSDXCeDcJR91kHqEu48" alt="" width="375"><figcaption></figcaption></figure>

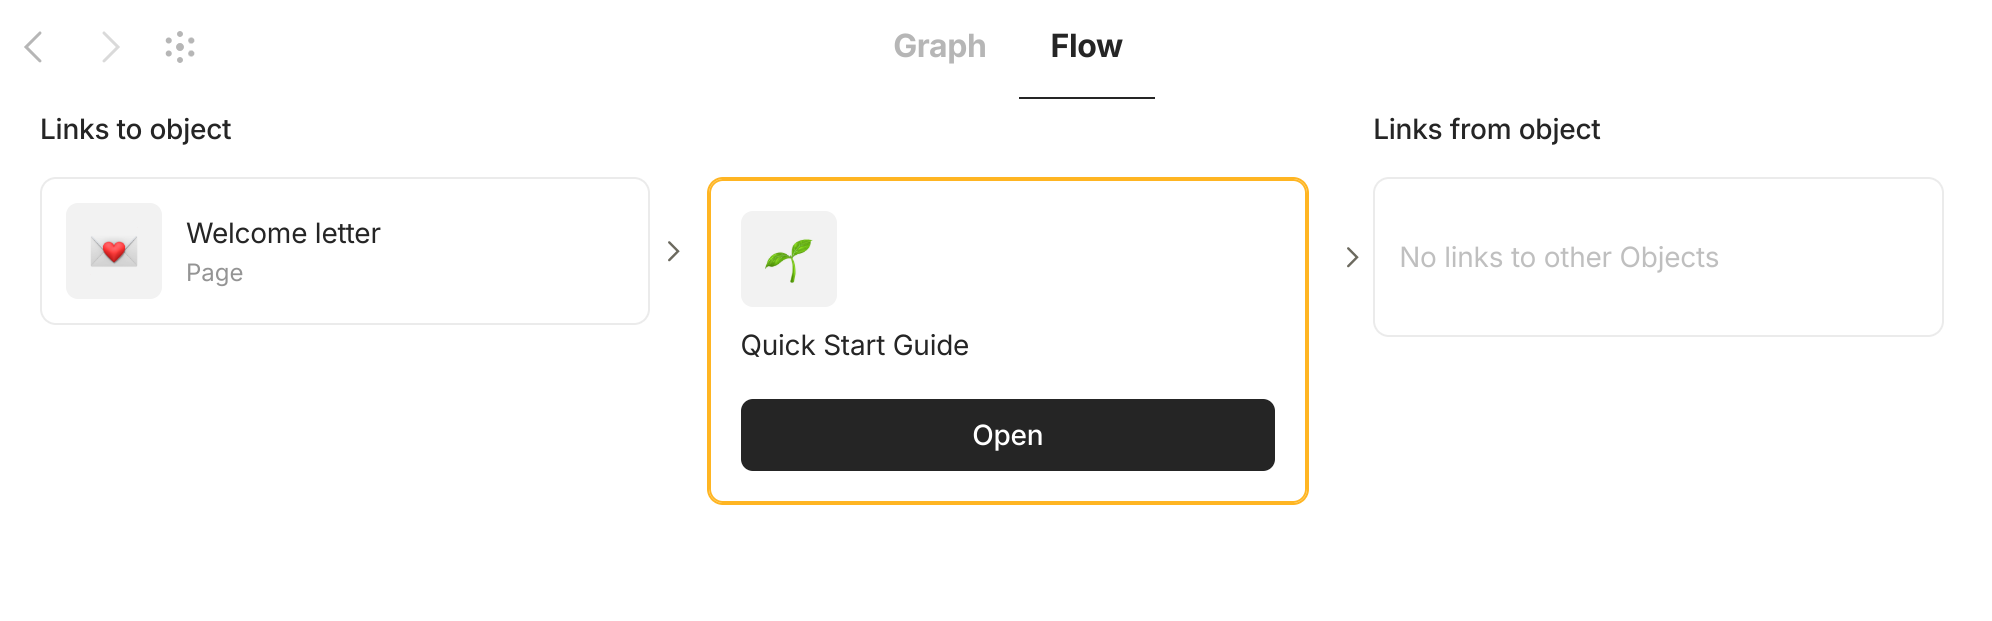
Another option to check which Objects are linked together can be found in the Flow tab next to the Graph.

On the top, center of your screen you will see the option to toggle to **Flow** view. This will show you which Object is linked before and after the current Object you are viewing.

#### Backlinks

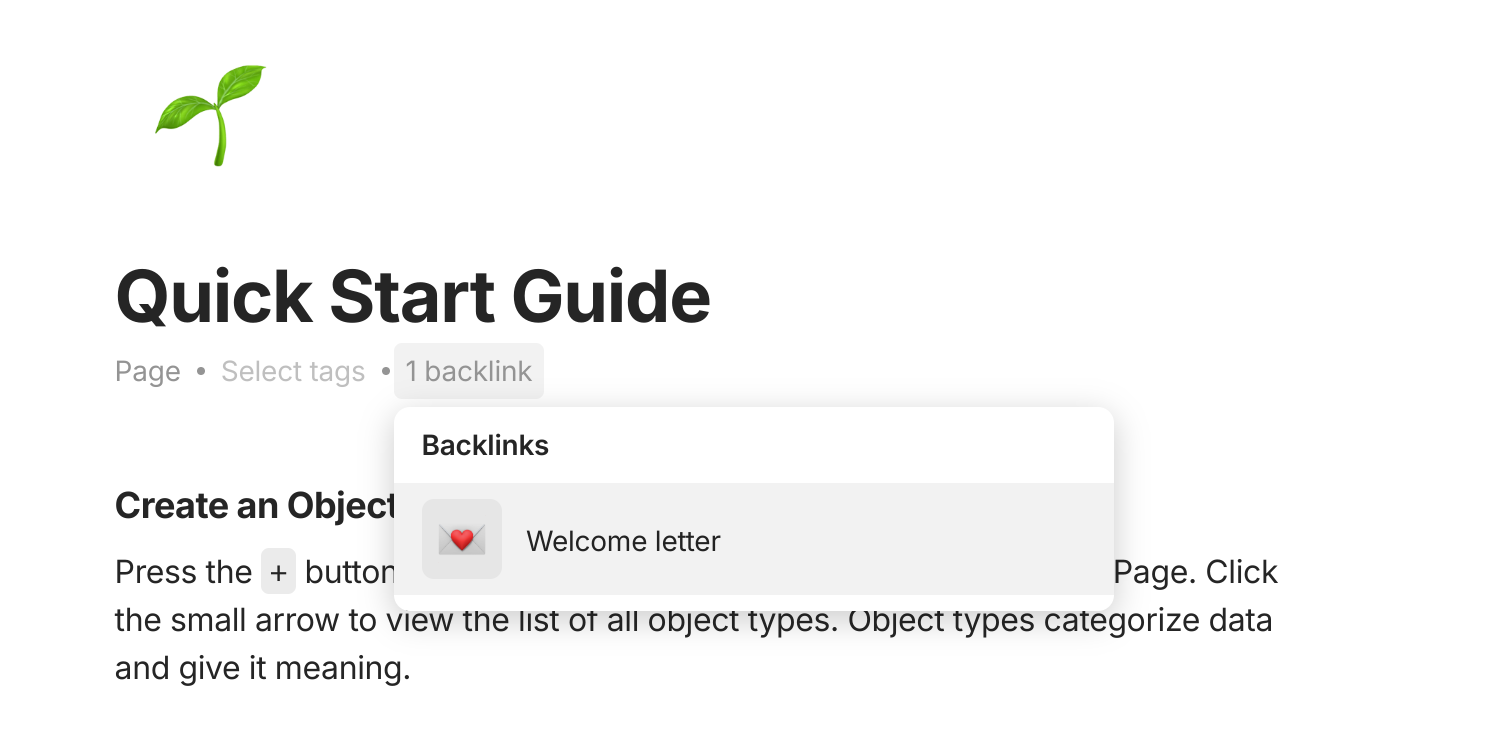
<figure><img src="/files/VNmn5fClJj9FLQWmWkA0" alt="" width="563"><figcaption></figcaption></figure>

Lastly, you can use the Backlinks property to check which Objects link to the currently opened one.


# Types

Just as in the physical world, Types are useful for defining Objects which are categorically different from one another.

A banana is something inherently different from a sofa. Its functions, properties, and relationships to other objects is more similar to those of apples and oranges, rather than sofas. For this reason, we might categorize apples, oranges, and bananas as *fruit*, whereas sofas would fall into a different category: that of *furniture.*

By the same principle, in Anytype there are two important concepts to keep in mind:

1\) Every object has a Type, which is defined at the time of Object creation (and can be changed later)

2\) Different Types are used to define Objects which are categorically different from each other

Colleagues, friends, and neighbors might all be considered type: *Human* in your Anytype graph. Here are other examples of Types you might have in your graph:

* Task
* Note
* Book
* Movie
* Idea

It's up to you how narrow or broad you'd like your Types to be, but generally we recommend using general Types for categorizing your Objects, and further refining the use of your Types through [Templates](/anytype-docs/getting-started/types/templates).

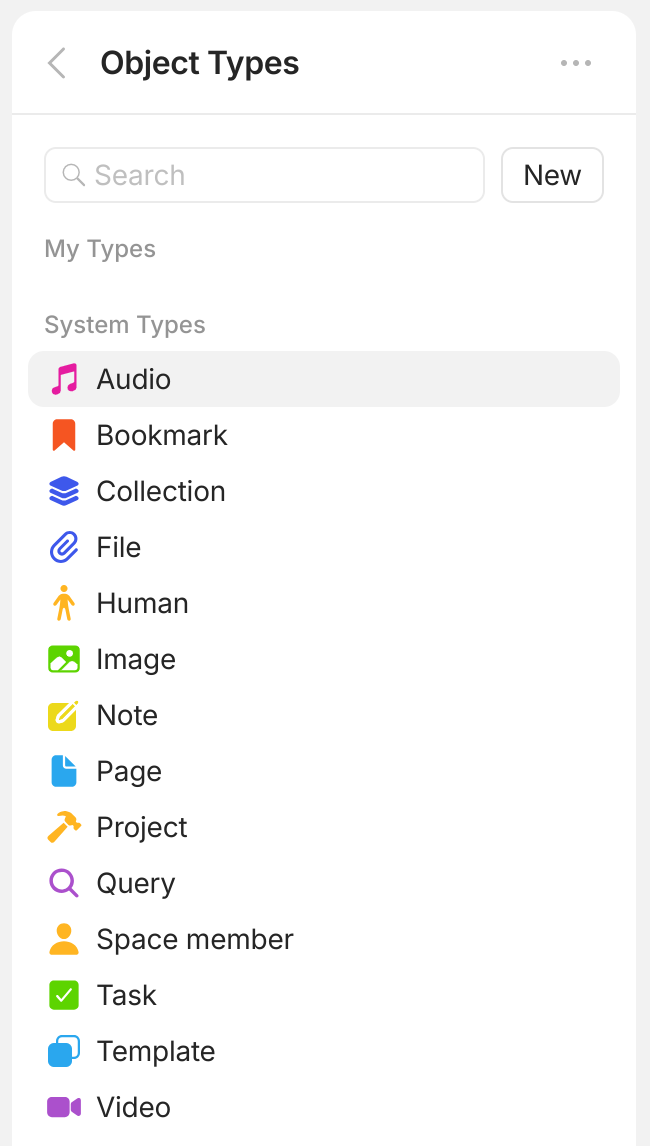
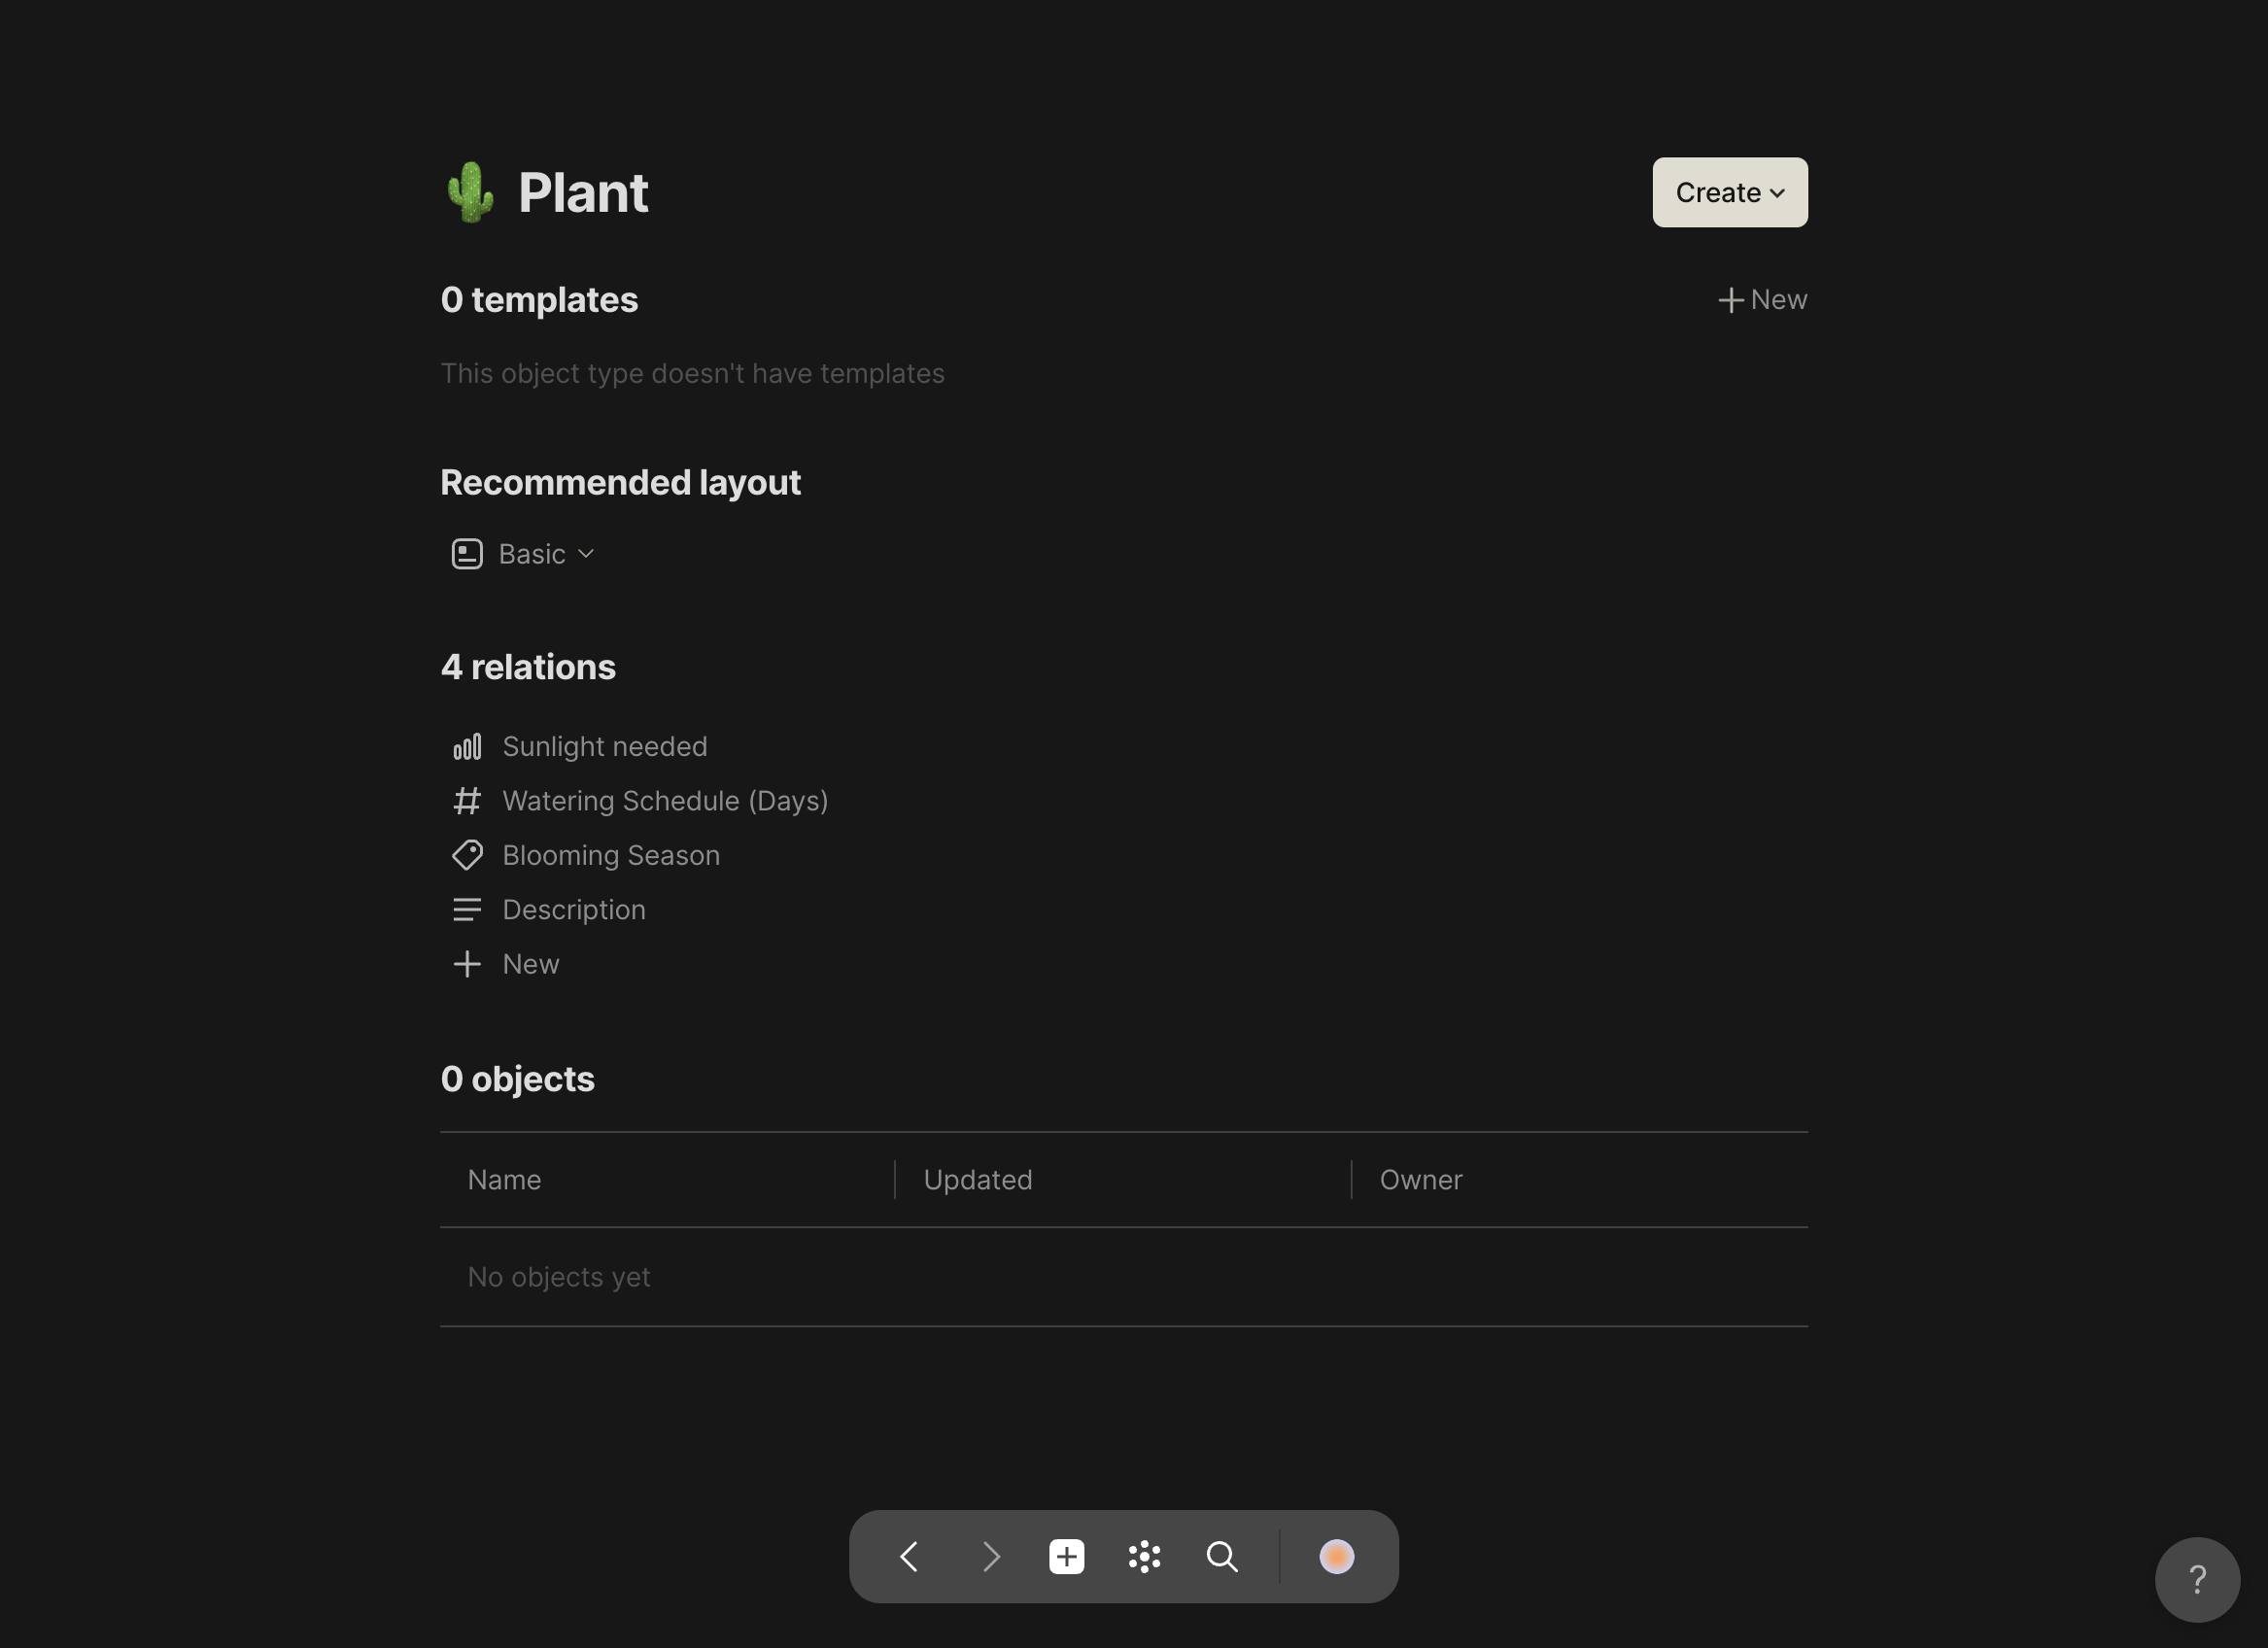
You can always view and manage your Types in your channel settings under the Content model section [Channel Settings](/anytype-docs/advanced/settings/space-settings#object-types)

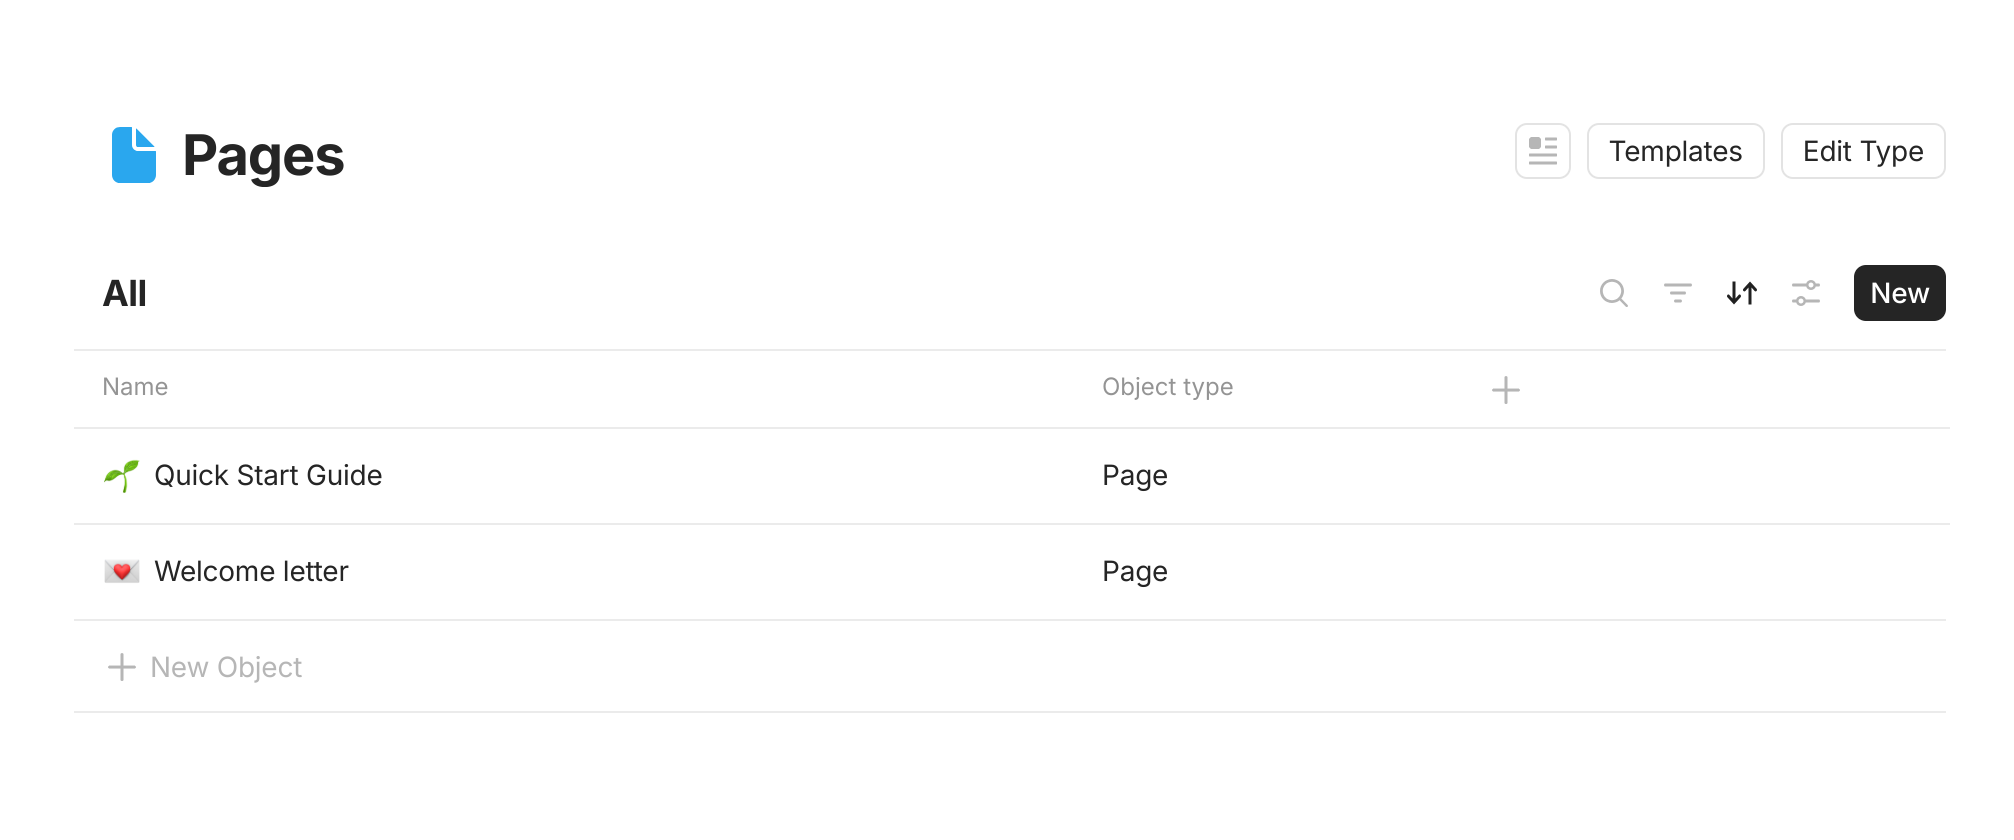
Additionally, each Type has an in-built Query which can be accessed by opening the Type from anywhere in the app.

<figure><img src="/files/SMTD0MtM5czRZou37YDO" alt=""><figcaption></figcaption></figure>

### Create a New Type

#### Creating Types from the Sidebar

In case you think of a new object type just as you're creating an object, you can create a new type on-the-fly. In this case, use the type selection menu in the same way as the search bar in the Types library. The type will be automatically added to your Types library, while you can proceed with editing the object of your new type.

<figure><img src="/files/ybbkoFq6vFJV8hkBTY5S" alt="" width="375"><figcaption></figcaption></figure>

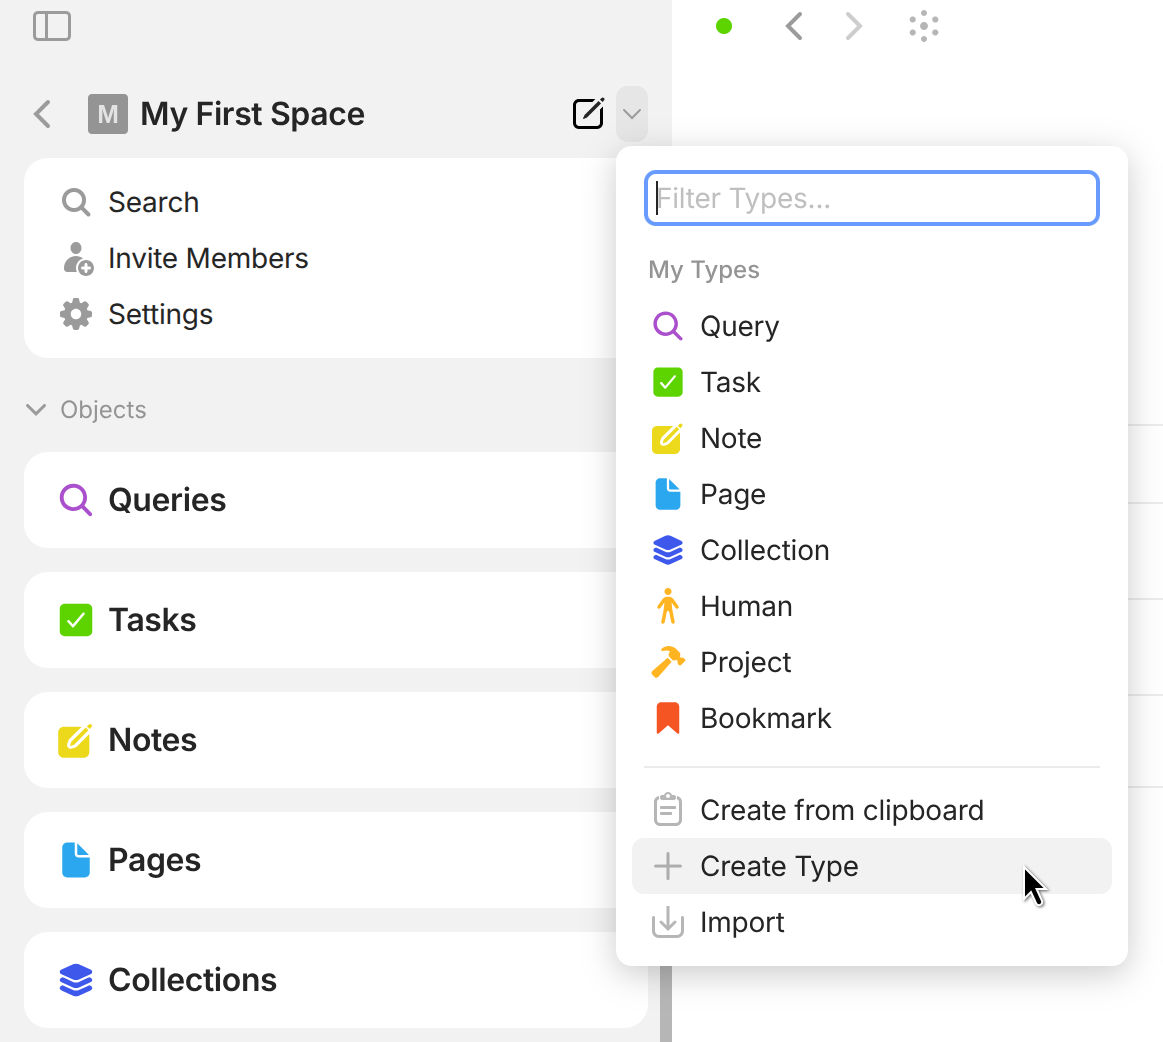
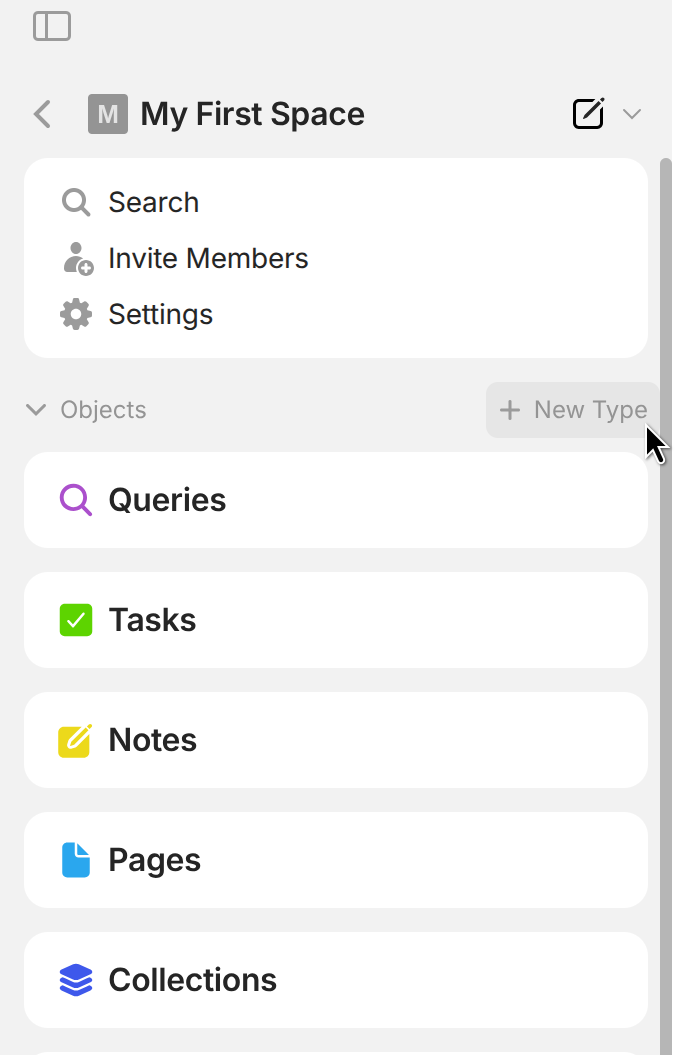
You're also able to create new Types directly from the Objects section:

<figure><img src="/files/qwsvz1QeAo5rmwQ4po9K" alt="" width="349"><figcaption></figcaption></figure>

#### Creating Types from Channel Settings

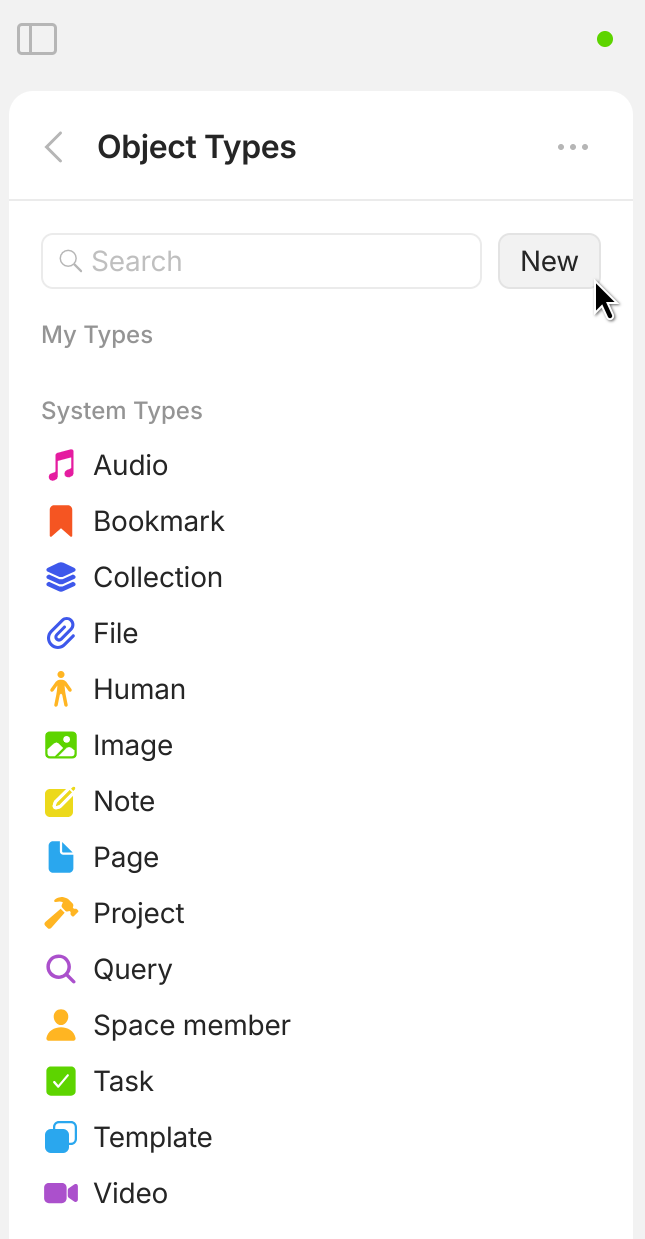
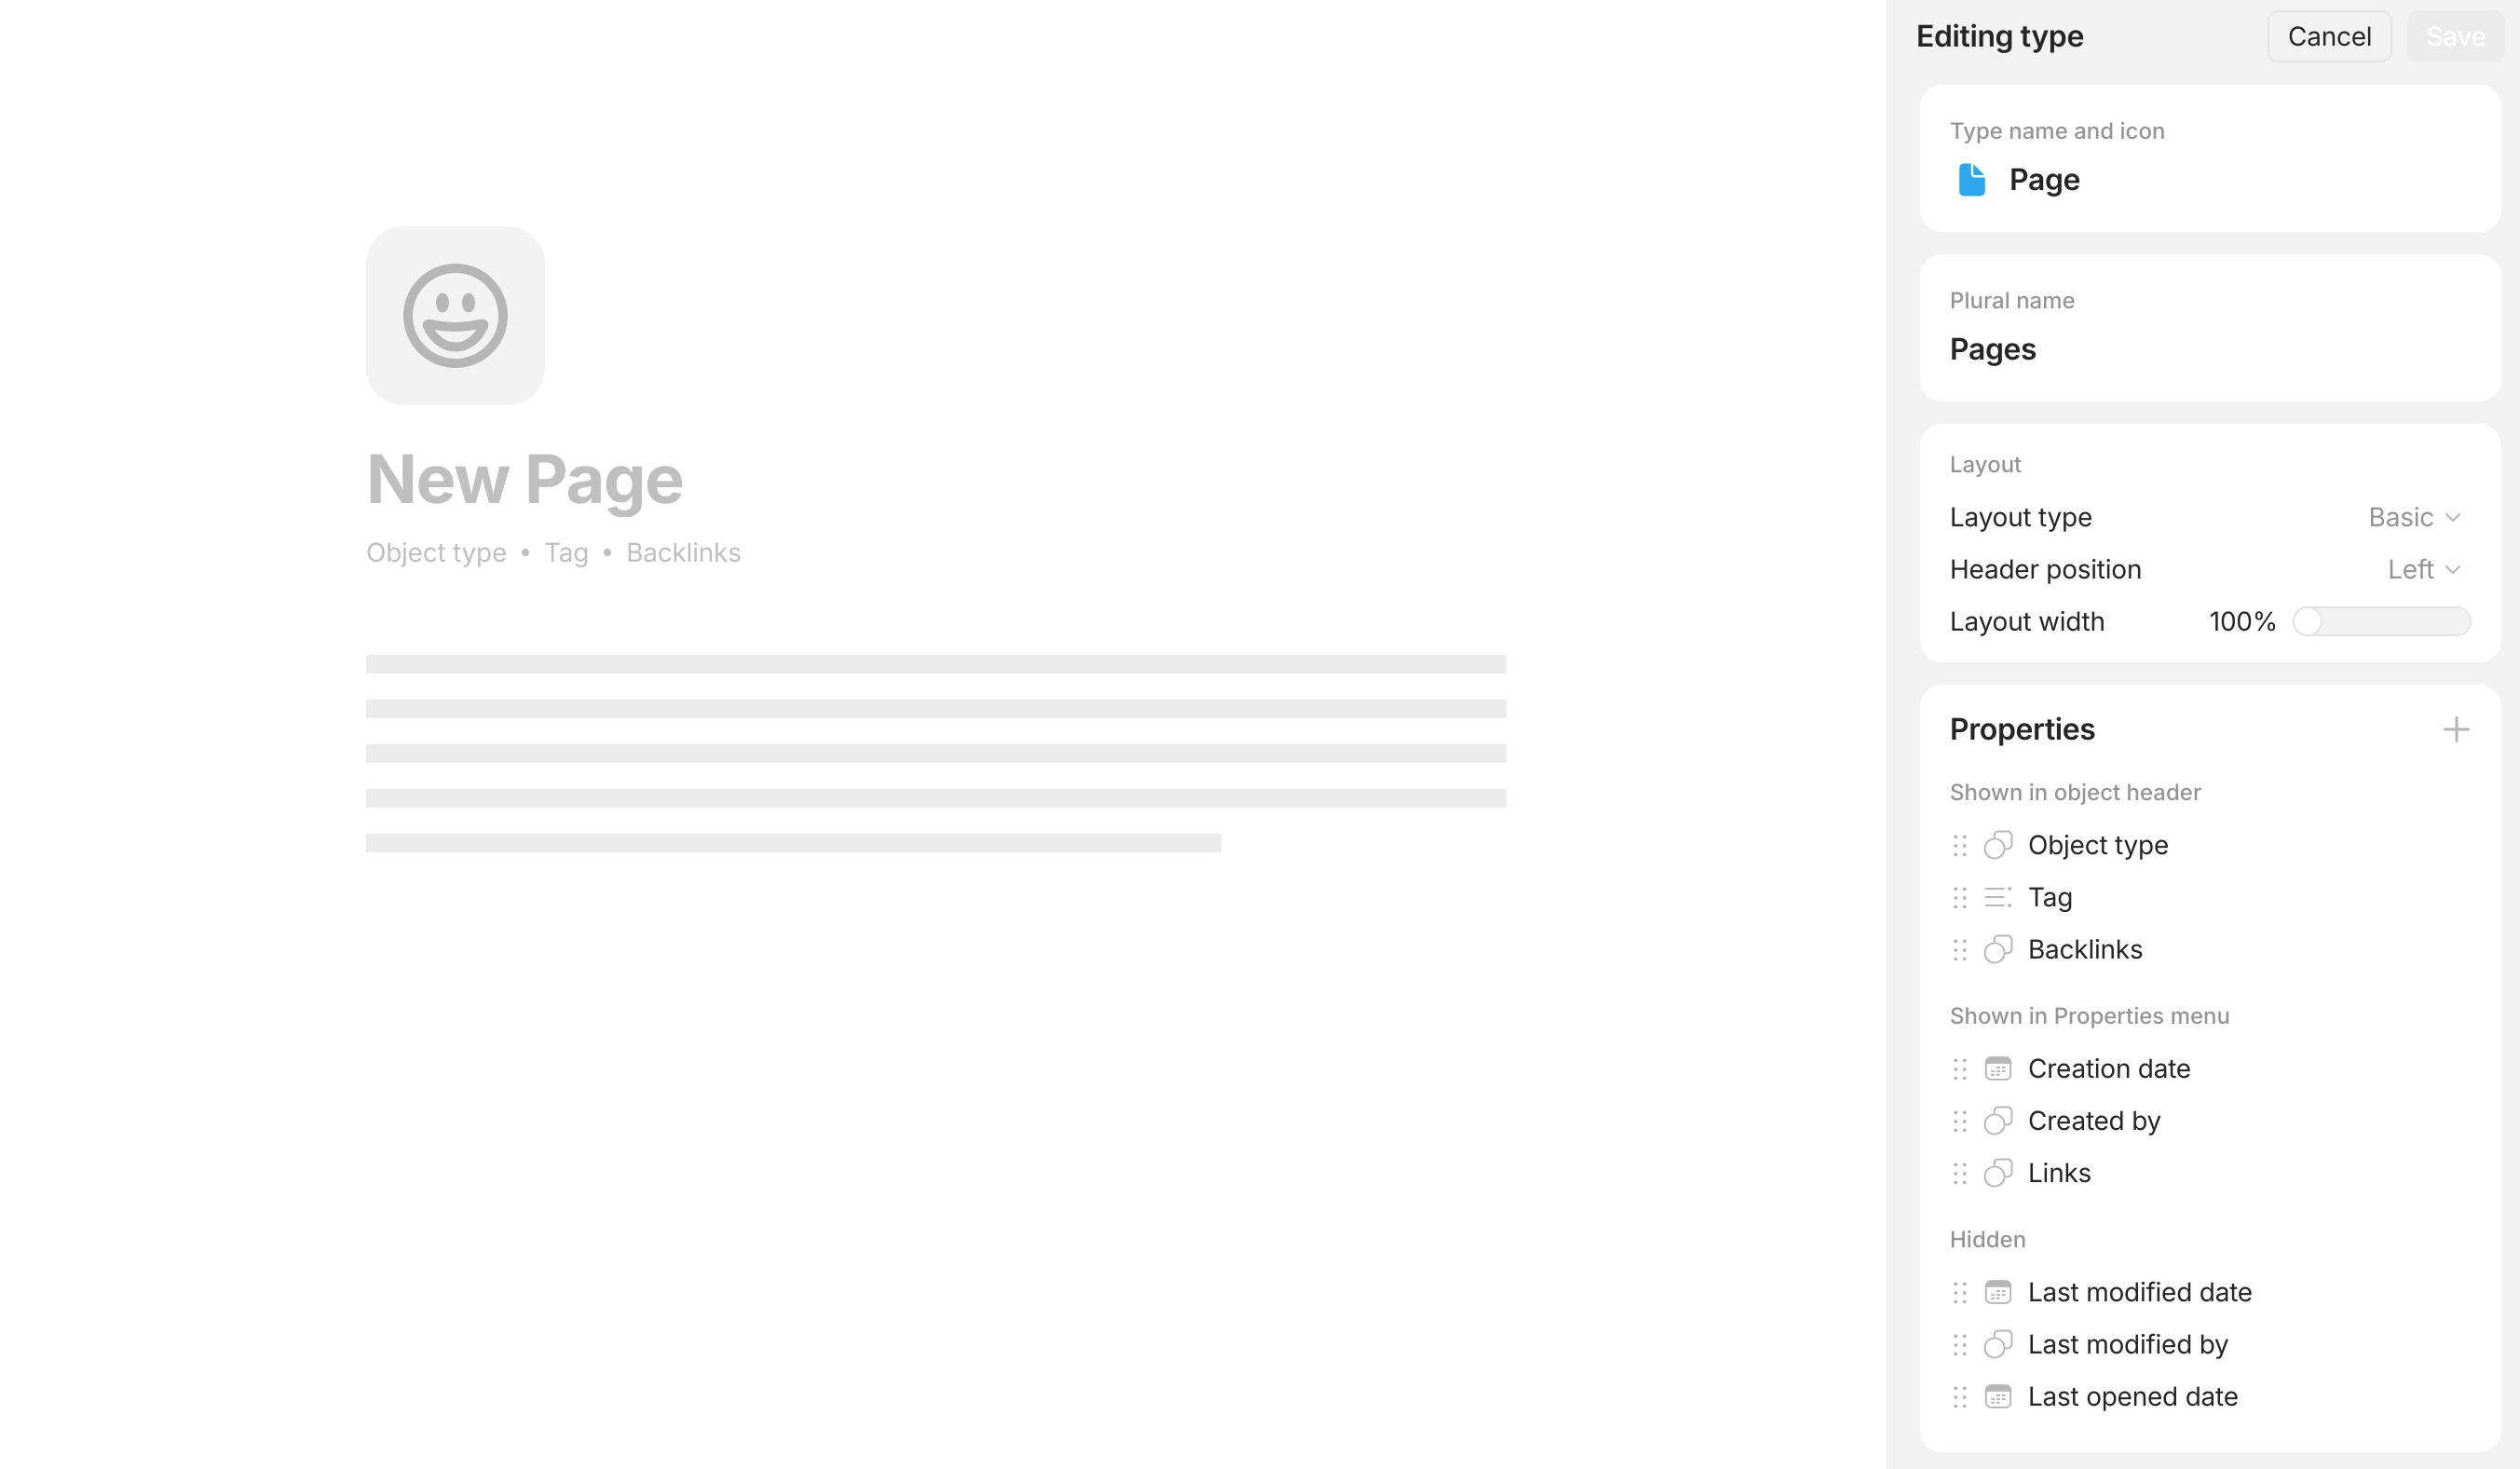
Open your [Channels](/anytype-docs/getting-started/vault-and-key/space) settings, and navigate to `Content Model > Object Types`. Afterwards, simply click on `New` button to create a new Type.

From here, you can choose a name, layout, and add templates and properties to the newly created Type.

<div><figure><img src="/files/UmVTqqsSufnV5UibAYoK" alt=""><figcaption></figcaption></figure> <figure><img src="/files/wiPKLxml8h0P6cdDpHSO" alt=""><figcaption></figcaption></figure></div>

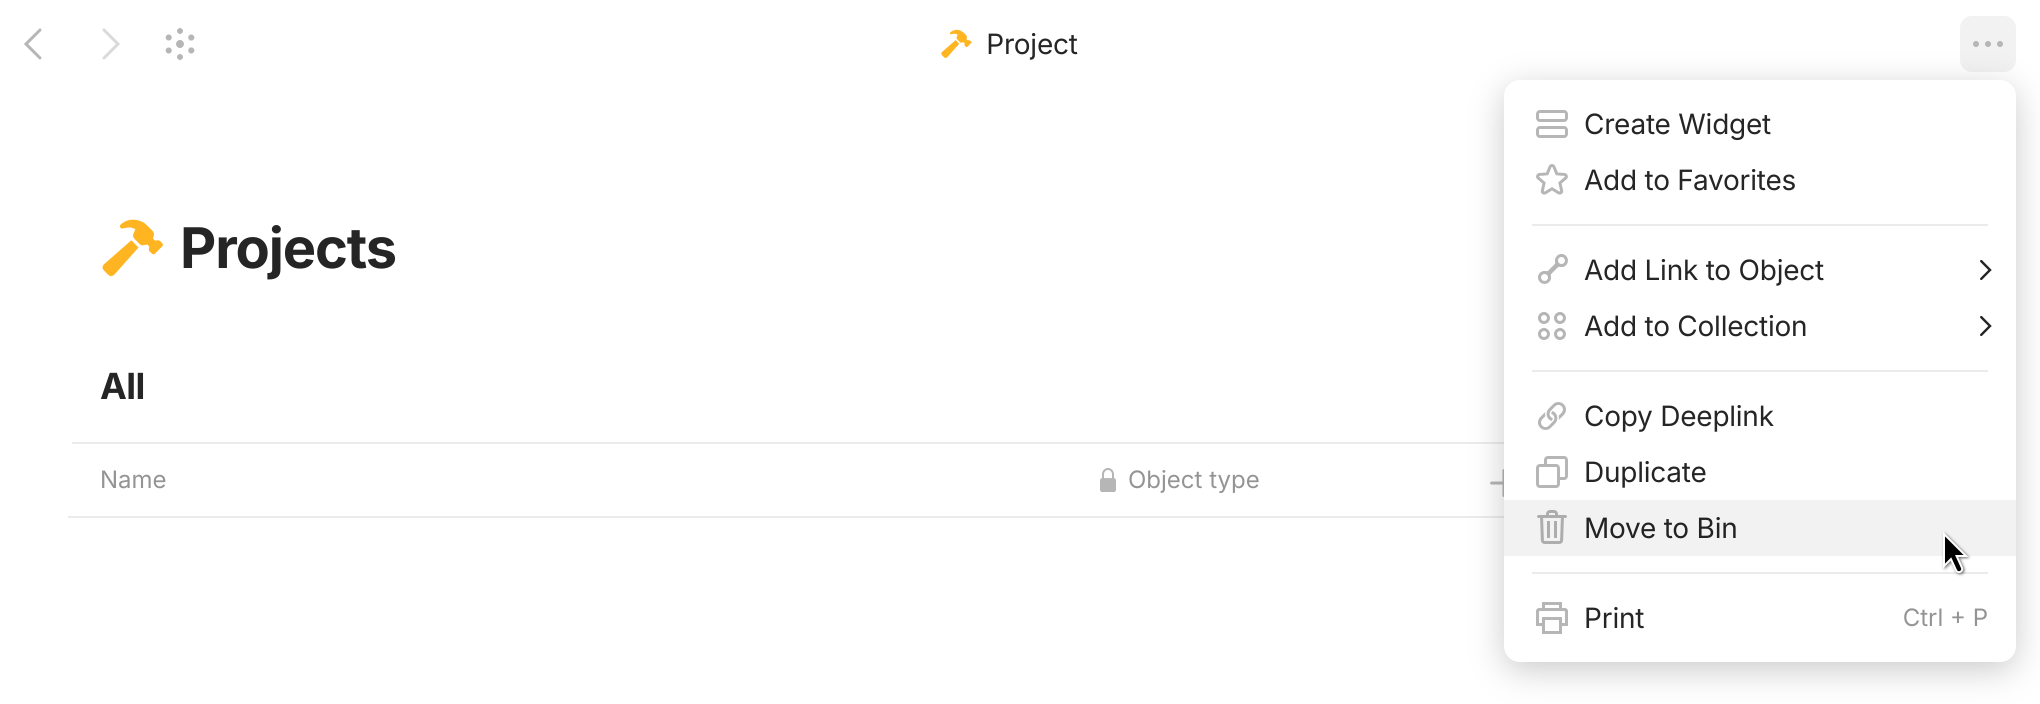
If you've decided that this Type is no longer relevant, you can use the context menu (mouse right-click) to delete the Type from your channel. Please proceed with caution; any objects of this type will show an alert if the Type has been removed from your library.

<div><figure><img src="/files/GHDcMadHCORe84n61lQK" alt=""><figcaption></figcaption></figure> <figure><img src="/files/HldFJMKiQRrxo4IvTZKL" alt=""><figcaption></figcaption></figure></div>


# Properties

Properties are key to organizing and connecting your Objects and knowledge in Anytype. There are two functions that Properties serve in Anytype:

* **Defining attributes:** You can use Properties to define the characteristics of a certain Object.
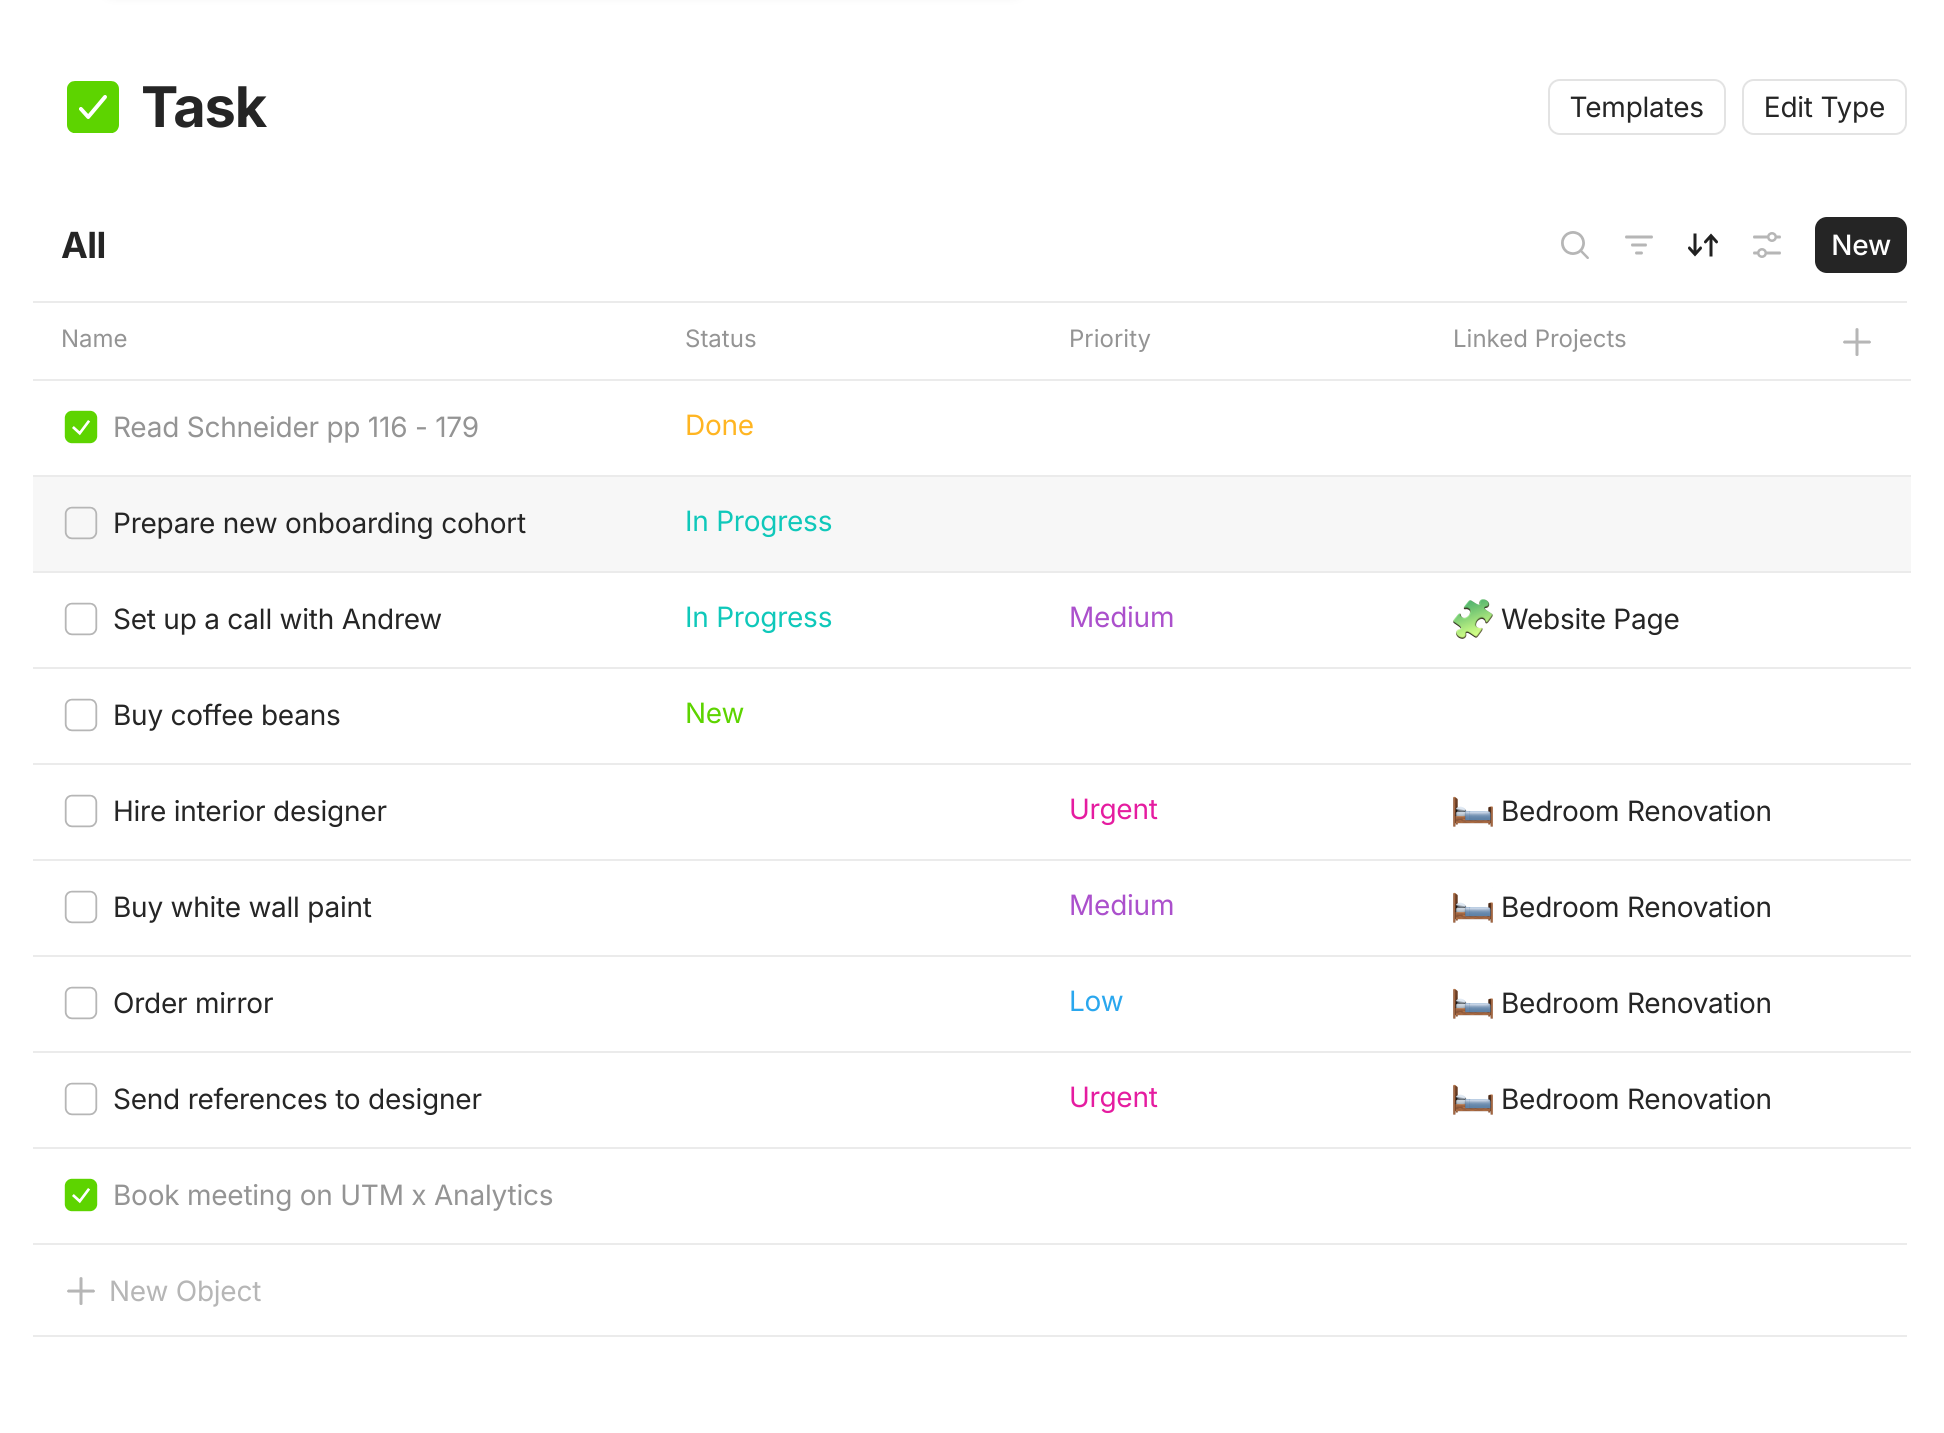
  * For example, when creating a Task in Anytype, you can add Properties such as *Status*: Done/Not Done, or *Priority*: Low, Medium, or High.
  * If we were to imagine a database, Properties represent the column headers to each row (where column A represents the Object name, and where each row represents an Object).
  * Once you have set your attributes, it becomes possible to sort and filter your Objects according to the Properties you've defined in your Query.
* **Defining connections:** You can also use Properties to link one Object to another.
  * Returning to the example of a Task, you can add the Property: *Linked Projects,* and connect another Object in your Anytype to this task.
  * As above, you can view the Linked Projects as Properties in a Query, or in your Graph.

<figure><img src="/files/toczpRNxVQCkheosyTXz" alt=""><figcaption></figcaption></figure>

### Create a New Property

#### Creating Properties from the Type Edit Menu

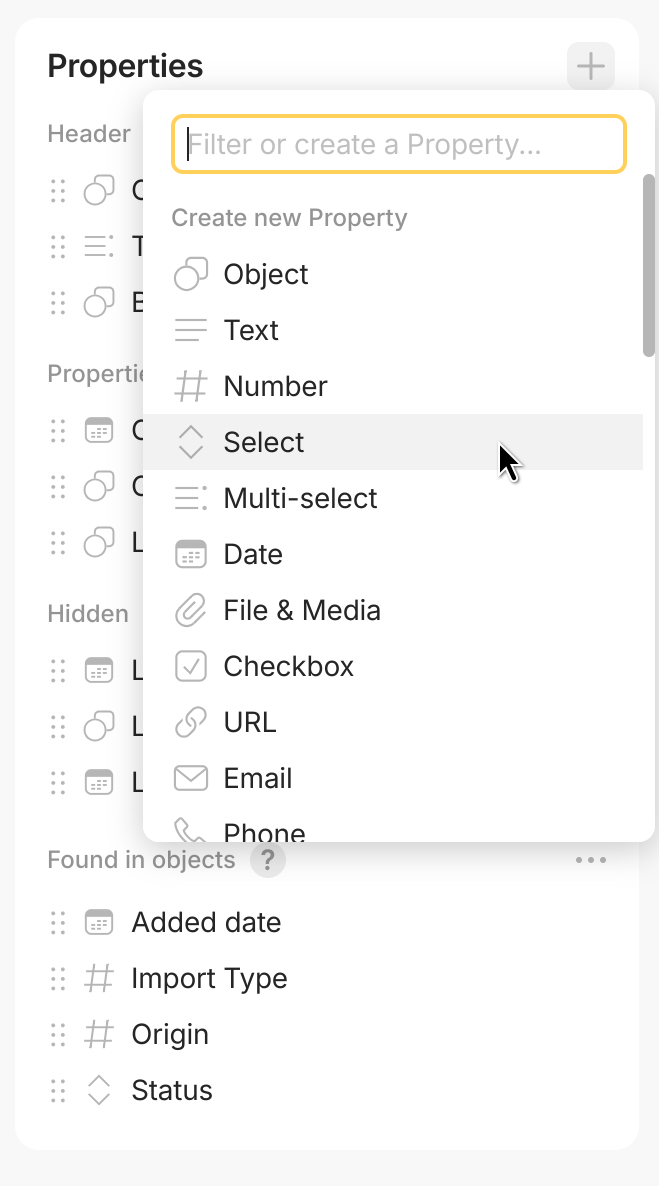
While editing any [Type in your Space settings](/anytype-docs/getting-started/types#creating-types-from-space-settings), you can use the `+` button in the top right corner of the Properties section to either add an existing property to the current Type or to create a new one.

<div><figure><img src="/files/PZTHTKYHrVUjfNFrrY0G" alt=""><figcaption></figcaption></figure> <figure><img src="/files/8wajKHo4gzviy3fKnOBn" alt=""><figcaption></figcaption></figure></div>

#### Creating Properties from Space Settings

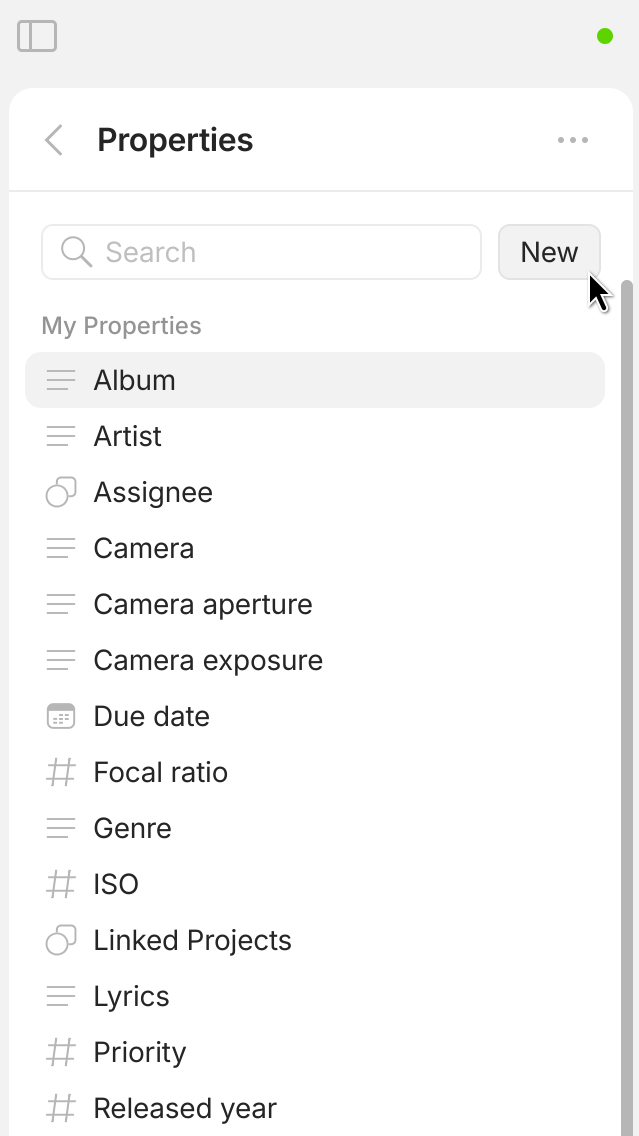
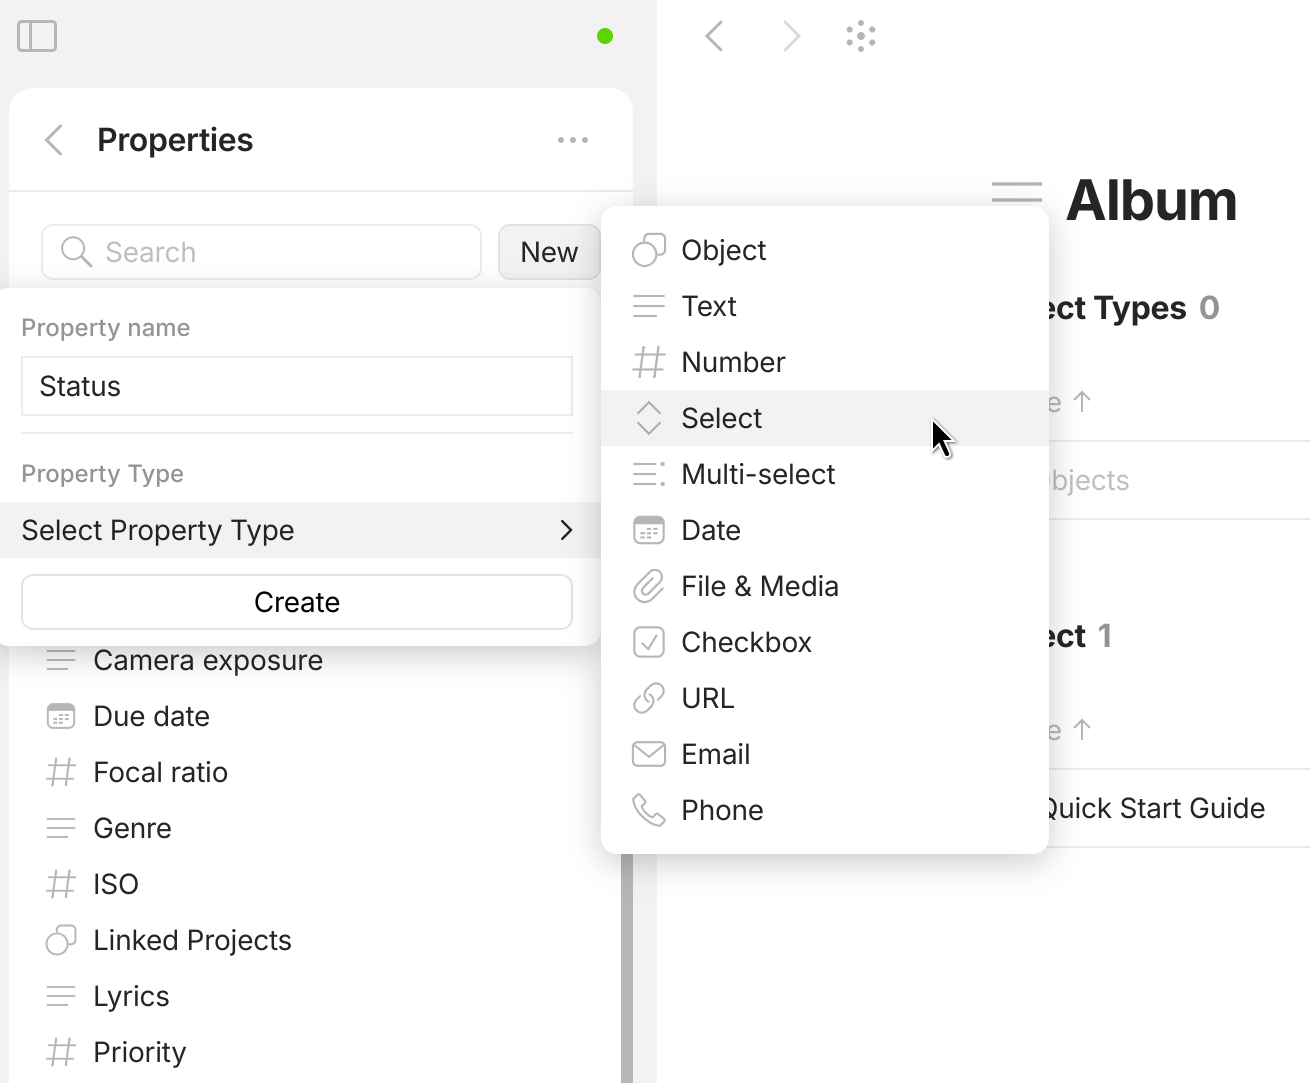
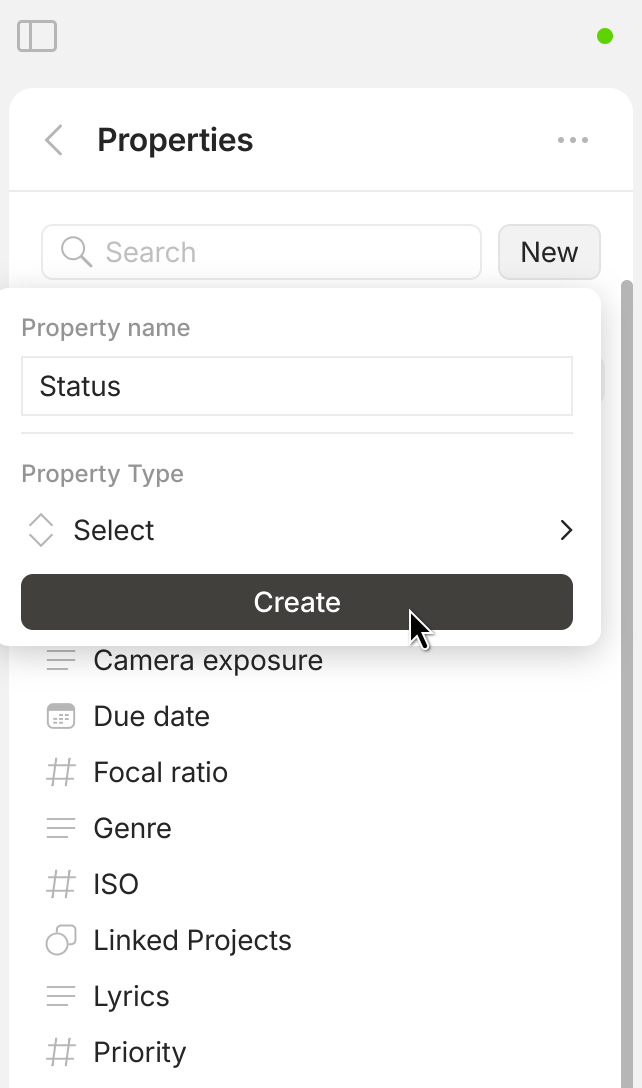
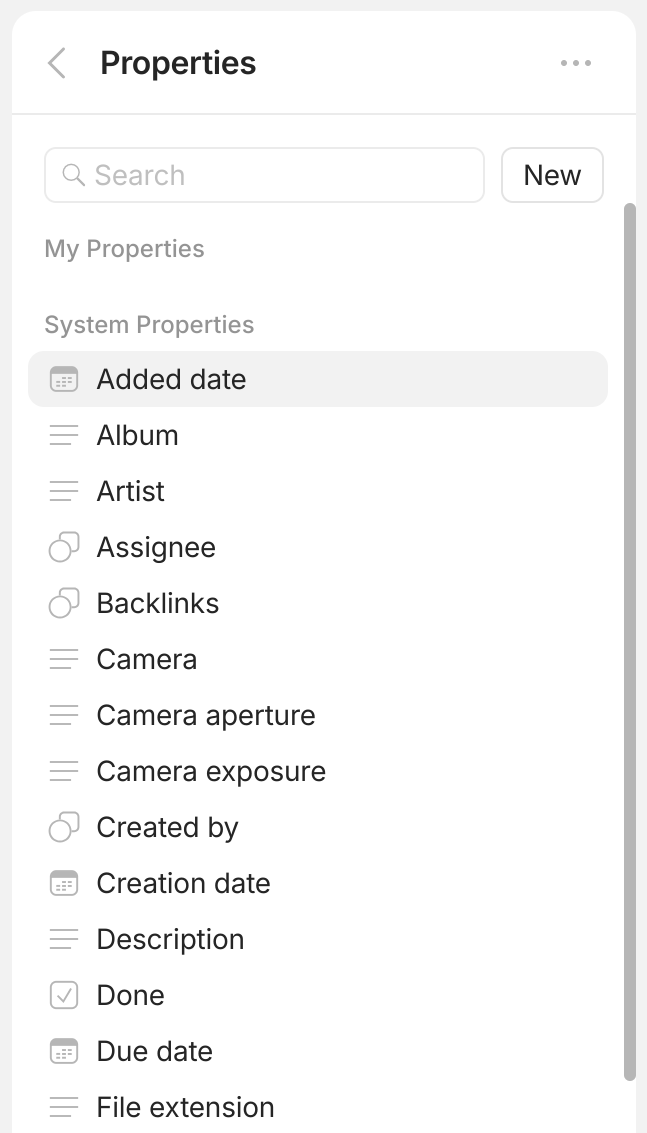
Open your [Channels](/anytype-docs/getting-started/vault-and-key/space) settings, and navigate to `Content Model > Properties`. Afterwards, simply click on `New` button to create a new Property.

From here, you can choose a name and a type for your new Property.

<div><figure><img src="/files/N5YgVTpJlAYPL2255fgS" alt=""><figcaption></figcaption></figure> <figure><img src="/files/9UbjbBxhfvorngANwbBR" alt=""><figcaption></figcaption></figure> <figure><img src="/files/0xMqvnJM8txlTqQBNYu2" alt=""><figcaption></figcaption></figure></div>

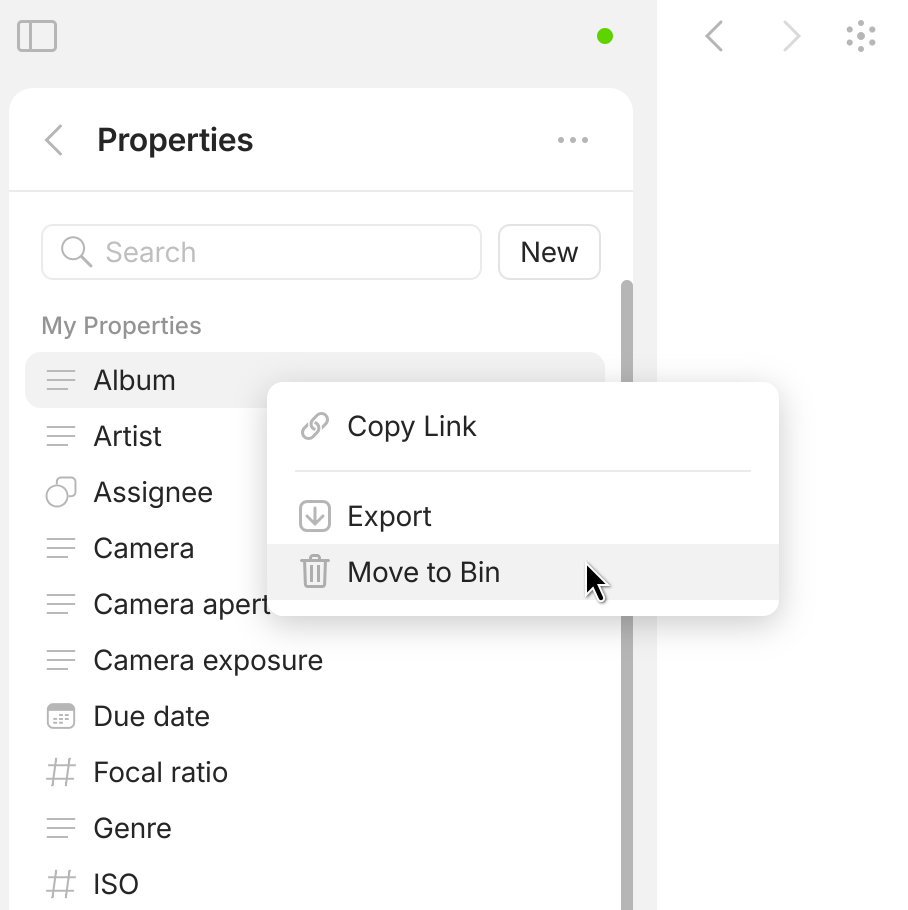
If you've decided that this Property is no longer relevant, you can use the context menu (mouse right-click) to delete the Property from your space.

<figure><img src="/files/Bw8e2JnrifnUl9Yu5FOy" alt="" width="375"><figcaption></figcaption></figure>

#### Creating Properties from the Object Editor

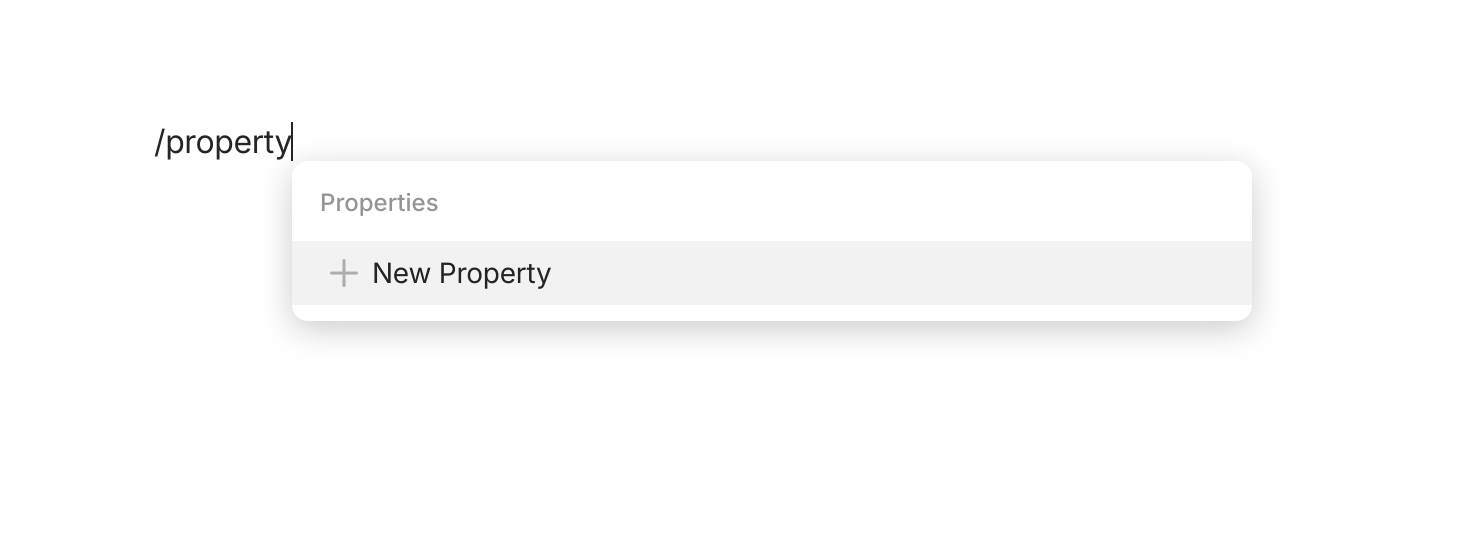
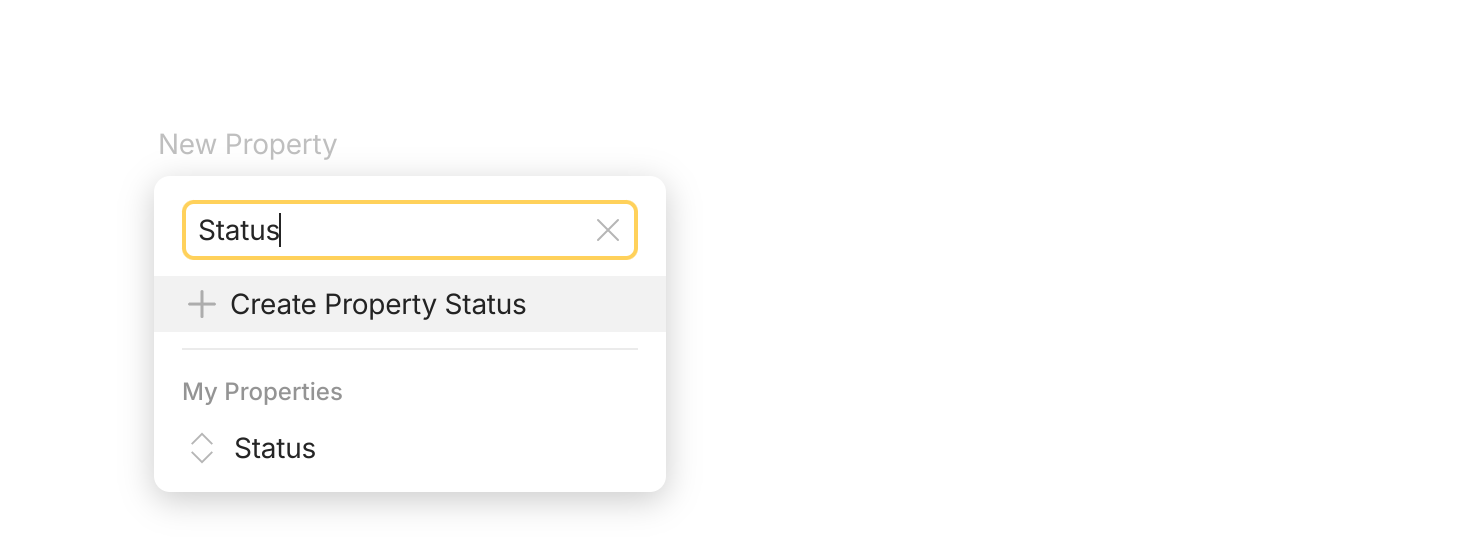
You can add a Property to your Objects as you would with any other block in the editor: by using the `+` button or the in-line `/` menu.

<div><figure><img src="/files/LI9IH42ydxtCpMEIlqSn" alt=""><figcaption></figcaption></figure> <figure><img src="/files/tAj5LoHhCqhrJfdsOOQb" alt=""><figcaption></figcaption></figure></div>

Any Property you create from the object editor will be available for editing in your space settings using the steps above.

#### Types of Properties <a href="#types-of-relations" id="types-of-relations"></a>

Here are the currently available Property types within Anytype:

* **Text**: accepts free-form text as input.
* **Number**: for all numbers. Different formats are coming soon.
* **Date**: date, with optional time.
* **Select**: categorical property with a predefined list of options. You can choose one.
* **Multi-select**: categorical property with a predefined list of options. You can choose multiple, with no limit.
* **Email/Phone/URL**: special formats for email addresses, phone numbers, or URLs.
* **Checkbox**: a boolean (true/false) value.
* **File & Media**: attach audio, video, or images to view, play, or download.
* **Object**: reference to another object, such as a person, task, or document.

### Managing Properties

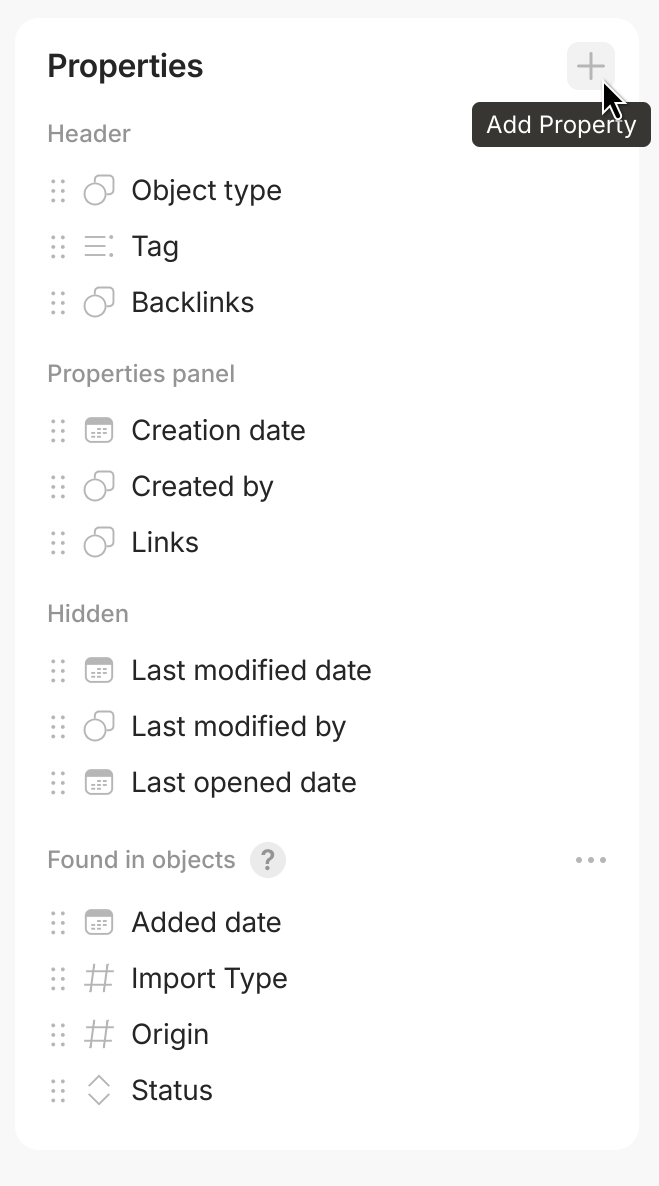
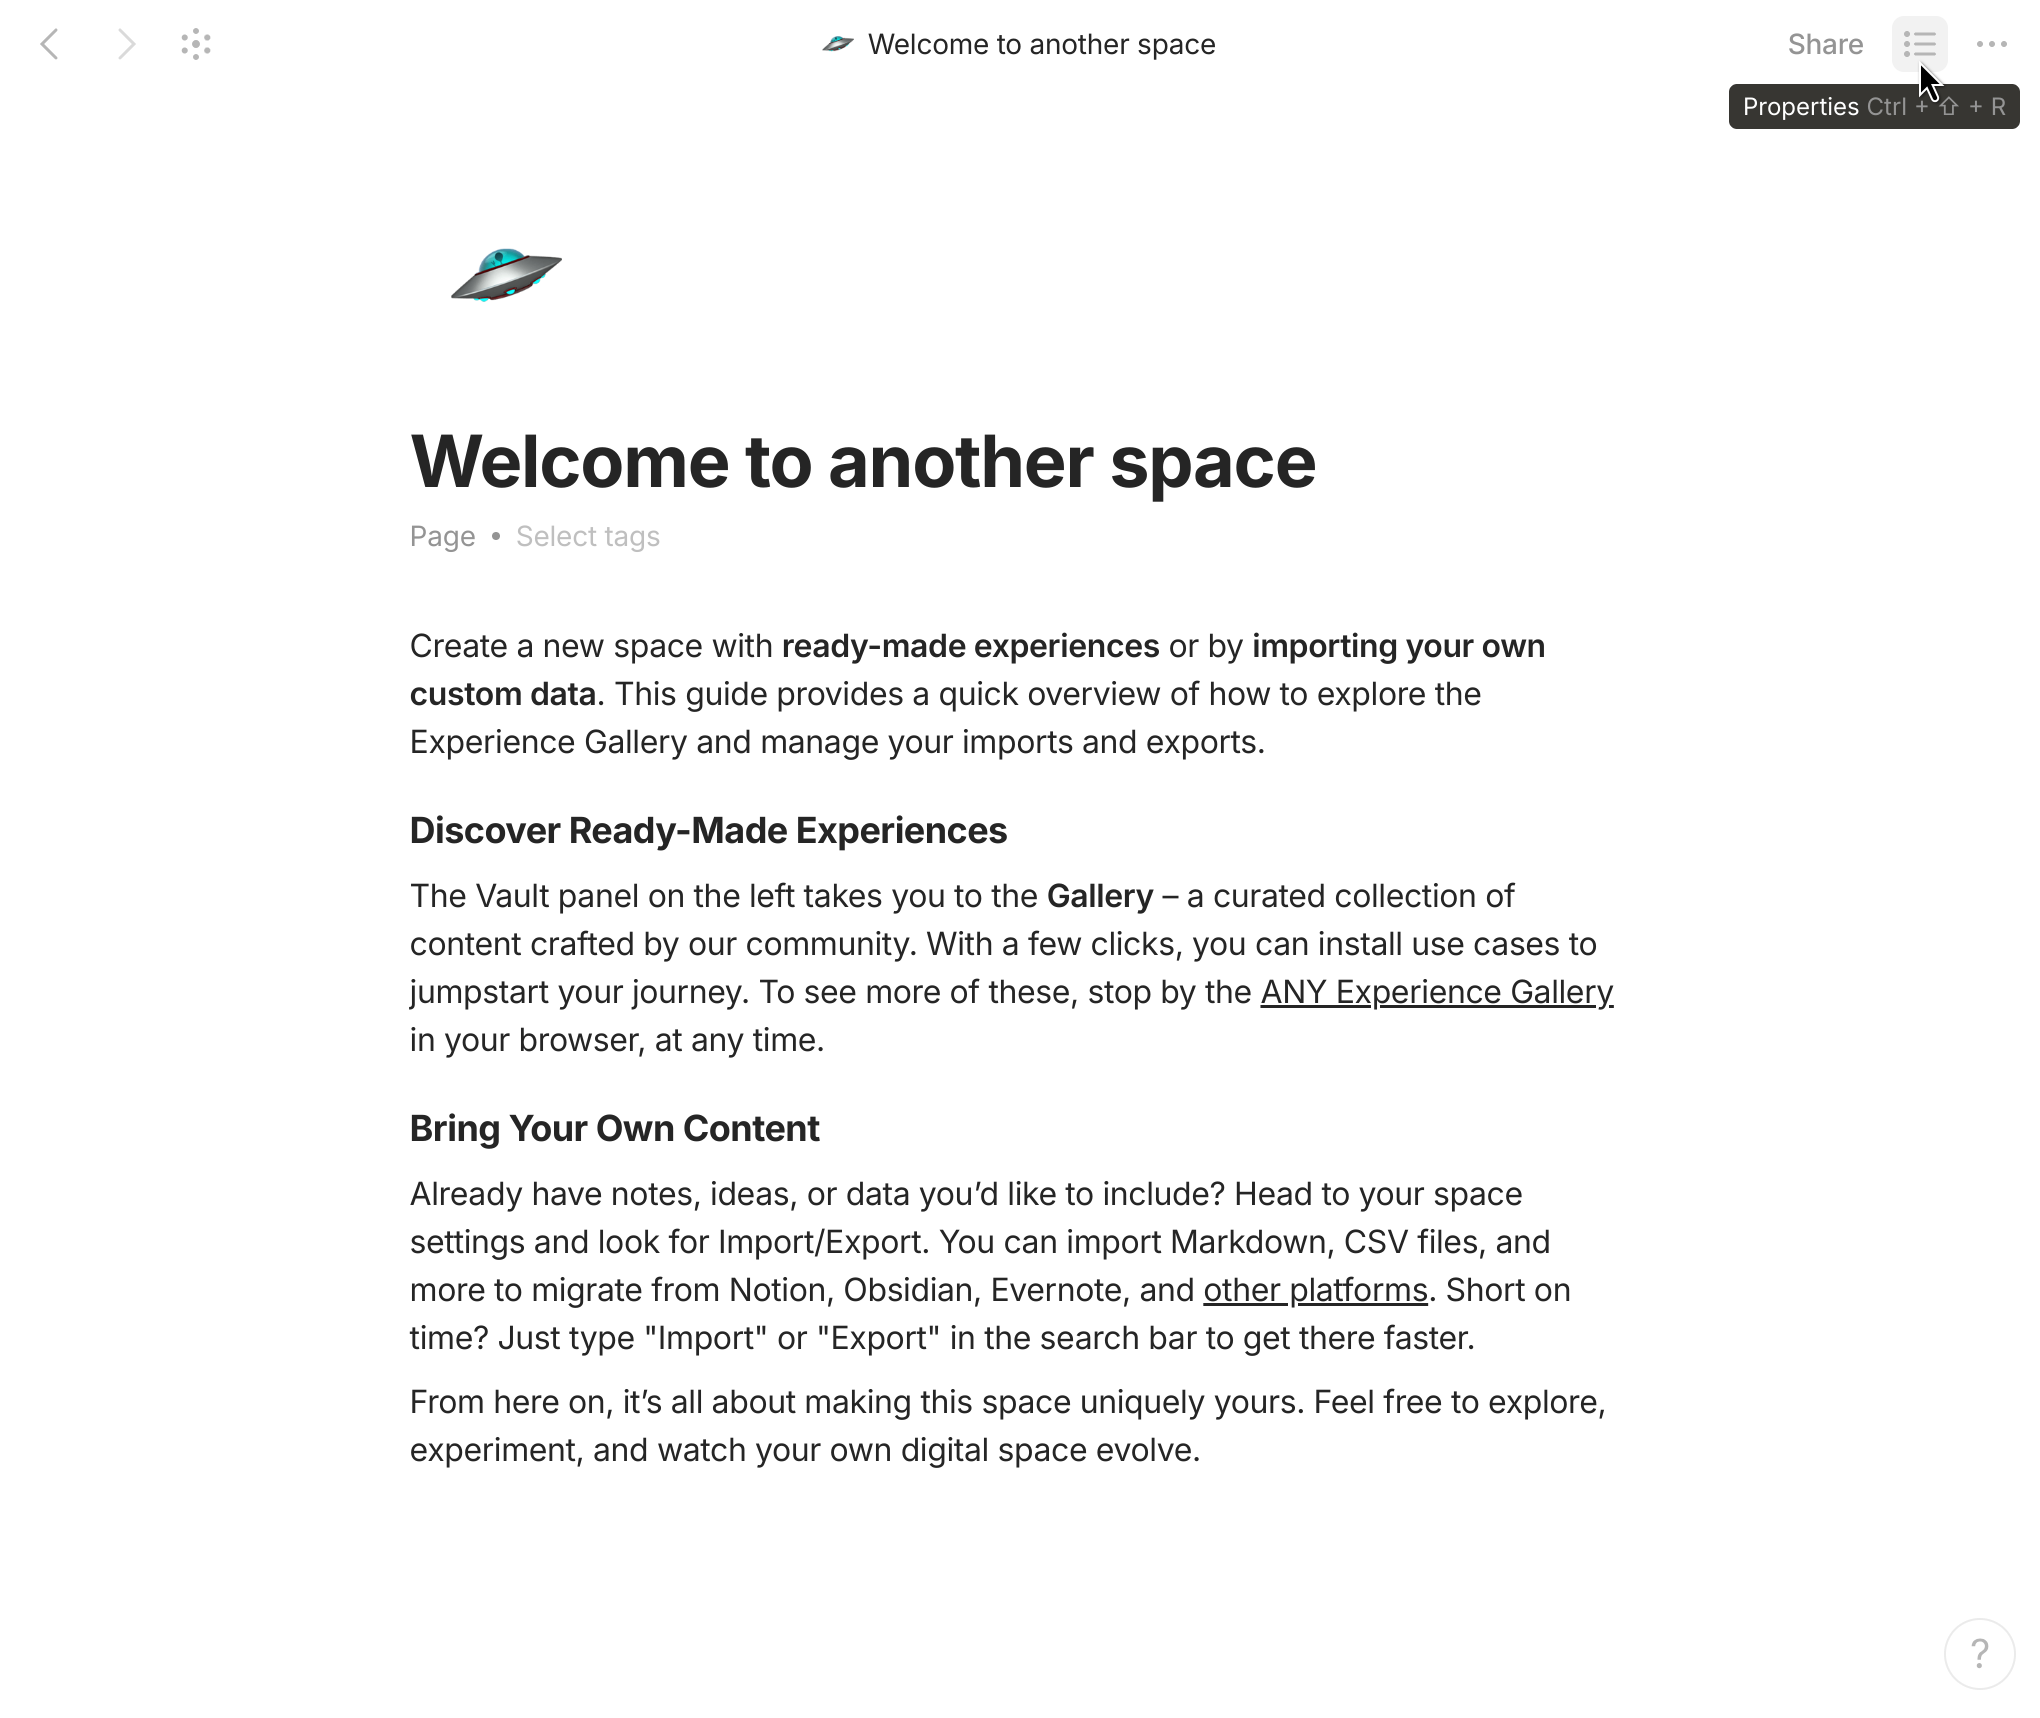
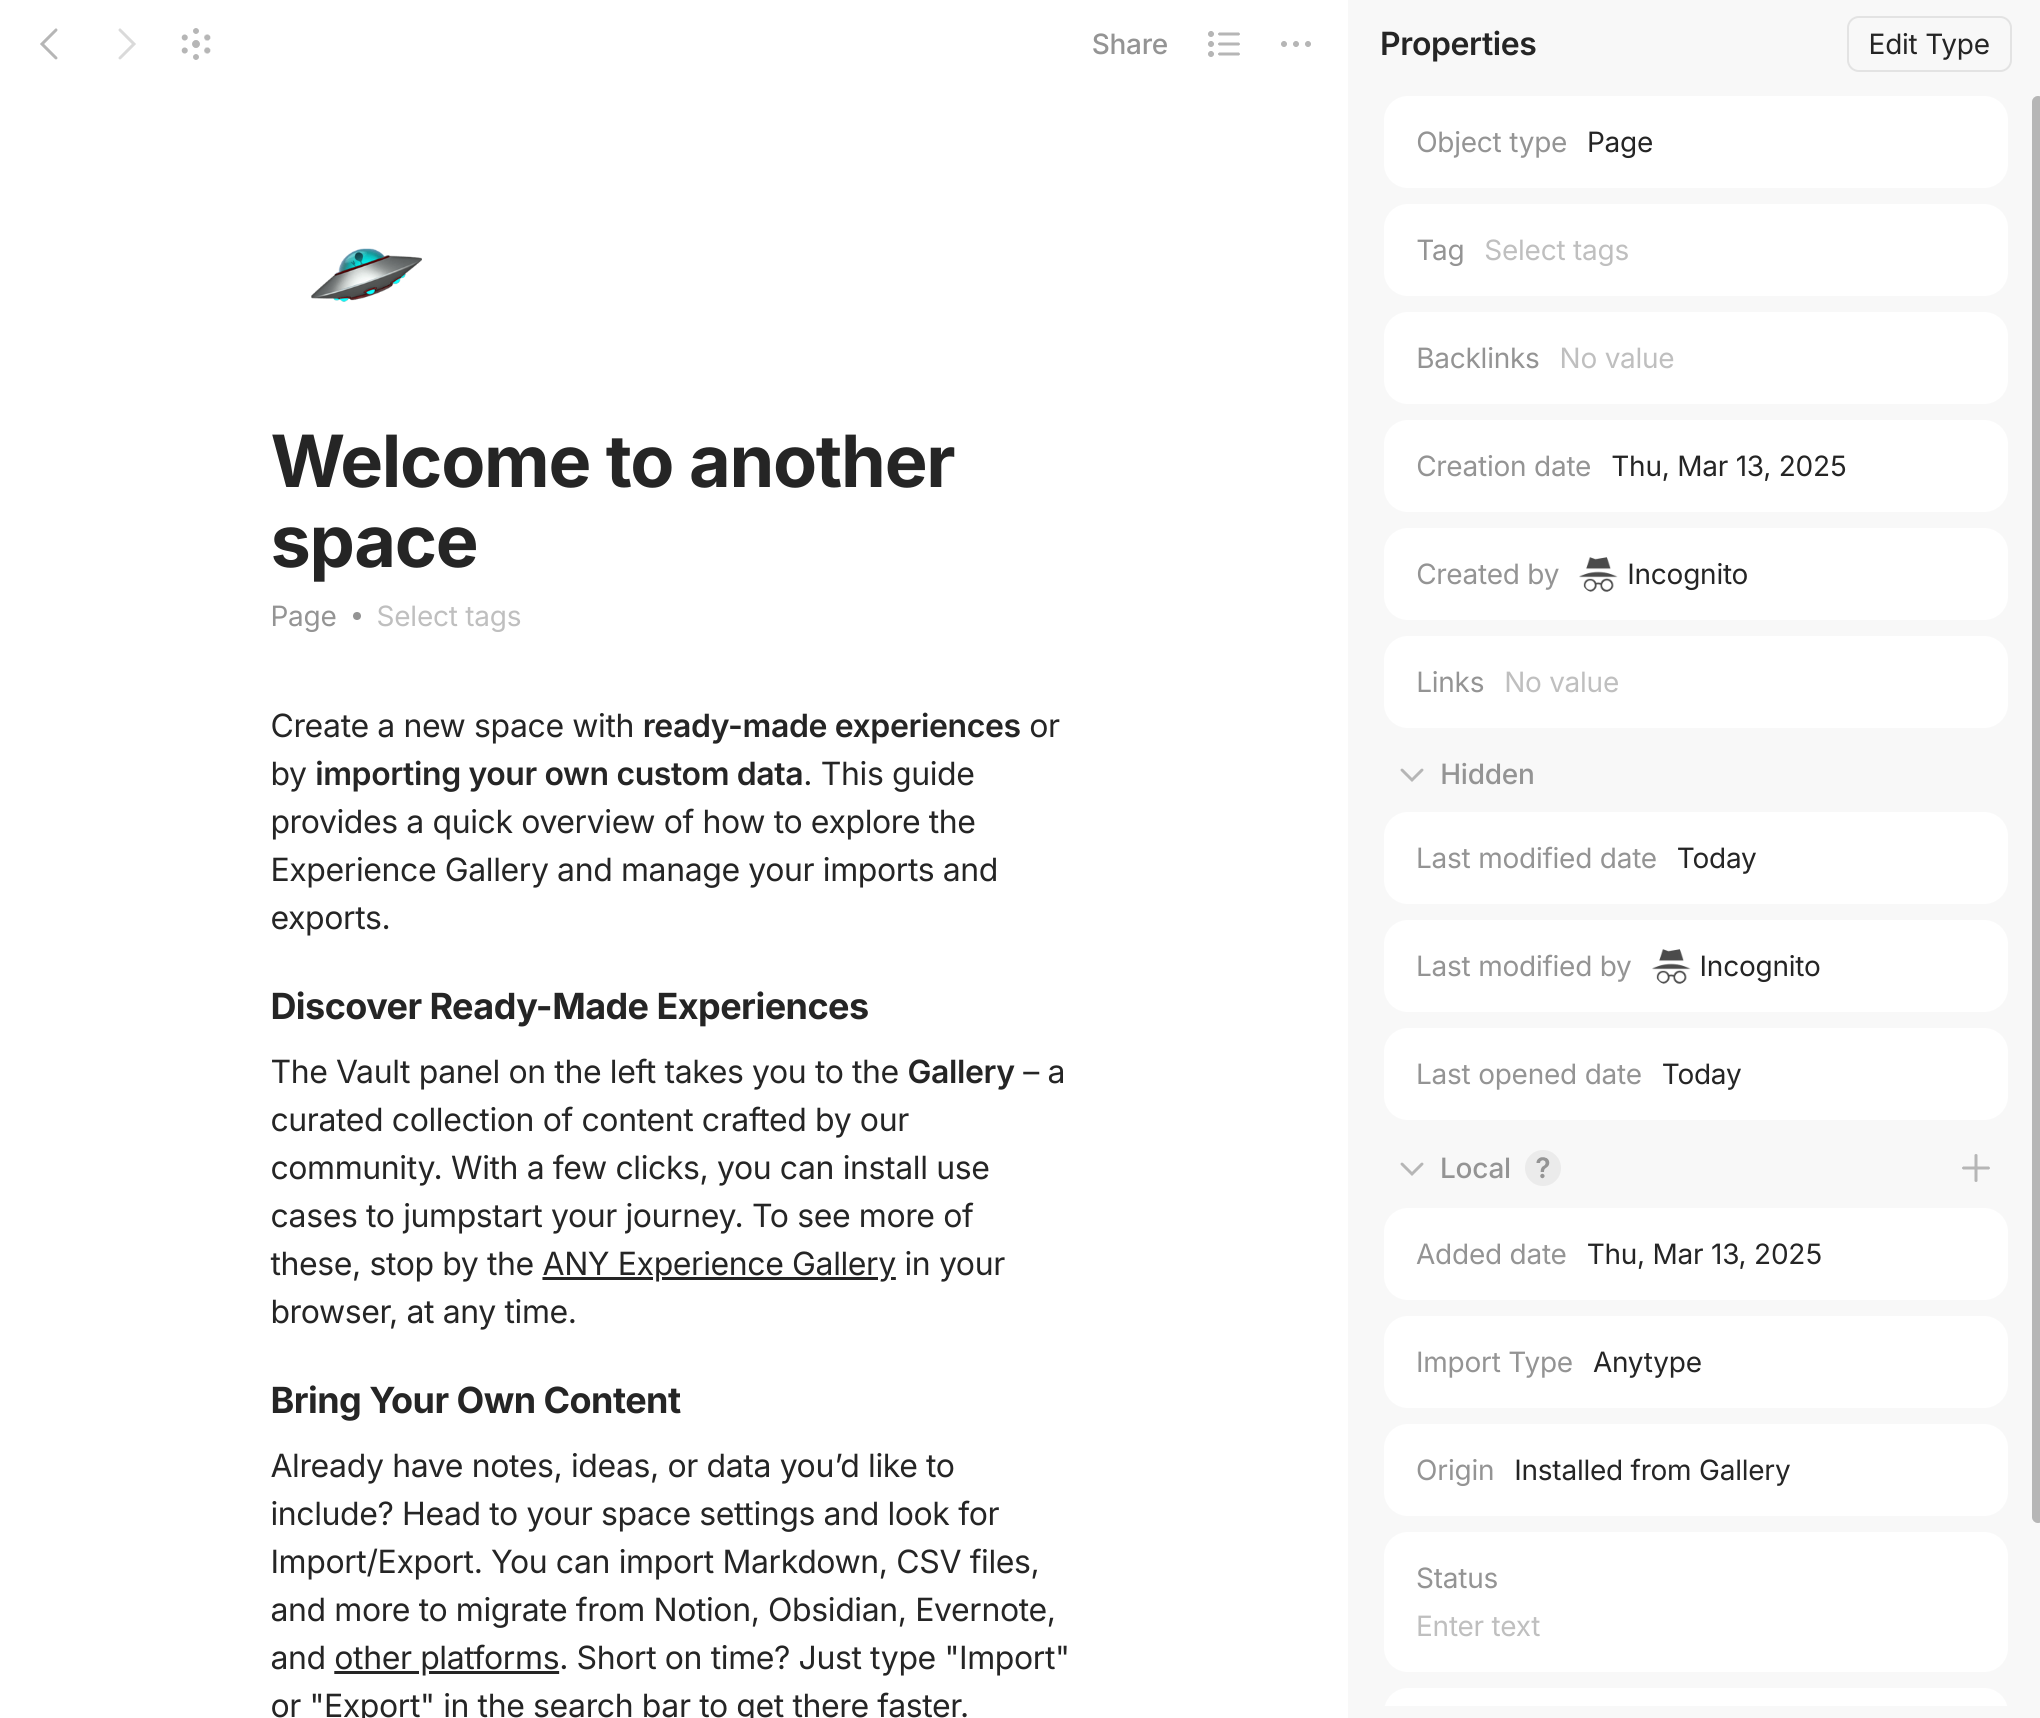
You can also manage the Properties for a given Object via its **Properties Panel:** the bullet list icon that appears in the top right corner of the screen. This Panel shows all Properties for that Object.

<div><figure><img src="/files/mLDjFe7IwVS6BQKkwKsz" alt=""><figcaption></figcaption></figure> <figure><img src="/files/8vioAwQBbN1ud8dROdtQ" alt=""><figcaption></figcaption></figure></div>

The Properties icon lets you view the properties of a specific object, while the Set up menu allows you to manage the properties of its Type – you can add, remove and organize them into different sections:

* Header properties appear in the header part of every object of that Type
* Panel properties are those that will be shown by pressing Properties icon
* Hidden properties live under the "Hidden" toggle
* Local properties are those that are not associated with the Object's Type

<figure><img src="/files/C0mLkzbt3FC7ga6zRzgJ" alt="" width="563"><figcaption></figcaption></figure>


# Templates

Templates are one of our most-beloved ways to work at Anytype, designed to help you scale and personalize your Object creation flows. With Templates, you can:

* Customize the cover or icon you want to use to for certain object Types
* Automatically re-use the same structure each time you add a new Object

Templates are saved on the Type level, and each Type can support multiple Templates. For example, you can have different Templates for different kinds of Books, like academic, fiction, or non-fiction.

### How to Create a Template

There are three ways to add a Template:

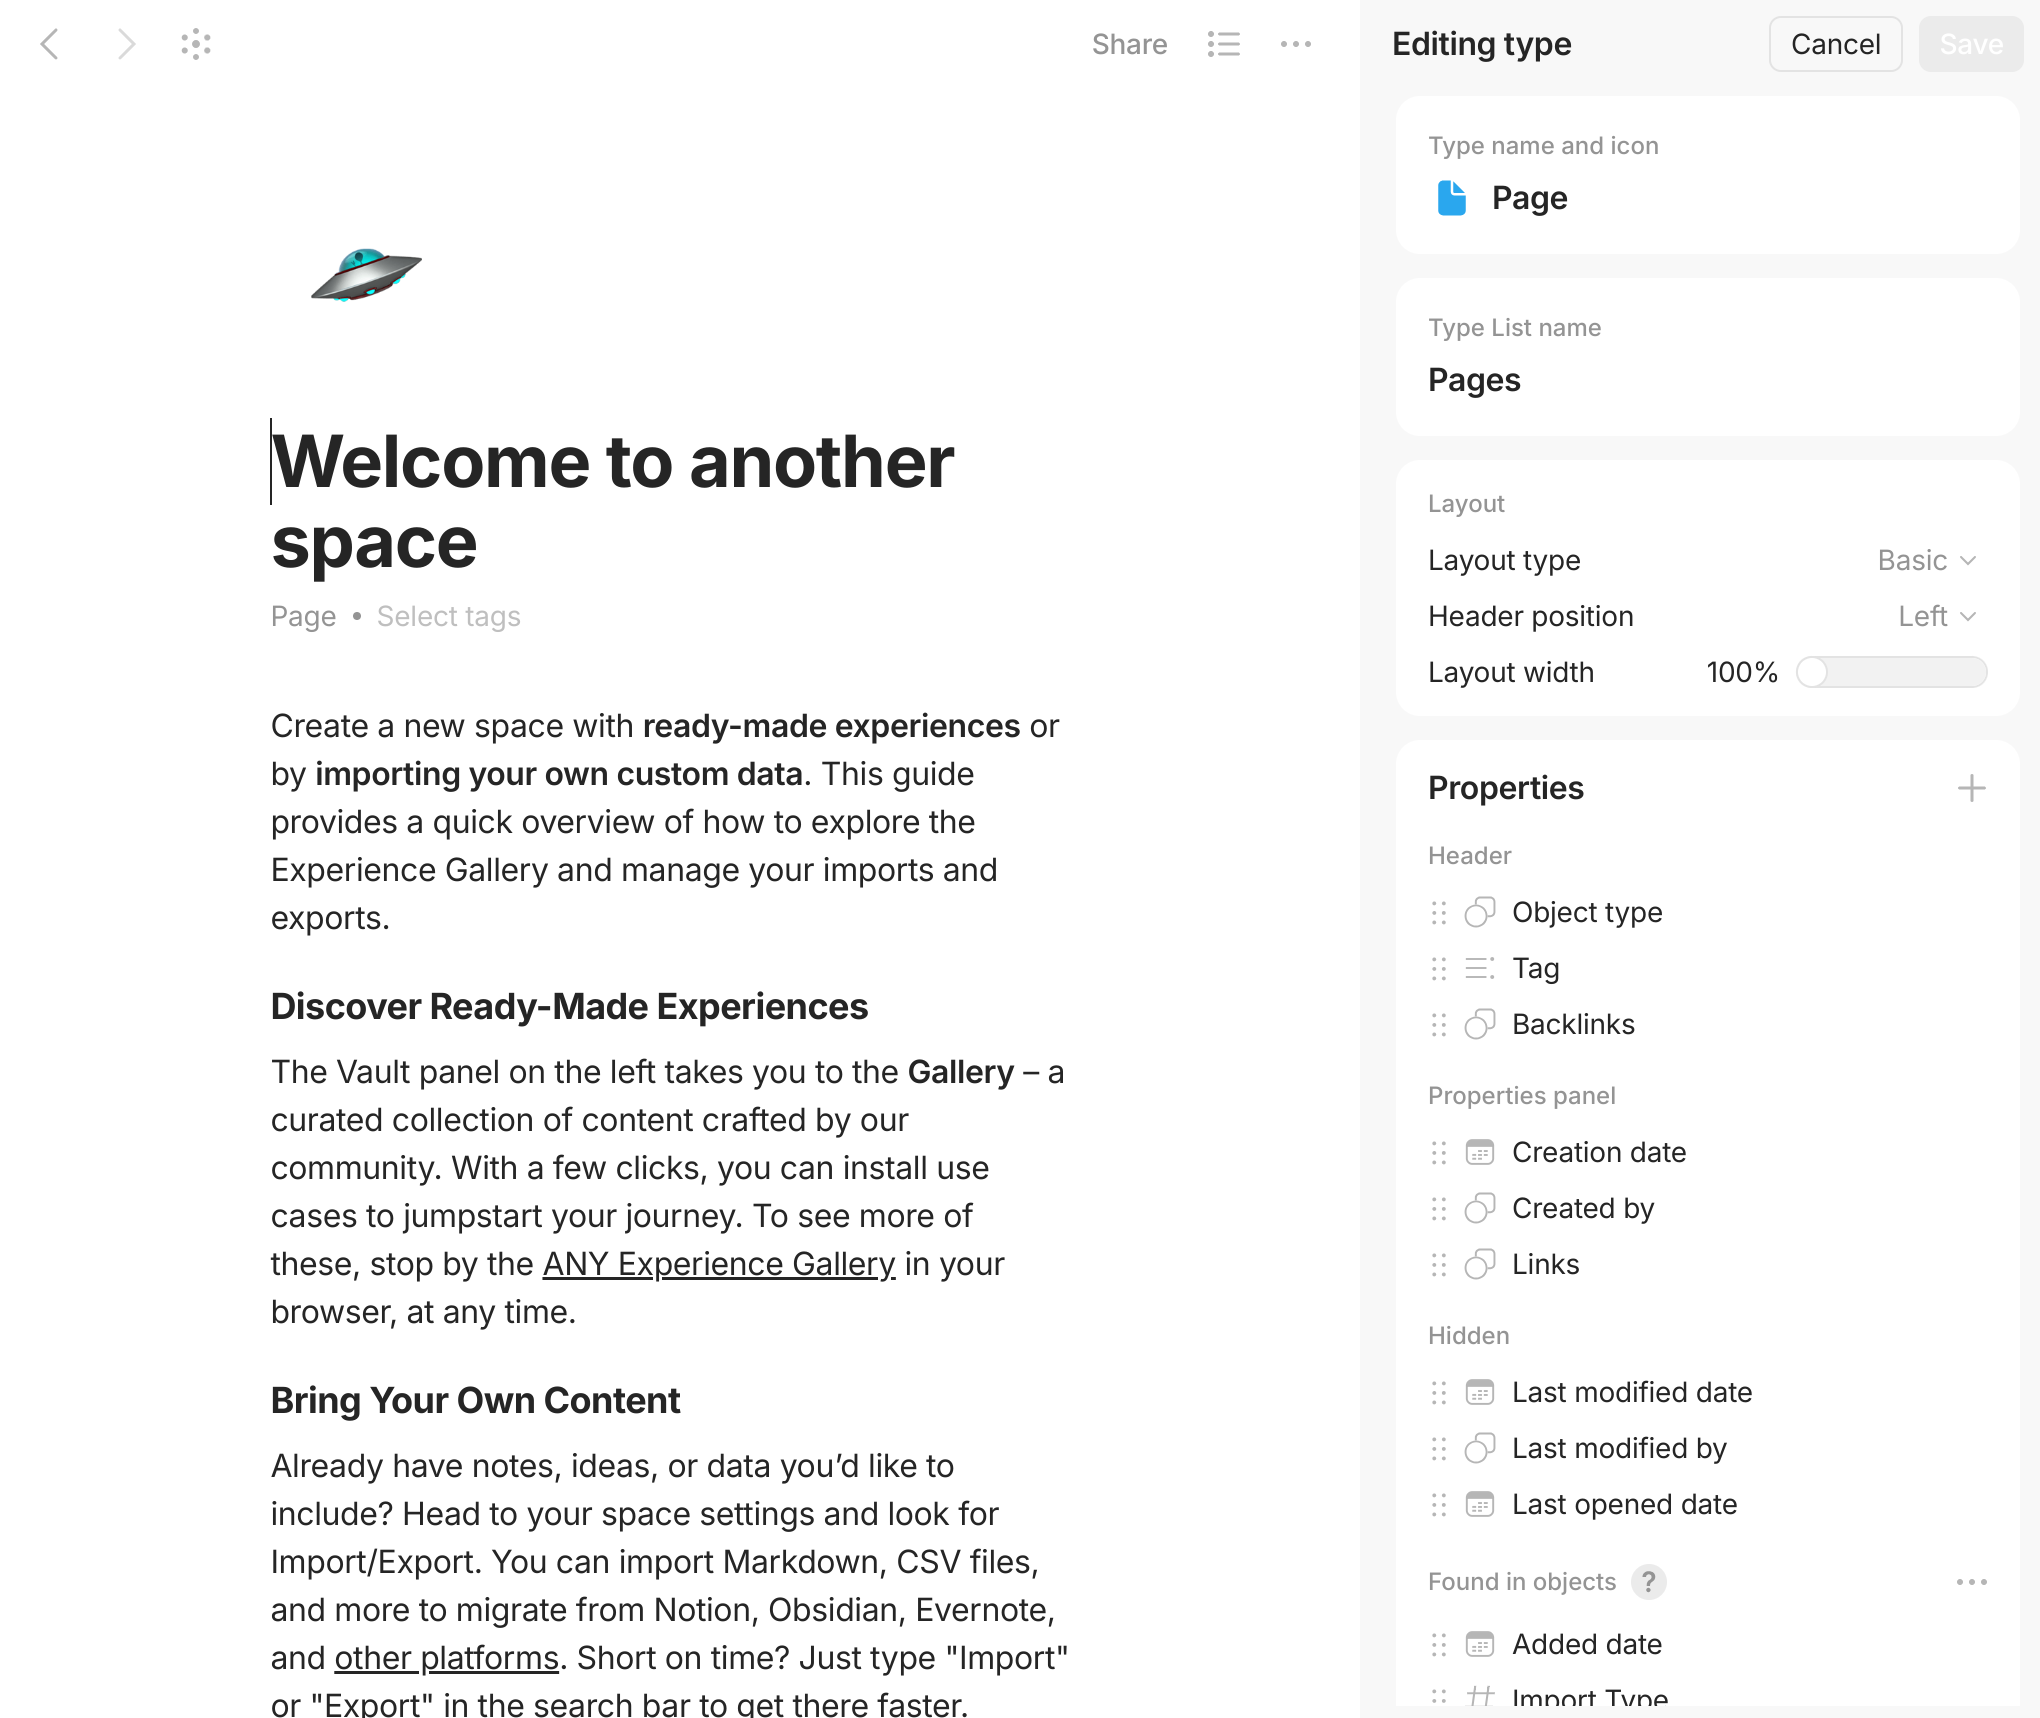
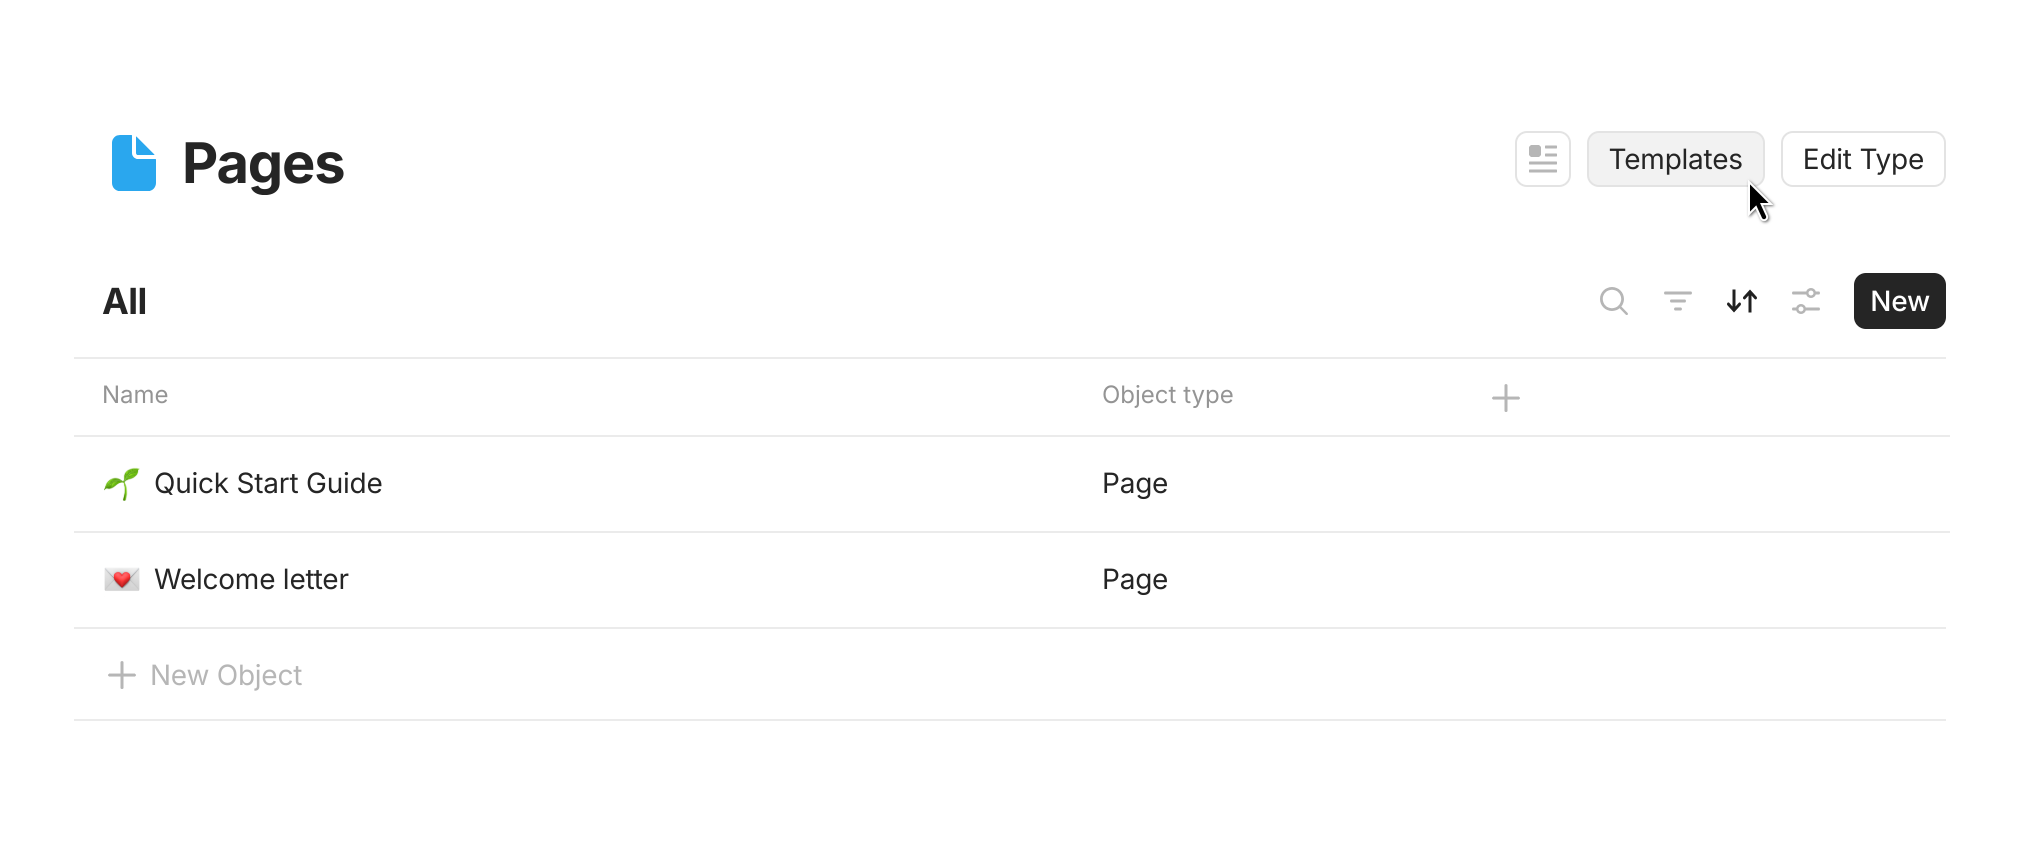
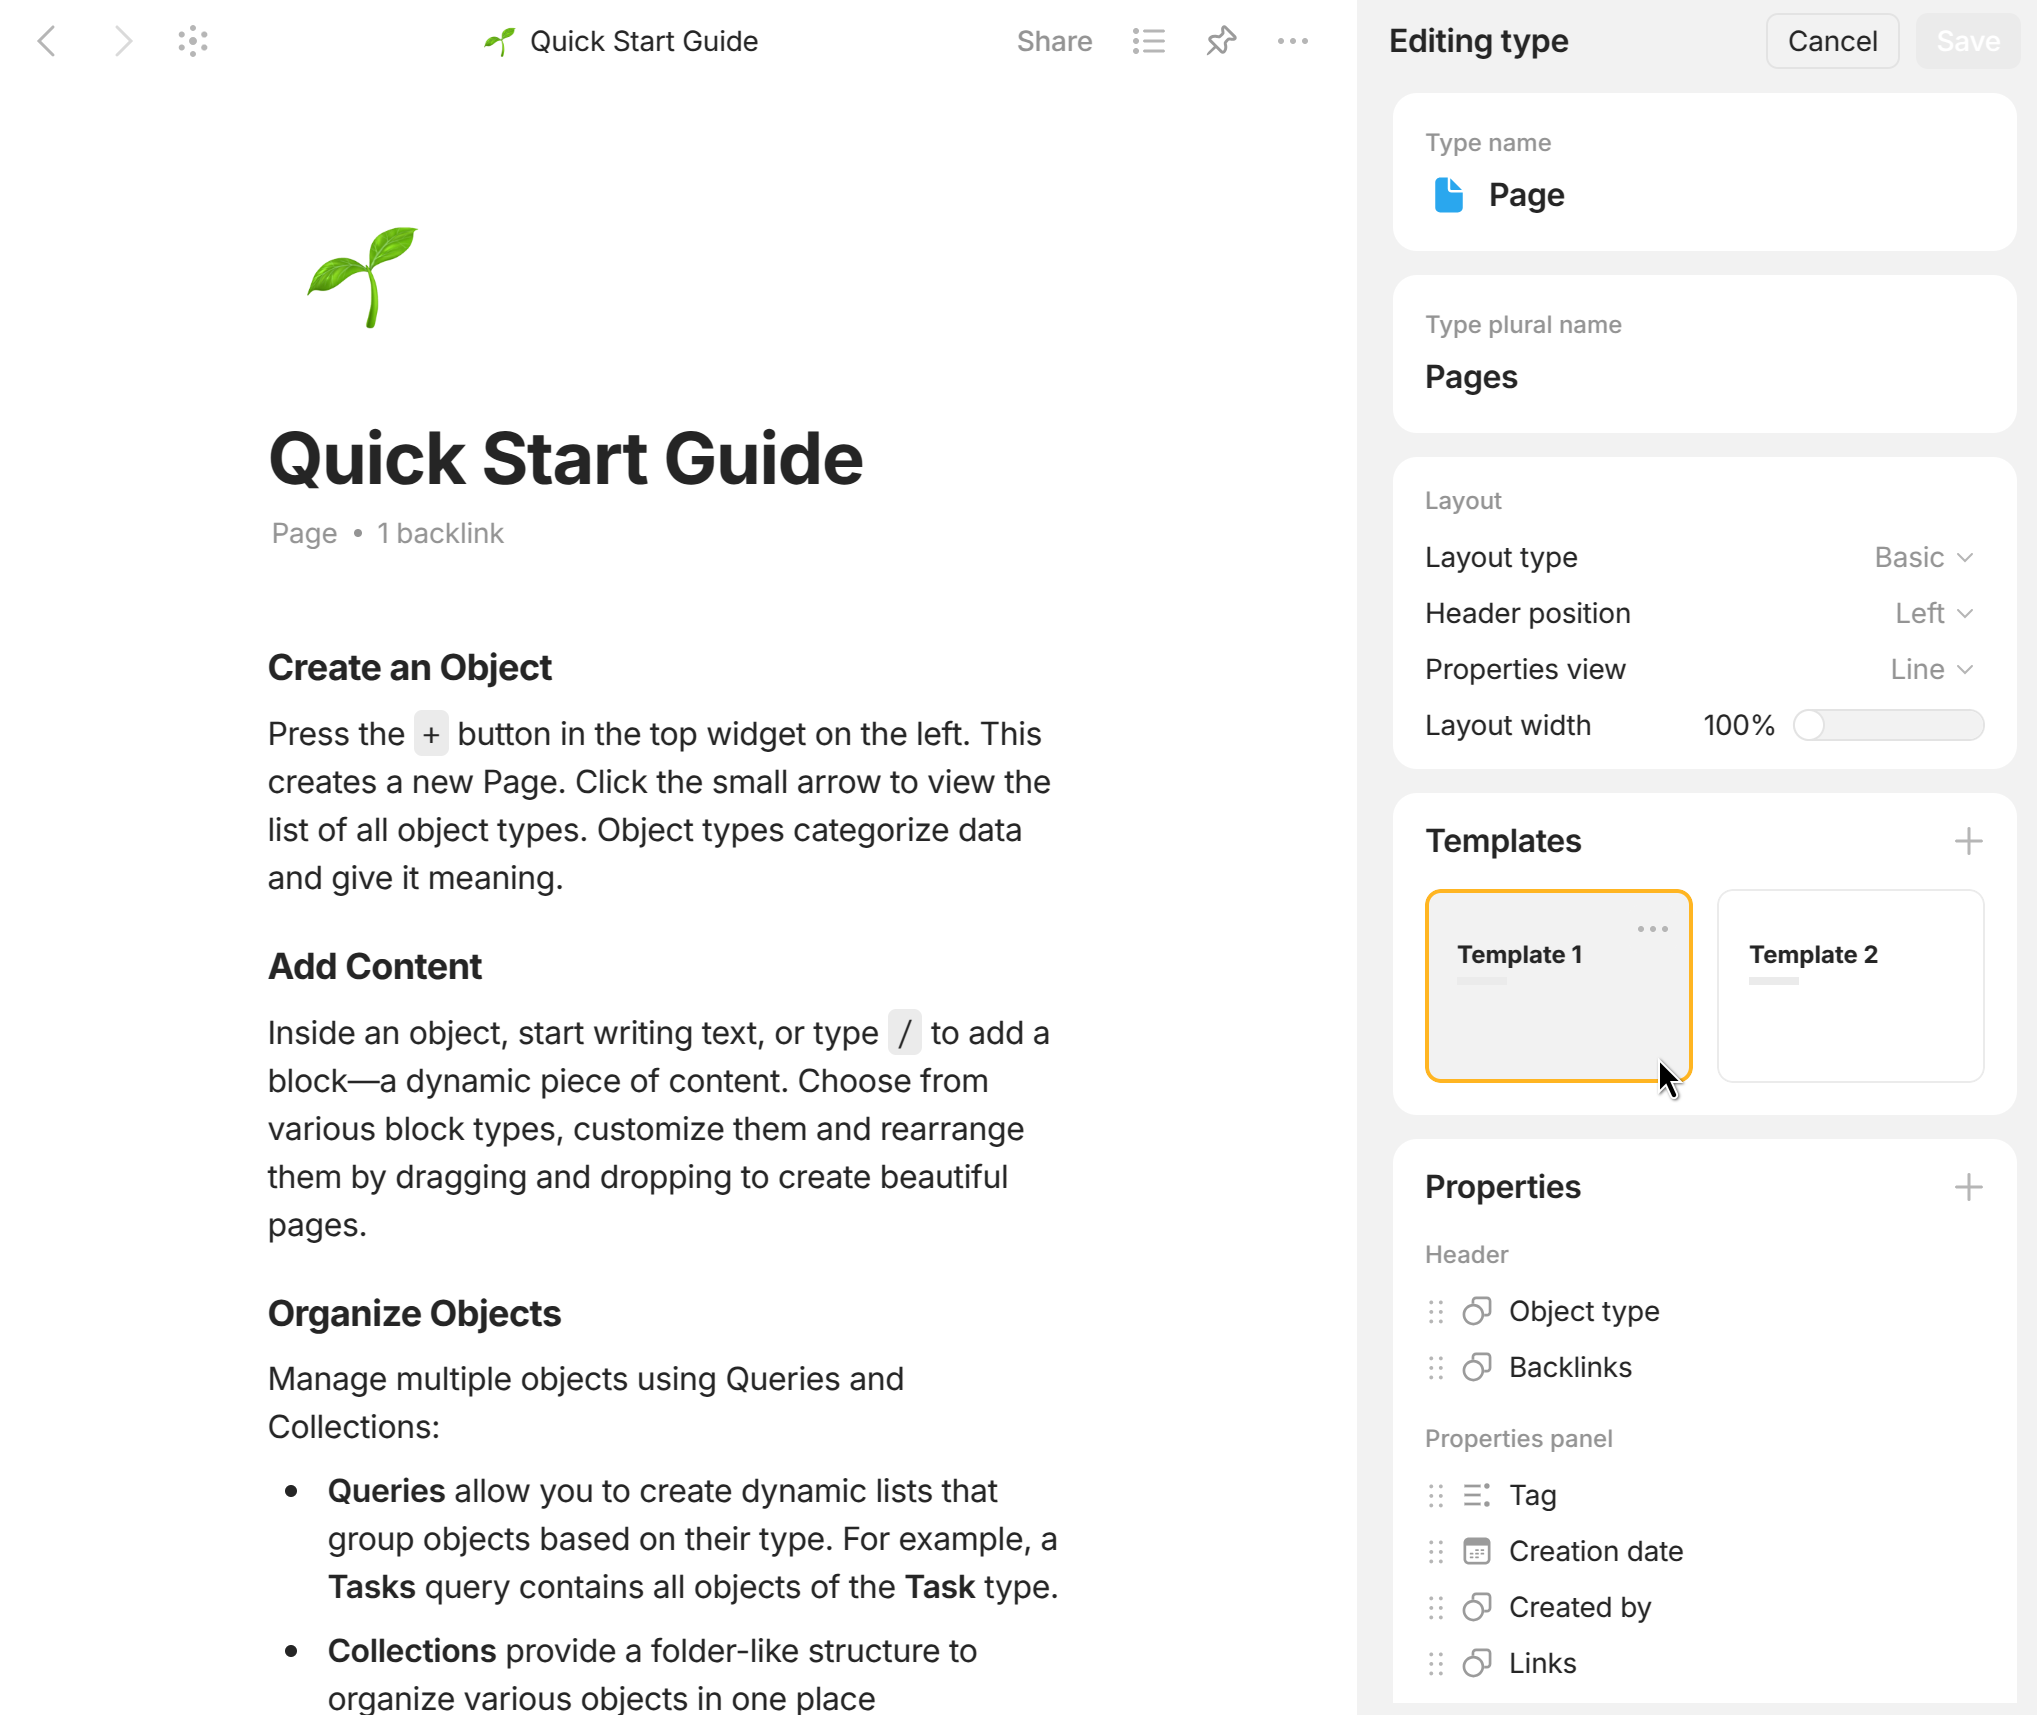
1\) Navigate to `Channel > Content Model > Object Types` → Click the Type for which you'd like to create a Template → Click on Templates in the top right corner → Click + to start creating a new template → Give your Template a name and start adding Properties and formatting → Your Template is auto-saved

<div><figure><img src="/files/uT2cklYIzgKUUE3nEHX0" alt=""><figcaption></figcaption></figure> <figure><img src="/files/t27MhkurVObv4iLB7Pxq" alt=""><figcaption></figcaption></figure></div>

You can also manage templates directly from the Edit Type menu, accessible from every object.

<figure><img src="/files/AaubcRwvxgHIW3NLpxYc" alt="" width="375"><figcaption></figcaption></figure>

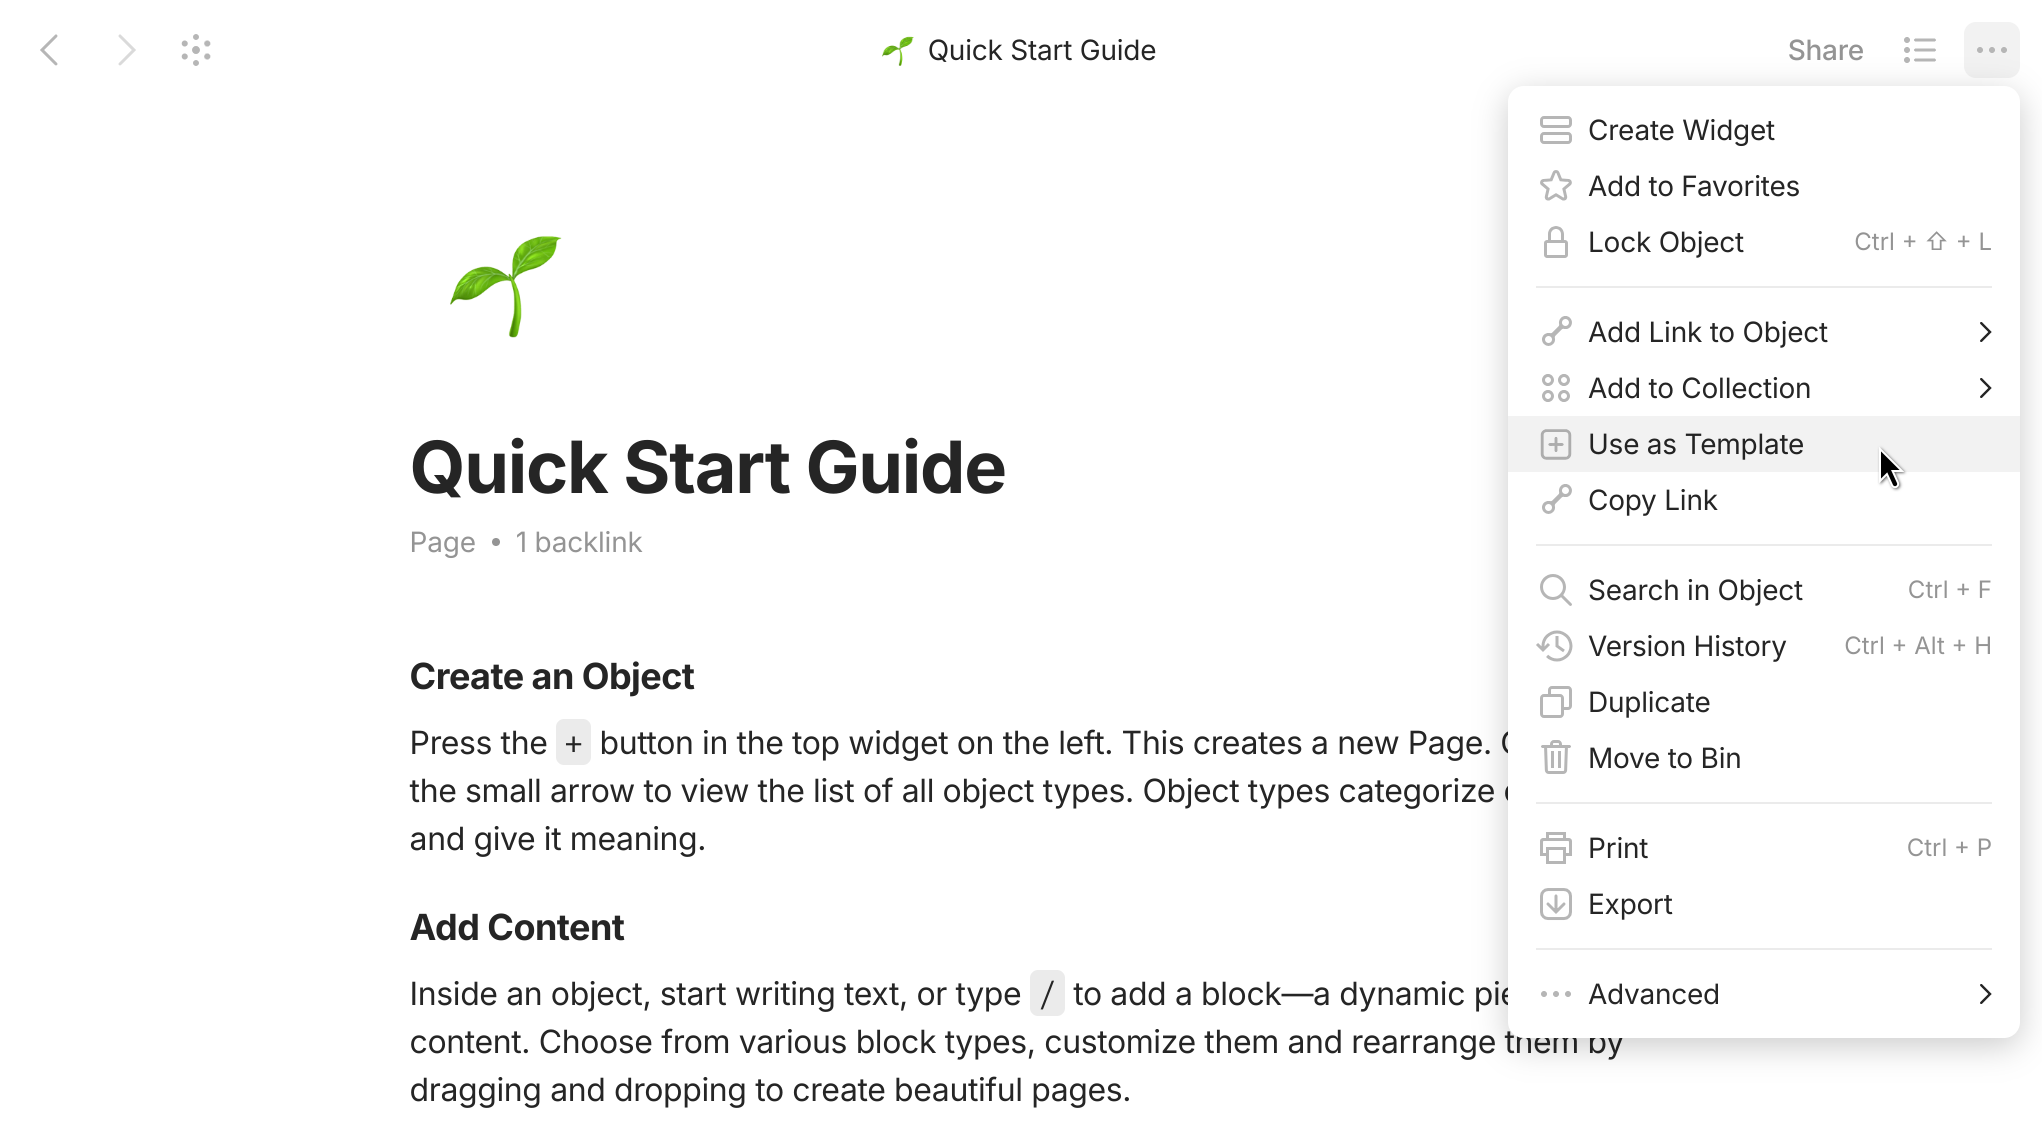
2\) If you're working within an Object and would like to save your work as a Template, you can: Navigate to `···` in the top-right corner → Click + Use as a Template, and your content will automatically be saved as a new Template for this Object Type.

<figure><img src="/files/Ftc0loFc9AQYXJ7JX0rE" alt="" width="563"><figcaption></figcaption></figure>

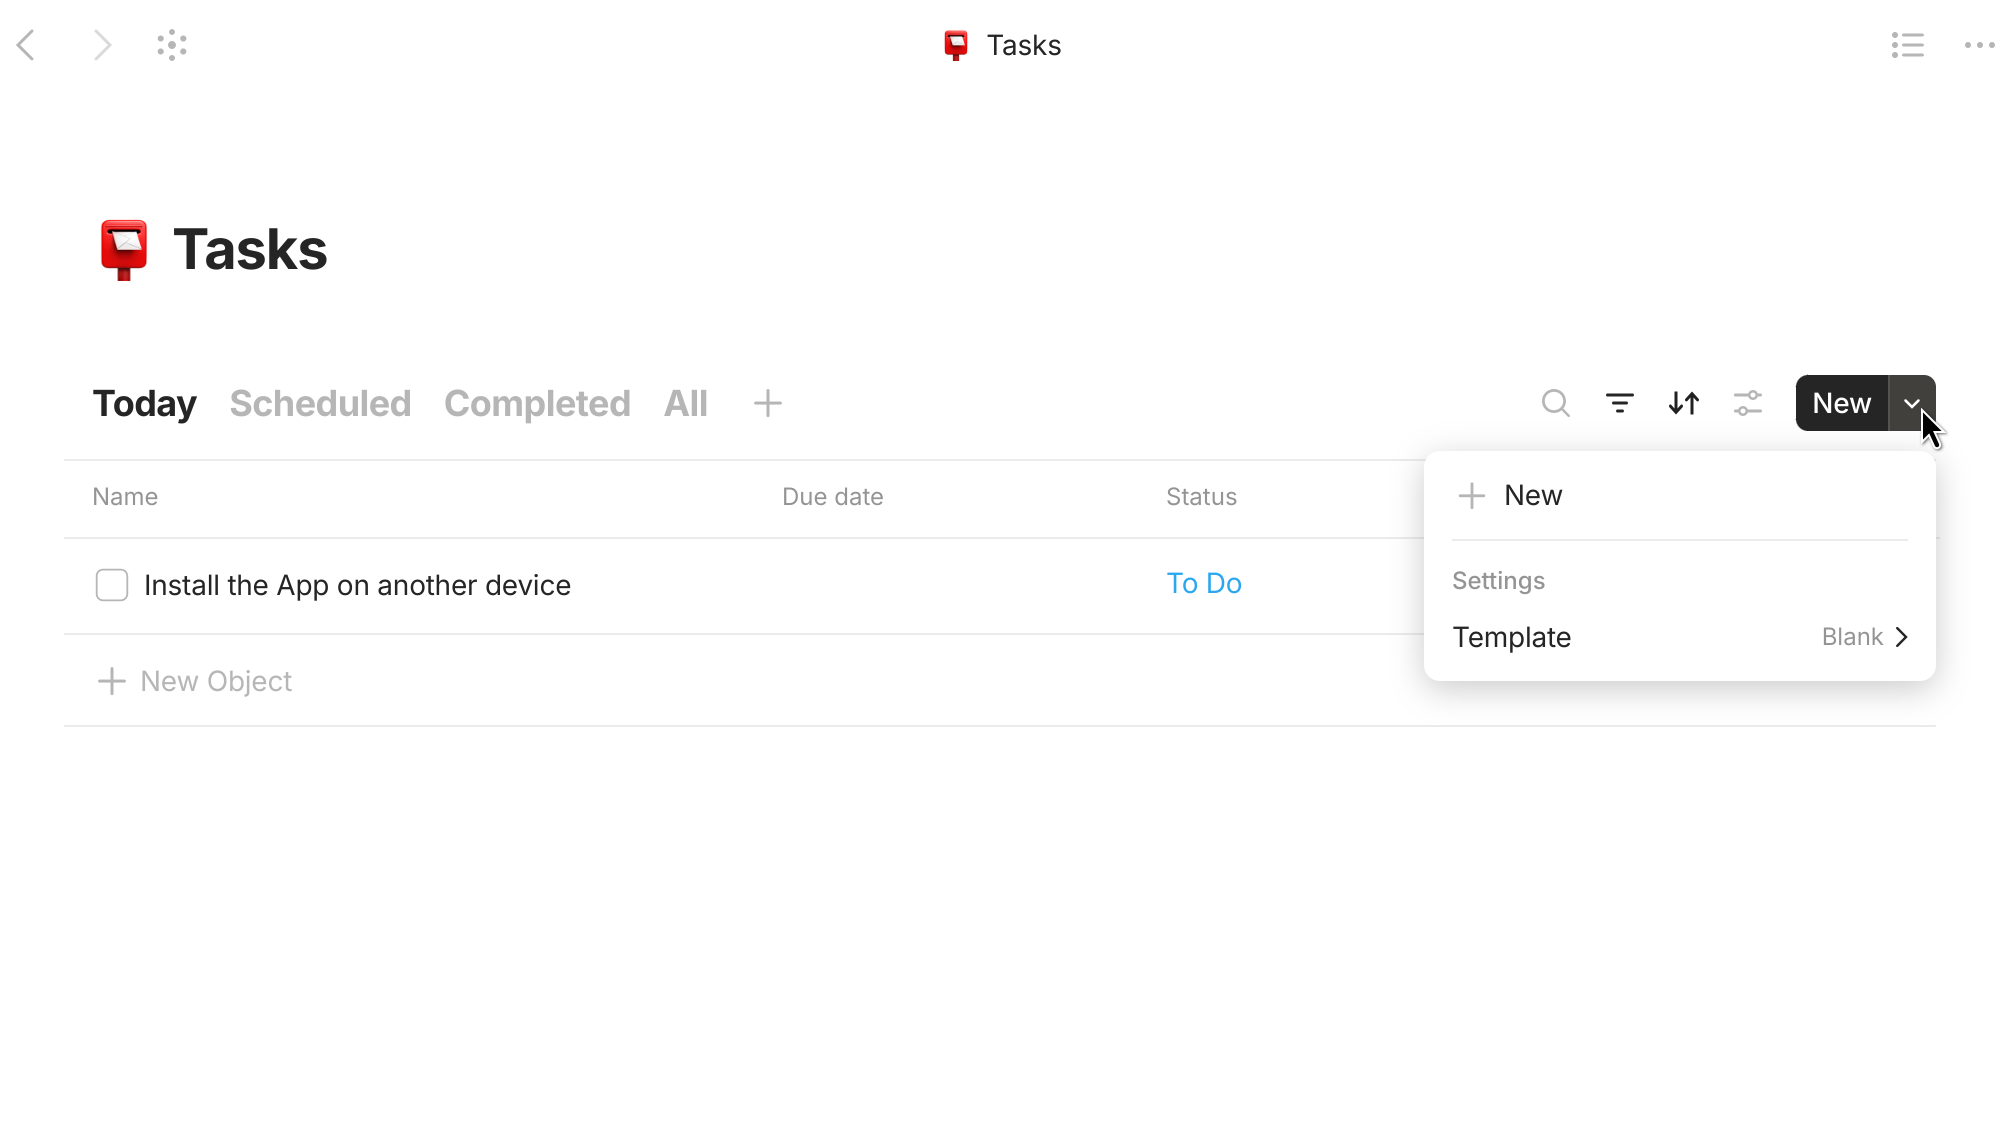
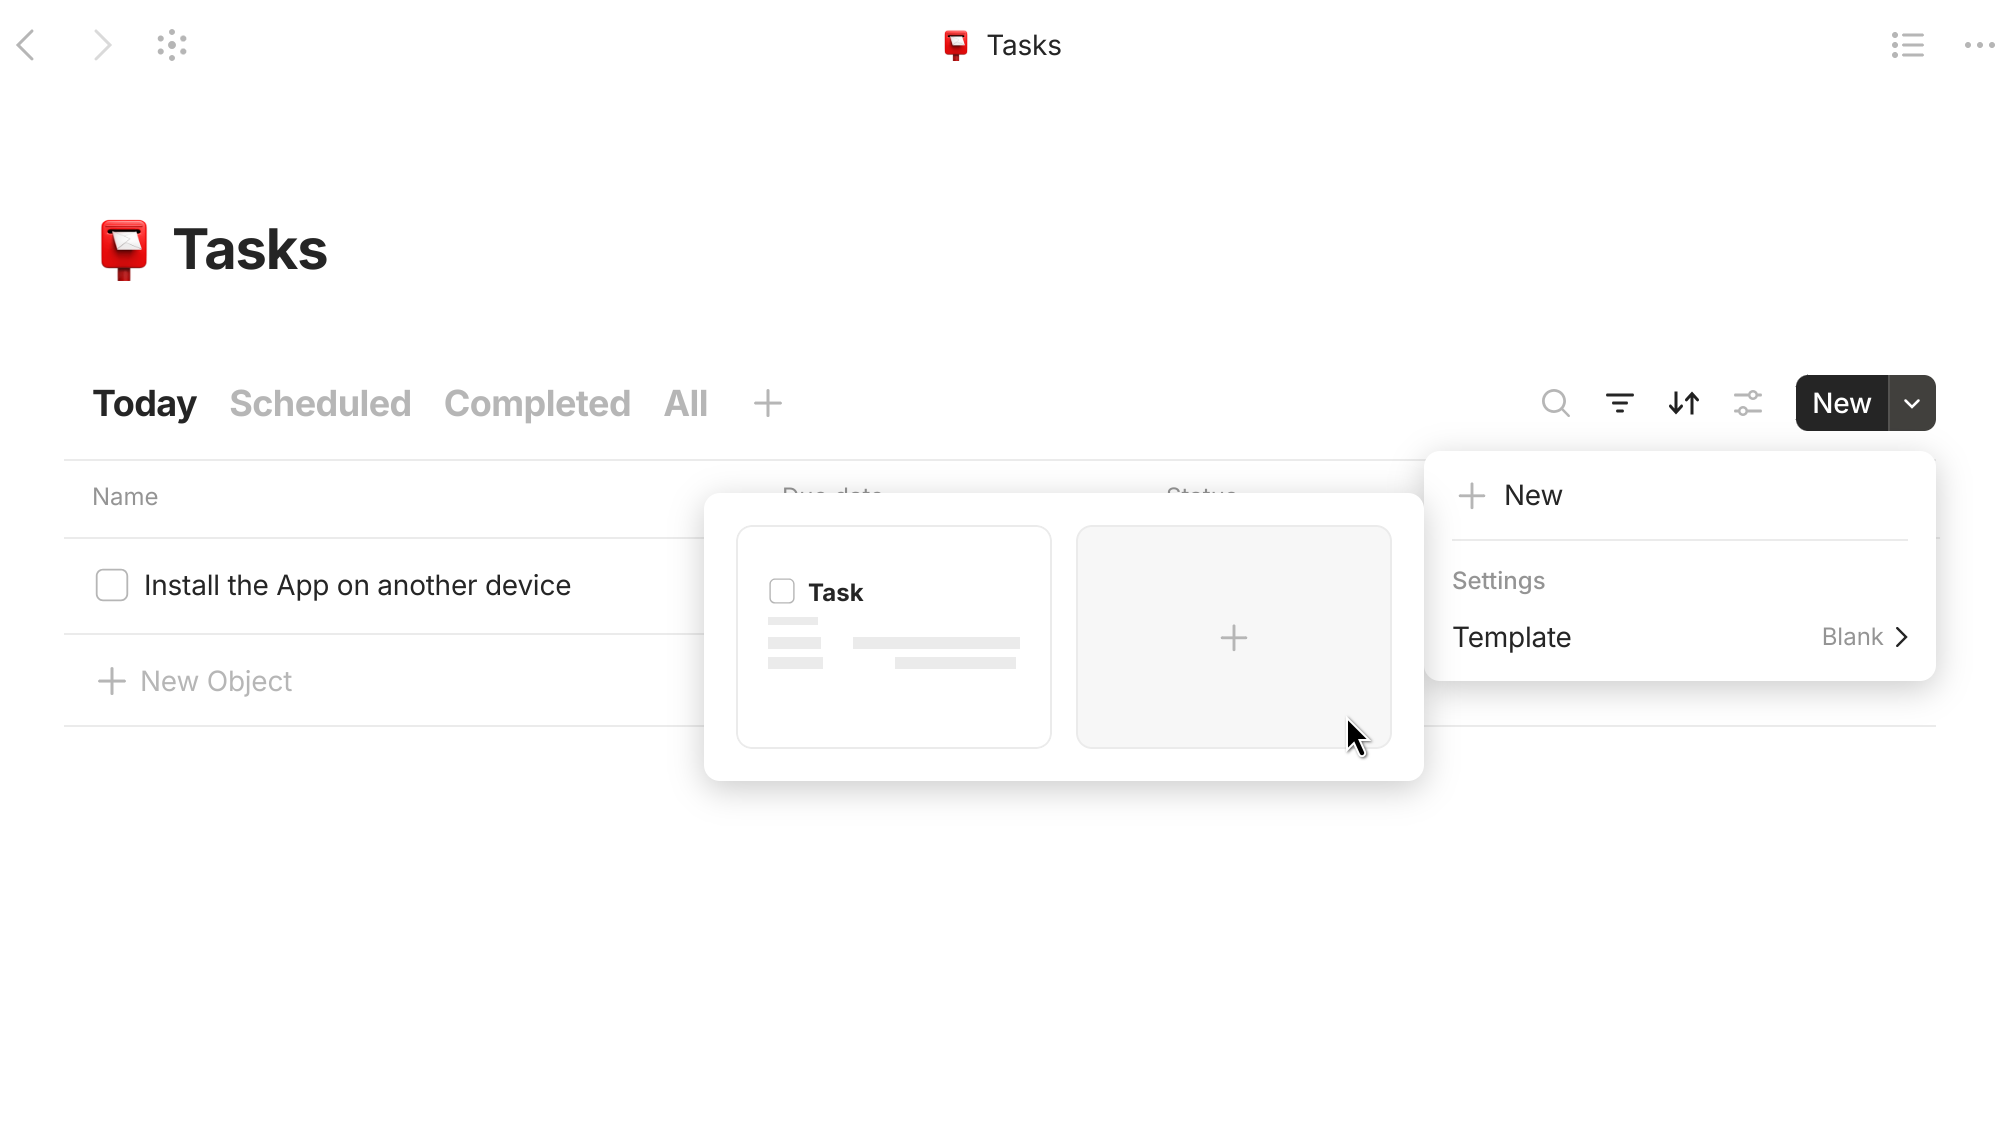
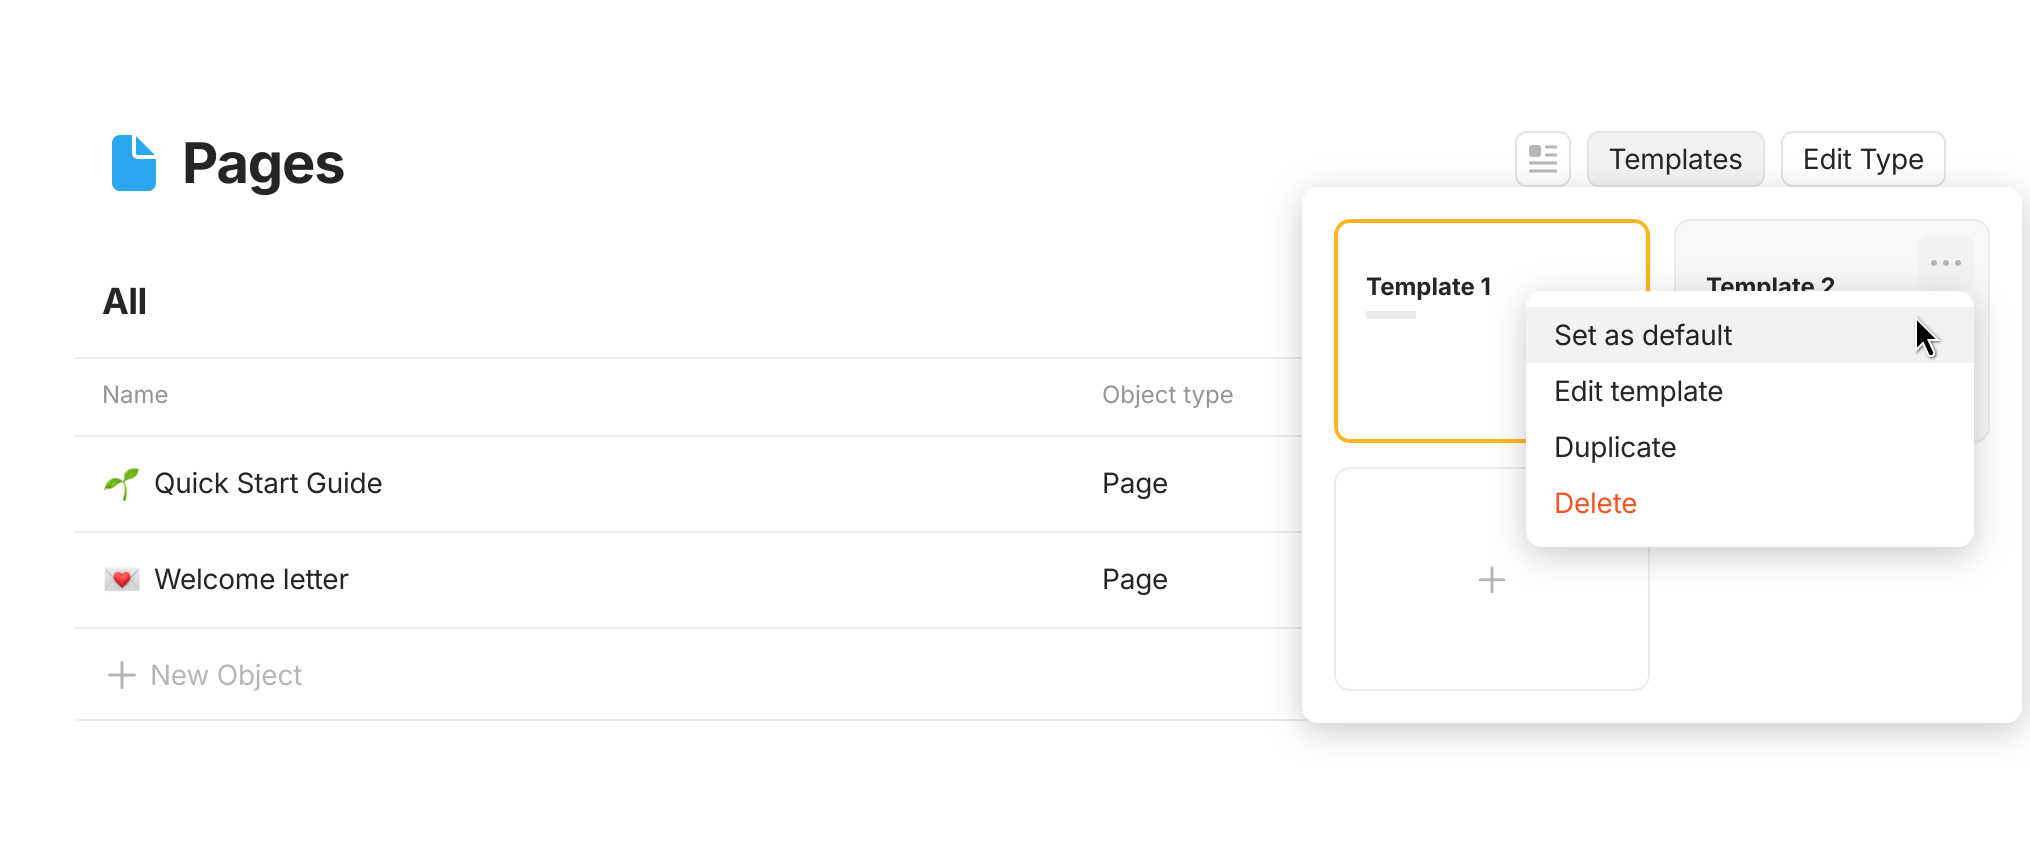
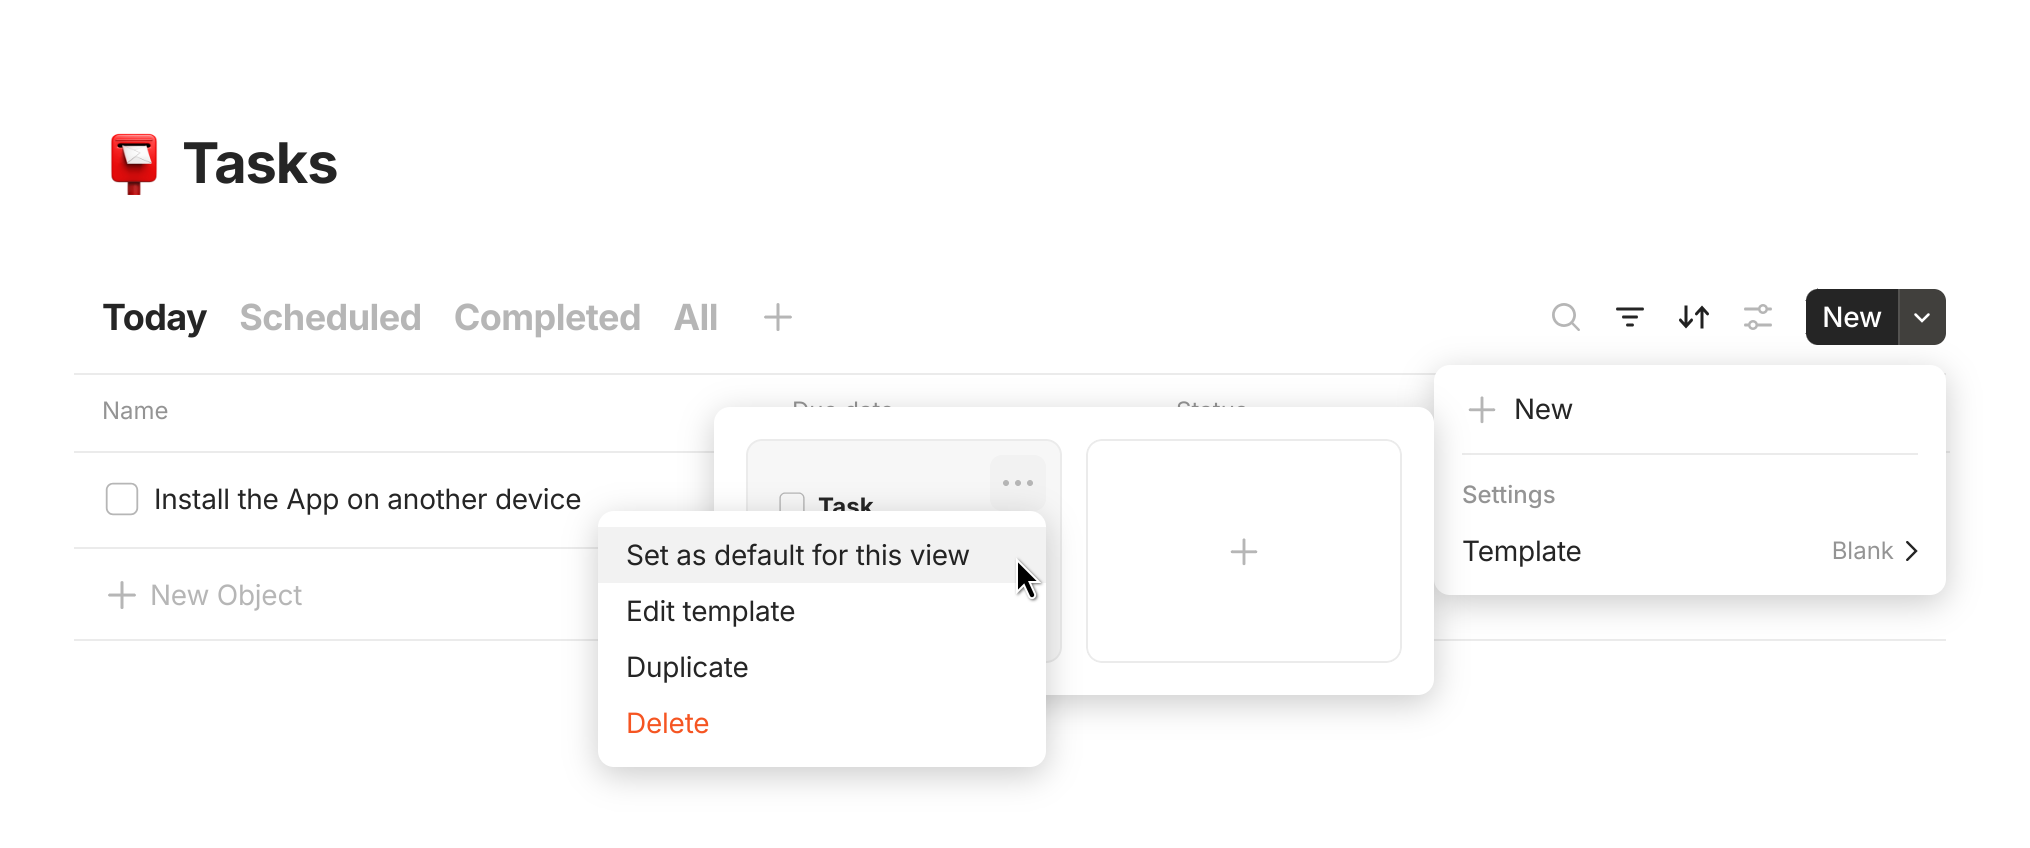
3\) If you are working in a List and you would like to create / edit your templates, you can:\
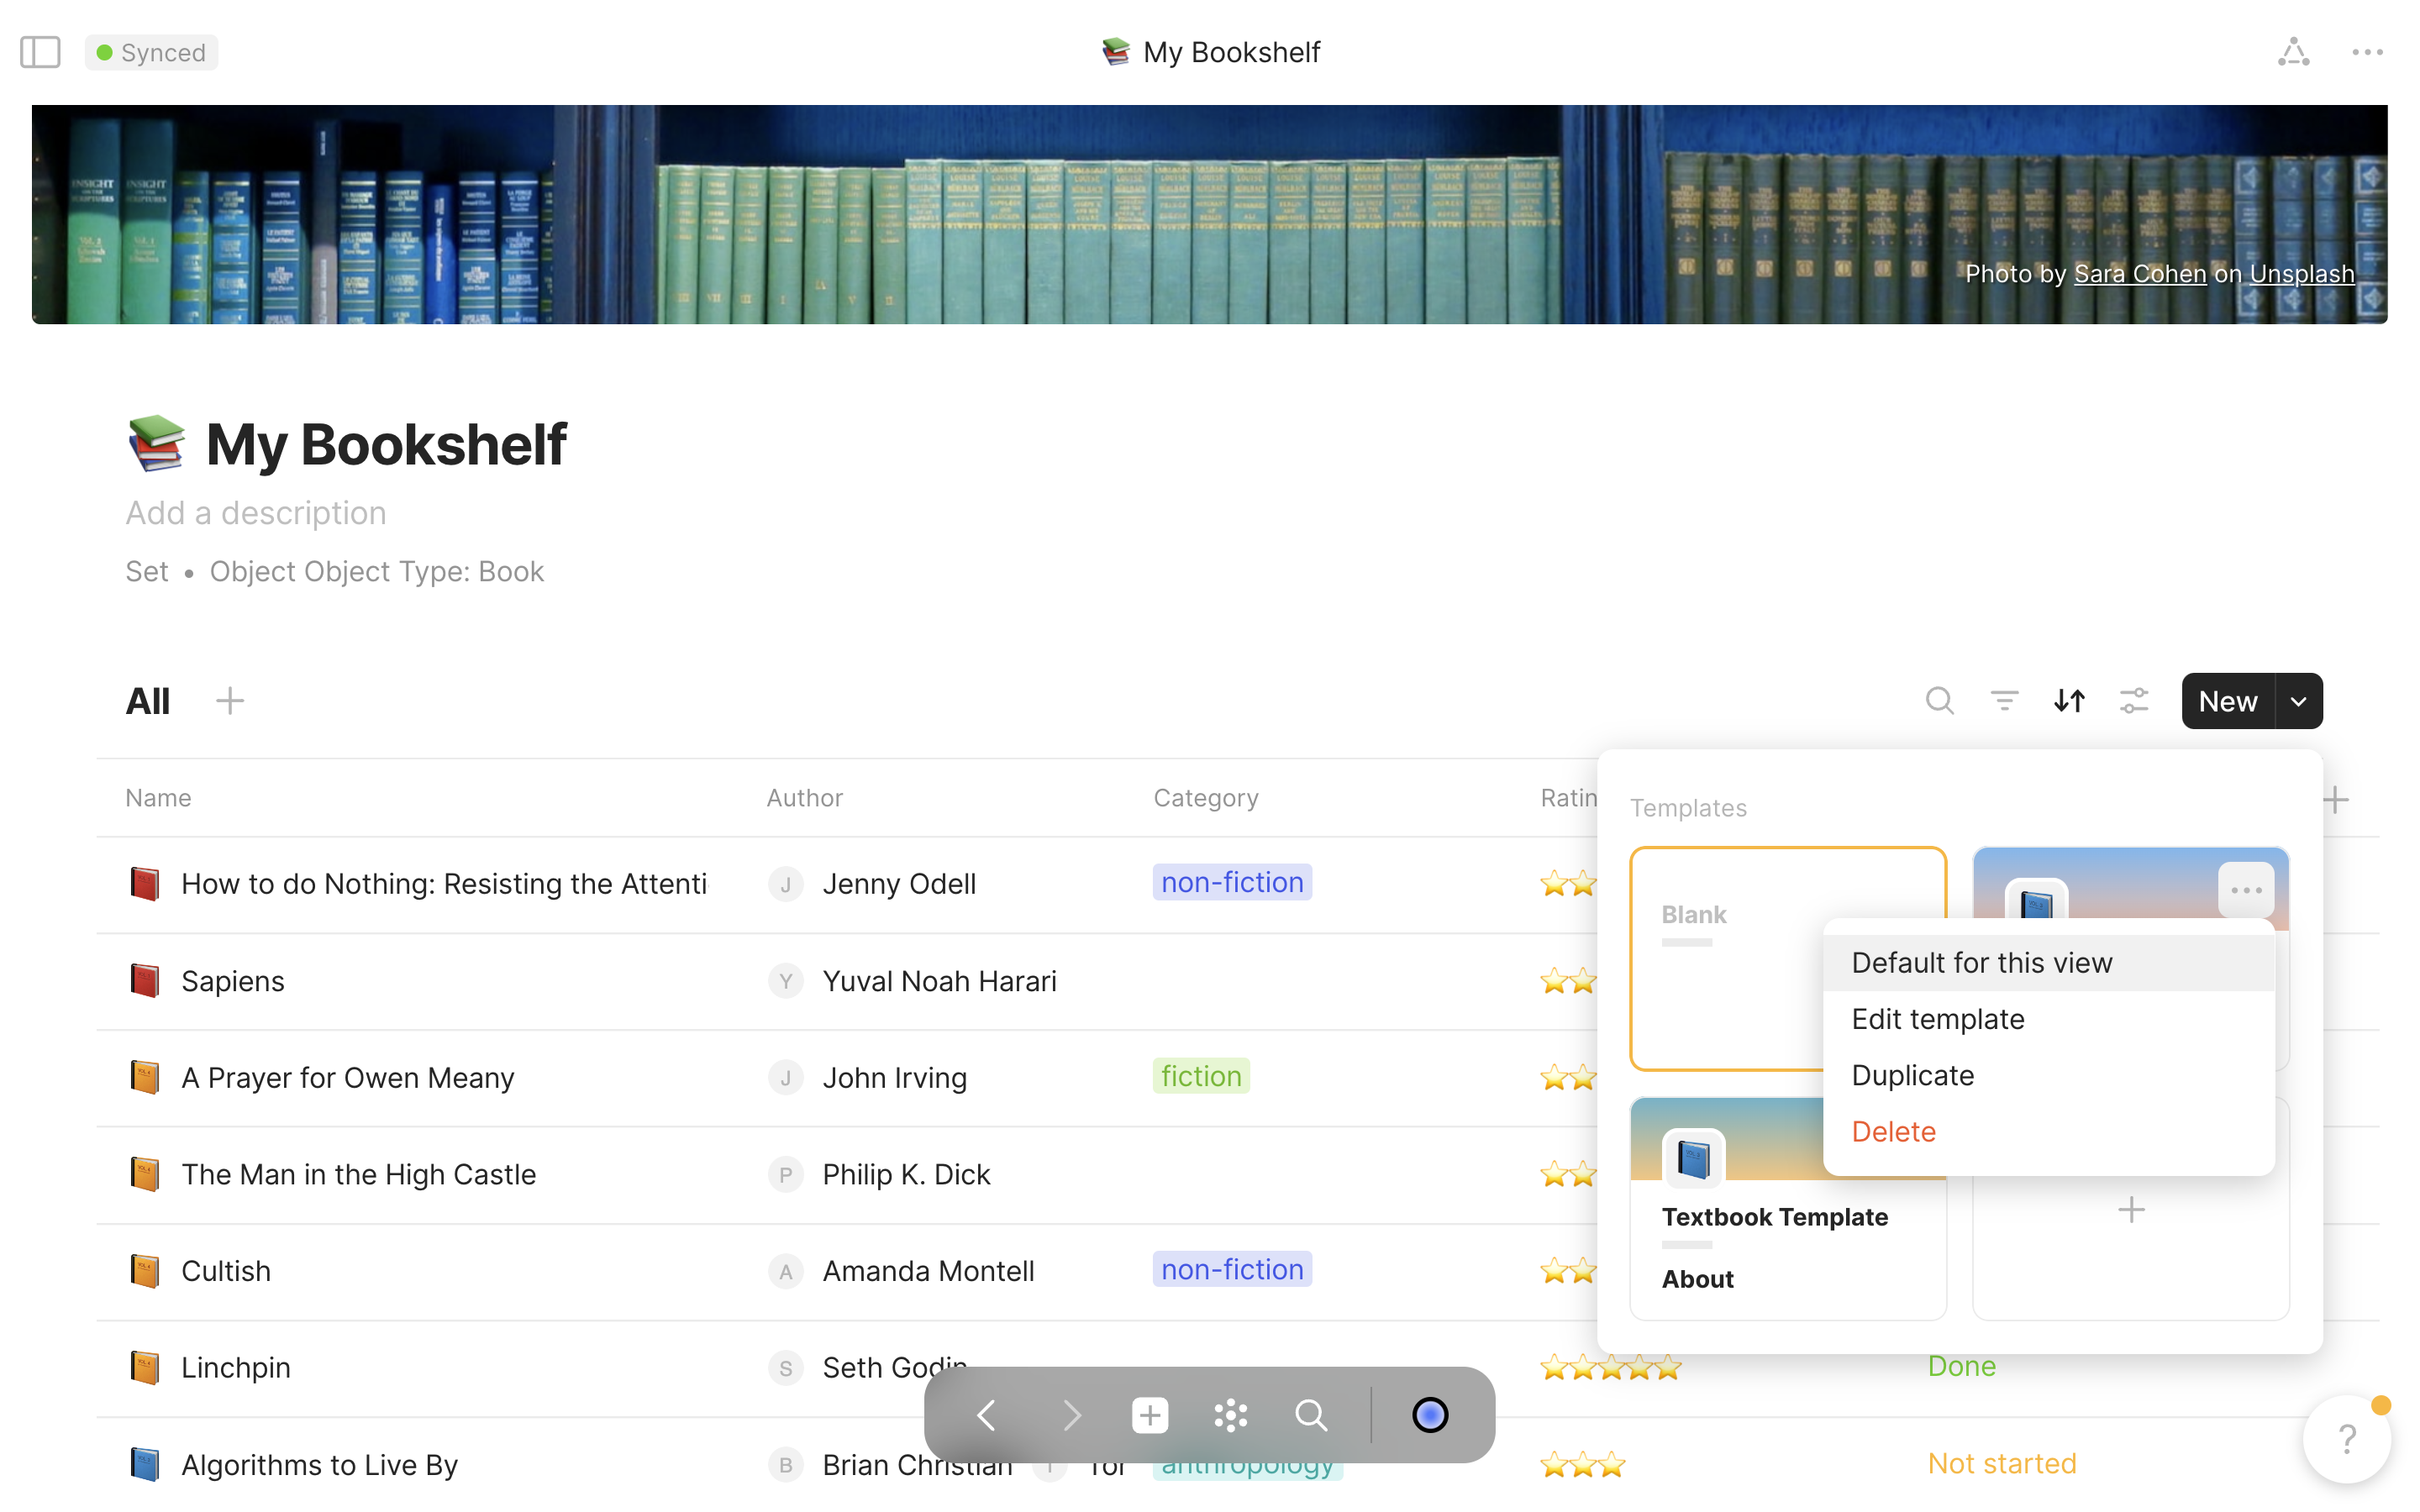
Navigate to `New|▾` in the top-right corner of the List view -> Click on the `▾` button to open up the template modal. Then either create a new template by using the `+` button, or modify an existing one by clicking on `···` in the top right corner of the template button, and choosing either `Edit template`, `Duplicate` or `Delete`.

<div><figure><img src="/files/joEq3UTwzXl1dLOQxu0H" alt=""><figcaption></figcaption></figure> <figure><img src="/files/cDzWtyshLtTCuzhCYmQ7" alt=""><figcaption></figcaption></figure></div>

### Using & Managing Templates

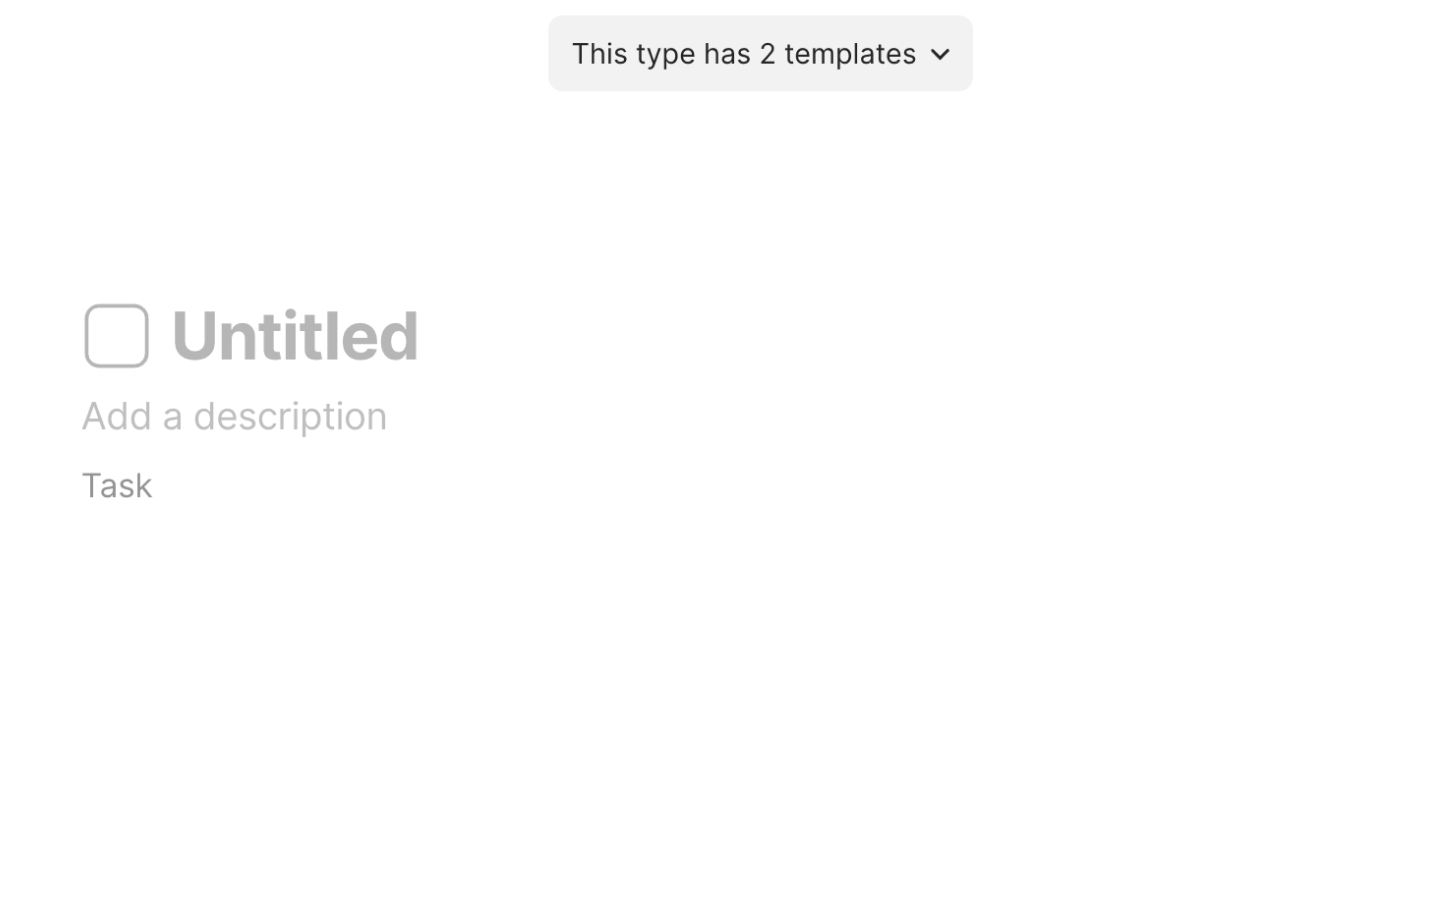
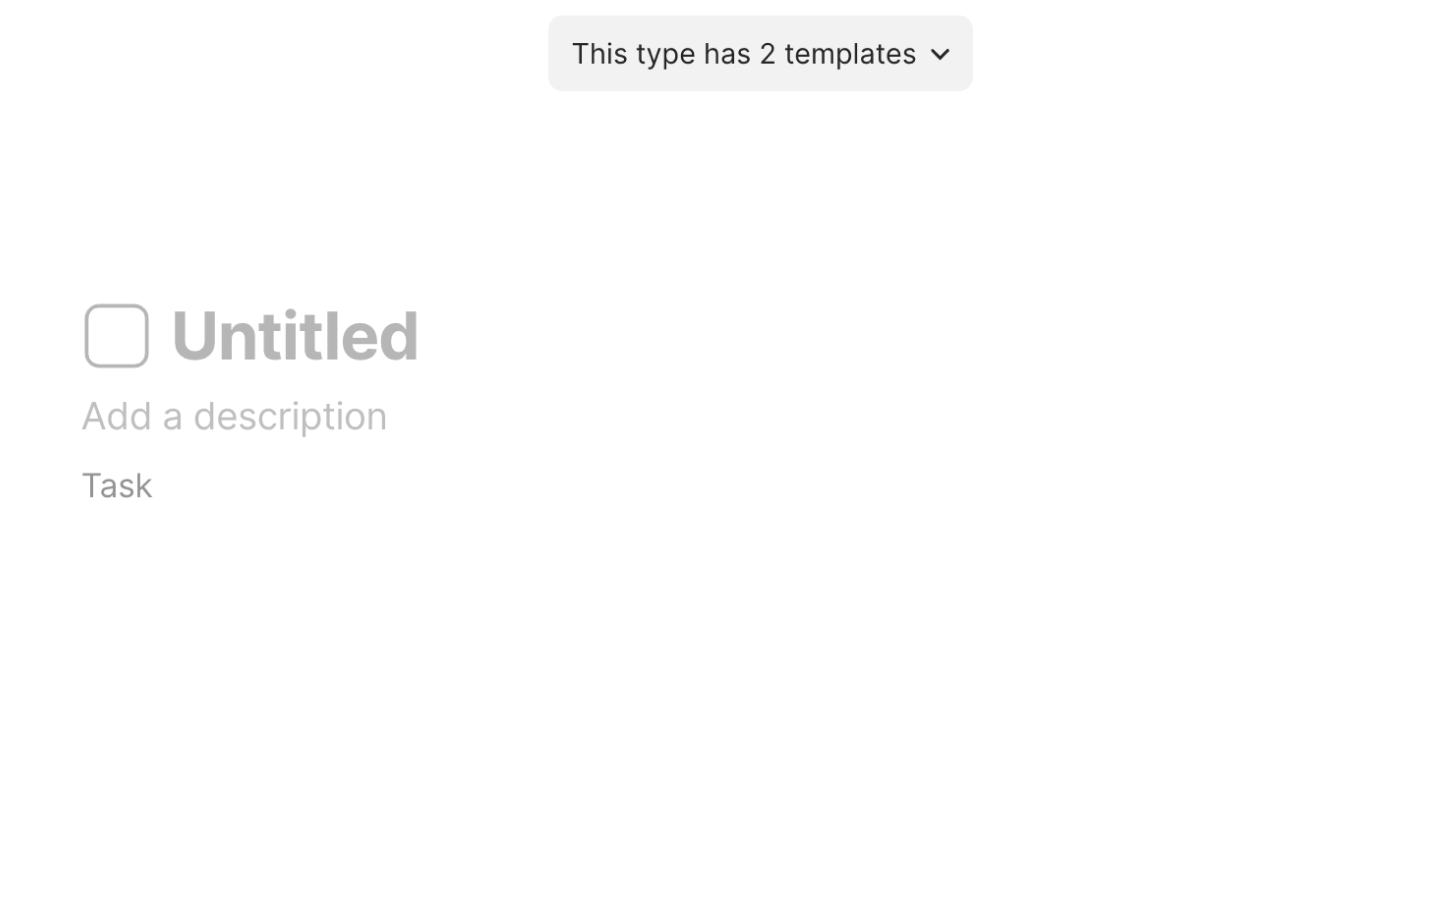
Depending on the way you've created your new object, either the default template will be applied automatically, or you will be asked to choose a template yourself.
<figure><img src="/files/e8BXY7Dn0FBUDW73NaPc" alt="" width="375"><figcaption><p>Choose a template</p></figcaption></figure>

You can also choose the default template for each type by opening the Type object, or you can choose the default template for each List view.
<div><figure><img src="/files/7TkyHRIJx0Bg5muiswyt" alt=""><figcaption></figcaption></figure> <figure><img src="/files/uiunelN3AYXzquuXdTPO" alt=""><figcaption></figcaption></figure></div>

#### Template Name Pre-fill
When editing a template, a new toggle lets you choose whether the template's name is pre-filled when creating Objects from it, so you no longer need to manually clear inherited names.

<figure><img src="/files/TQeDiQcAbtALlImKF9kB" alt=""><figcaption></figcaption></figure>


# Queries

Lots of people compare Queries with databases, but there's a key difference: Queries don't *store* Objects like regular databases.

Queries are a way to see a portion of your Graph, and Objects you've created, based on your filtered criteria, and several secondary filters which you can customize. You can think of them as a live filter or query for Objects which share certain criteria - specifically, a Type or a Property.

#### Queries serve two primary functions:

1. **Organizing and Accessing Objects**\
   \
   We often get requests along the lines of: *How do I find all of the Notes I've created?*\
   \
   One easy way is to create a Query based on Type.\
   For example; Note, which will display every Note you've created in Anytype.\
   \
   If you have specific notes you'd like to frequently access, you can filter them based on Properties you've added to these notes.\
   \
   For instance: Creation Date, Tags, or Priority.\
   \
   You can then create a Widget which will appear in your Sidebar, acting like a folder for all Objects that meet certain criteria.
2. **Editing Objects**

<figure><img src="/files/42Jd7yUBkuFbAs5qXFnj" alt="" width="563"><figcaption></figcaption></figure>

Queries also provide a way to quickly edit Objects in a list View.\
\
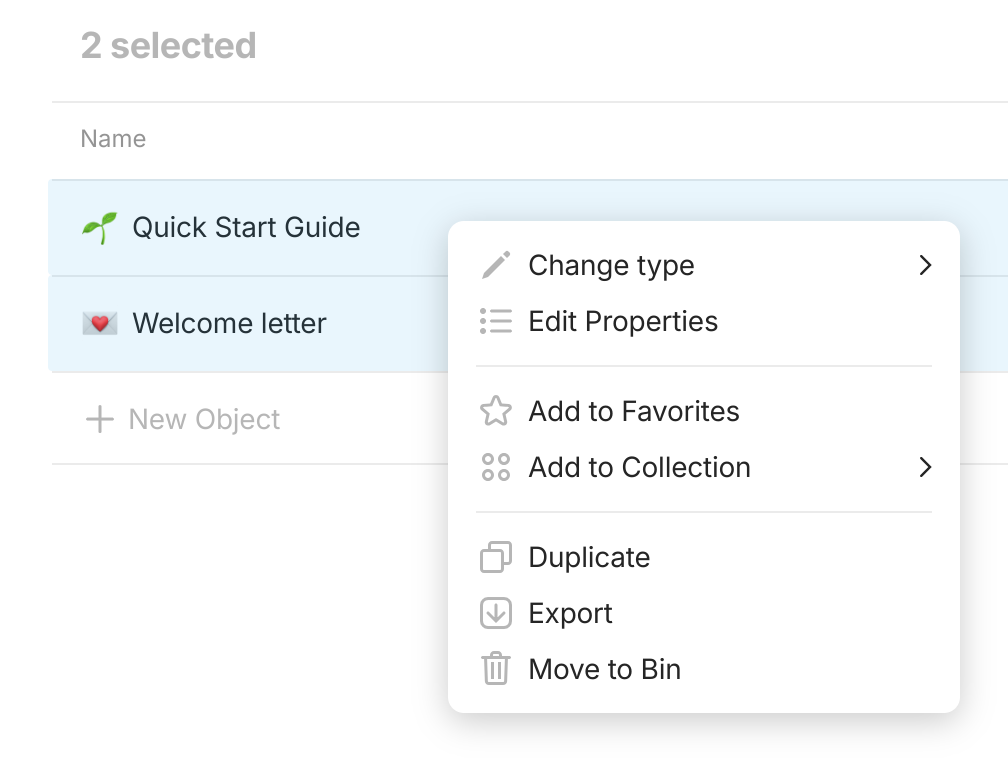
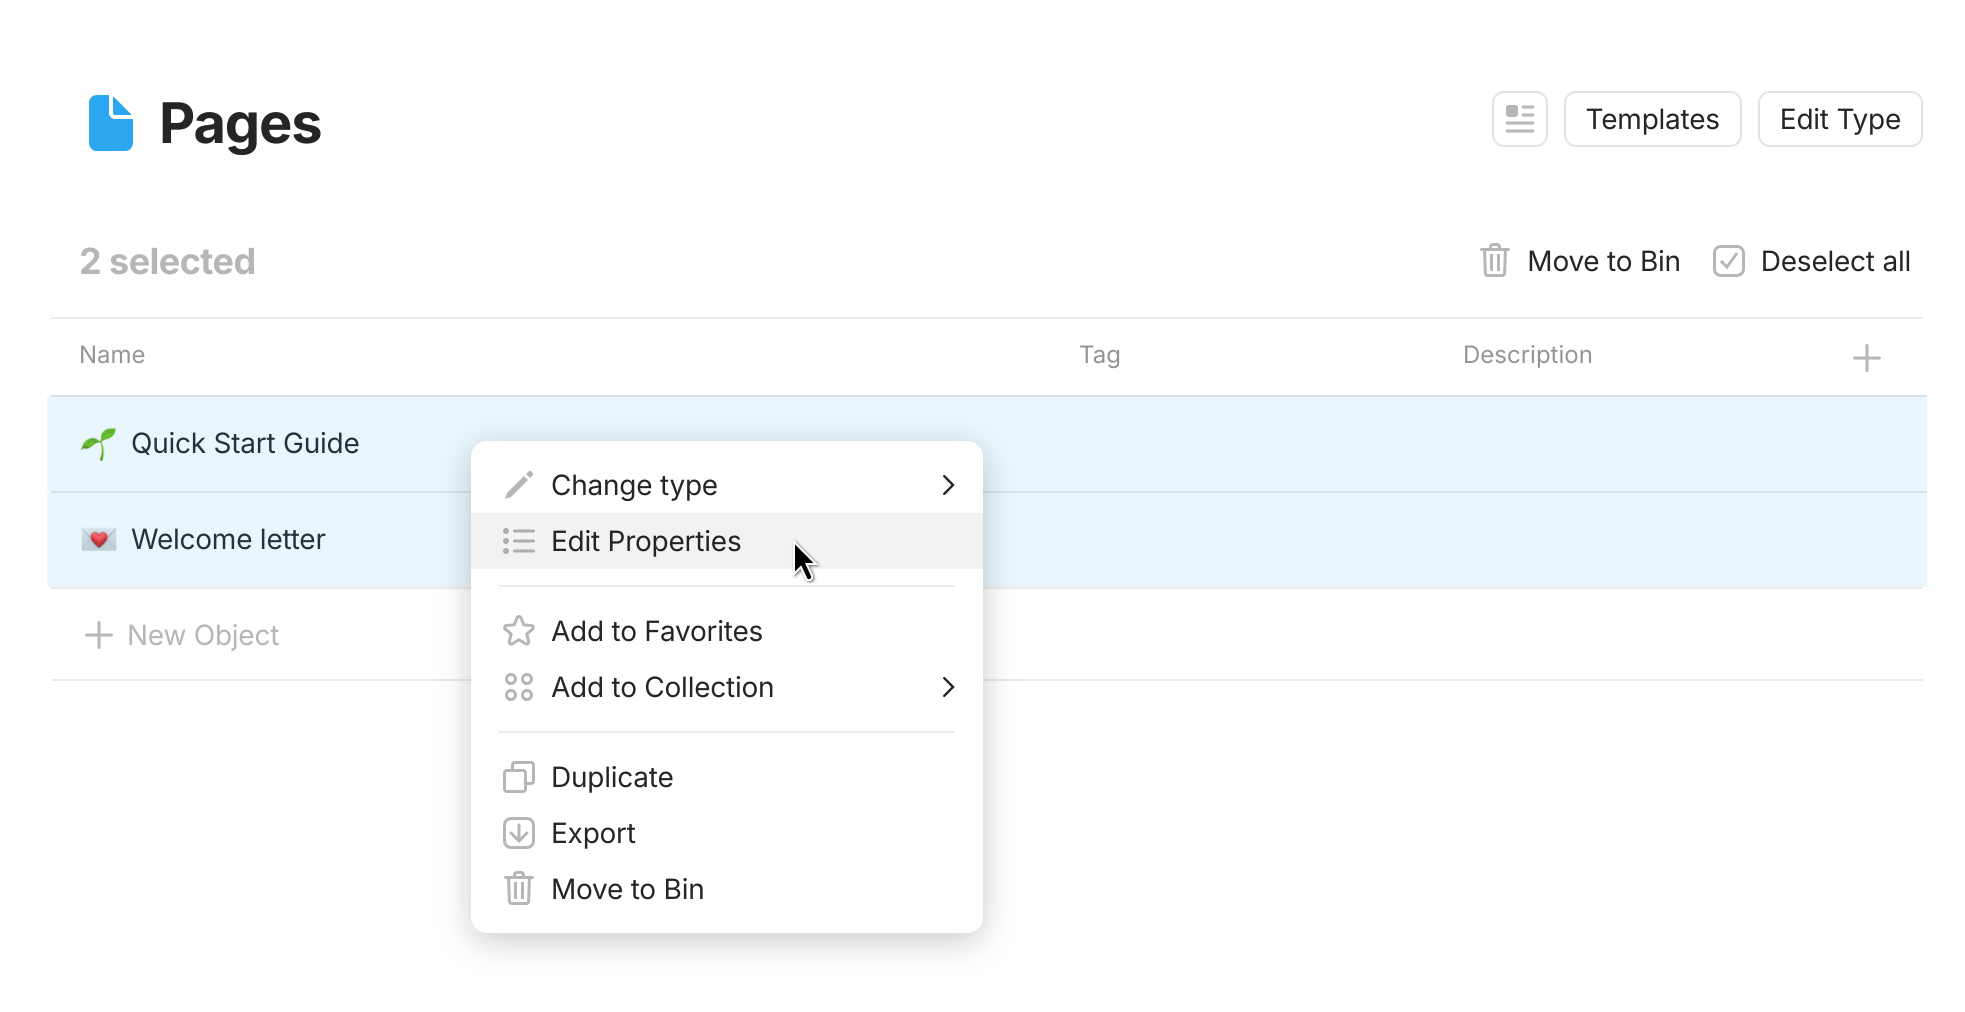
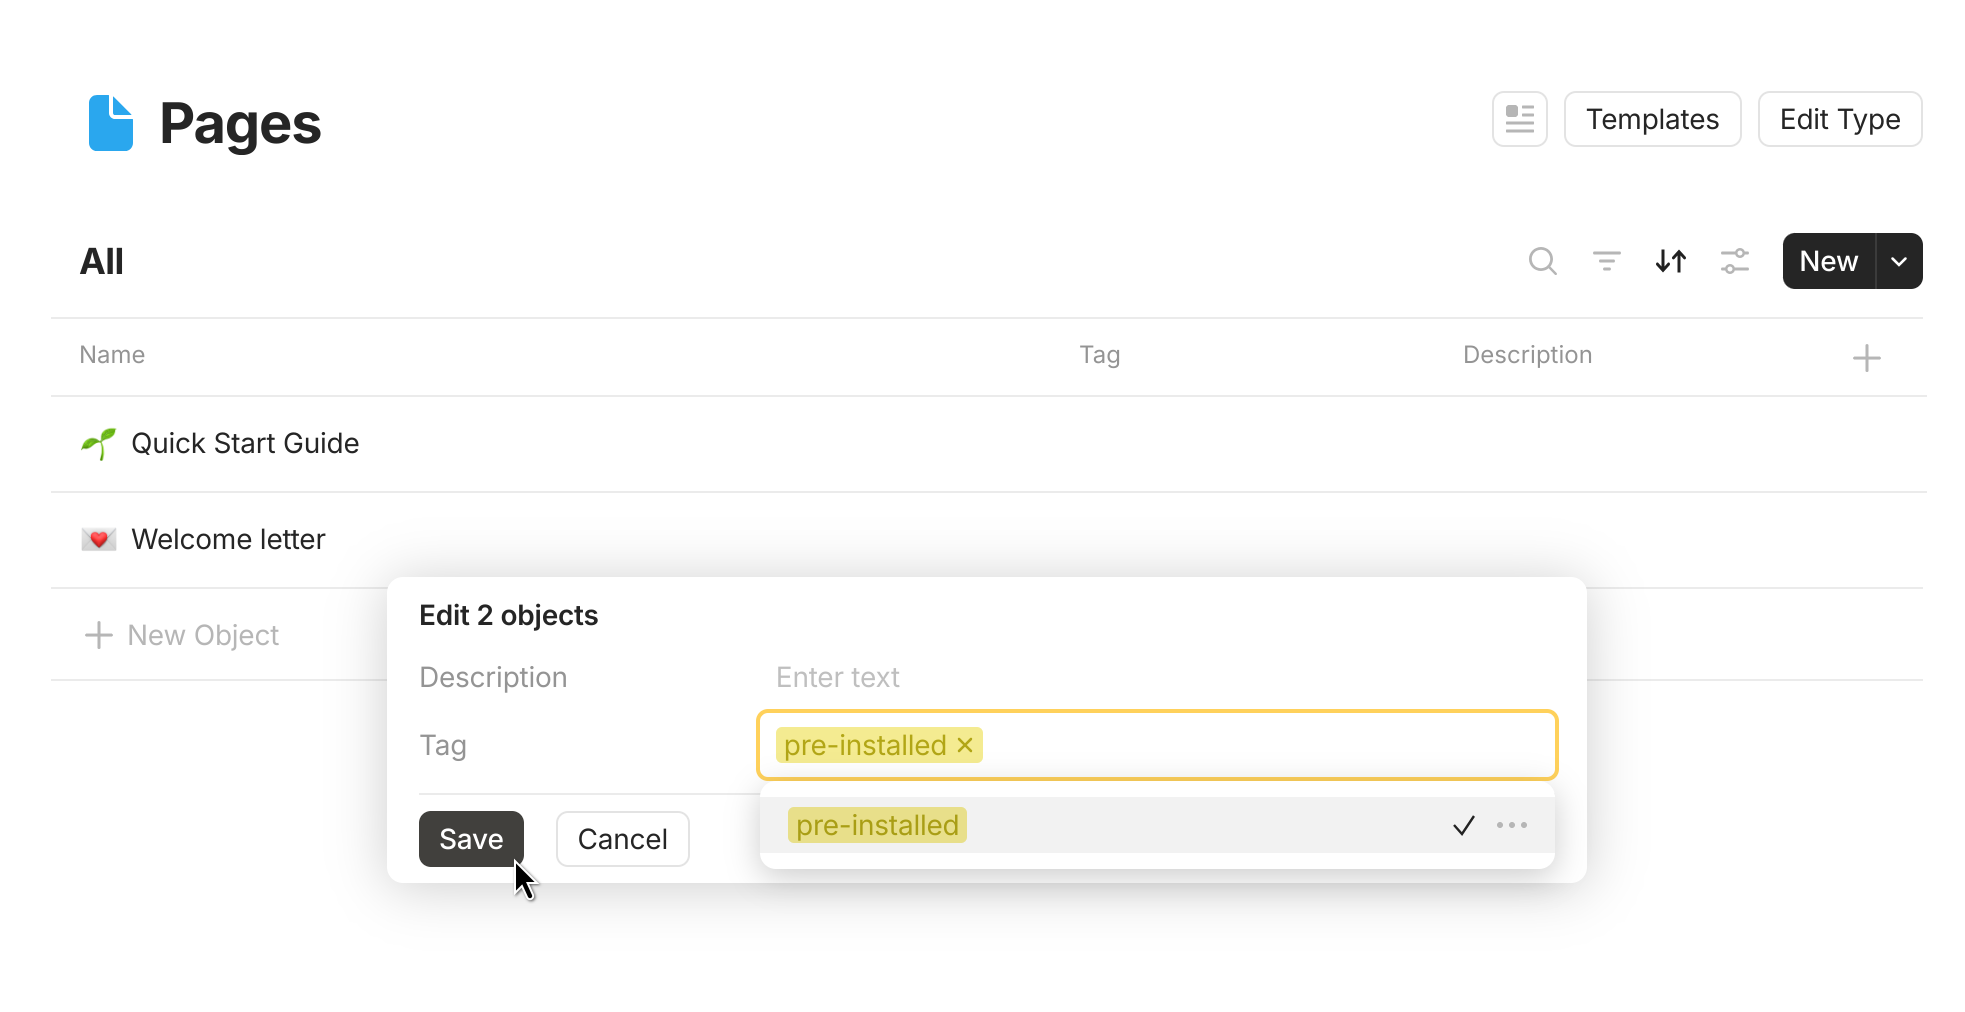
You can use multi-select in Queries to delete multiple Objects at once, or to batch update Properties / the Object Type of Objects. Any Properties added to a Query in the Property Menu (top right), will be adopted by all new Objects created with the "+ New Object" button.

<div><figure><img src="/files/QK0Ll0Naxo9R2RGYq2LC" alt=""><figcaption></figcaption></figure> <figure><img src="/files/Yjy5RxwsAPspJx5Qo6h3" alt=""><figcaption></figcaption></figure></div>

### Creating Queries

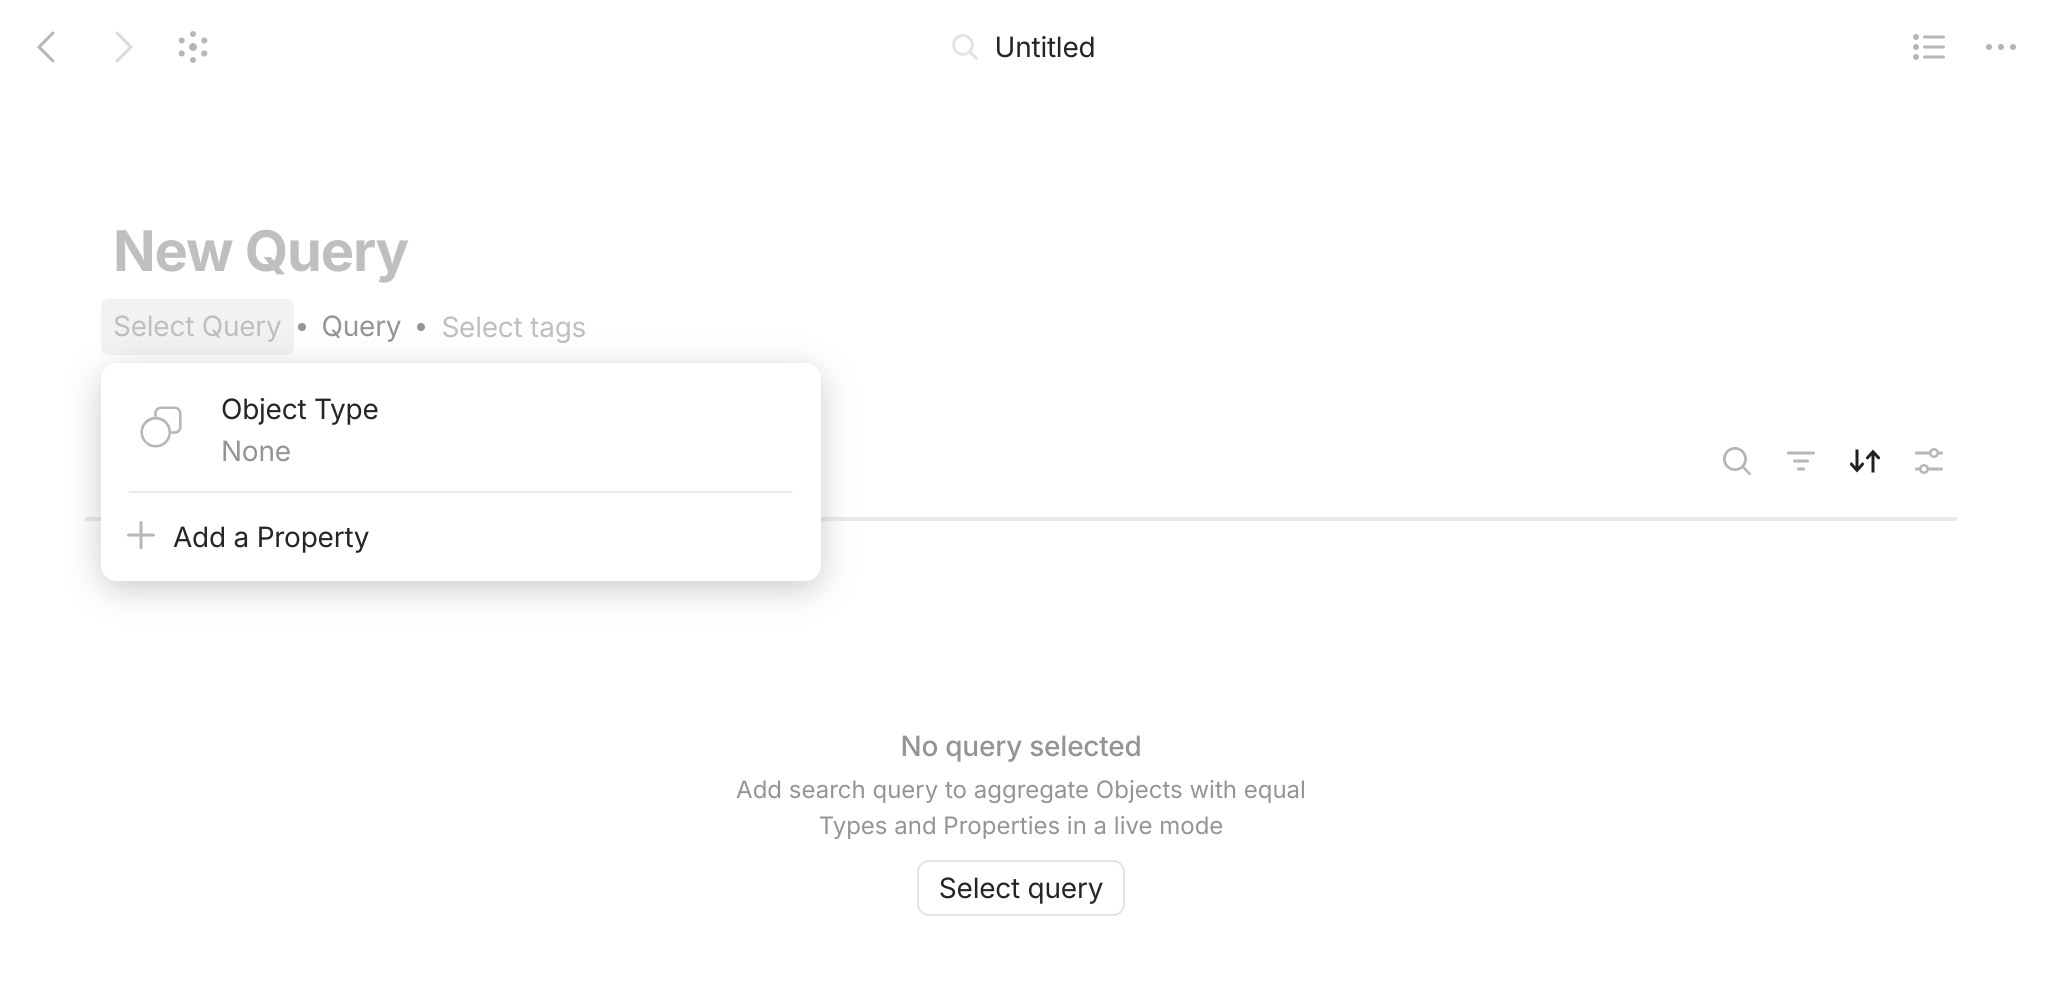
You can create a new Query with the drop-down button from your sidebar or using the / shortcut menu in the editor.

You'll then need to choose if you want a Query by Type which lets you list all of your Objects of a certain Type, or a Query by Property which will list all Objects that contain the Property of your choosing.

<div><figure><img src="/files/lkvuyjOrhfkOmfzZufuu" alt="" width="375"><figcaption></figcaption></figure> <figure><img src="/files/sZT3kvrcBUXa0rrafUSF" alt="" width="375"><figcaption></figcaption></figure></div>

### Customizing Your Query

#### Toggle & Add Properties to Objects via Queries

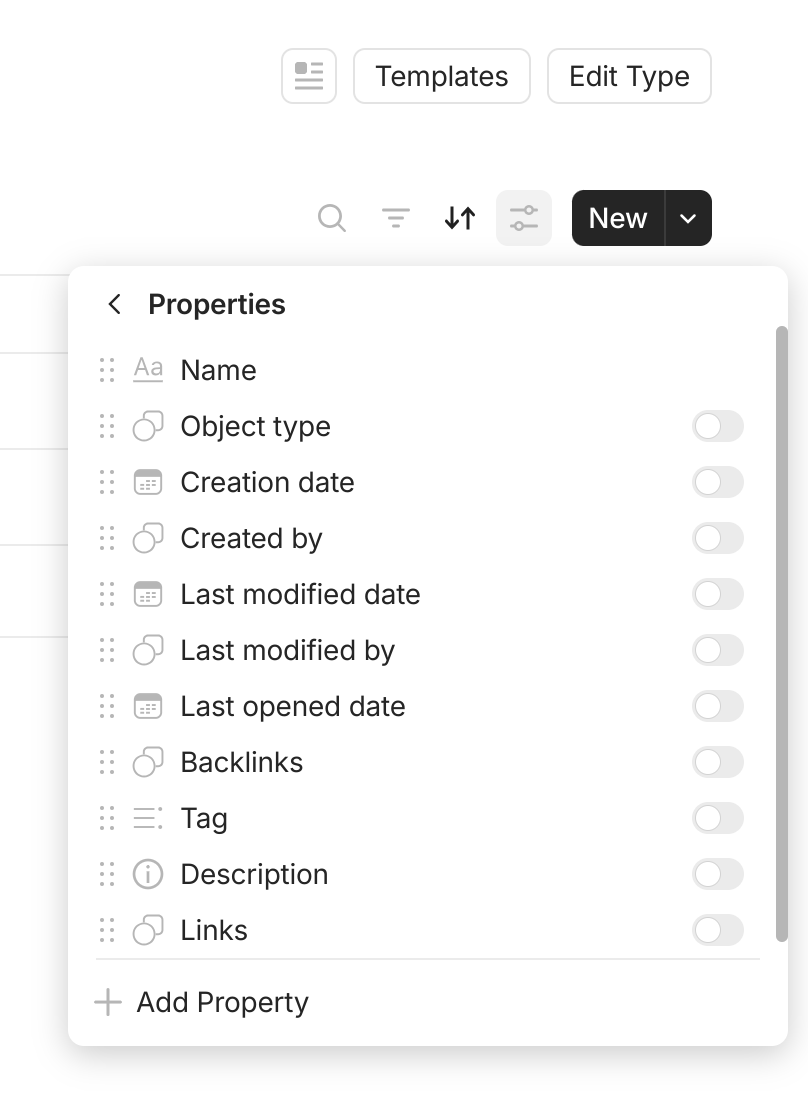
Instead of adding Properties one-by-one to Objects, you can batch-add them to your Query by clicking the filters on the right side.

Here you can toggle on/off any Properties that you would like to see, add another Property or new Property, and edit the View of the Query here.

<figure><img src="/files/DaswiveaKFMdakdD5DWj" alt="" width="375"><figcaption></figcaption></figure>

#### Sorts & Filters

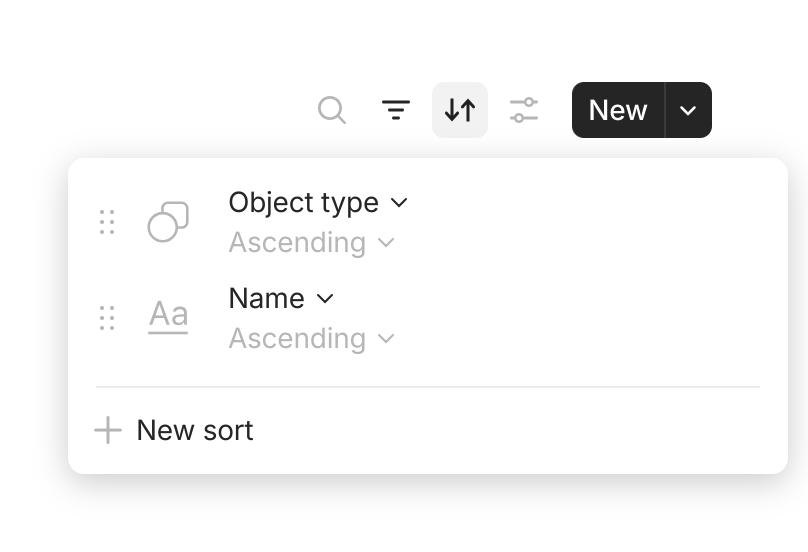
You are also able to sort or filter your Query by any Property that you've previously added to the Query.

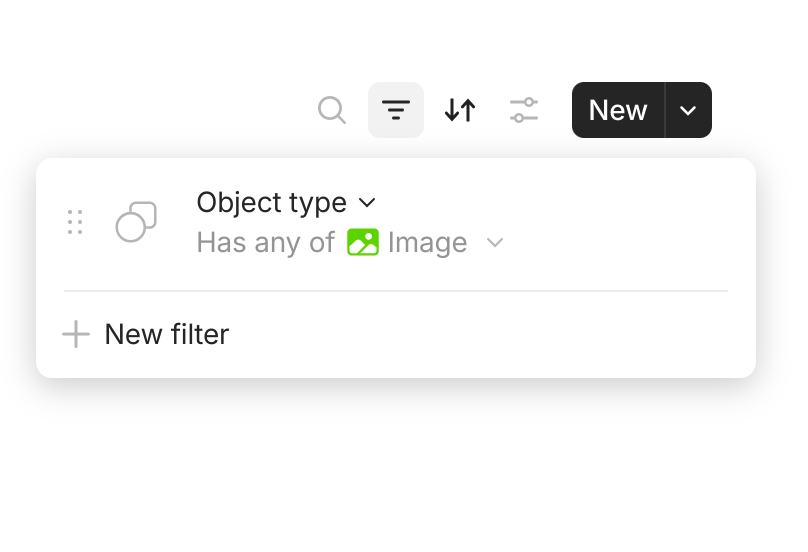
<div><figure><img src="/files/jpzQsT4IZgBJtnvZEdlv" alt=""><figcaption></figcaption></figure> <figure><img src="/files/KXTQYqGzGJbRBBygpXYf" alt=""><figcaption></figcaption></figure></div>

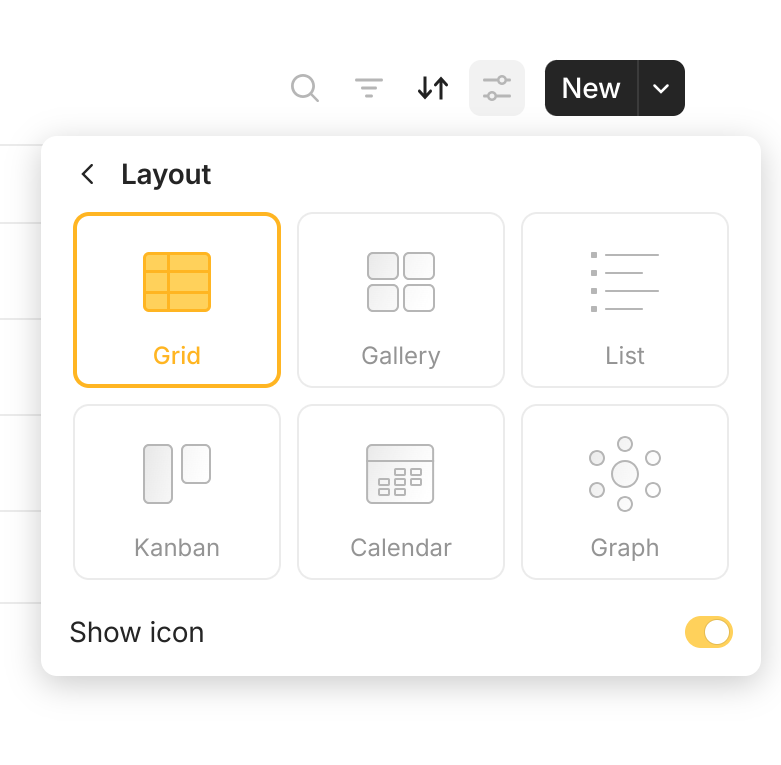
#### Layout

In this section you can find all the currently available layout options.

{% hint style="warning" %}
Kanban, calendar and graph views are available on desktop only.
{% endhint %}

<figure><img src="/files/0Ue2xrHzlocQ6hkg5zc1" alt="" width="375"><figcaption></figcaption></figure>


# Collections

Collections can be used to organize a variety of different objects and store them in one place.

You are not restricted to viewing only one Object Type at a time, this means you can have multiple different types within one collection.

If you are organizing your meal prep for the week, you might have a list of recipes, as well as ingredients and a shopping list.

The main types you may have could be Recipes and Ingredients.

In a Collection, you can organize all of this Types together seamlessly.

{% hint style="warning" %}
The main difference between Queries and Collections is that Queries draw Objects from your entire Graph, whereas Collections work more like a traditional database, where they start empty and you have to add Objects to them manually.
{% endhint %}

### Adding Objects

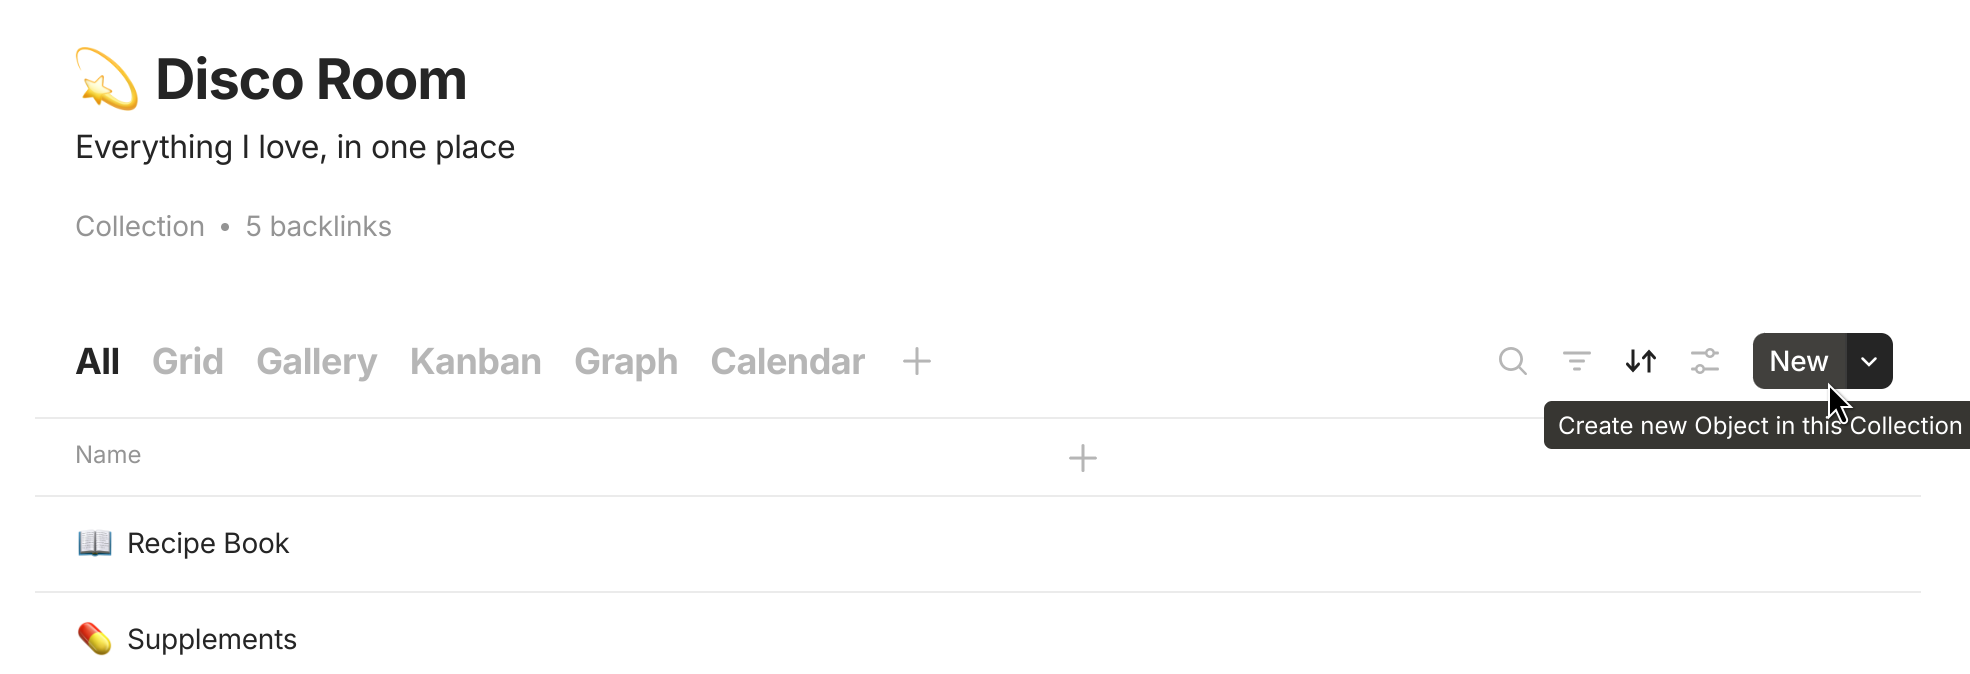
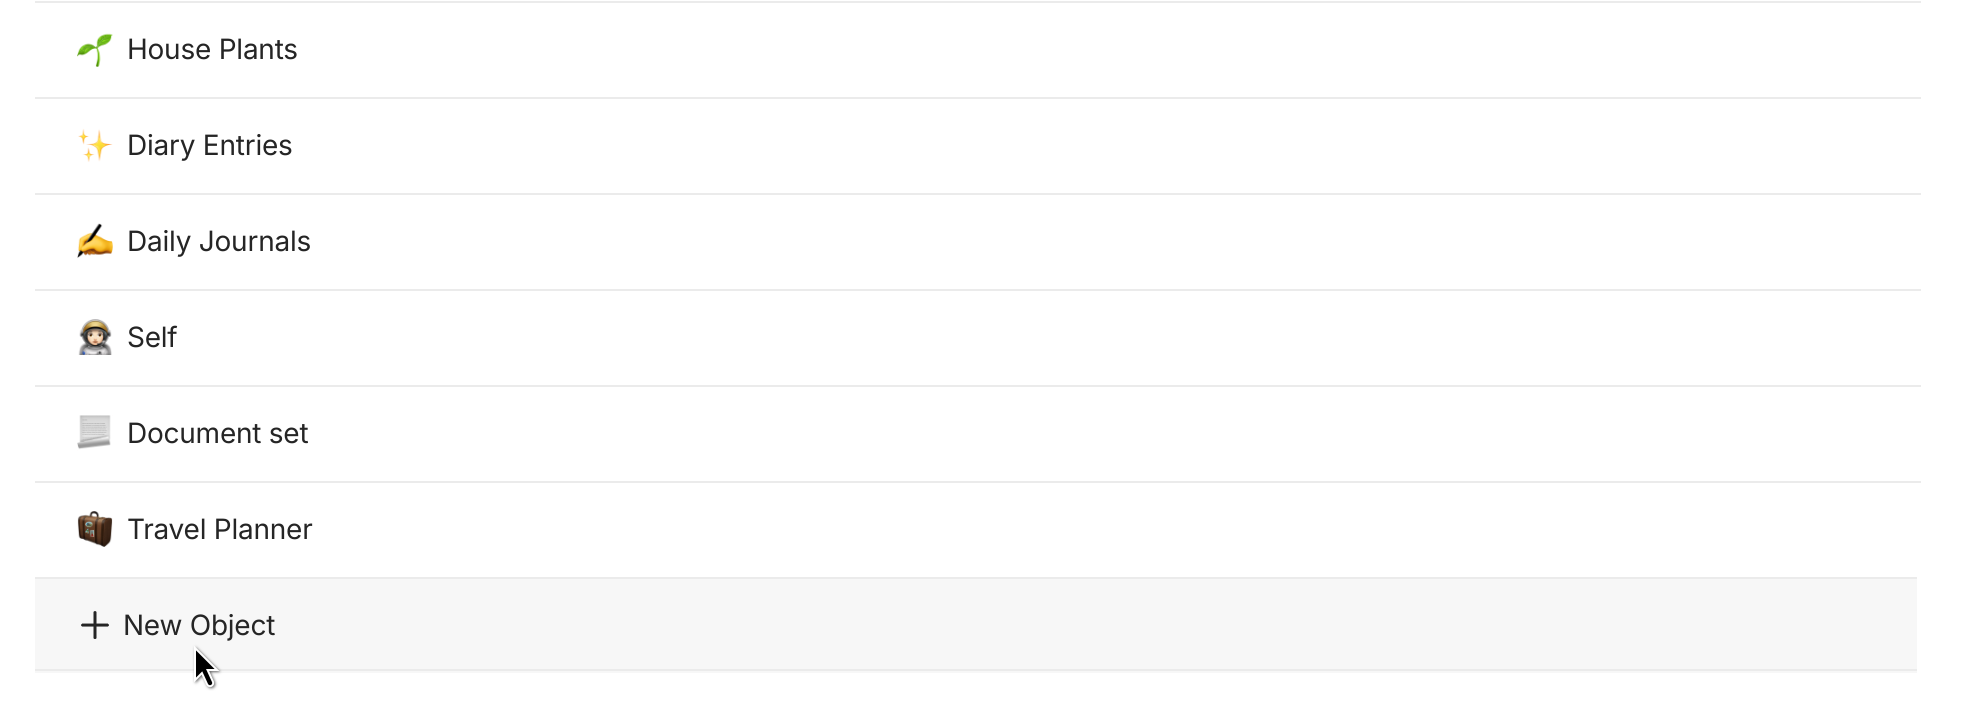
To add new Objects to a Collection, simply click on the New buttons either in the top right corner or at the bottom of a collection.

<div><figure><img src="/files/J3cL3smX5QqV5GoAjZIh" alt=""><figcaption></figcaption></figure> <figure><img src="/files/tLpOyVRgYx8ykc2uXczJ" alt=""><figcaption></figcaption></figure></div>

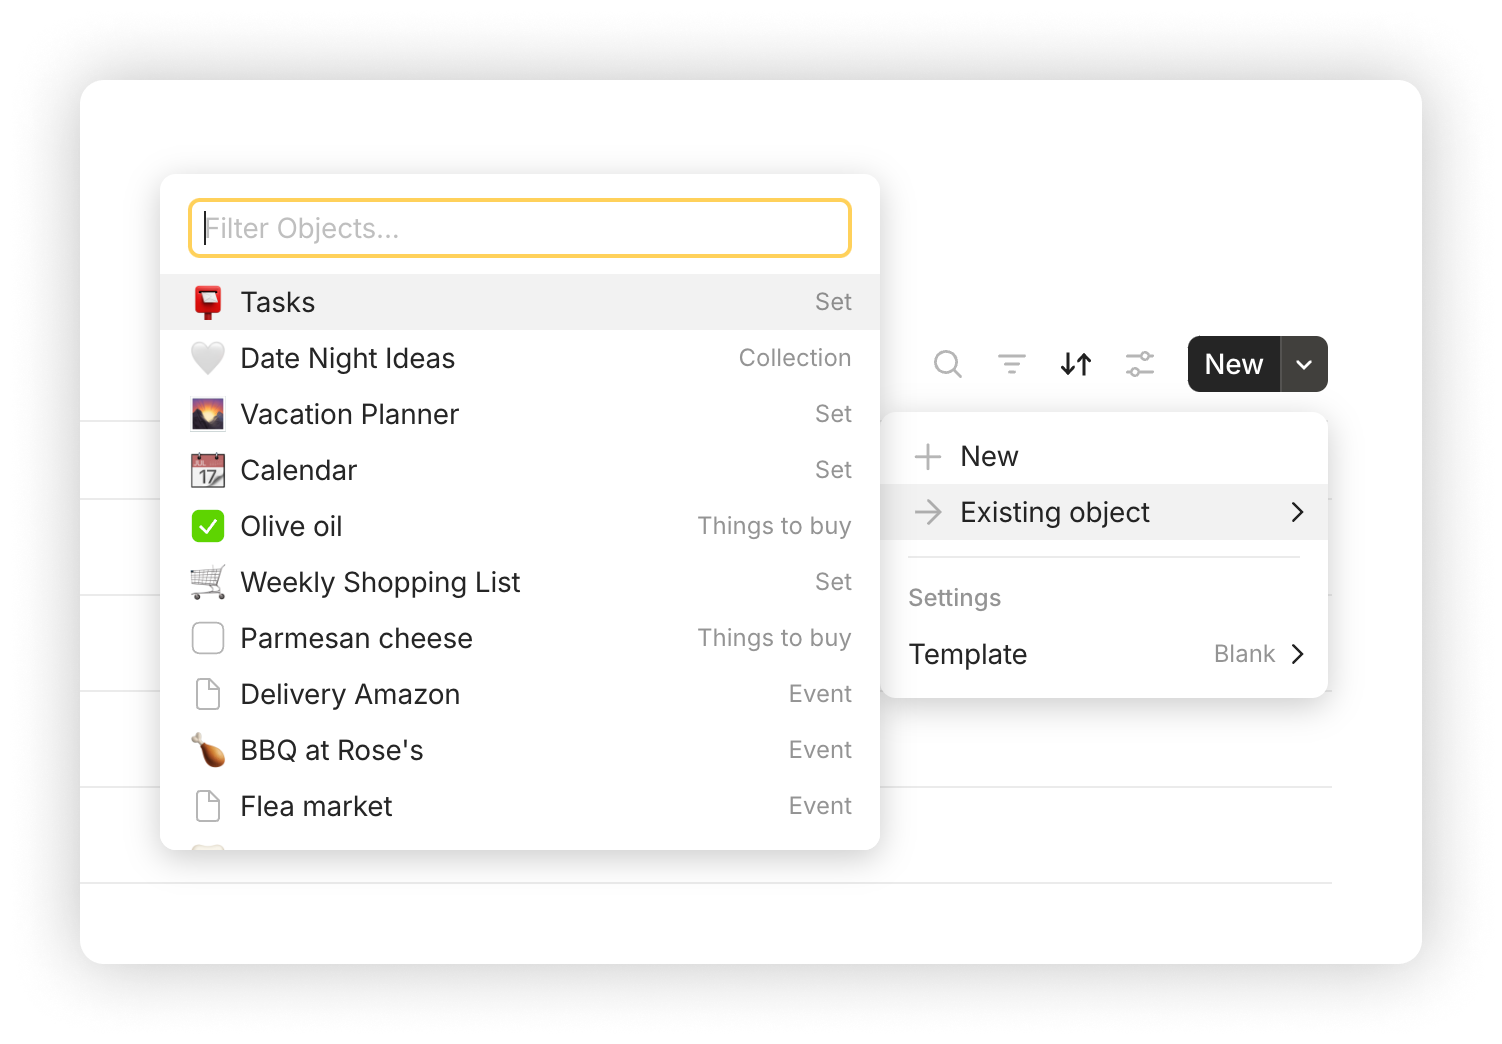
To add an existing Object to a Collection while in the collection view, you can hover over the Existing object menu option under the arrow menu.

<figure><img src="/files/uMslASdiTjZUEz4mlewF" alt="" width="563"><figcaption></figcaption></figure>

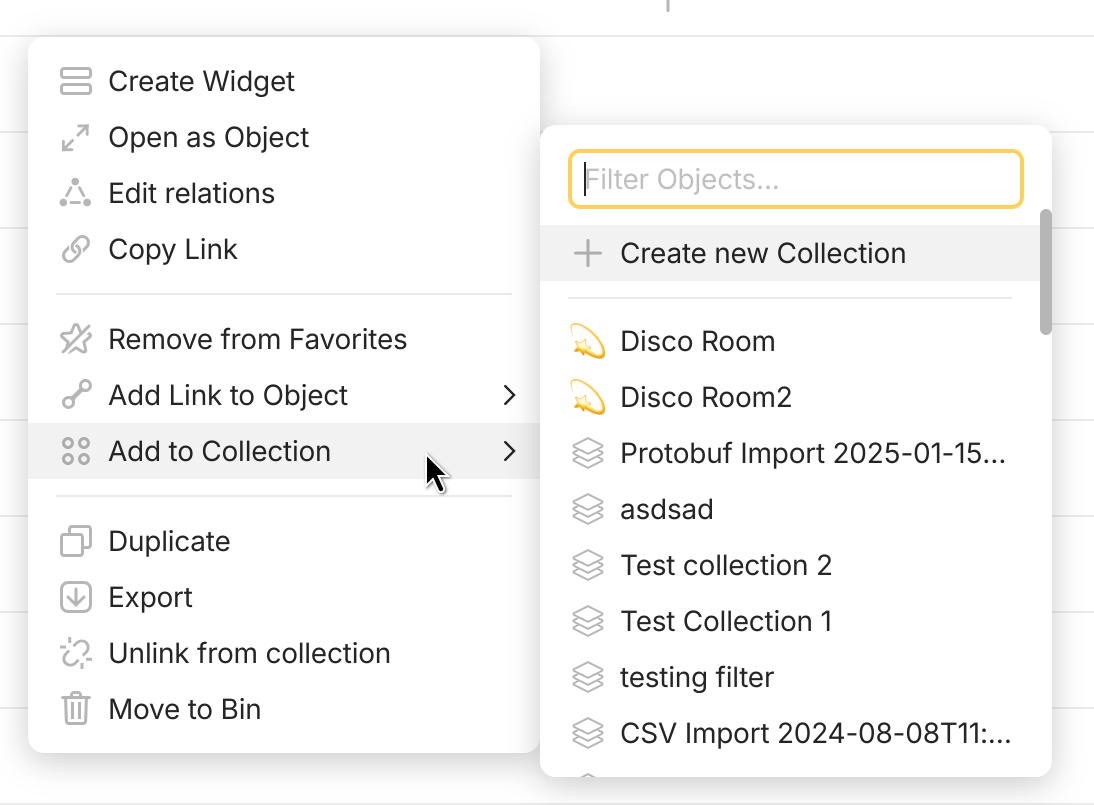
To add an existing Object to a Collection outside of the collection view, you can use the Add to Collection menu option from the object menu.

<figure><img src="/files/h42iuuYqplOgC0UQ173Y" alt="" width="563"><figcaption></figcaption></figure>


# Sidebar

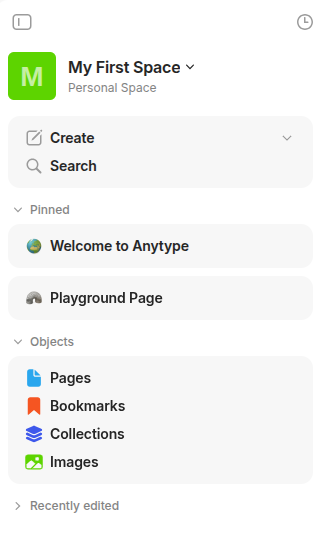
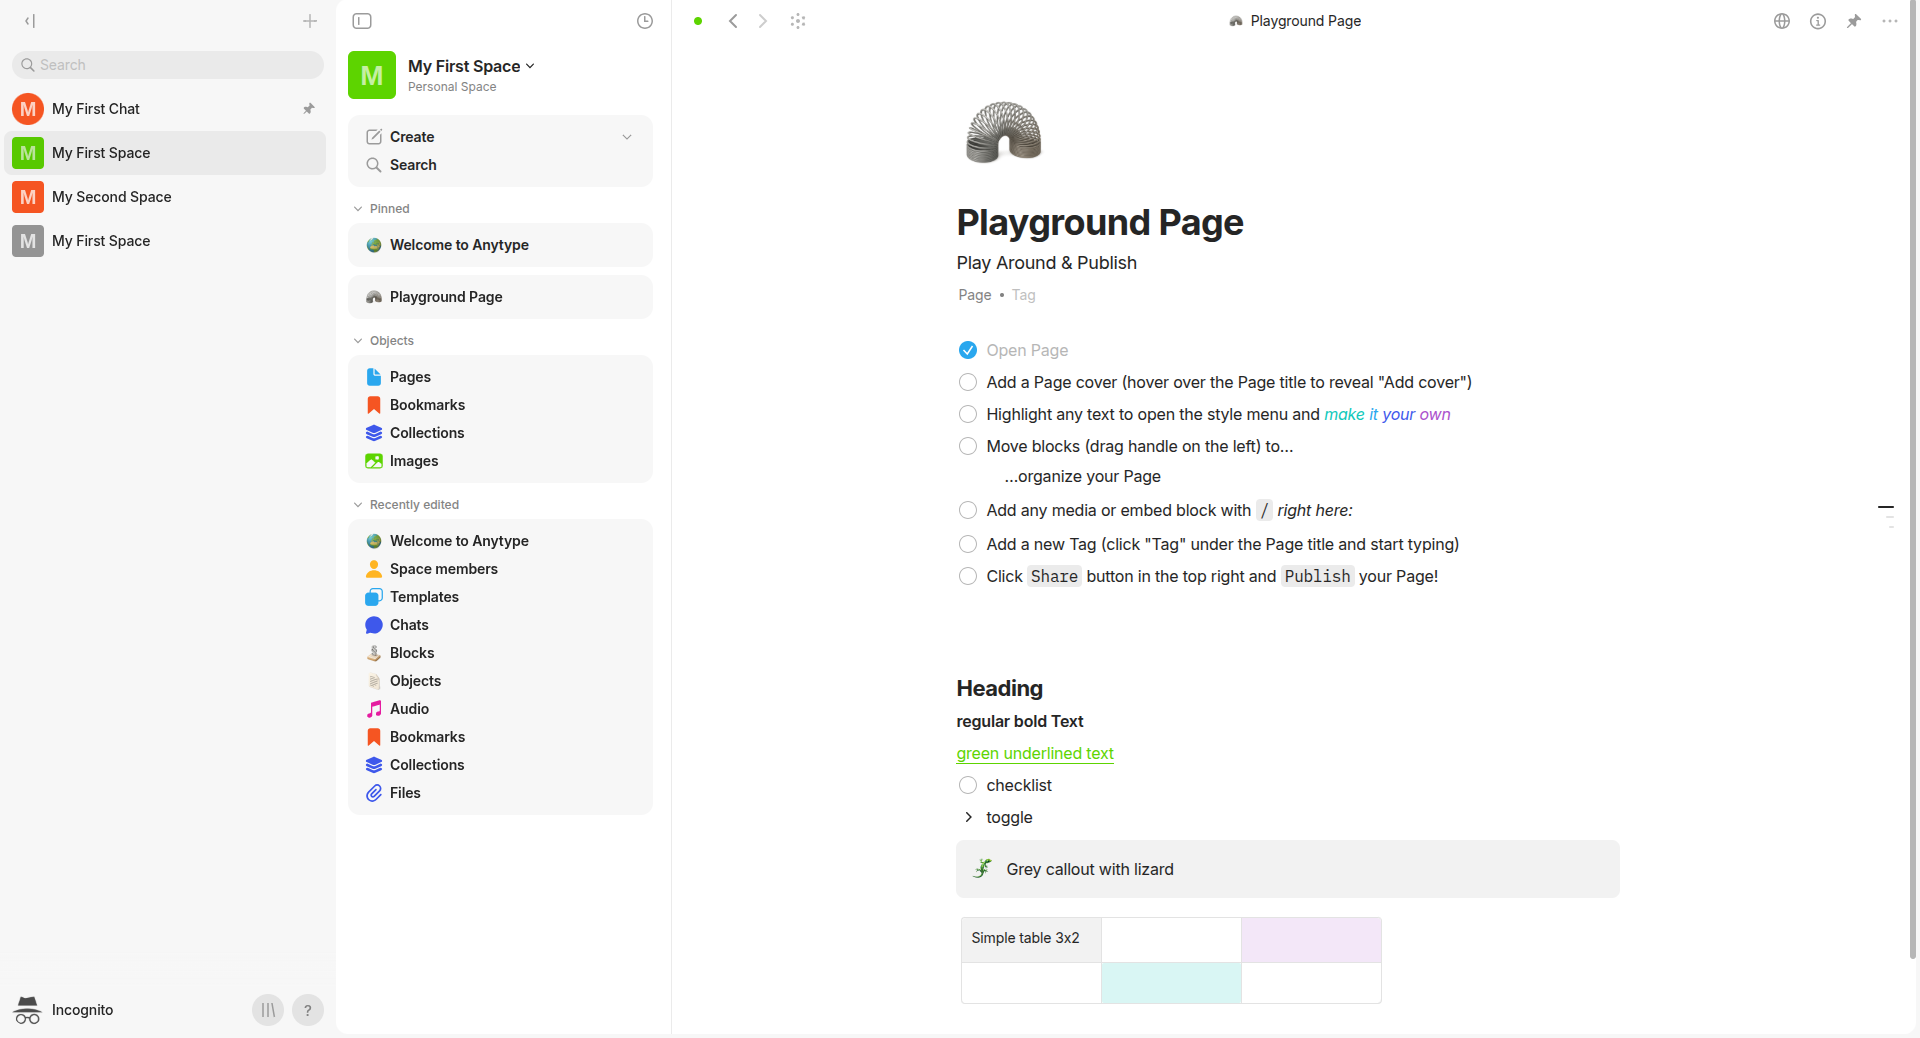
Your sidebar is divided into three sections:

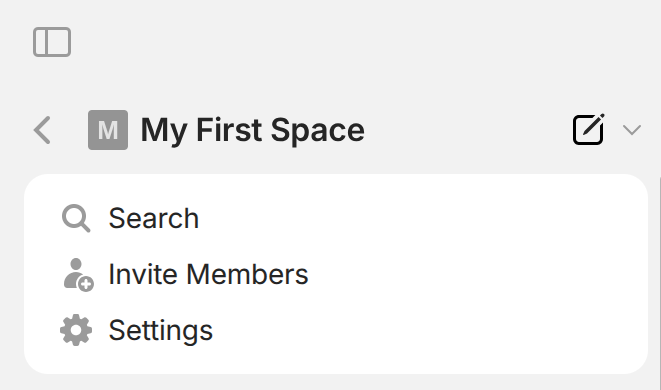
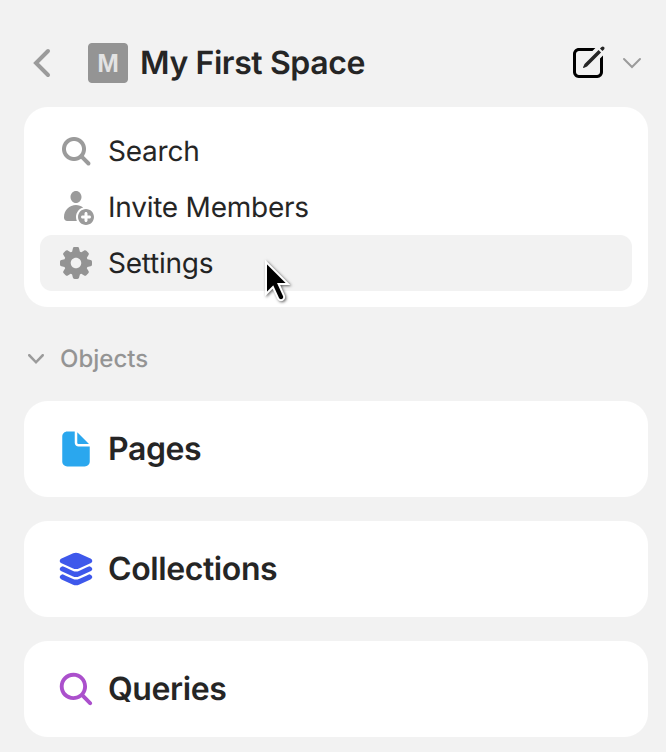
Your channel widget, which includes the Search button, Members button, and Settings button.

<figure><img src="/files/om4StnSgCfAhK5iT9VMv" alt="" width="331"><figcaption></figcaption></figure>

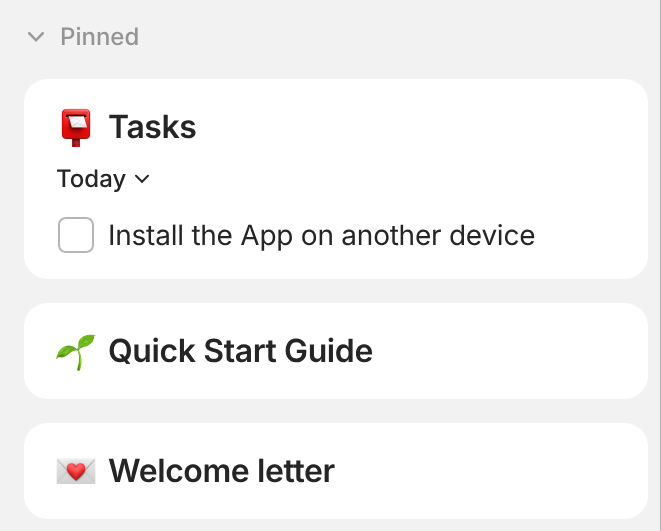
The Pinned section where you can find any object that you wish to pin to your sidebar.

<figure><img src="/files/YAtBl2Hh5yEaSw0RqZp8" alt="" width="331"><figcaption></figcaption></figure>

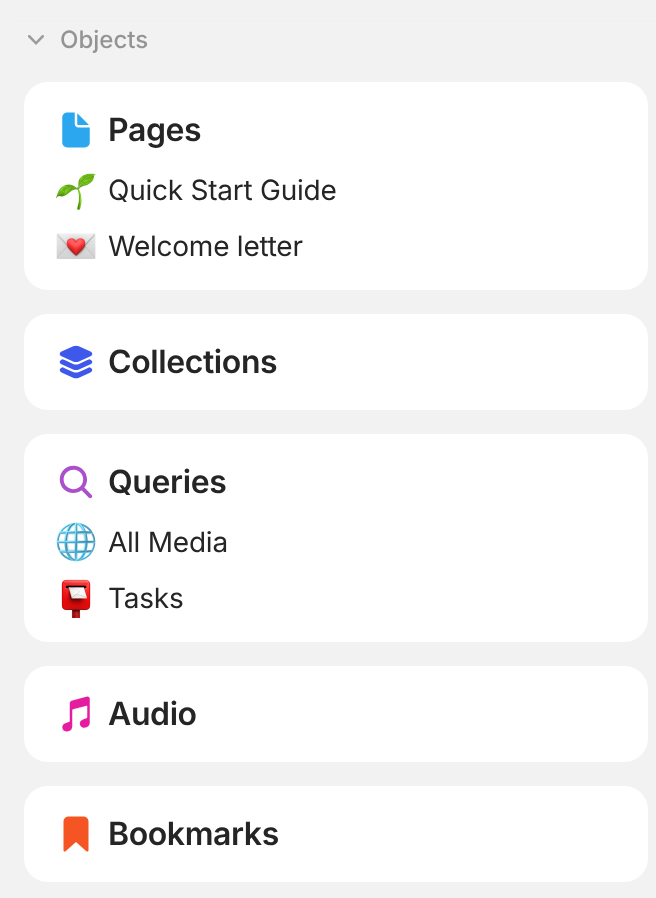
The Objects section which allows you to view all your types, and by extension, all your objects.

<figure><img src="/files/KjhtsKRmFKwbQTOIUFWK" alt="" width="328"><figcaption></figcaption></figure>

### Pinning Objects

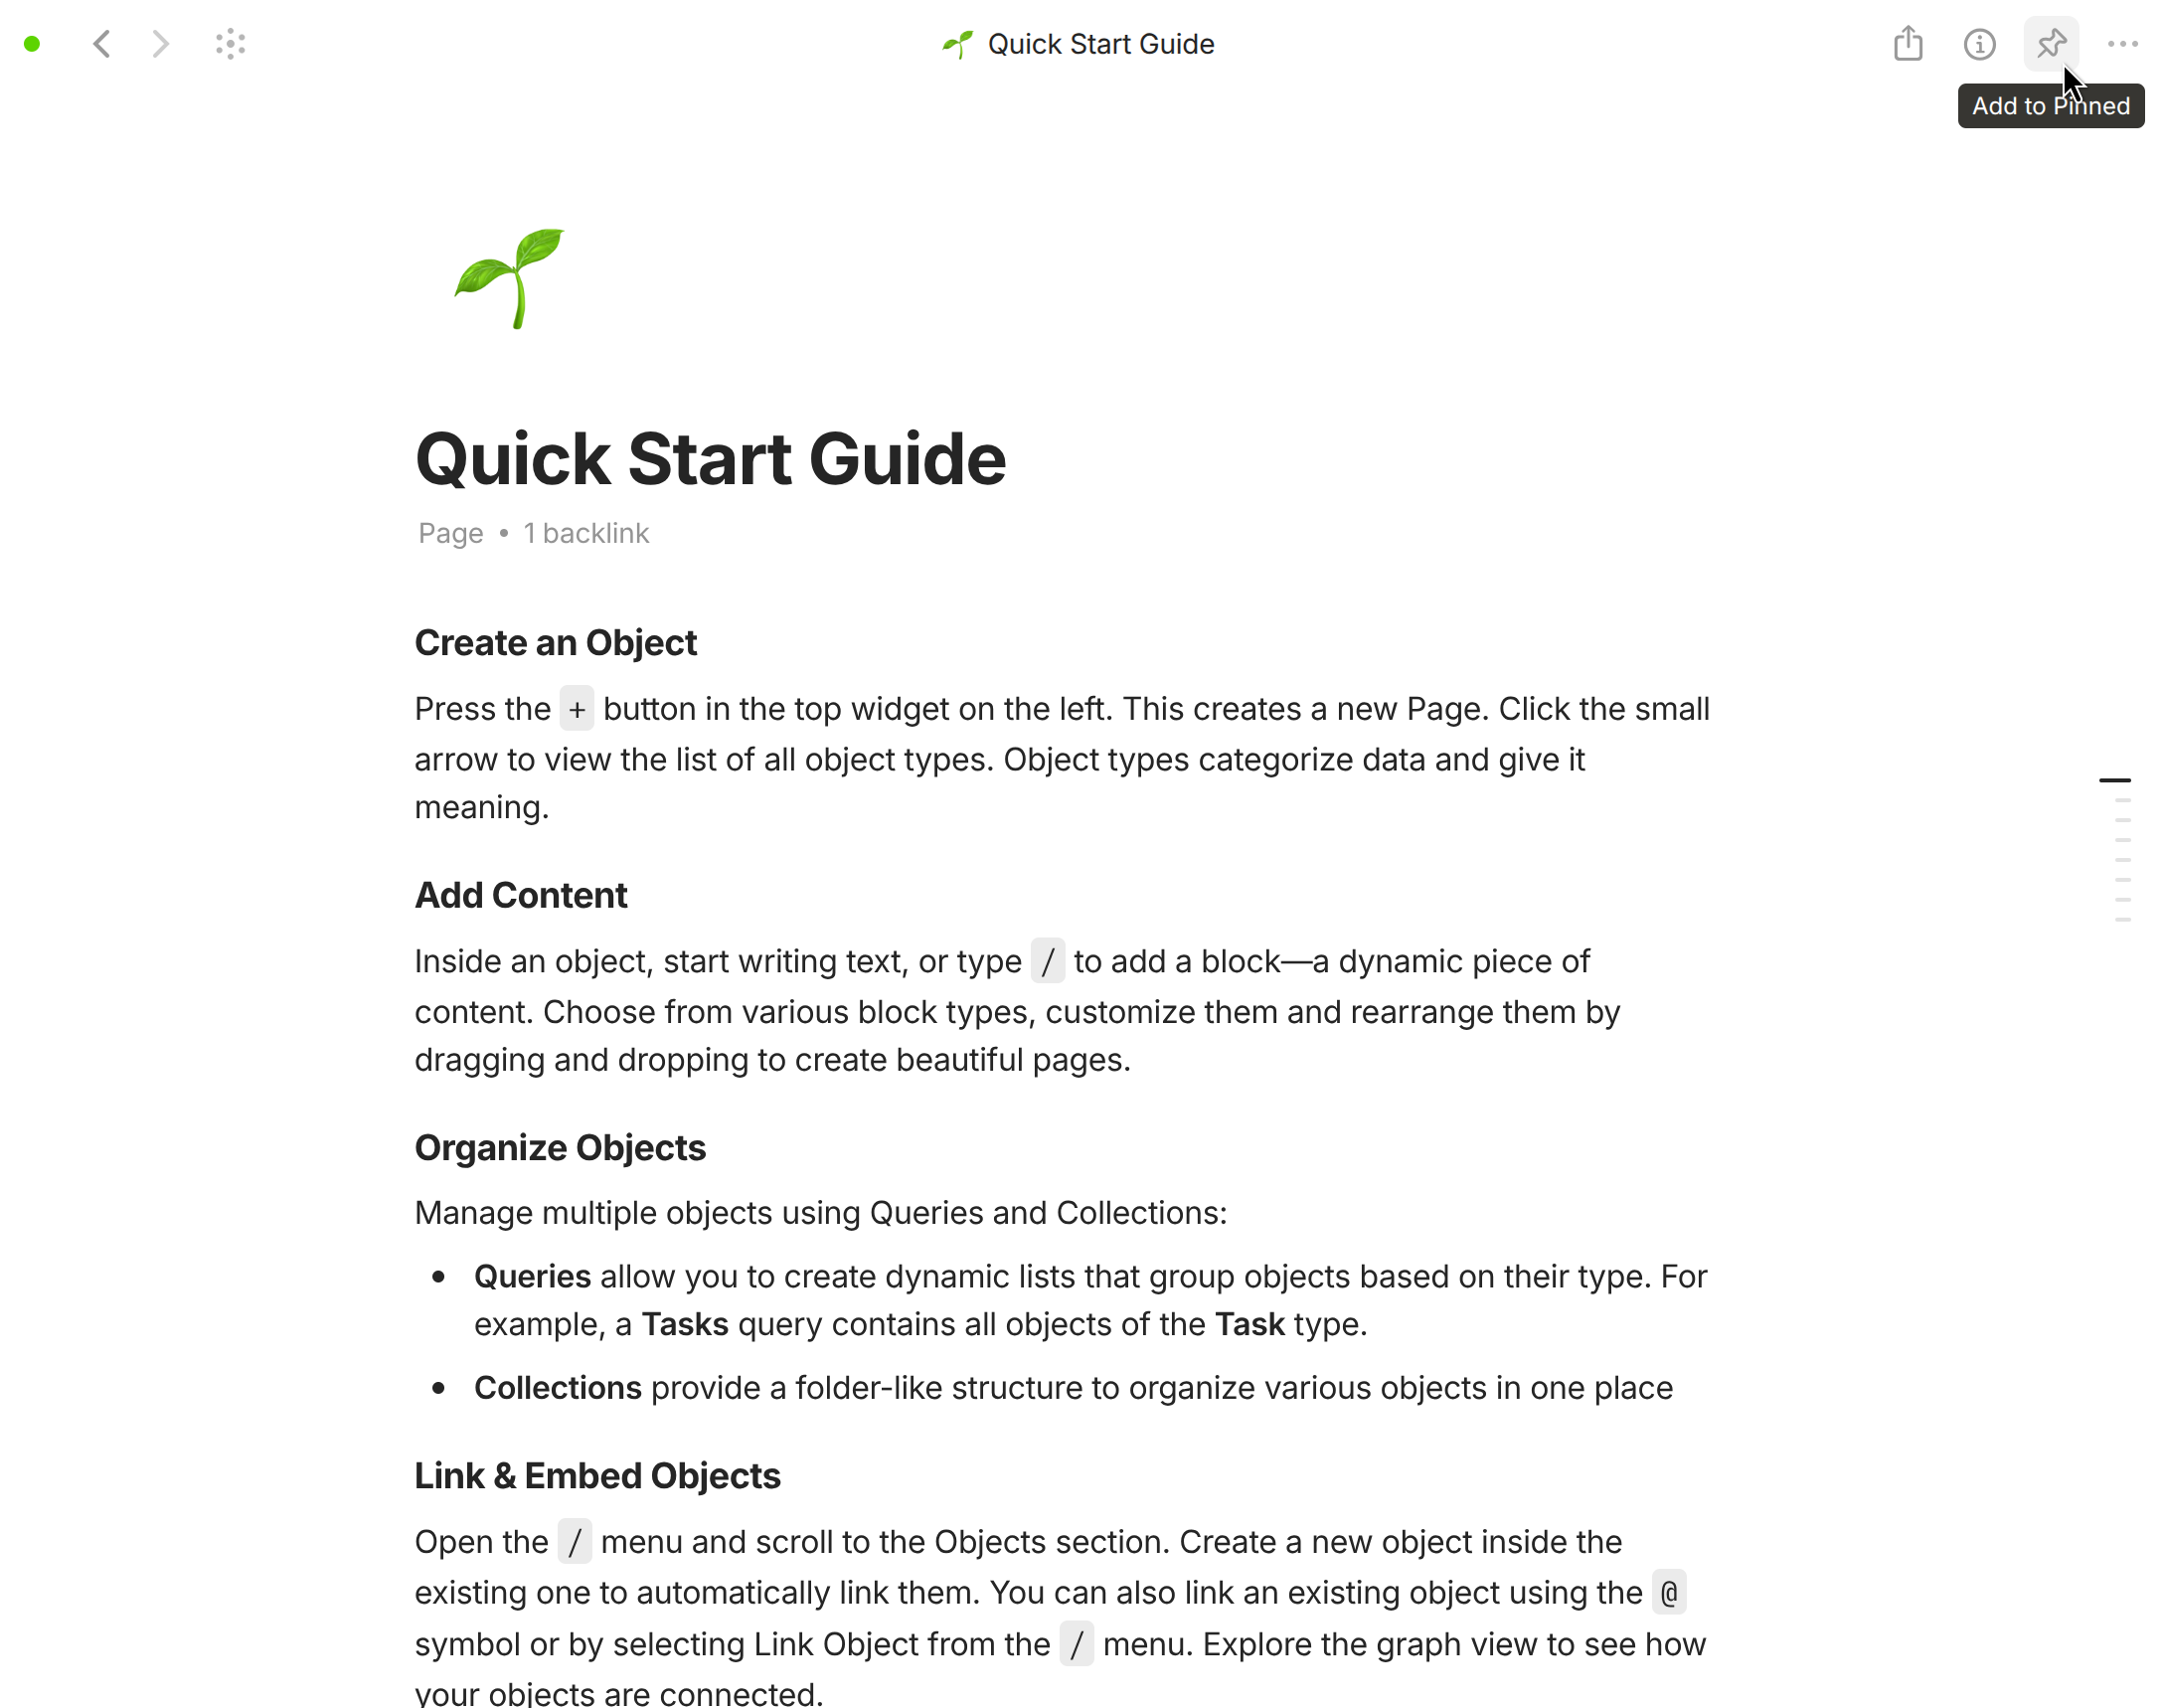
In general, you can pin any object that you've created using the Anytype editor to the sidebar. To do so, navigate to the pin button in the top right corner.

<figure><img src="/files/isDjyEOJw6hMNSPgqoOY" alt=""><figcaption></figcaption></figure>

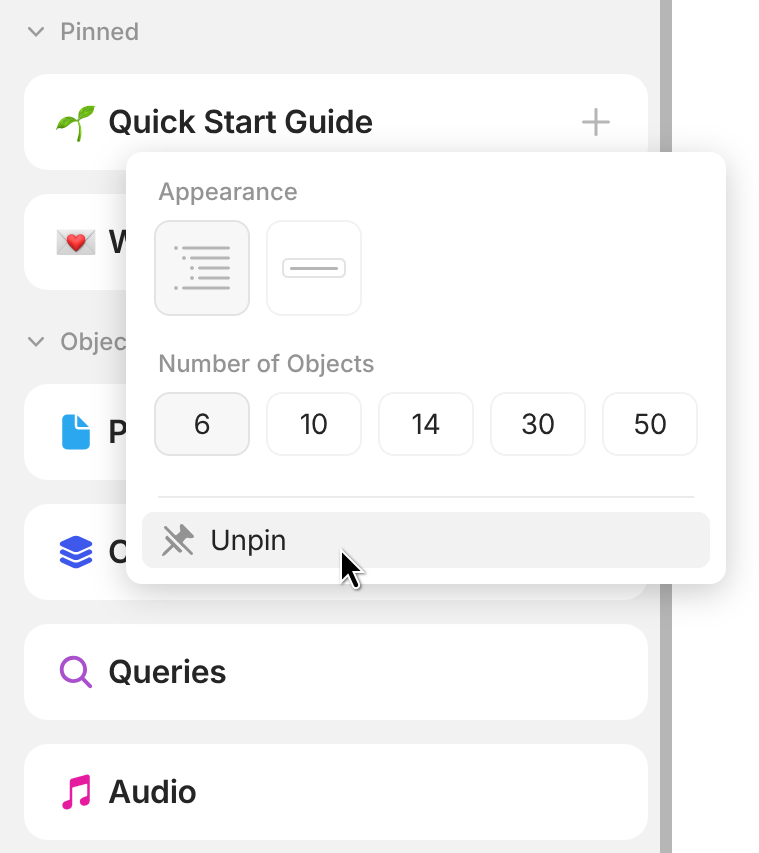
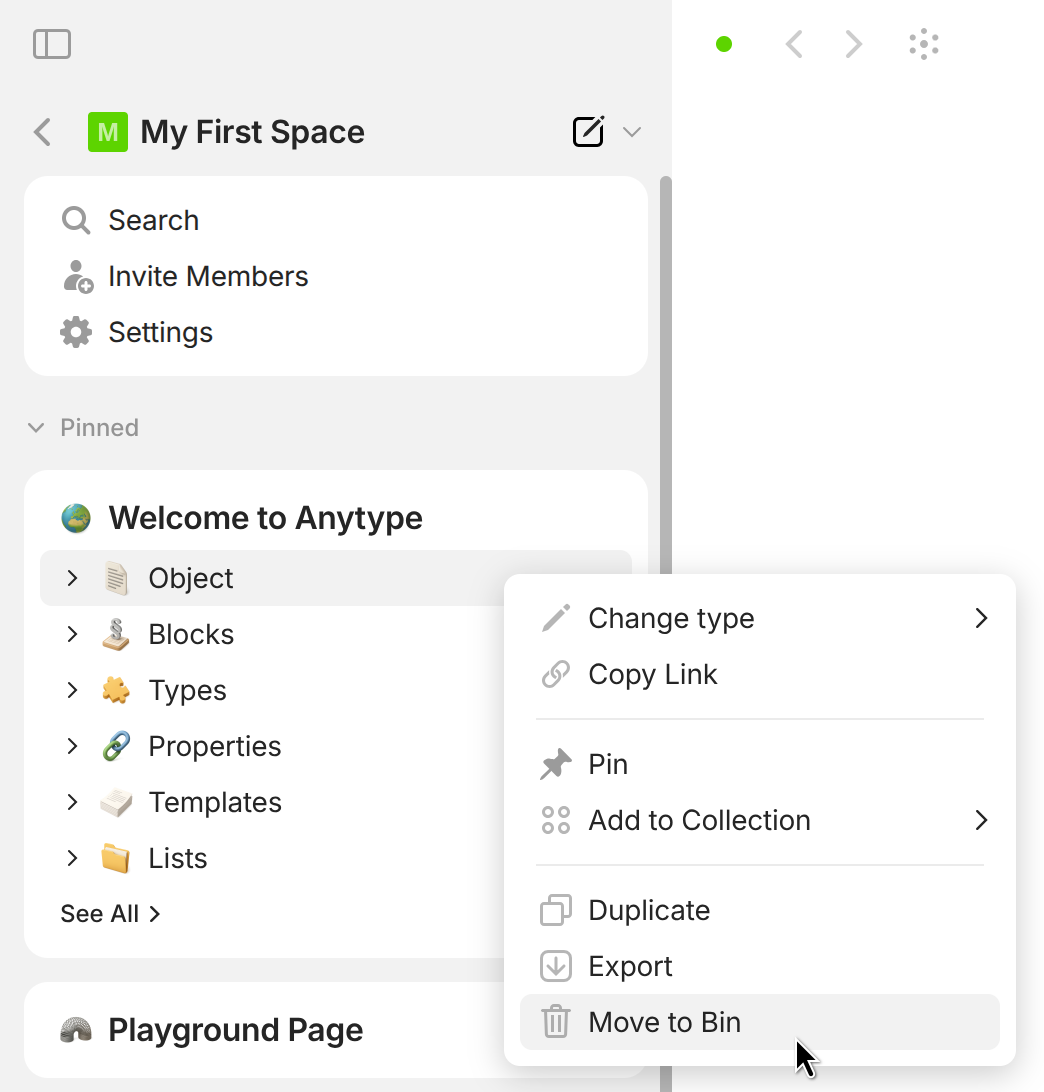
You can unlink them by clicking the same button or right-clicking on them in the pinned section and selecting this option:

<figure><img src="/files/ZUXVGZycezvAMnVA3NsB" alt="" width="375"><figcaption></figcaption></figure>

### Adjust your Widget Appearance

Depending on the object type, you can choose from a variety of layouts.

<figure><img src="/files/Wp8VxxFL6m6KjhBjAGyi" alt="" width="375"><figcaption></figcaption></figure>

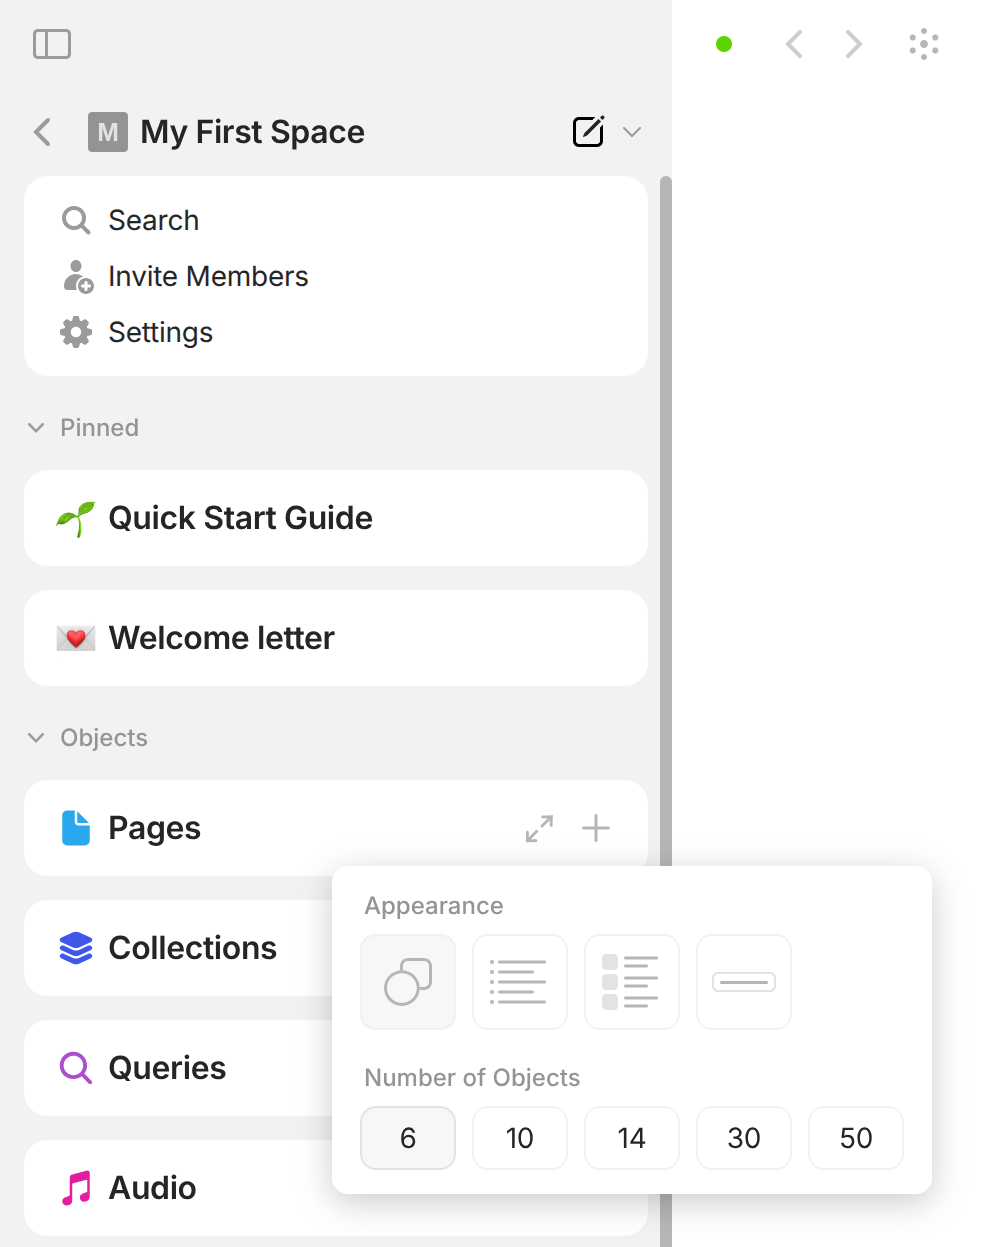
Regular objects can choose between compact and tree layouts, while queries and collections can choose from compact, list, compact list, or object layouts.

Selecting the object layout allows you to choose any view from that particular query/collection, and it will also follow that view's layout.

<figure><img src="/files/xBVDPDkm8Xt9DFIFHvag" alt="" width="563"><figcaption></figcaption></figure>


# Collaboration

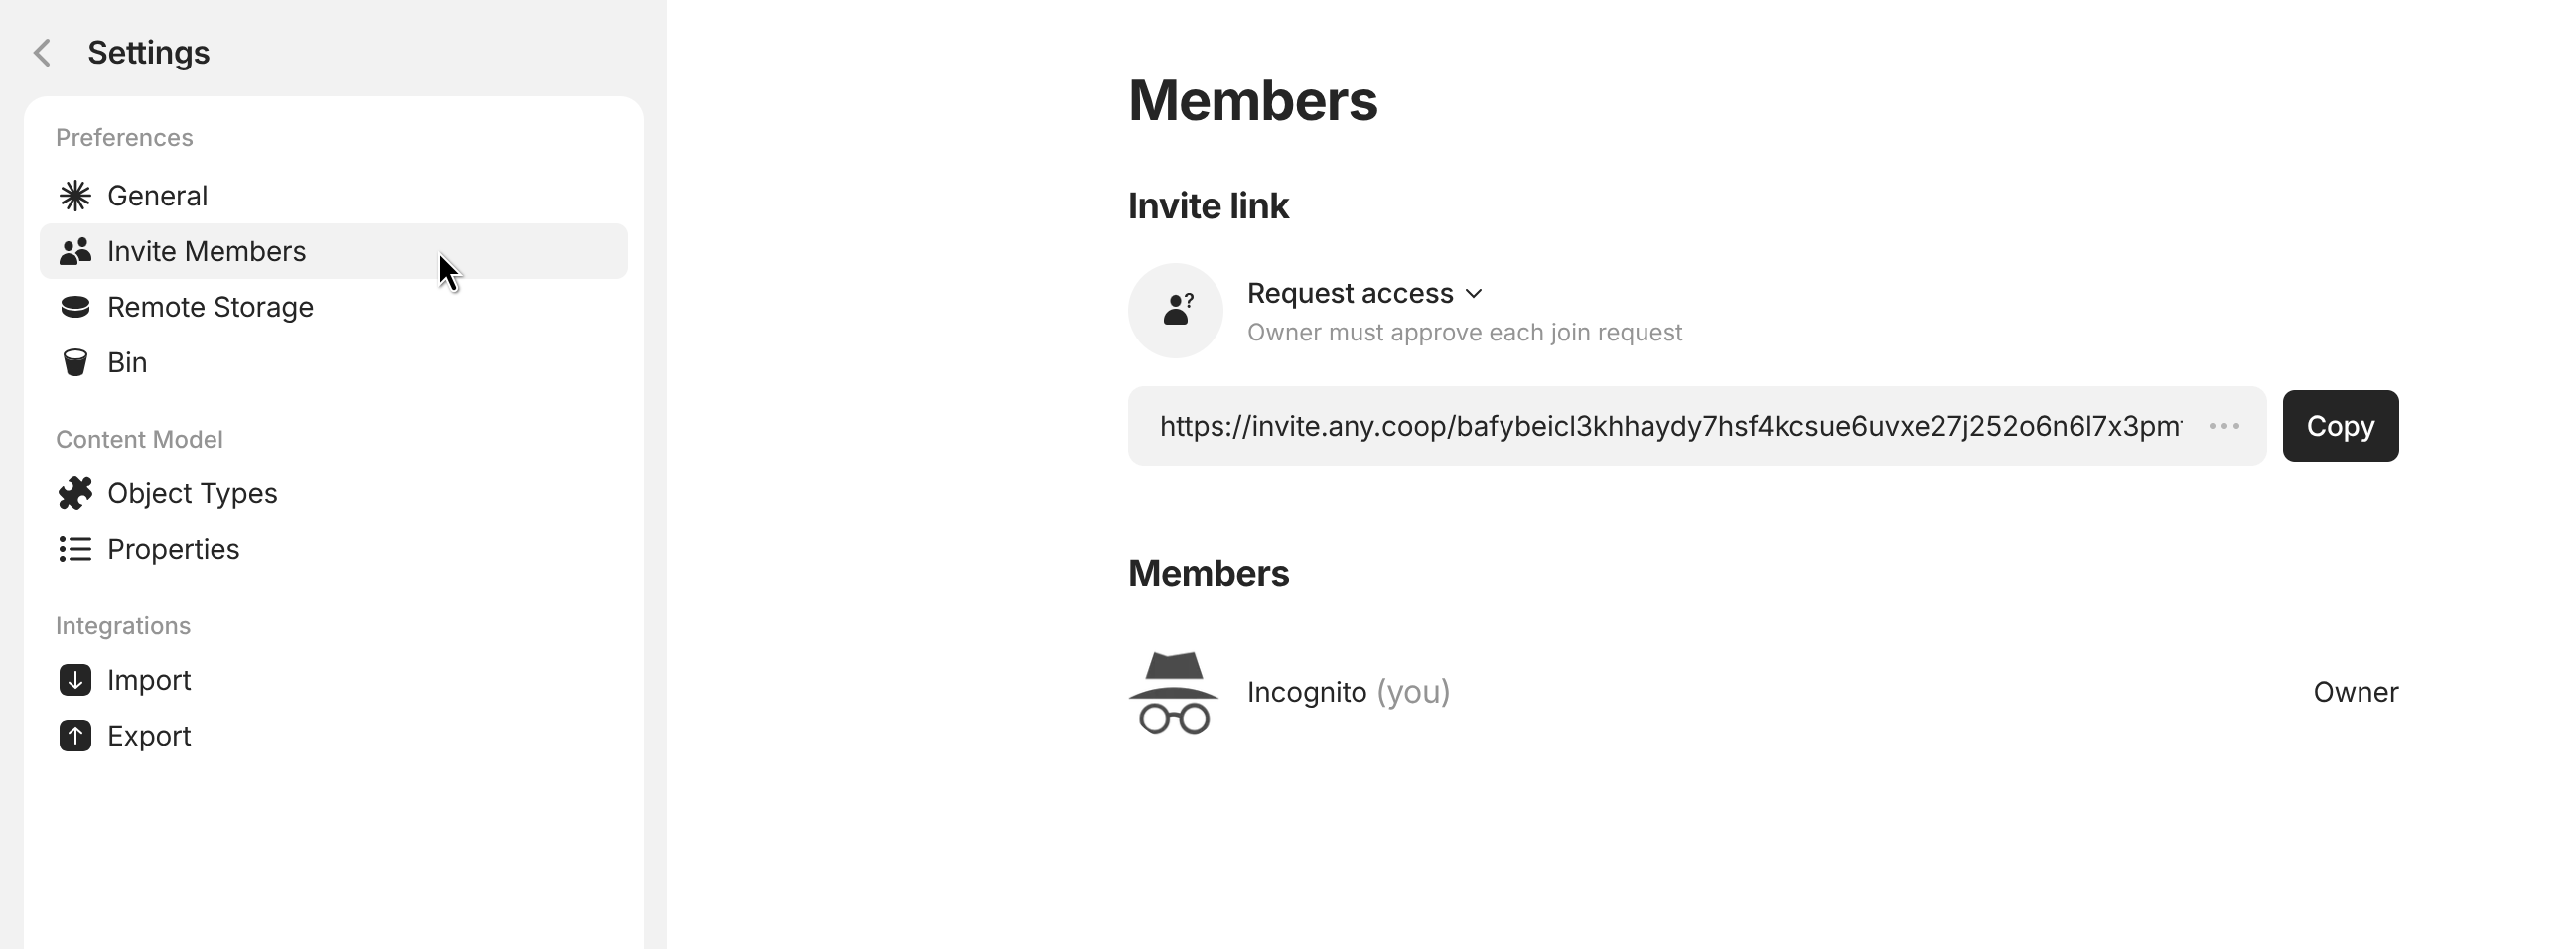
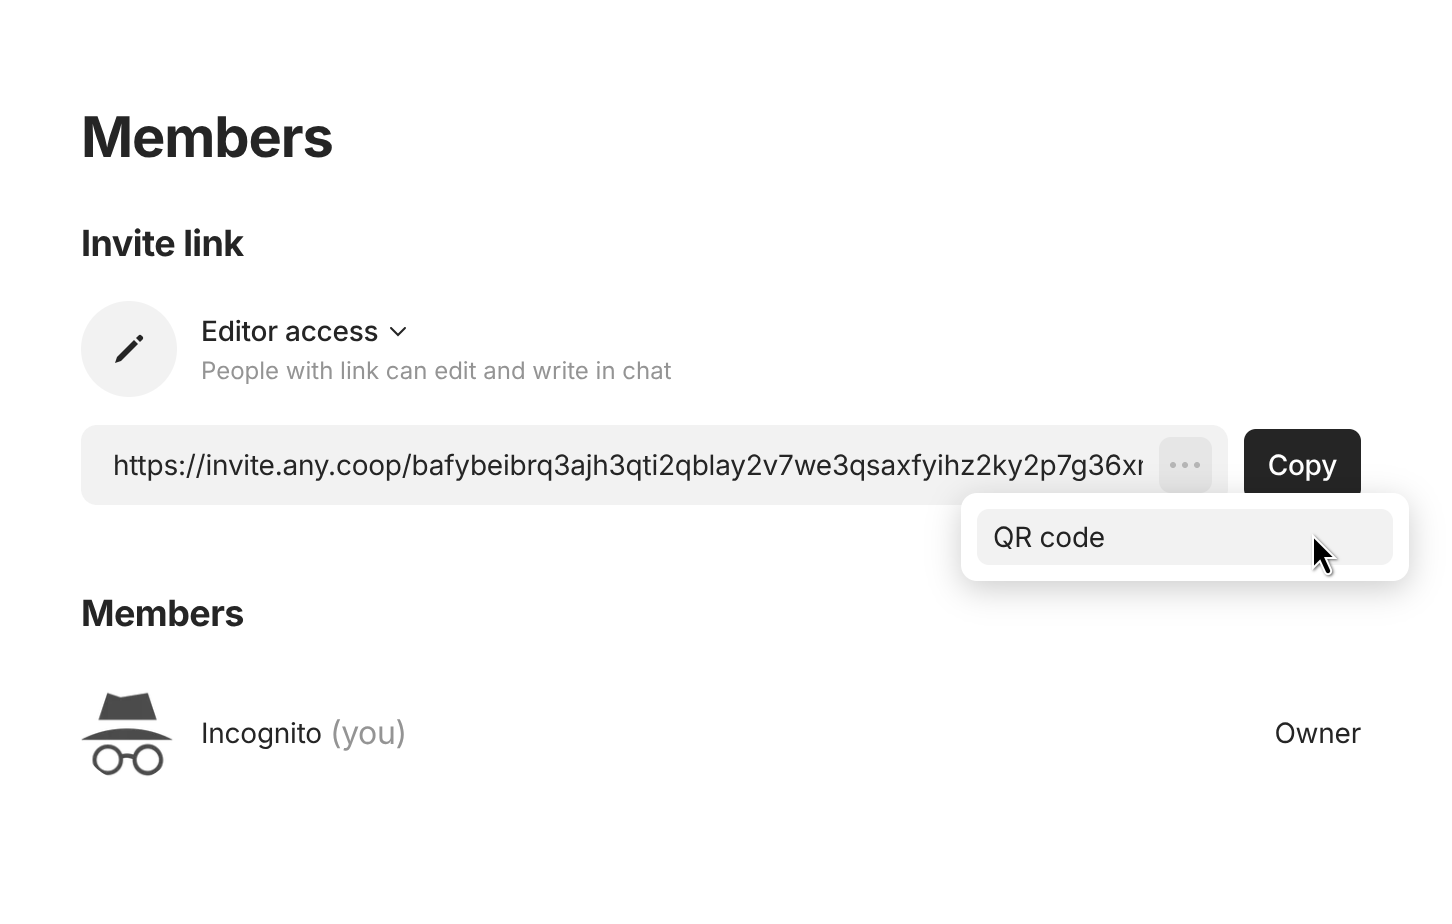
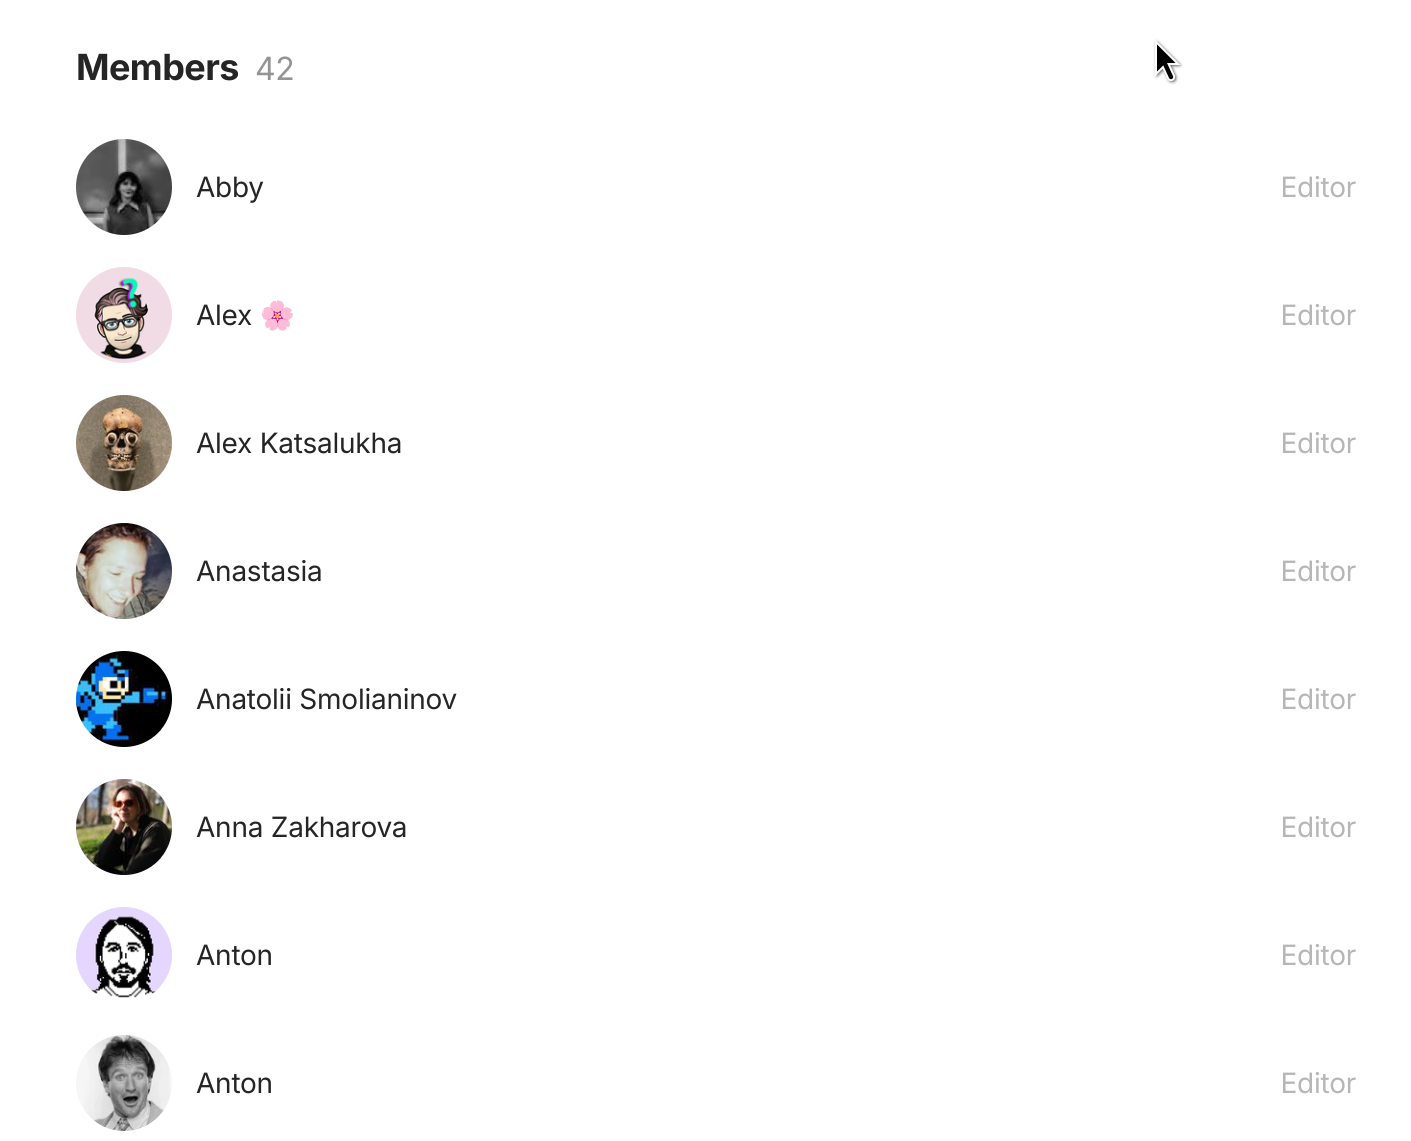
You can now find the Members submenu in the Channel Settings menu of each channel you’ve created. Clicking here allows you to generate an invite link for the channel that can be sent to anyone.

<figure><img src="/files/qbHu9jtUciE9VGN92eSh" alt=""><figcaption></figcaption></figure>

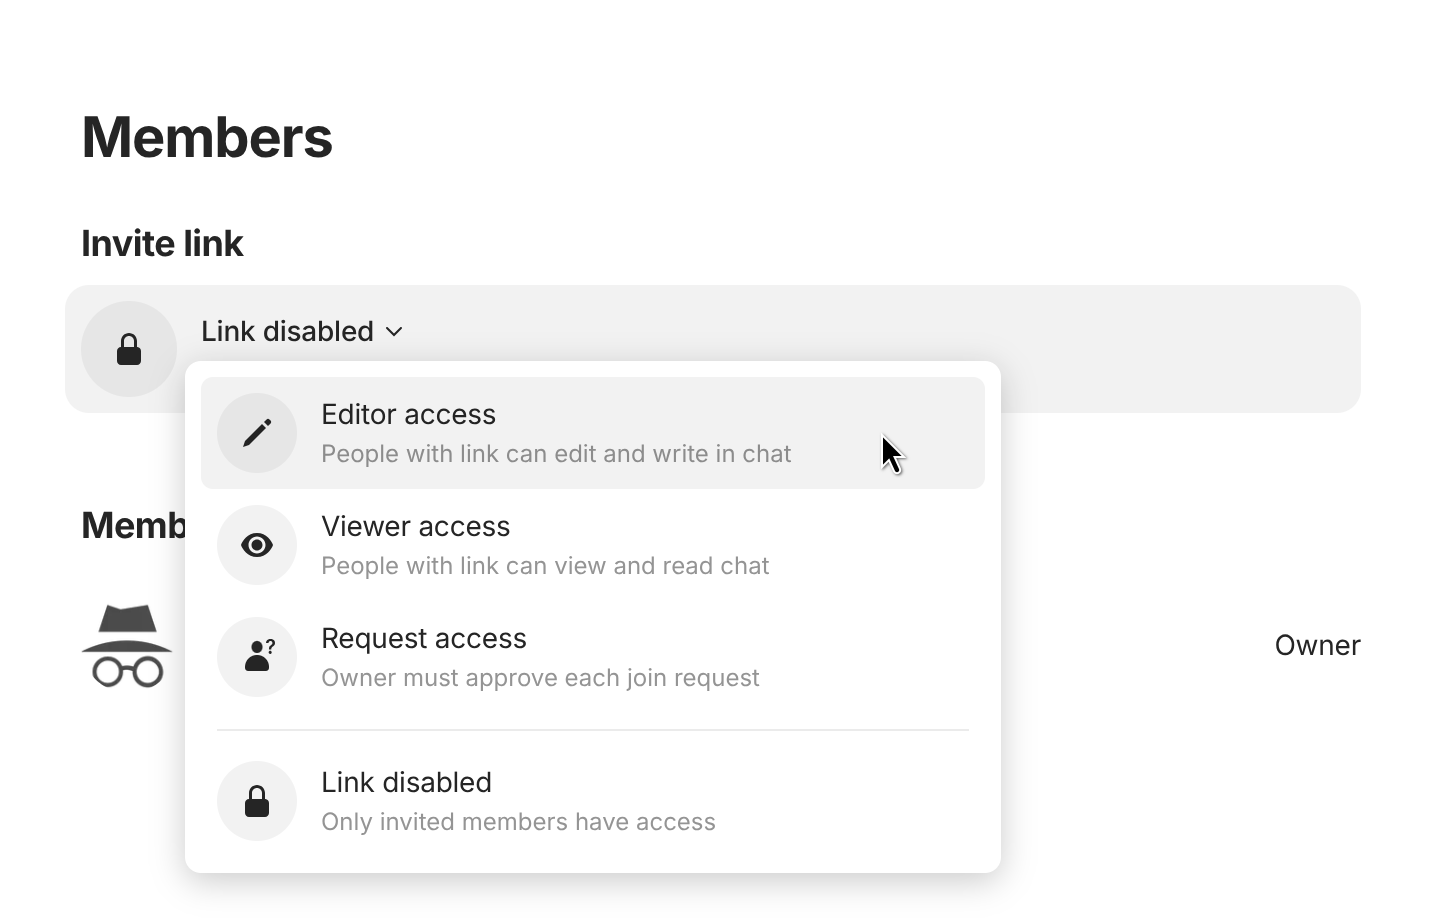
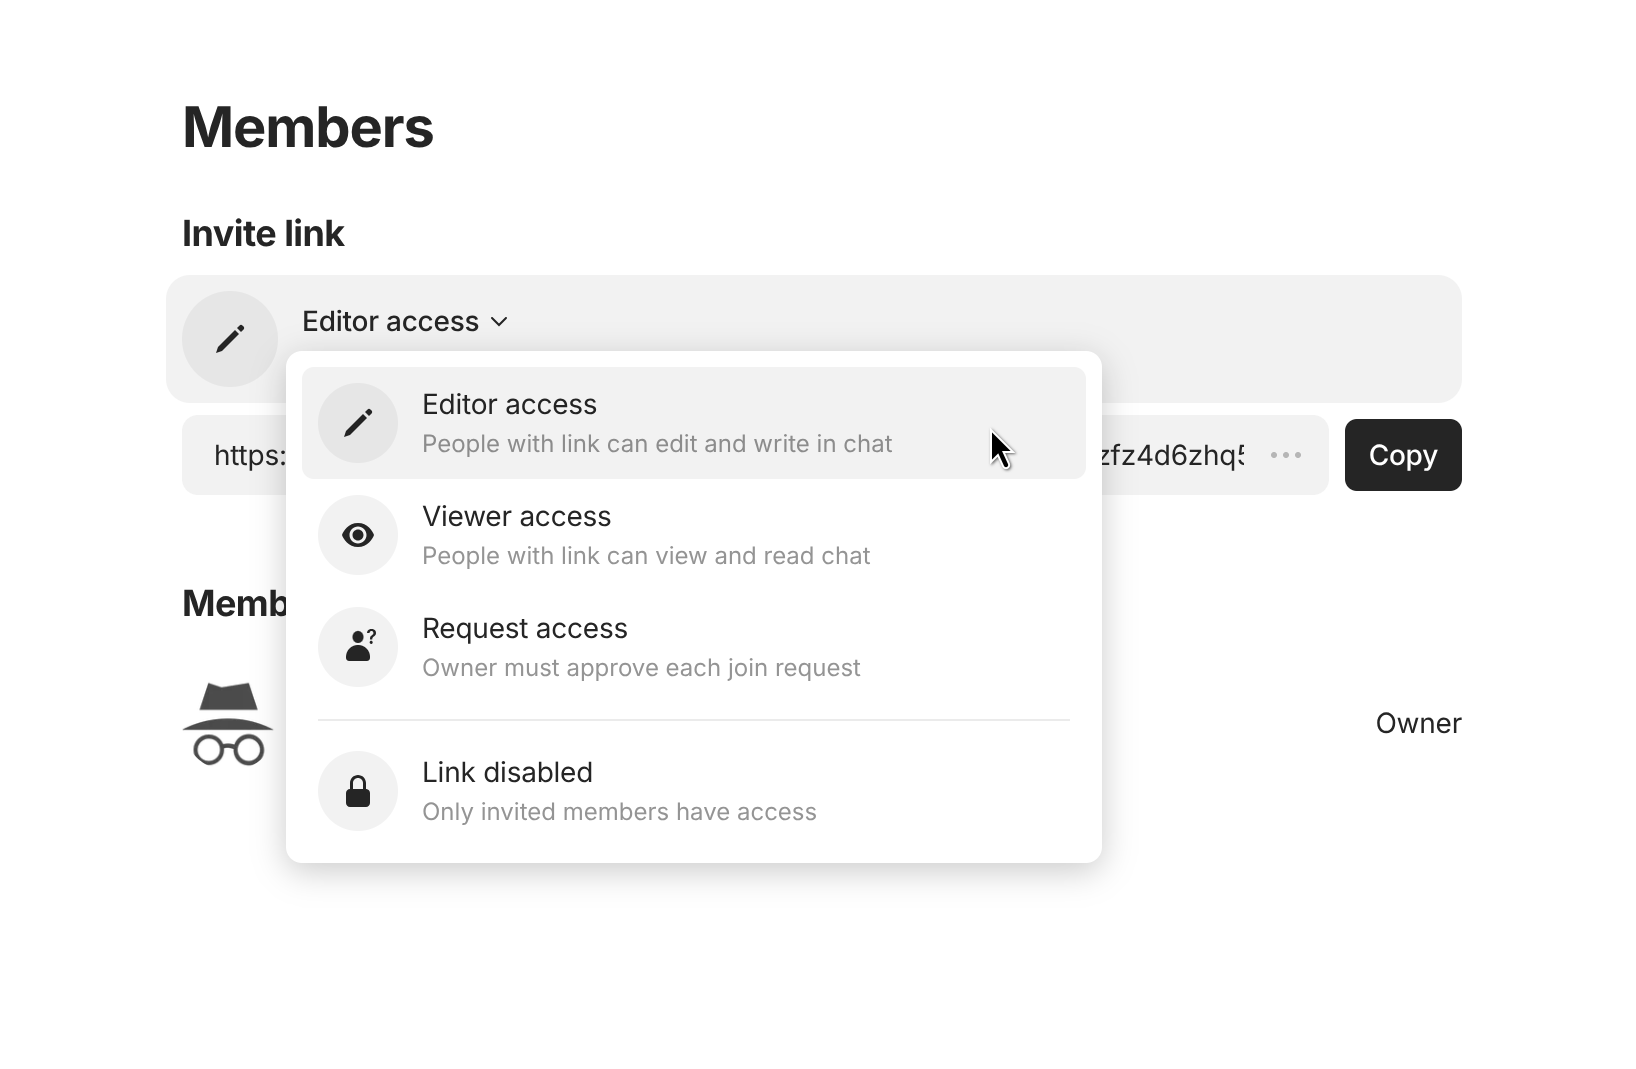
There are three types of invitation link: Editor, Viewer, and Request Access. The first two allow users to join the channel directly with specific access, eliminating the need for confirmation by the owner. The third type enables the owner to select the desired level of access after the user has requested it.

<figure><img src="/files/Y2QElpQ4tUiGGjr8XX96" alt=""><figcaption></figcaption></figure>

When you create a shared channel you are the Channel Owner. The Channel Owner can change any object in the channel, the channel name and settings, and is the only one with rights to add and remove members.

All other members of the Channel have either Viewer or Editor rights. Viewers have read-only access to the Channel, while Editors can edit any object in the Channel or the Channel Name.

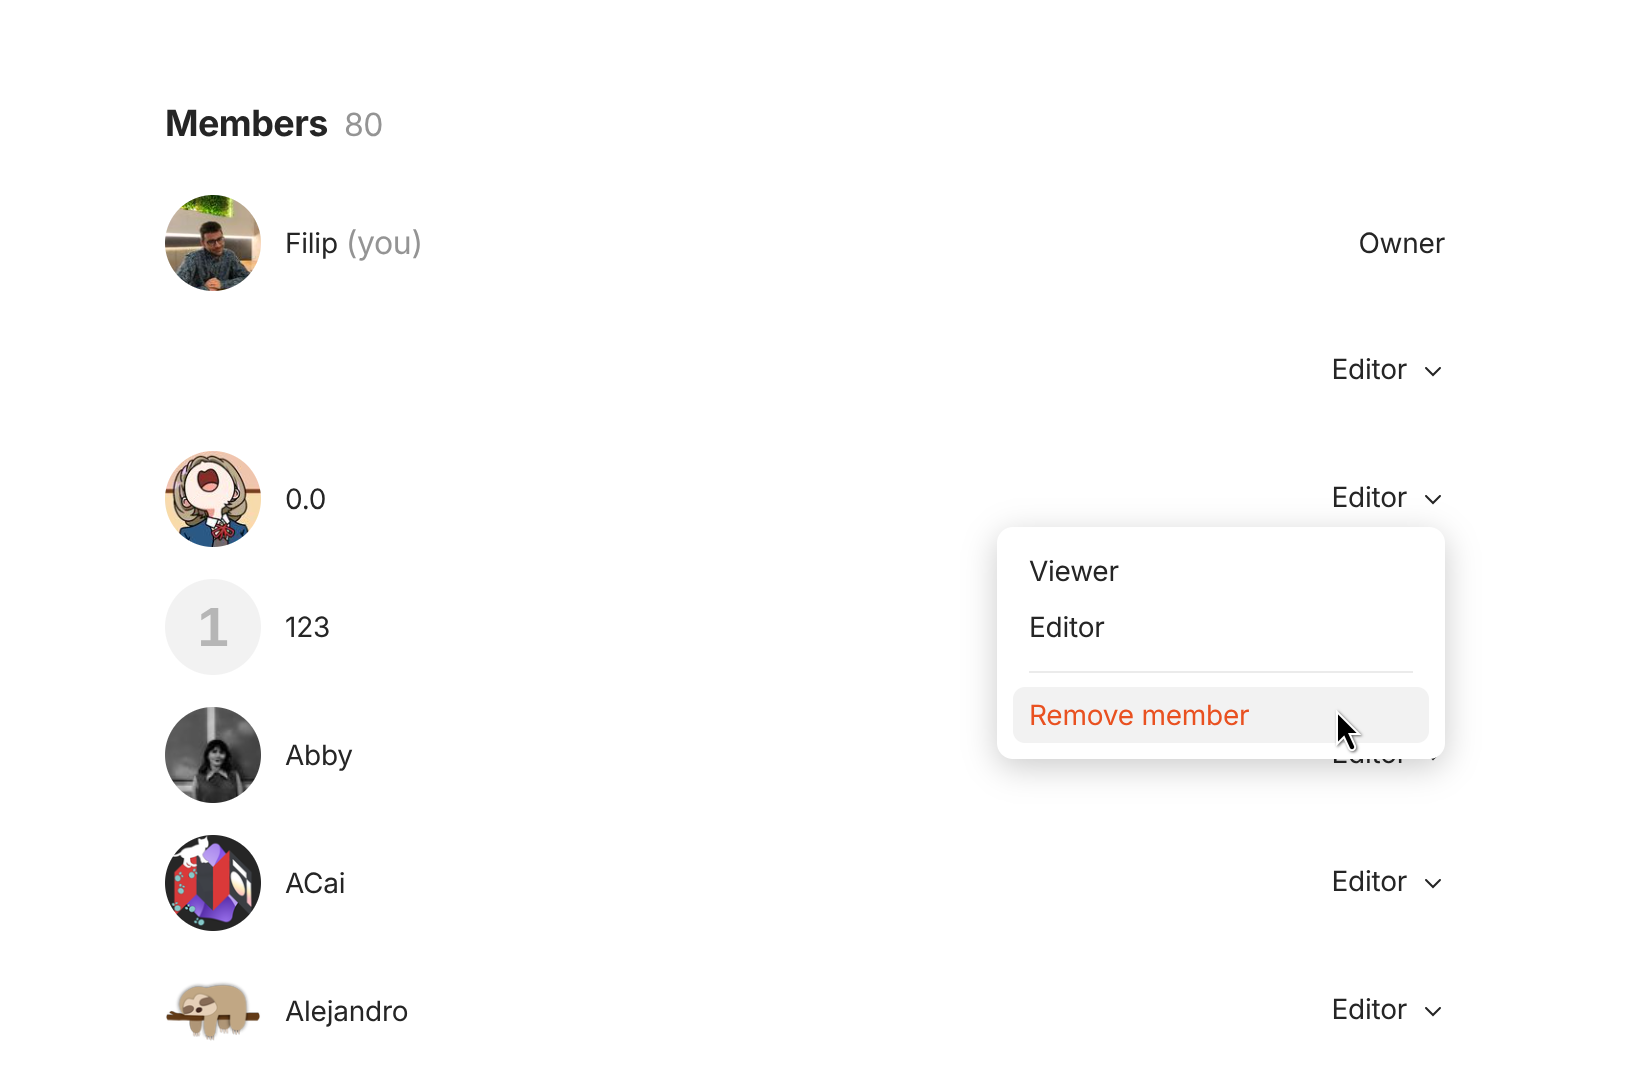
From the same menu, you can manage the roles of guests you have invited to your Channel or remove them altogether. Guests who have been removed from a Channel will receive a notification informing them of this.

<figure><img src="/files/B1EZ9K7VRSjNeBhmC3oW" alt=""><figcaption></figcaption></figure>


# Publish

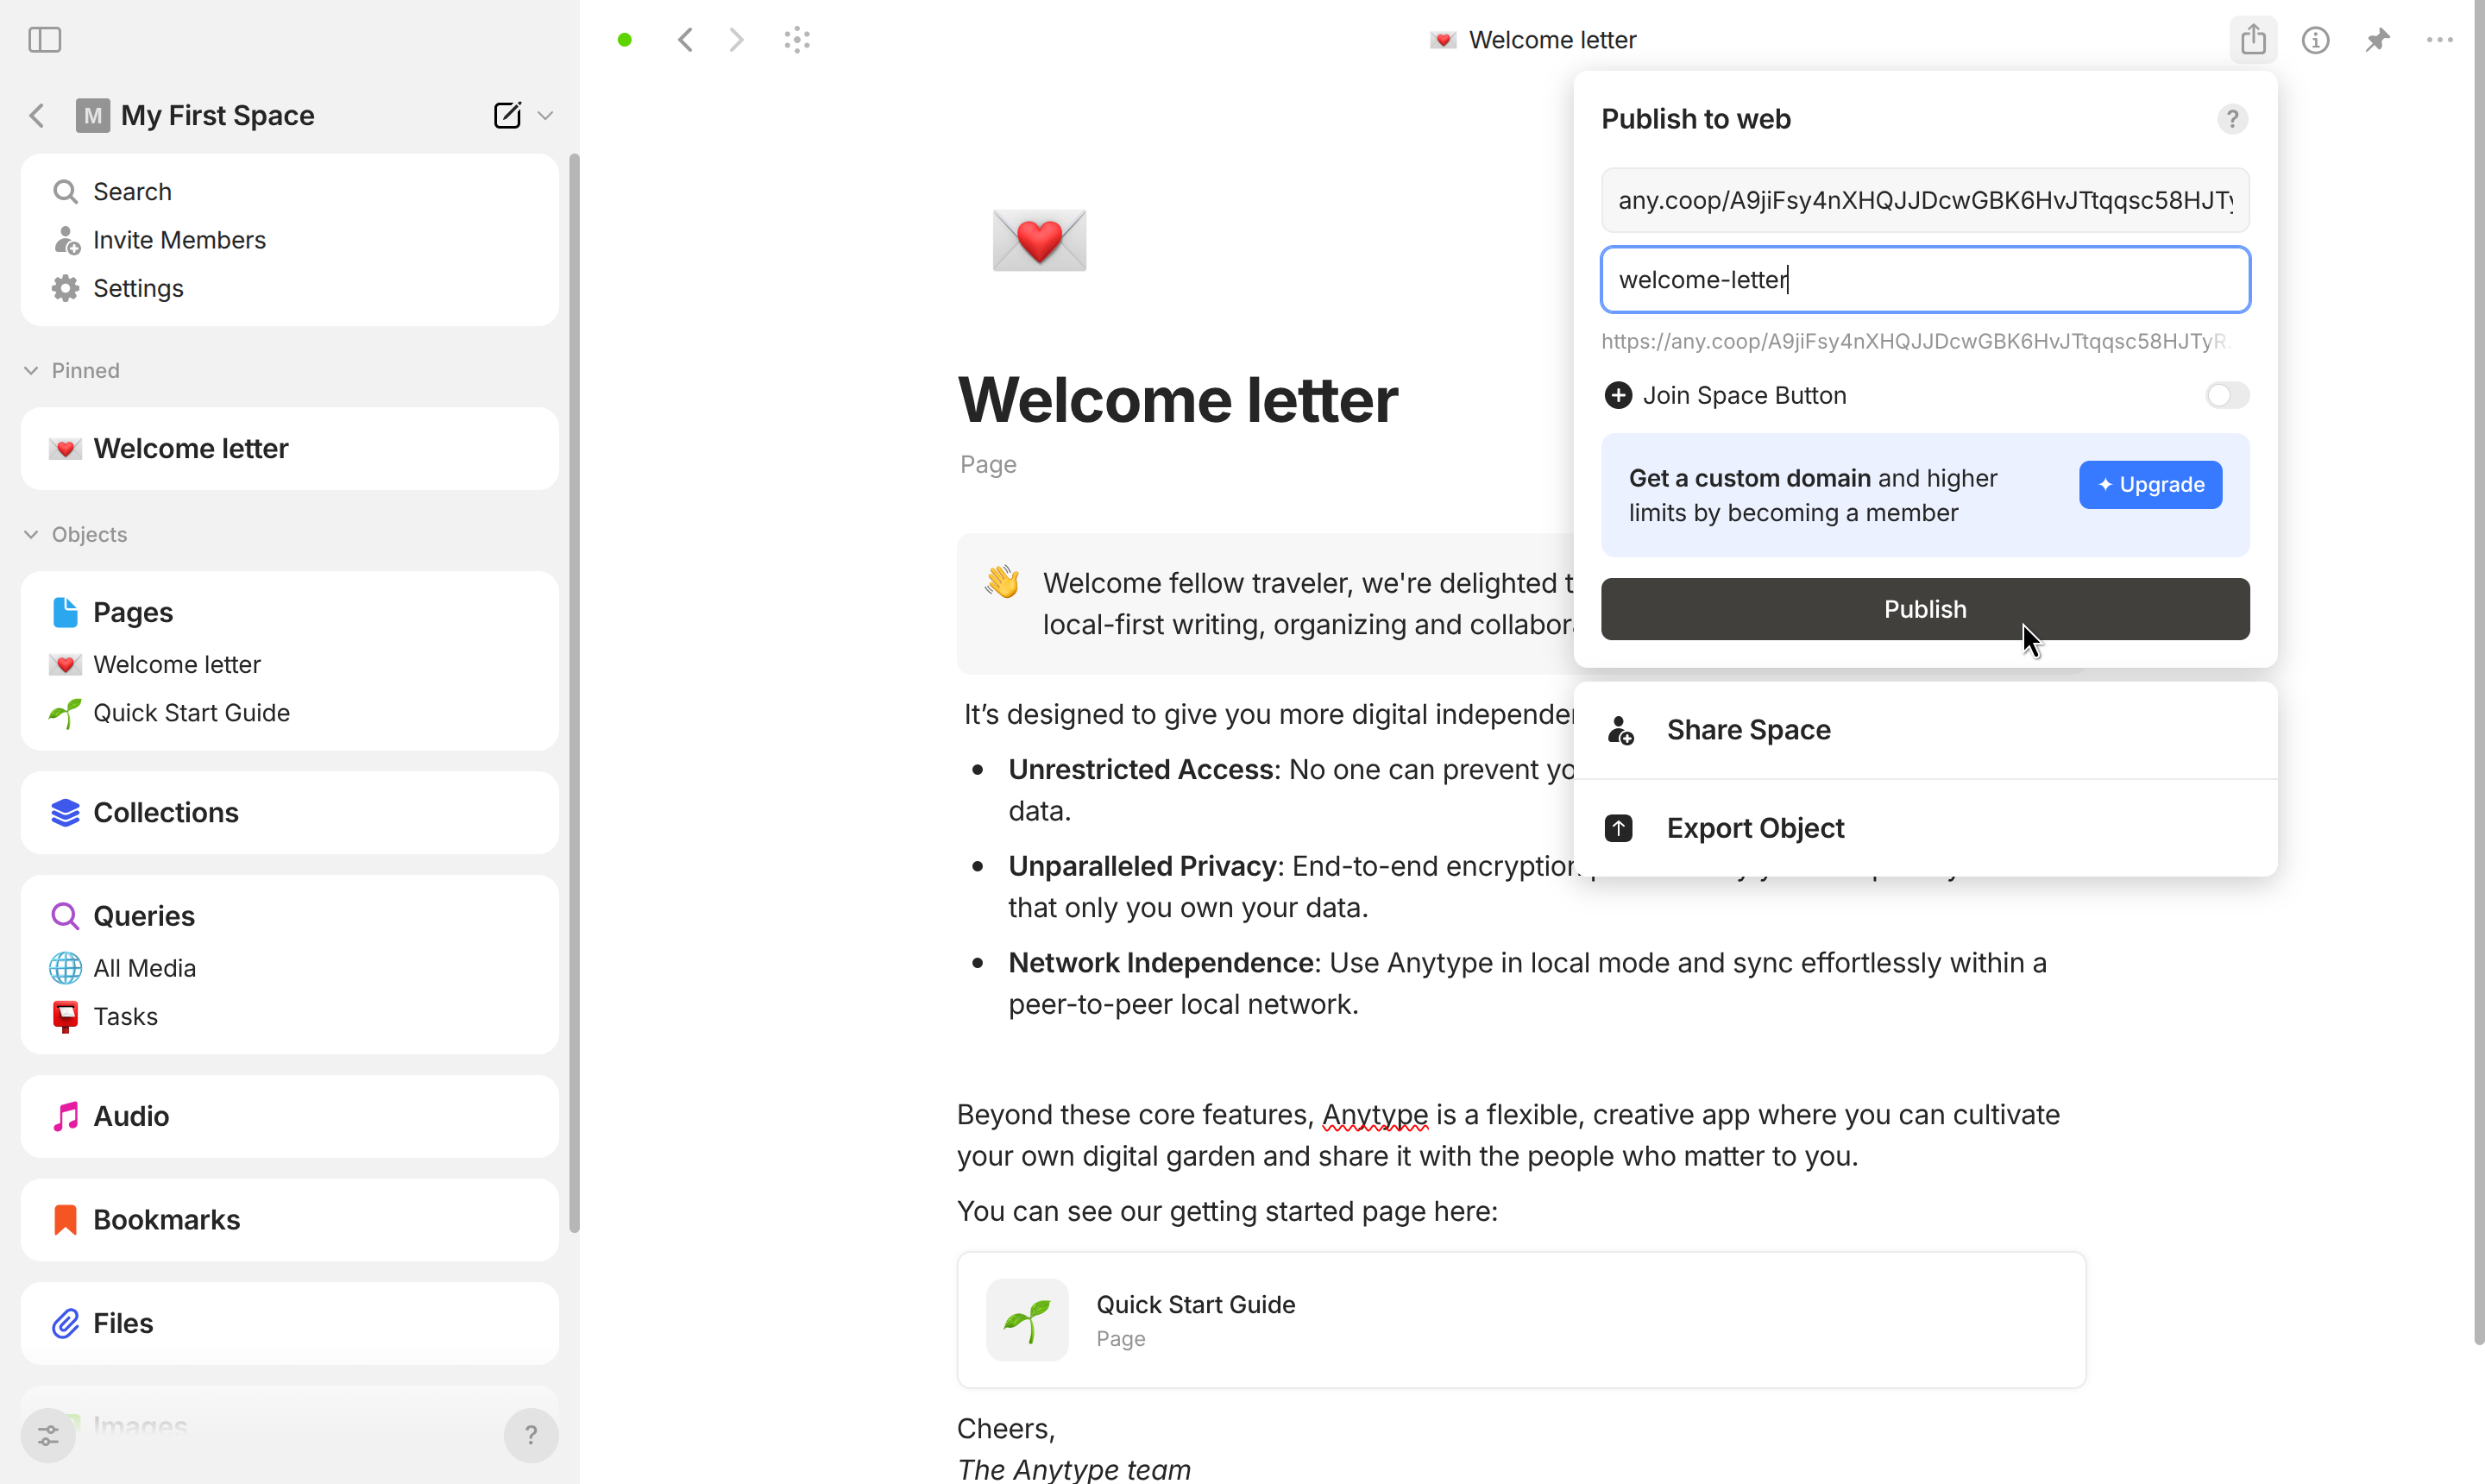
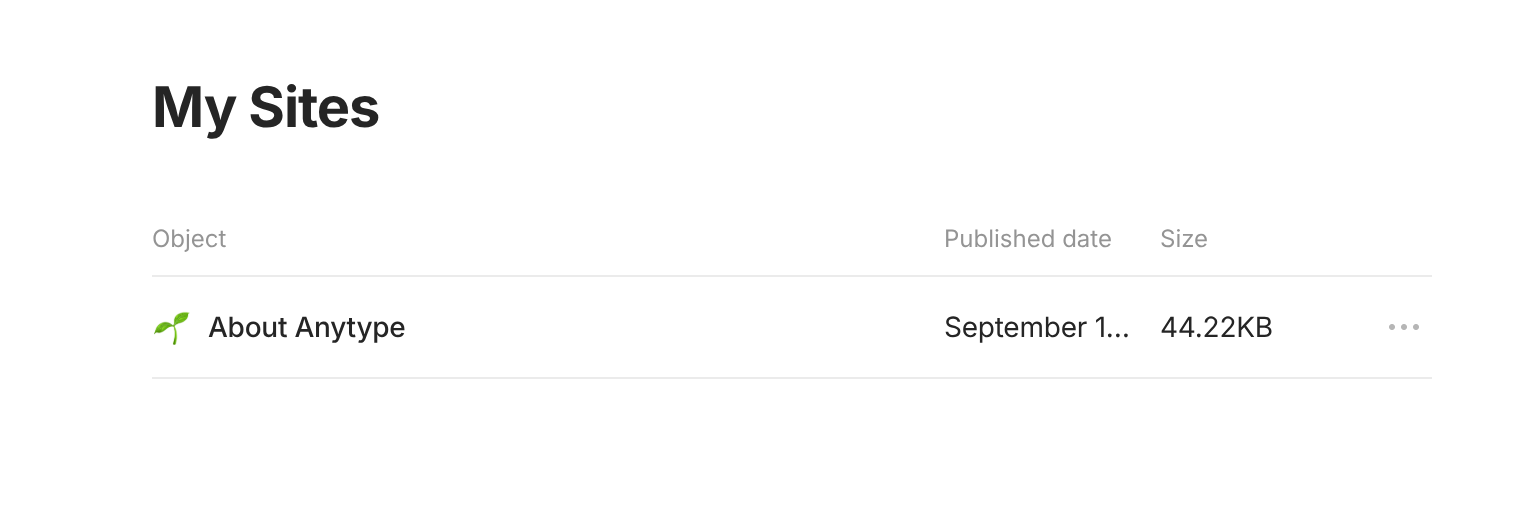
You can now publish Objects as static web pages (HTTPS links) on your personal subdomain if you have an ANY ID. These pages are uploaded to our servers as unencrypted HTML files.

This is an early version— linked Objects, and blocks like Queries and Collections aren’t supported yet. Multi-page publishing and other enhancements are on the way, and we’d love your feedback to guide these improvements.

<figure><img src="/files/KA0VLdDgqRrLrbWfaDVx" alt=""><figcaption></figcaption></figure>

### Encryption

When users use web publishing, we upload objects unencrypted for a number of reasons:

* Users explicitly choose an object to publish. So we limit the chance of accidental leakage.
* If users want their website to be indexed by search engines, it should be plaintext.
* The solution of decrypting in the browser and including the encryption key in the URL is a bit tricky in the case of multi-object exports.
* We do rendering and caching server-side to limit resource consumption.

The object is decrypted locally on the device and then uploaded to the web publishing server in Anyblock format.

If you have files in your object, we include the encryption keys for those files. But because each file has a unique locally-generated encryption key, it doesn't compromise your account in any way.


# Chats

### Chat as a Channel

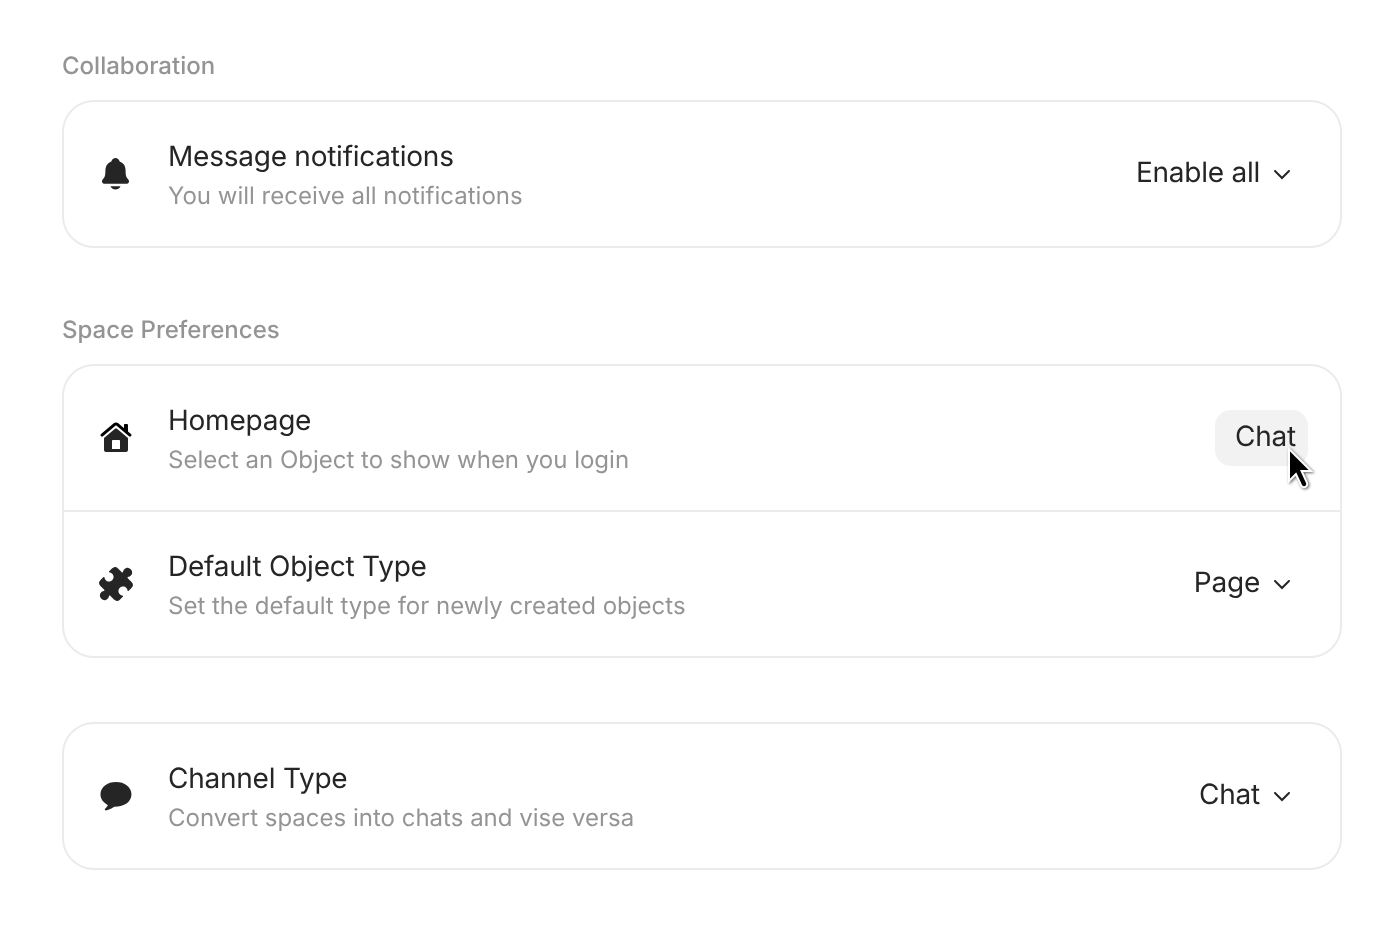
Chat is a new type of channel in Anytype, designed for fast, conversational flow.

<figure><img src="/files/Kzruo7eyS5oUUpYe8Wdz" alt=""><figcaption></figcaption></figure>

It gives you the familiar rhythm of chatting – replying, reacting, sharing files – but with a powerful twist: you can create and edit objects together in real time.

* Create Objects right from your chat window – turn thoughts into Pages, Tasks, or any other Type.
* Share existing Objects – anything you drop into Chat can be opened and edited right away.
* Keep things organized – uploads are added to the relevant Types (Audio, Images) and everything stays searchable and structured in your sidebar.
* Invite with ease – bring new members into a conversation instantly with links that don’t require approval.

### Multi-Chats in your Space

Space Channels now hold more than one conversation at a time. Start topic-specific chats right where your work happens – discussions now live alongside your notes, tasks, and documentation as part of your knowledge graph.

<figure><img src="https://anytype-static.fra1.cdn.digitaloceanspaces.com/img/help/51/1.png?v=0.51.12-alpha" alt=""><figcaption></figcaption></figure>

#### Chat as an Object Type

Chats are now native Objects in your Space. You can organize them into different views, assign tags to group related conversations, include them in Collections or Queries, and @-mention them from any Object for cross-referencing. As a system Type, Chat doesn’t support templates or layout changes.

<figure><img src="https://anytype-static.fra1.cdn.digitaloceanspaces.com/img/help/51/2.png?v=0.51.12-alpha" alt=""><figcaption></figcaption></figure>

#### Widget Behaviour

The Chats Type Widget works like any other widget: you can pin it to your Sidebar, adjust its appearance by choosing how many chats to show, and pin individual chats for quicker access.Unlike other Widgets, pinned chats display counters and mention indicators directly in the Sidebar. A temporary *Unread* section also appears automatically when new messages arrive, listing chats with unread content.

<figure><img src="https://anytype-static.fra1.cdn.digitaloceanspaces.com/img/help/51/3.png?v=0.51.12-alpha" alt=""><figcaption></figcaption></figure>

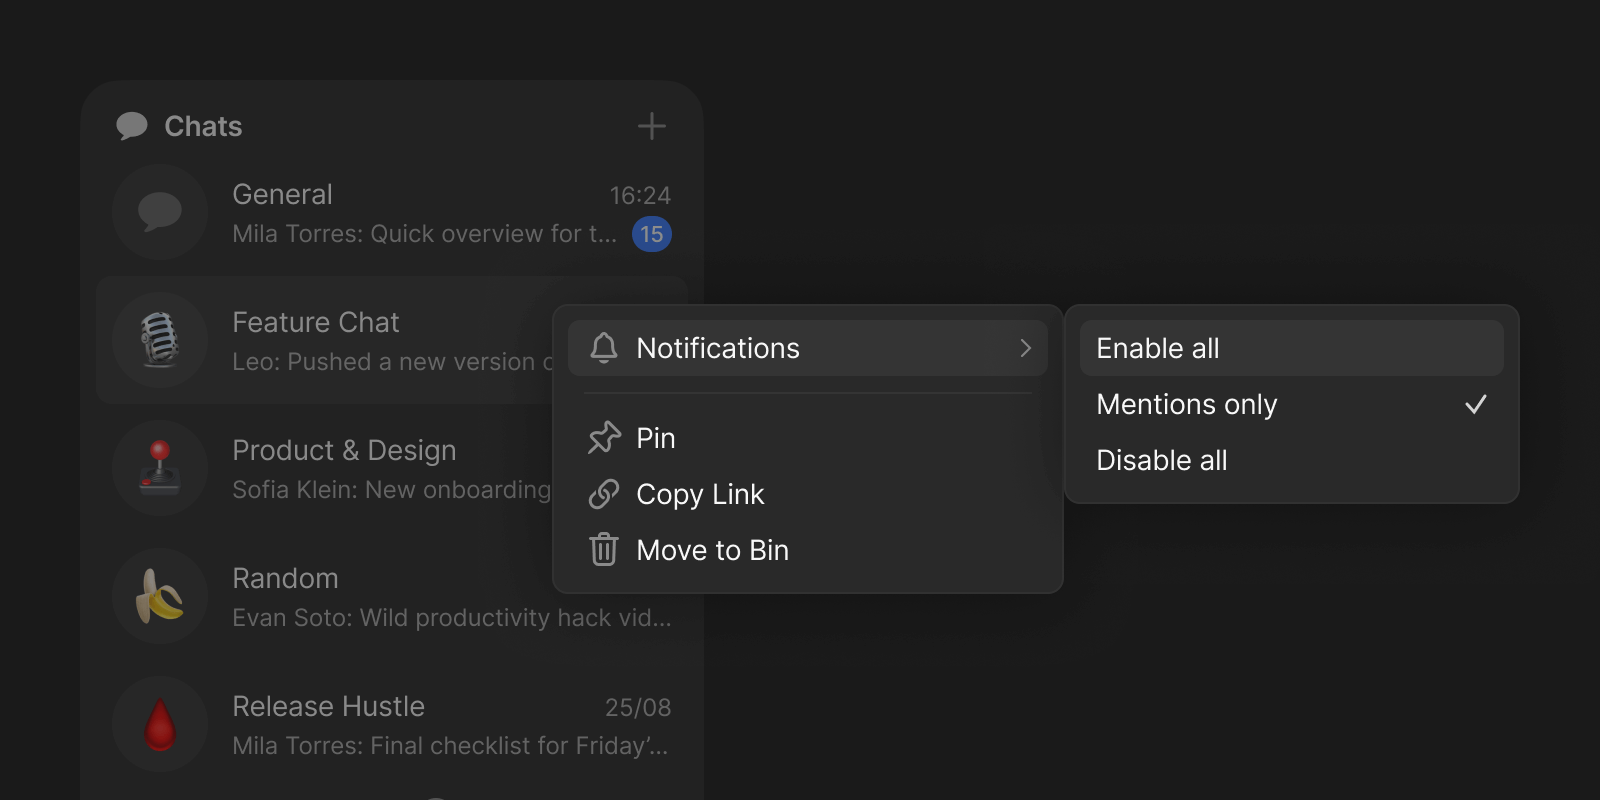
#### Per-Chat Notifications

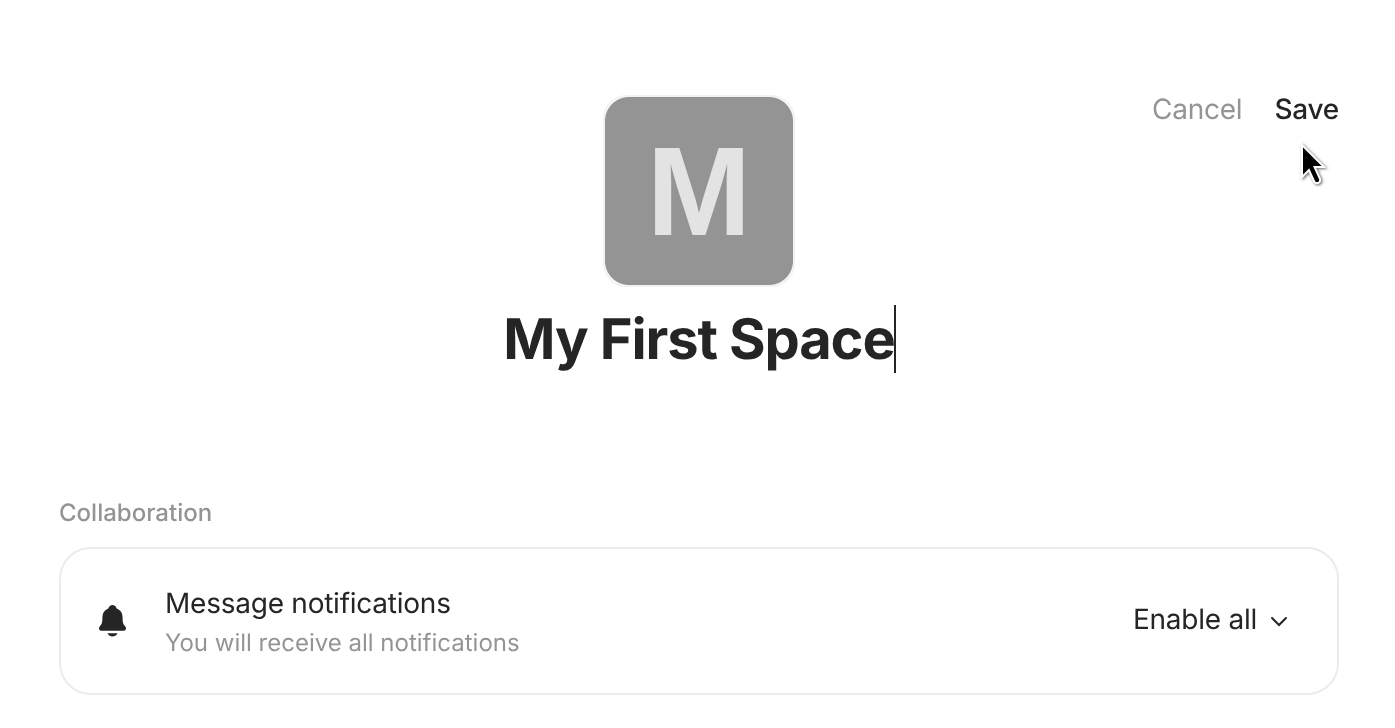
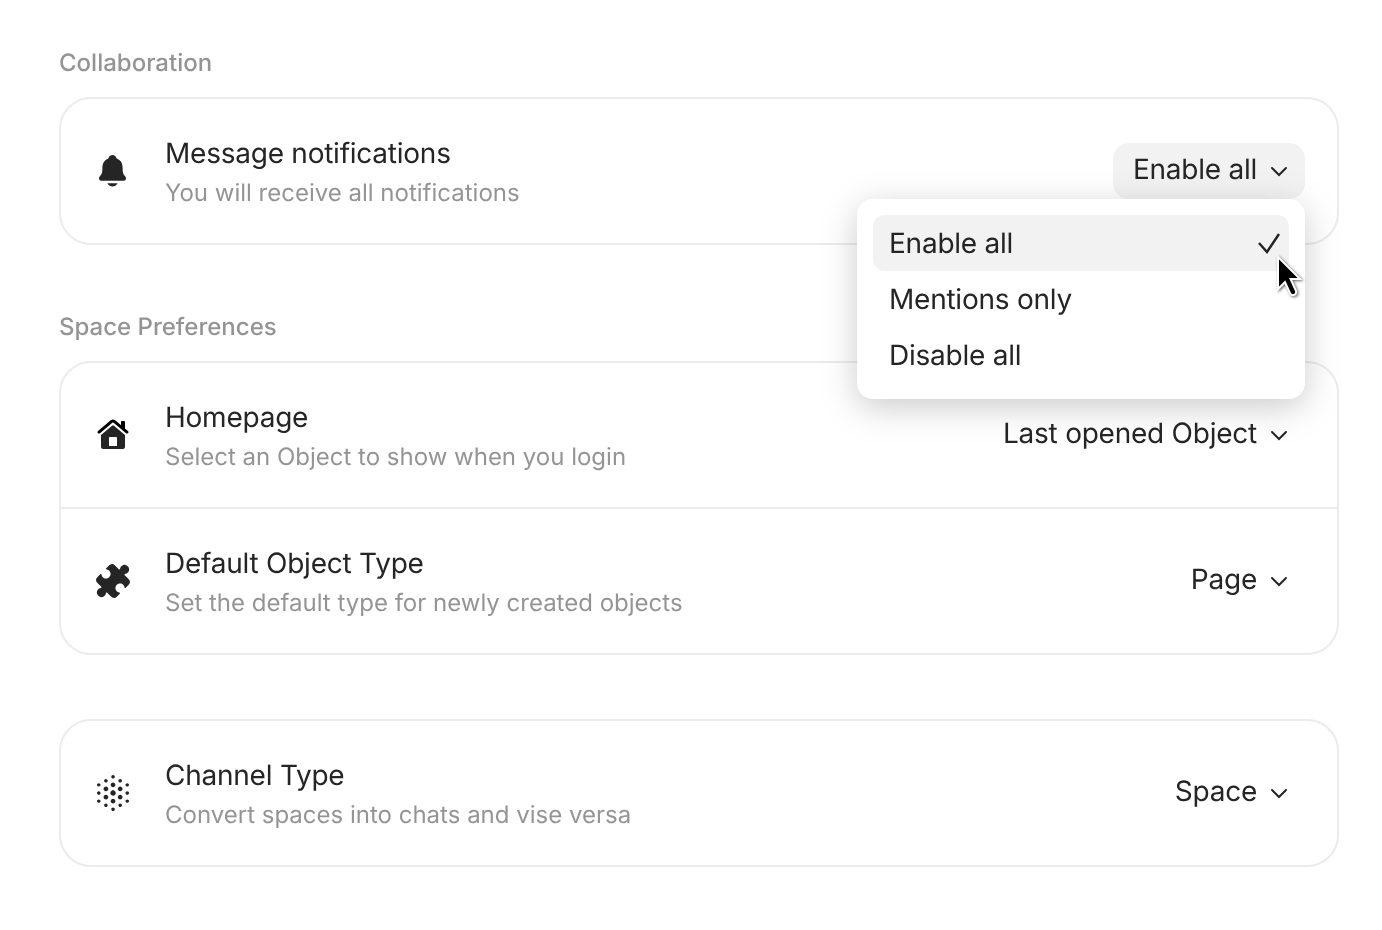
Right-click any Chat Object, or use the three-dots menu inside a chat window to open preferences and choose *Enable all*, *Mentions only*, or *Disable all*.

<figure><img src="https://anytype-static.fra1.cdn.digitaloceanspaces.com/img/help/51/4.png?v=0.51.12-alpha" alt=""><figcaption></figcaption></figure>

### Direct Channels

Sometimes you just need to talk to one person. Privately.

Direct Channel is a one-on-one connection between two members, where both participants have equal access: no admin, no hierarchy. Just a place for quick check-ins, sharing an object, or whispering memes in the middle of a project. It’s simple, it’s lightweight, and it just works.

<figure><img src="https://anytype-static.fra1.cdn.digitaloceanspaces.com/img/help/52/2.png?v=0.51.39-alpha" alt=""><figcaption></figcaption></figure>

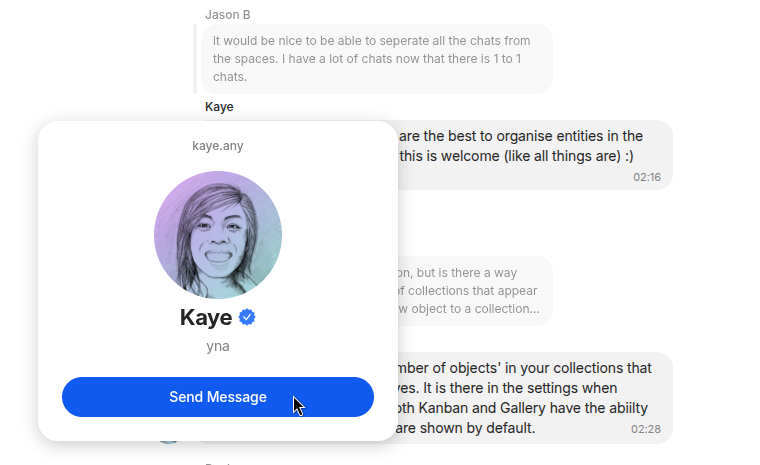
To start a new direct channel, simply click on someone's profile and select 'Send message':

<figure><img src="/files/pOBe05KVDg1JgkMrzaN9" alt=""><figcaption></figcaption></figure>


# PARA Method

We tested Tiago Forte's popular method for note taking and building a second brain.

{% hint style="info" %}
You can import this use case to your channel using this [link](https://gallery.any.coop/?experience=para_lite).
{% endhint %}

<figure><img src="/files/Xe7Rv3UrM7Lx2WhAhcVs" alt=""><figcaption></figcaption></figure>

For more use cases, please check out our [ANY Experience Gallery](/anytype-docs/advanced/community/any-experience-gallery). You can either access it directly from the app by navigating to the bottom of your spaces sidebar or by clicking [this link](https://gallery.any.coop/).


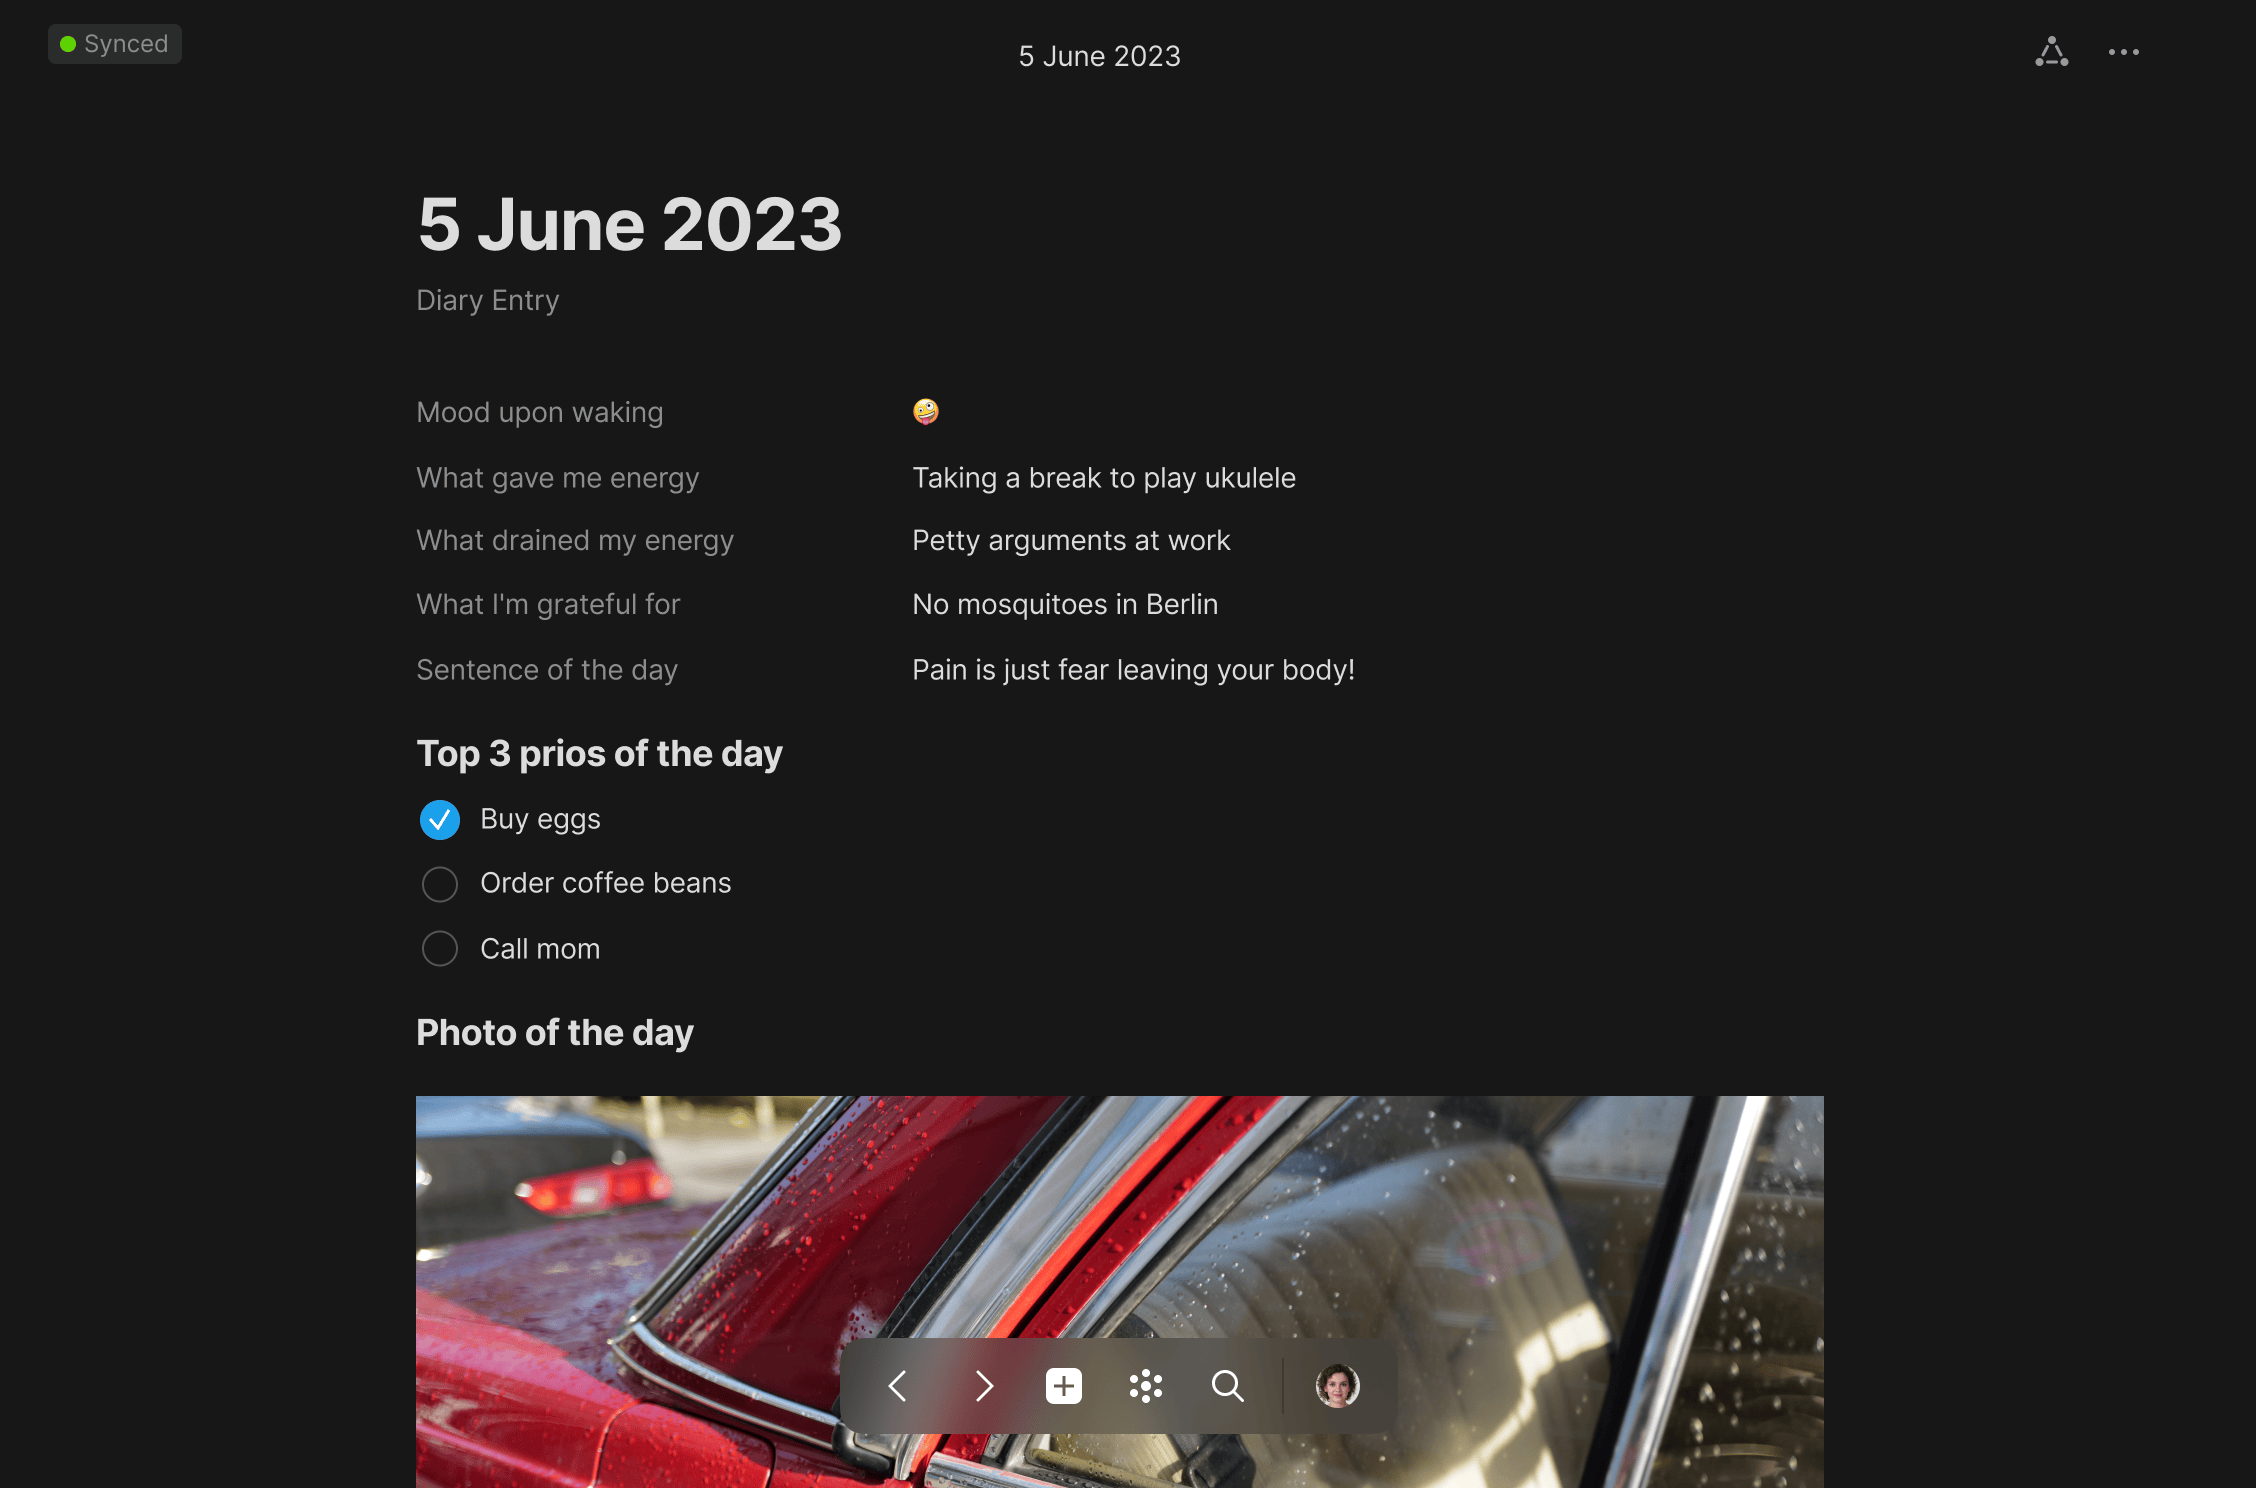
# Daily Notes

95% of our thoughts are repetitive. Cultivate a practice of daily journaling to start noticing thought patterns and develop new ideas.

{% hint style="info" %}
You can import this use case to your channel using this [link](https://gallery.any.coop/?experience=daily_journal).
{% endhint %}

<div><figure><img src="/files/N7MfDj6CXcaM333kLG1K" alt=""><figcaption></figcaption></figure> <figure><img src="/files/f6lHTHiEfLiDnLkokQZO" alt=""><figcaption></figcaption></figure></div>

For more use cases, please check out our [ANY Experience Gallery](/anytype-docs/advanced/community/any-experience-gallery). You can either access it directly from the app by navigating to the bottom of your spaces sidebar or by clicking [this link](https://gallery.any.coop/).


# Study Notes

One place to keep your course schedule, syllabus, study notes, assignments, and tasks. Link it all together in the graph for richer insights.

{% hint style="info" %}
You can import this use case to your channel using this [link](https://gallery.any.coop/?experience=study_hub).
{% endhint %}

<div><figure><img src="/files/qm7zztUIC75qshFxCLPv" alt=""><figcaption></figcaption></figure> <figure><img src="/files/w9xFRdjeeoEZqeQclYaY" alt=""><figcaption></figcaption></figure></div>

For more use cases, please check out our [ANY Experience Gallery](/anytype-docs/advanced/community/any-experience-gallery). You can either access it directly from the app by navigating to the bottom of your spaces sidebar or by clicking [this link](https://gallery.any.coop/).


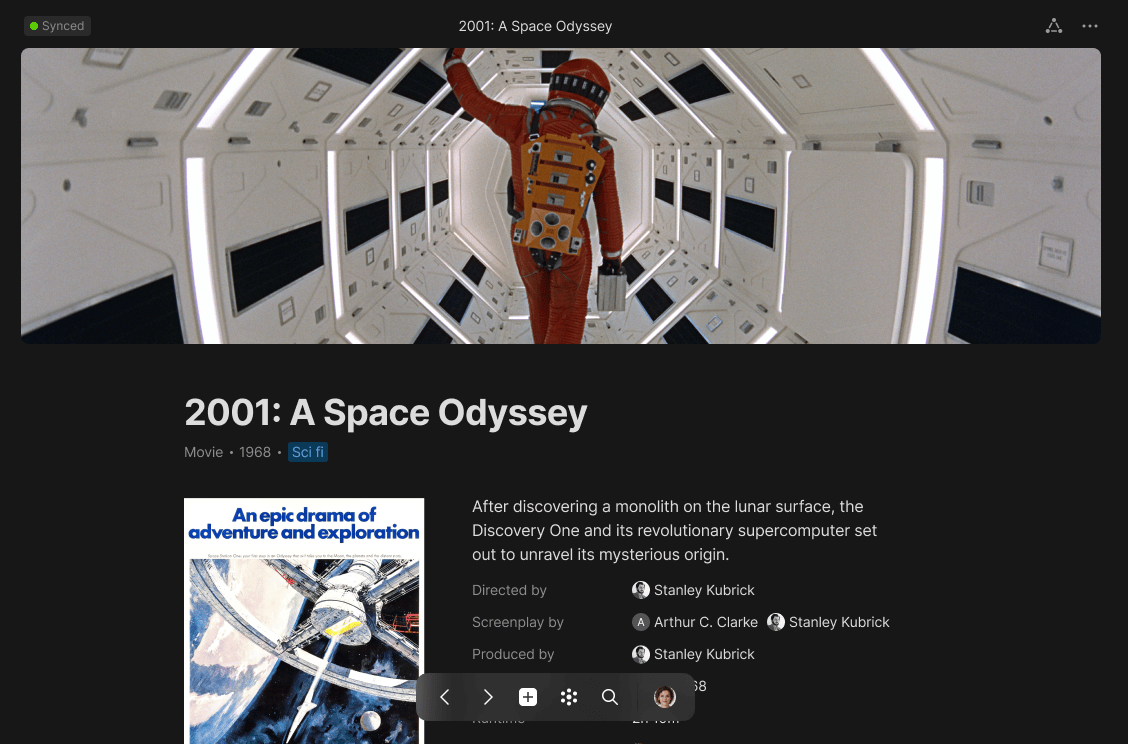
# Movie Database

Let your inner hobbyist run wild and create an encyclopaedia of everything you love. Use it for documenting knowledge you collect over the years.

{% hint style="info" %}
You can import this use case to your channel using this [link](https://gallery.any.coop/?experience=movie_database).
{% endhint %}

<div><figure><img src="/files/r5UfiXj5Igw4Bvc2nQmg" alt=""><figcaption></figcaption></figure> <figure><img src="/files/cTqentWzUPrtavXSbt0R" alt=""><figcaption></figcaption></figure></div>

For more use cases, please check out our [ANY Experience Gallery](/anytype-docs/advanced/community/any-experience-gallery). You can either access it directly from the app by navigating to the bottom of your spaces sidebar or by clicking [this link](https://gallery.any.coop/).


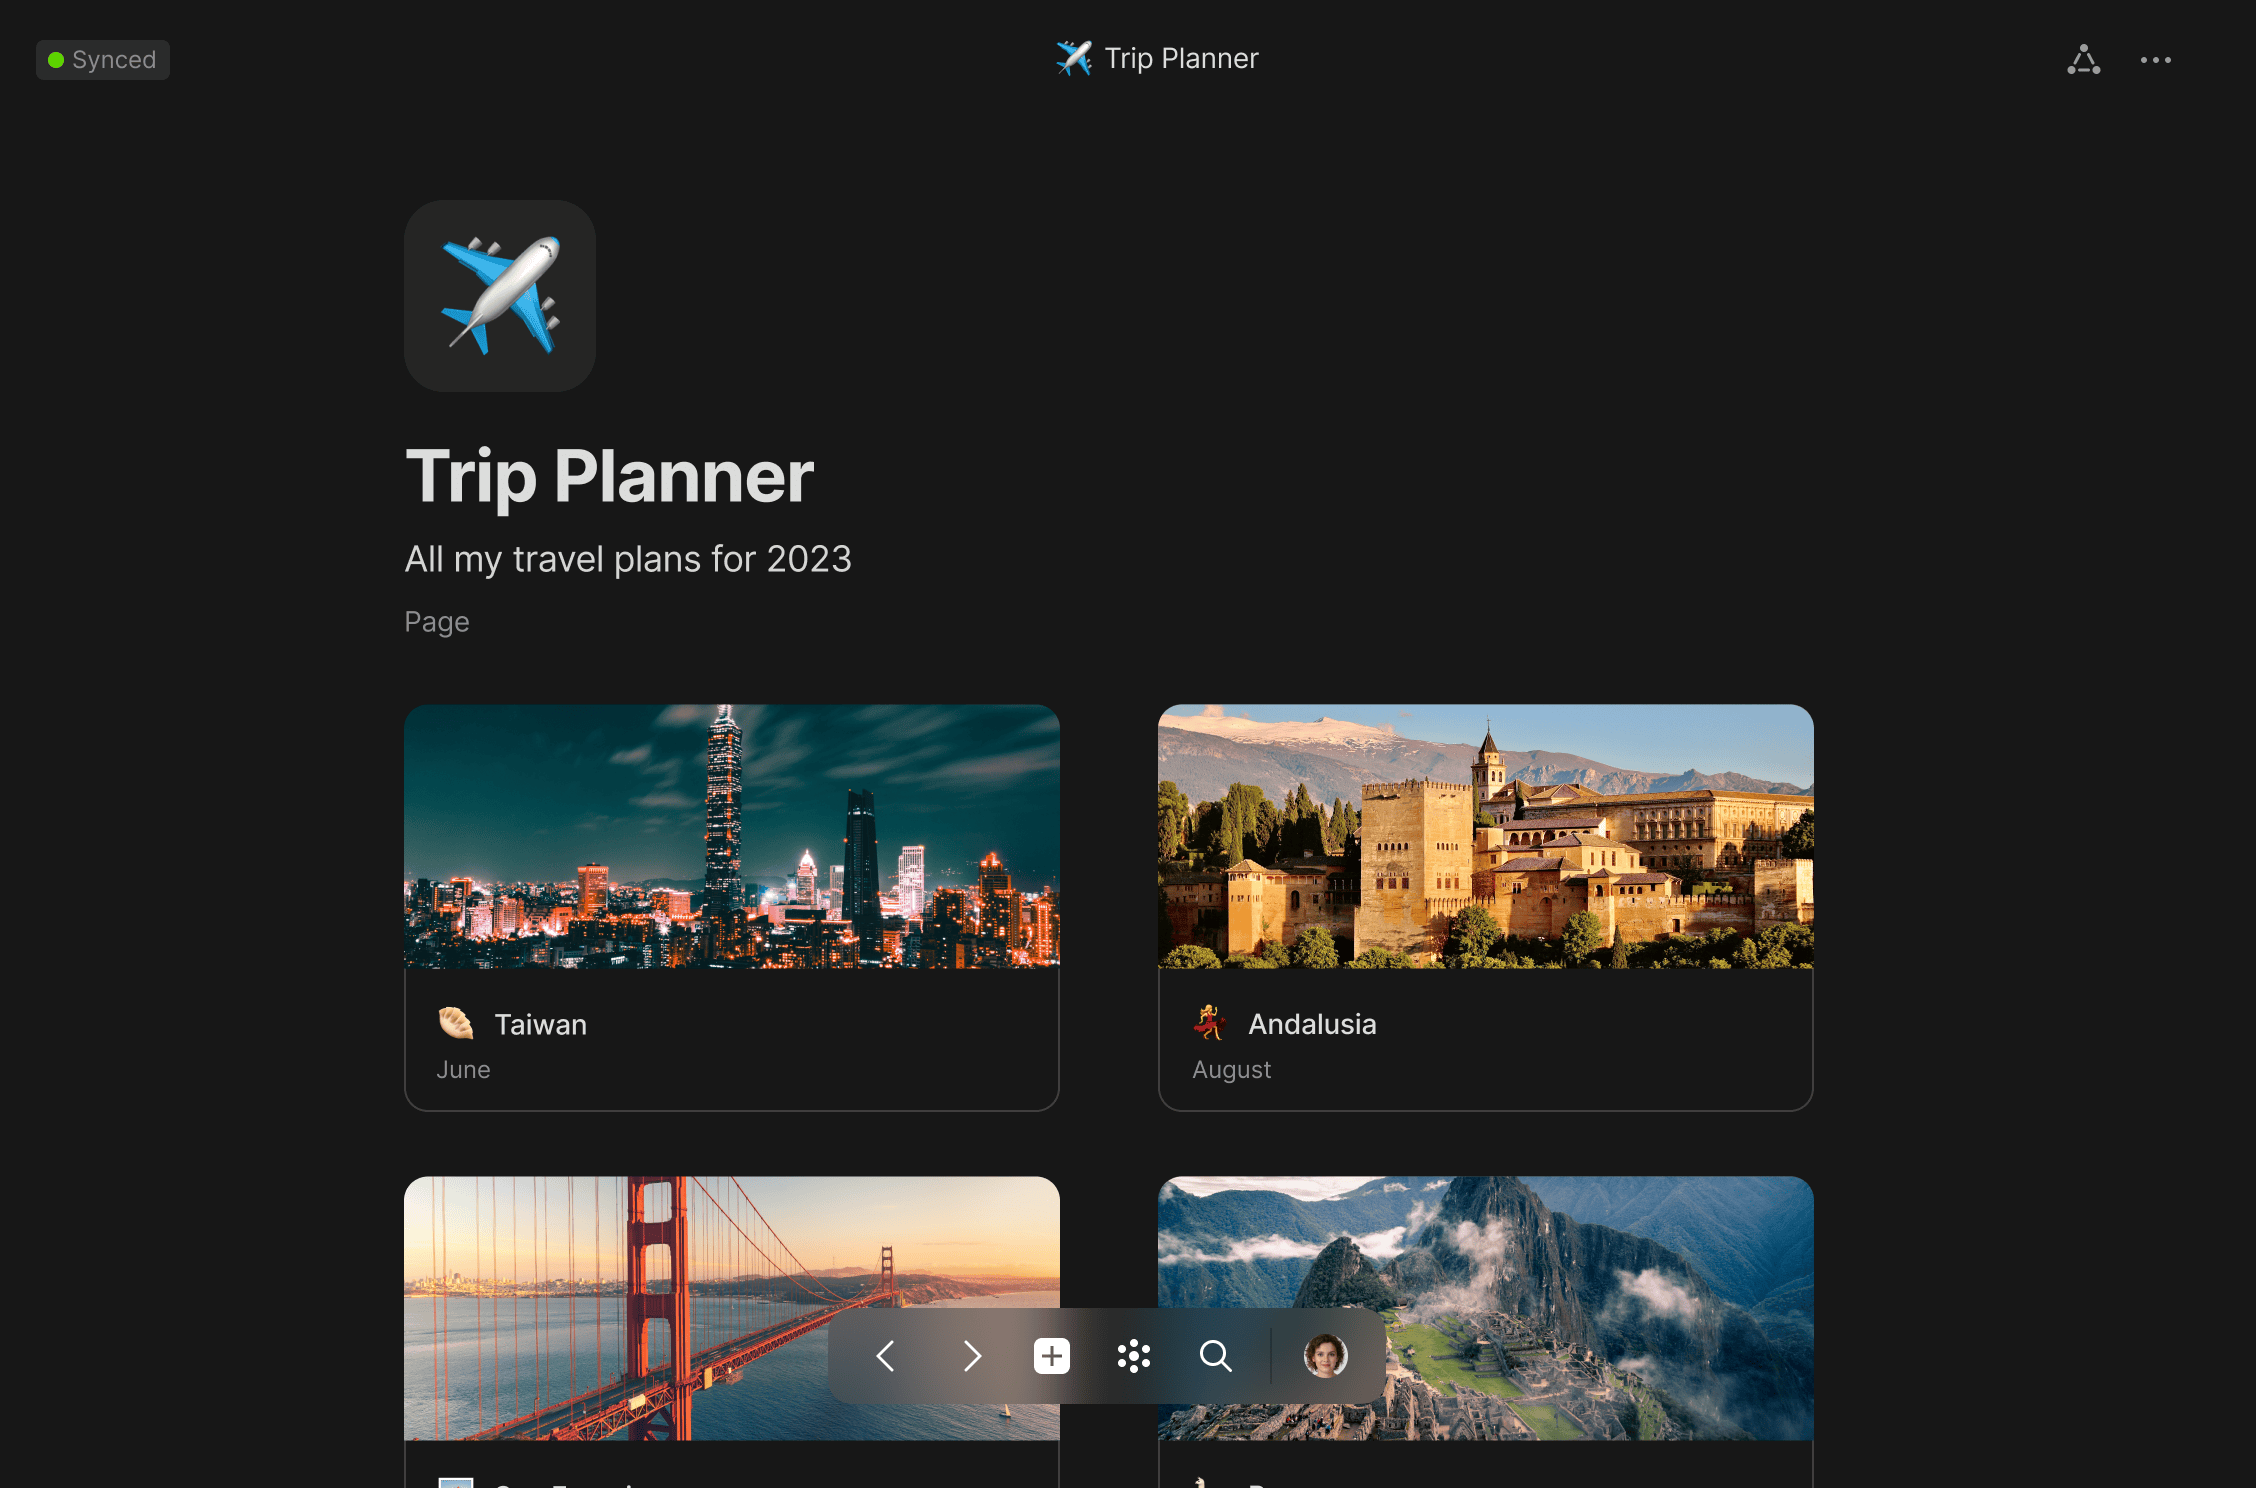
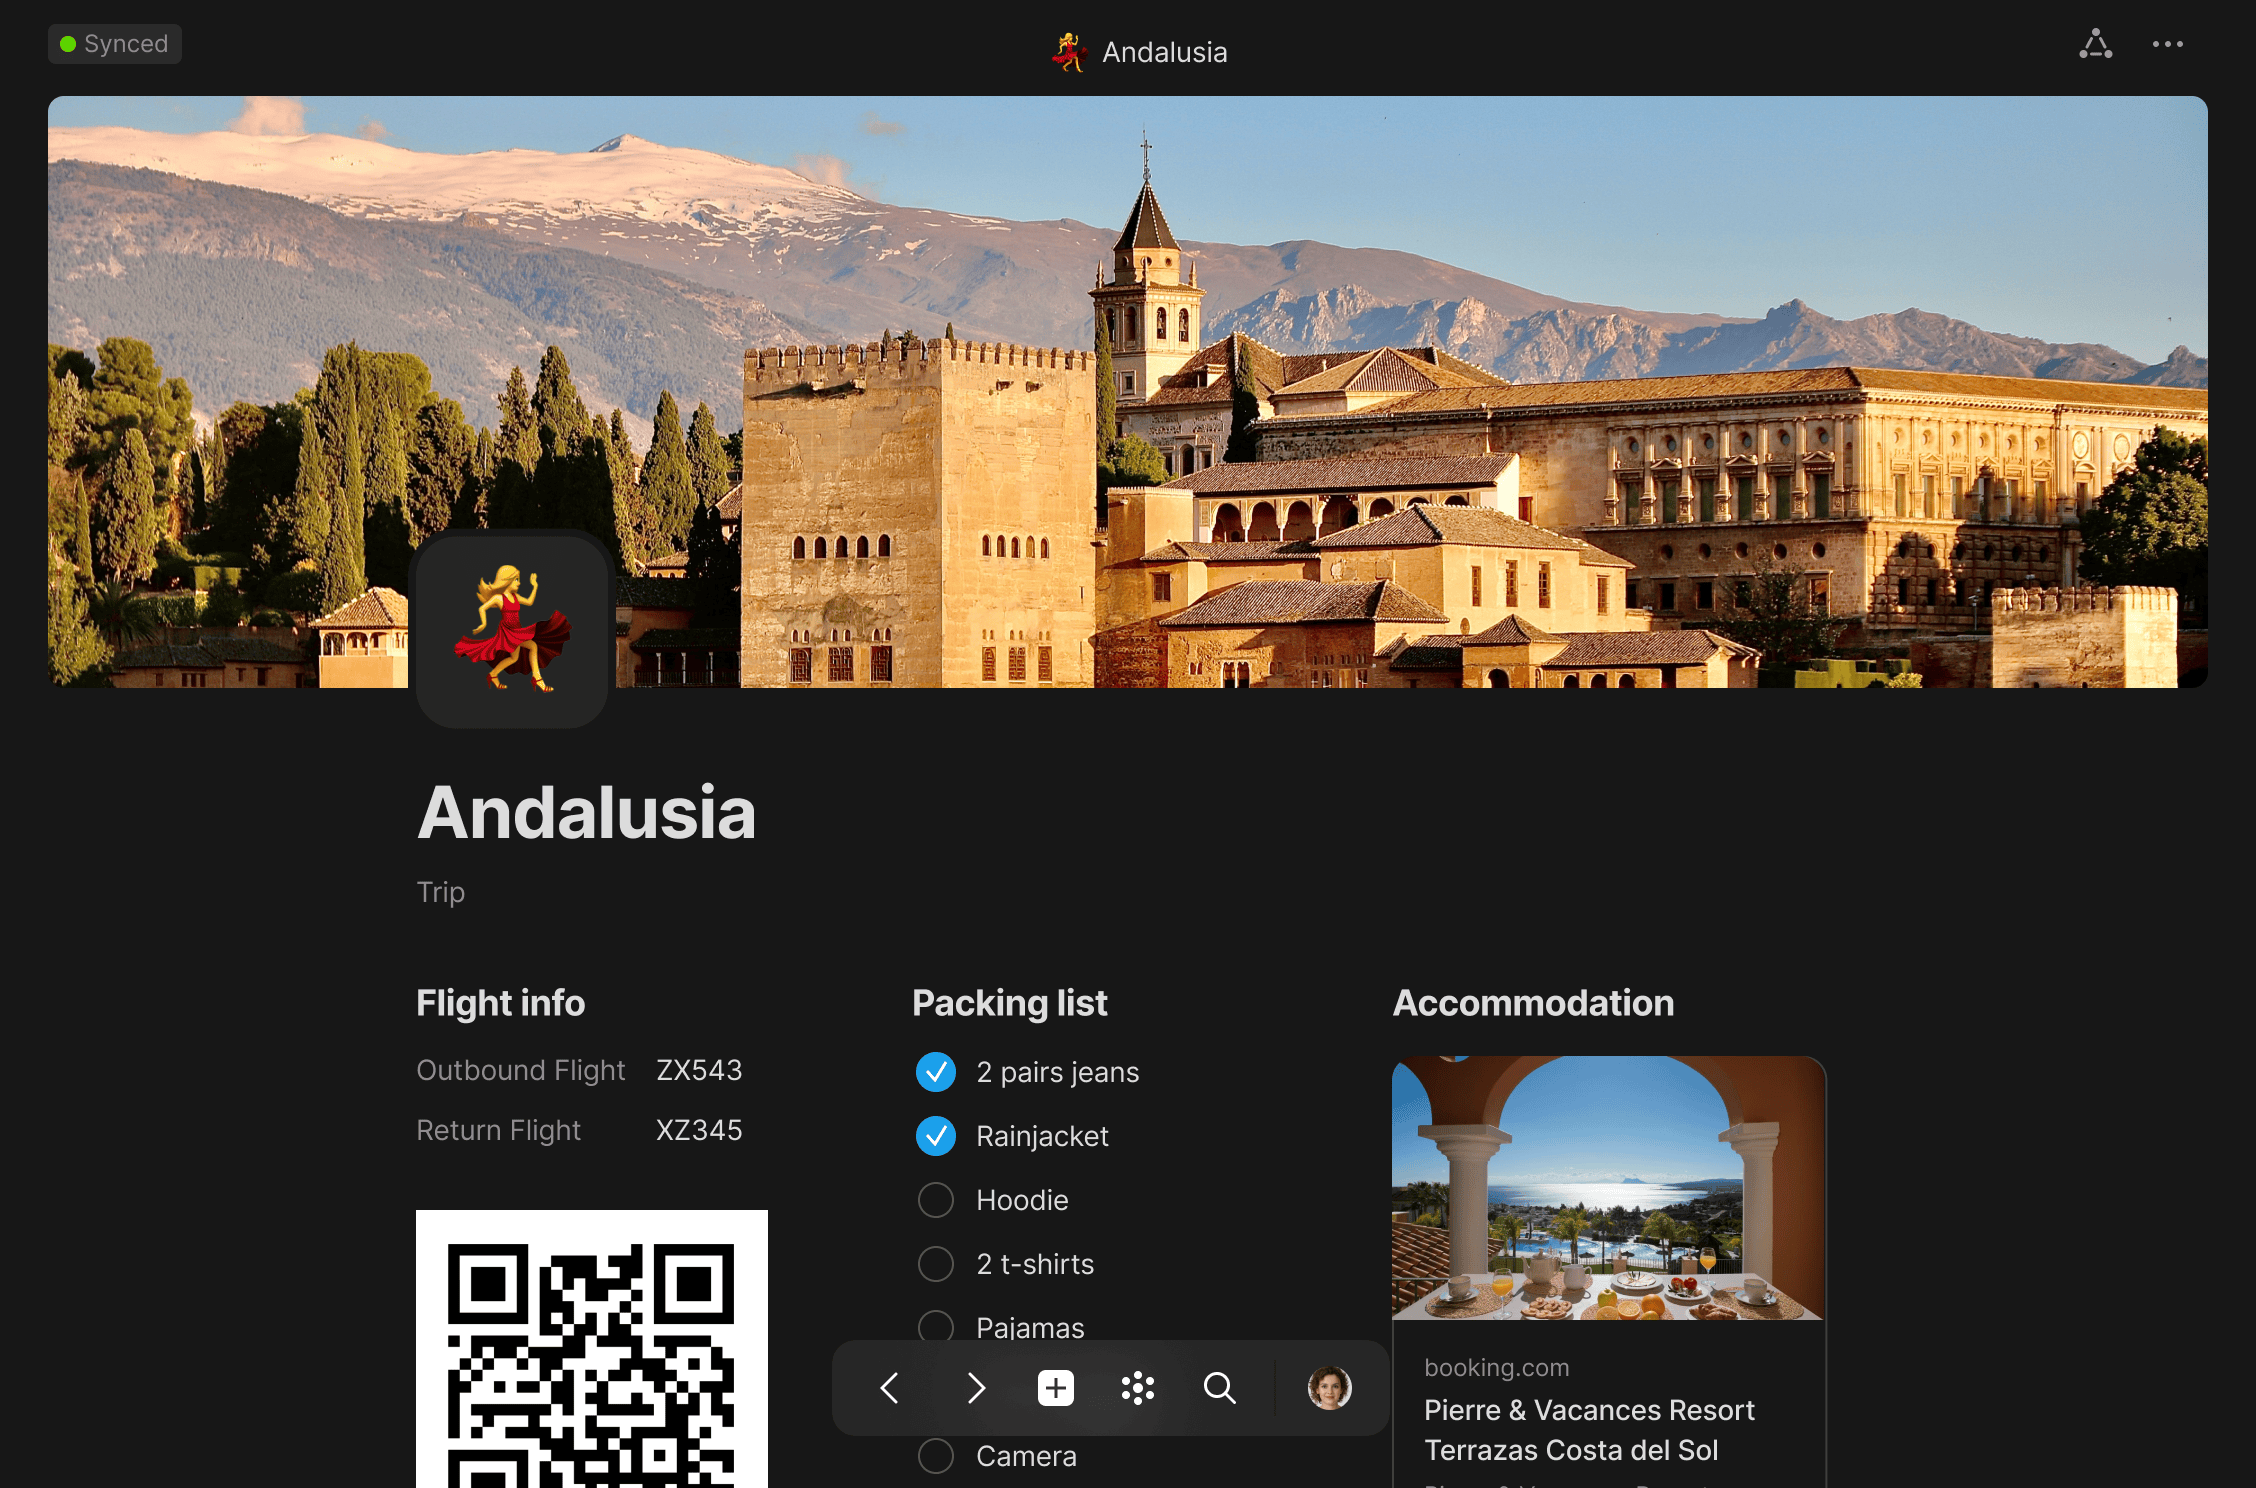
# Travel Wiki

Travel with half the hassle. Put everything you need in one place, so you don't need to fuss over wifi while traveling.

{% hint style="info" %}
You can import this use case to your channel using this [link](https://gallery.any.coop/?experience=trip_planner).
{% endhint %}

<div><figure><img src="/files/OmZdPMyRABmZeQuqZnjN" alt=""><figcaption></figcaption></figure> <figure><img src="/files/2dECZRPkR8NdmWJC75aY" alt=""><figcaption></figcaption></figure></div>

For more use cases, please check out our [ANY Experience Gallery](/anytype-docs/advanced/community/any-experience-gallery). You can either access it directly from the app by navigating to the bottom of your spaces sidebar or by clicking [this link](https://gallery.any.coop/).


# Language Flashcards

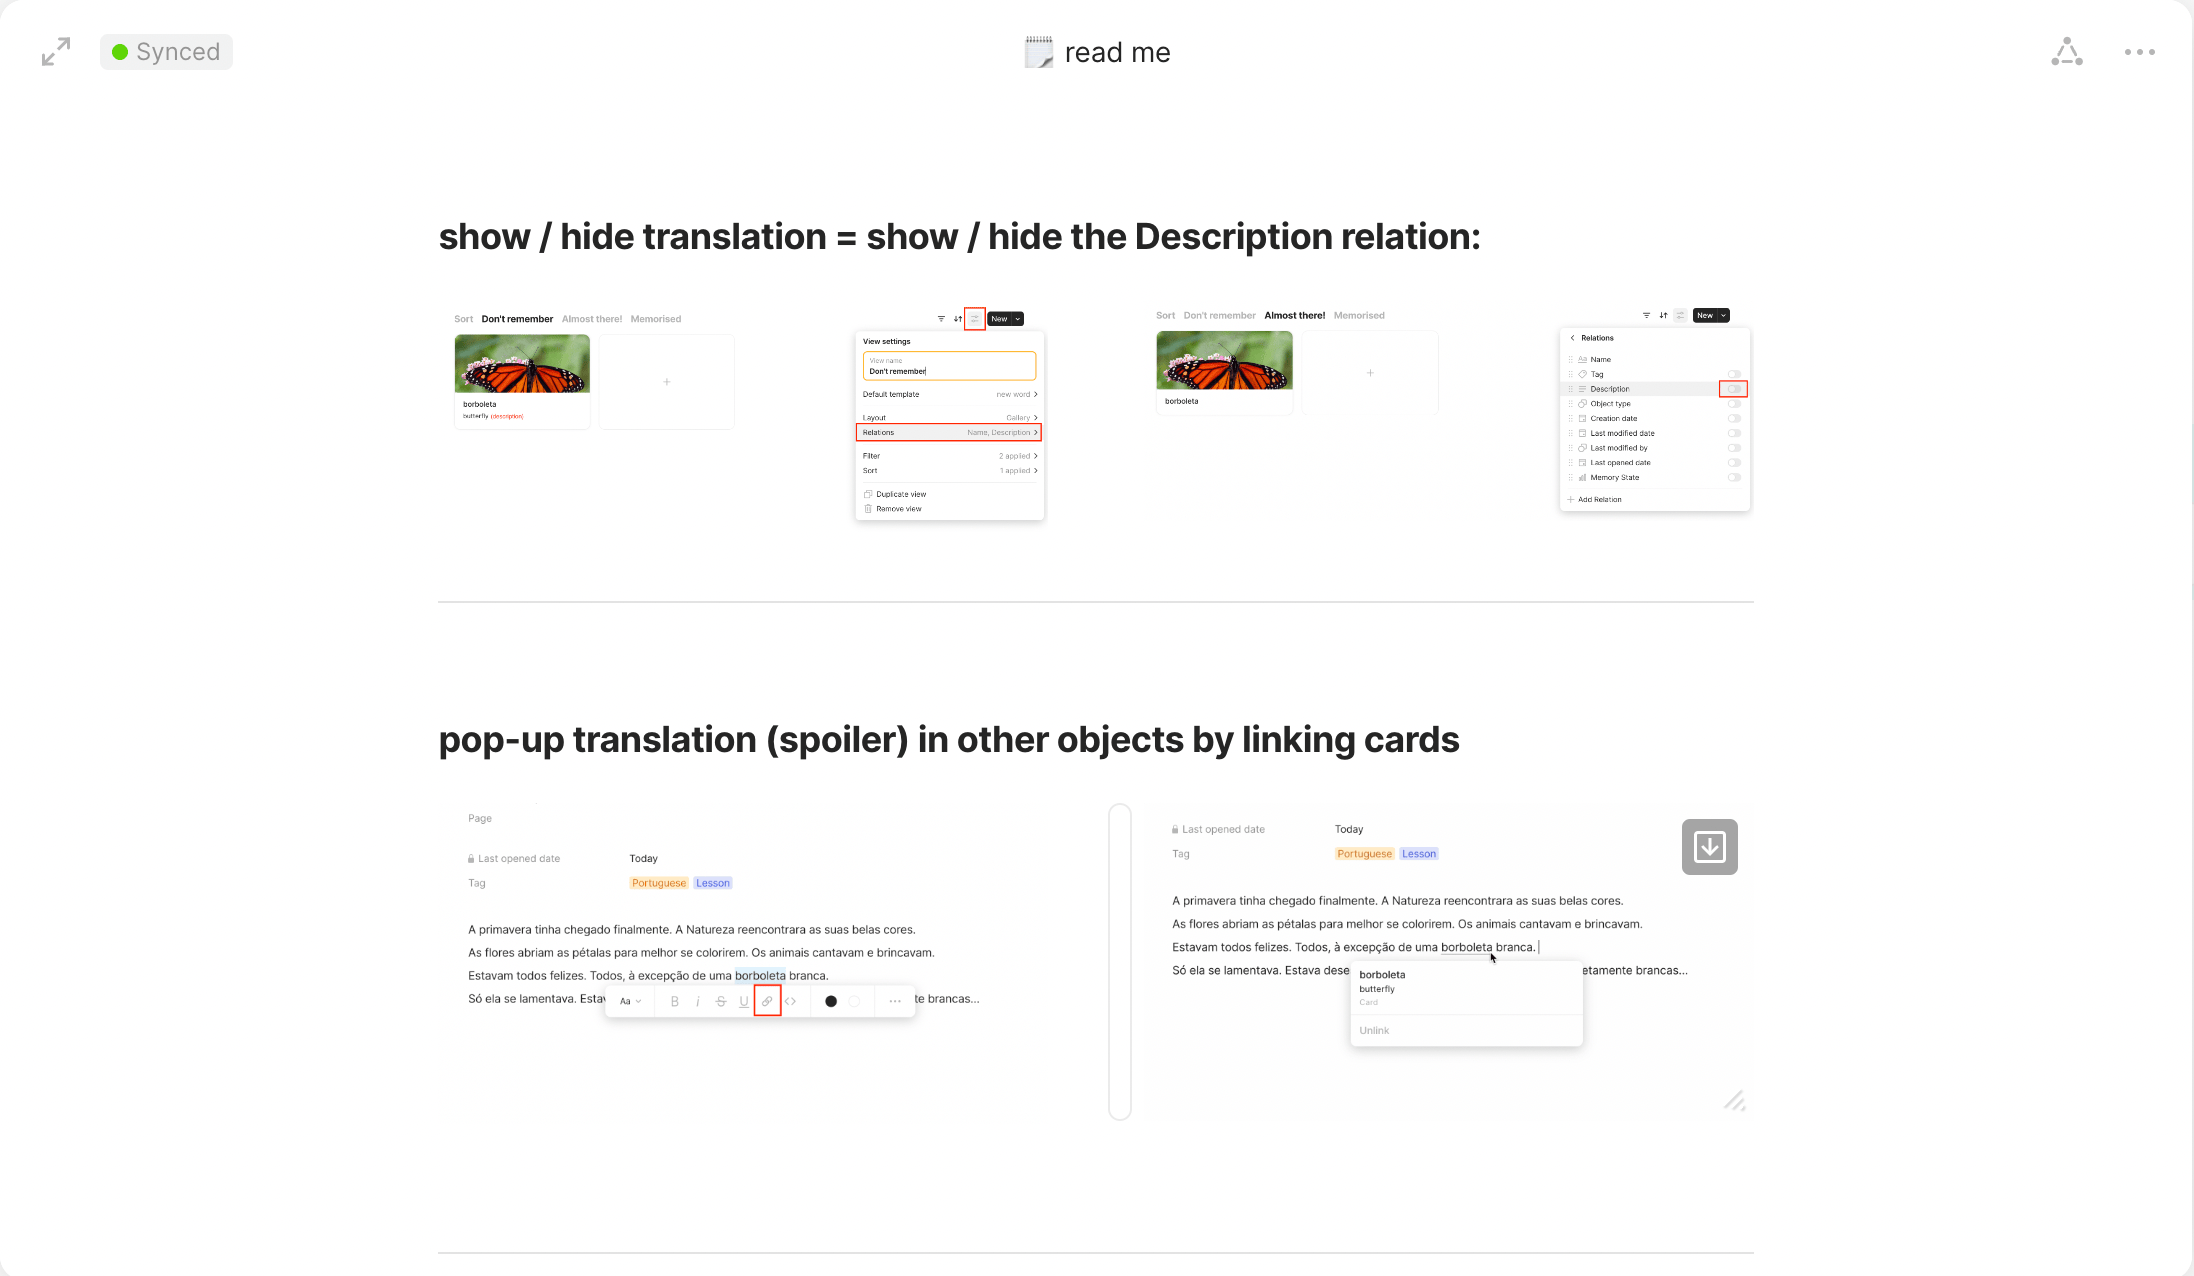
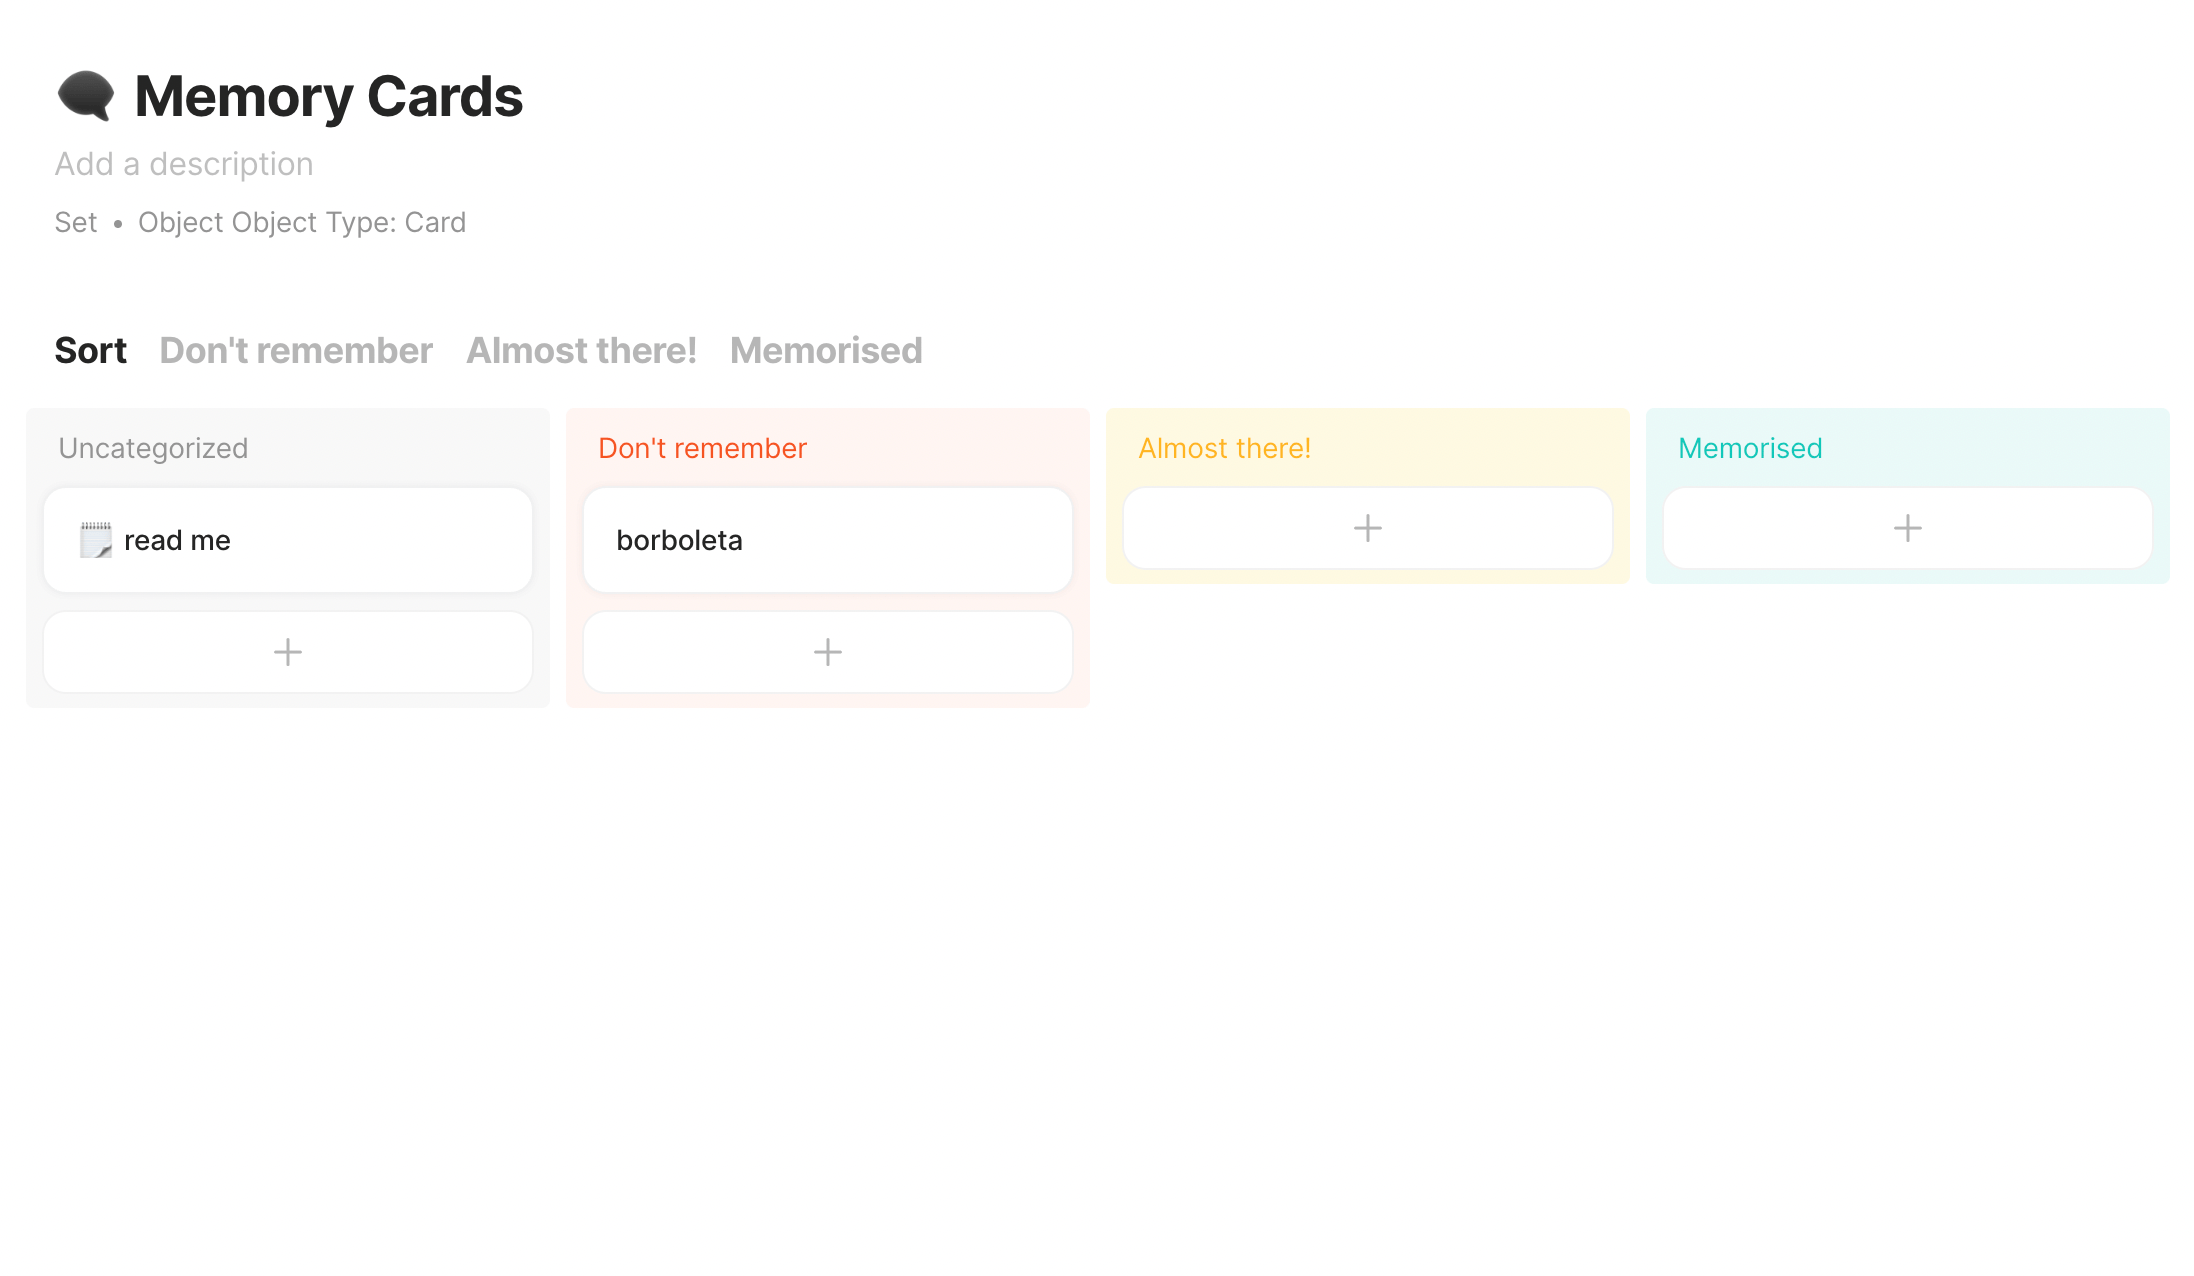
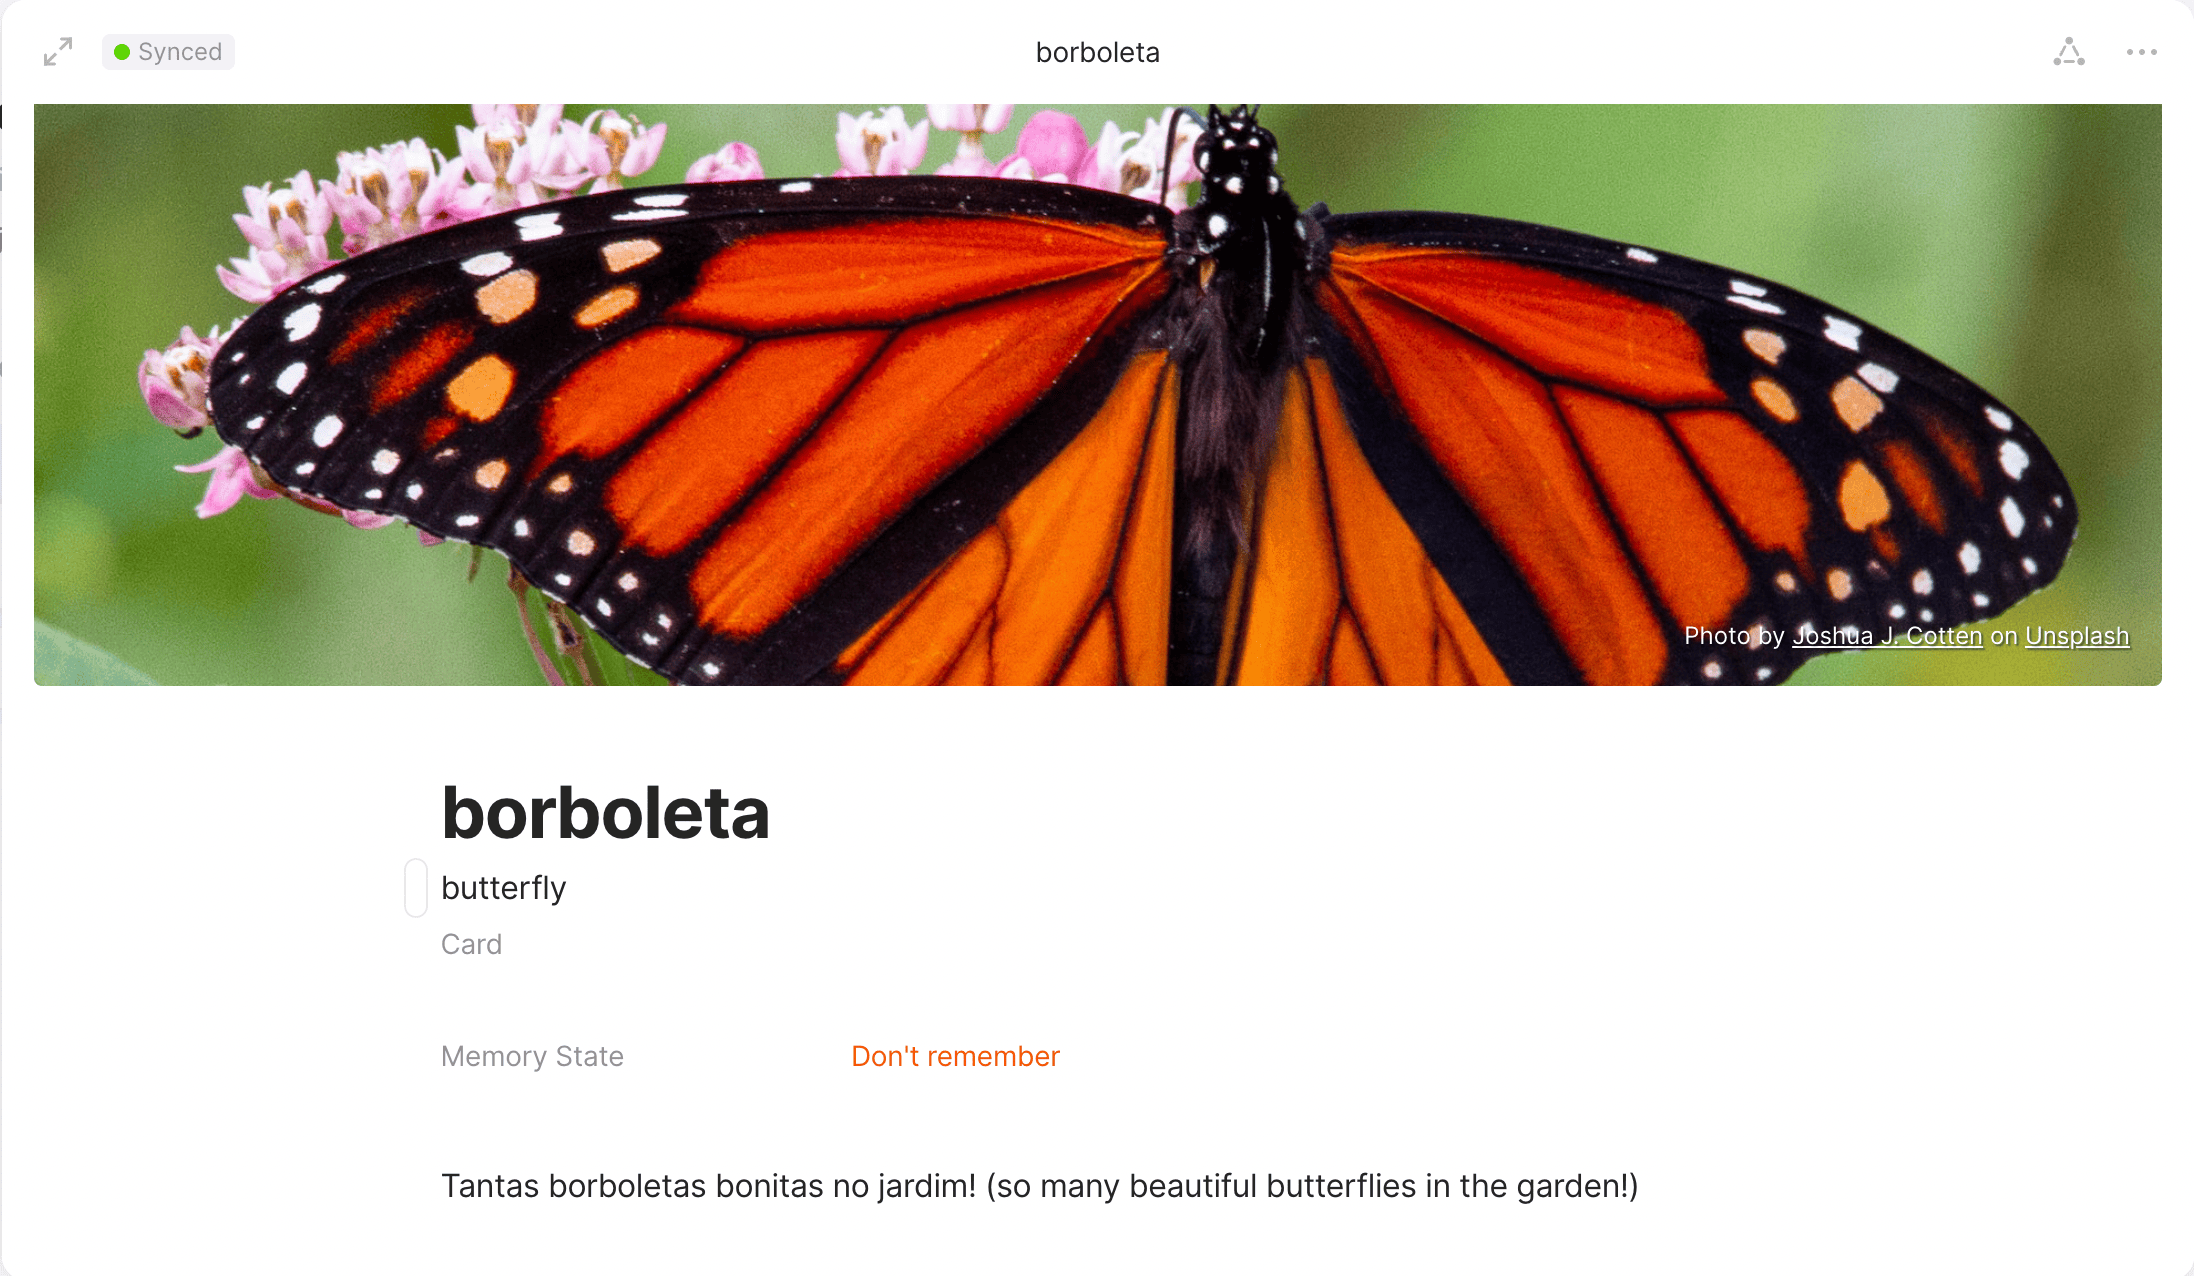
Make your language learning process more productive, with the help of improvised flash-cards & translation spoilers

{% hint style="info" %}
You can import this use case to your channel using this [link](https://gallery.any.coop/?experience=language_flashcards).
{% endhint %}

<div><figure><img src="/files/COrEtW0IUWl664mm5f4C" alt=""><figcaption></figcaption></figure> <figure><img src="/files/d1mWG0r6vYFA7fmtRZNM" alt=""><figcaption></figcaption></figure> <figure><img src="/files/Y8cNdHCYOs0FrnTT2vLz" alt=""><figcaption></figcaption></figure></div>

For more use cases, please check out our [ANY Experience Gallery](/anytype-docs/advanced/community/any-experience-gallery). You can either access it directly from the app by navigating to the bottom of your spaces sidebar or by clicking [this link](https://gallery.any.coop/).


# Recipe Book

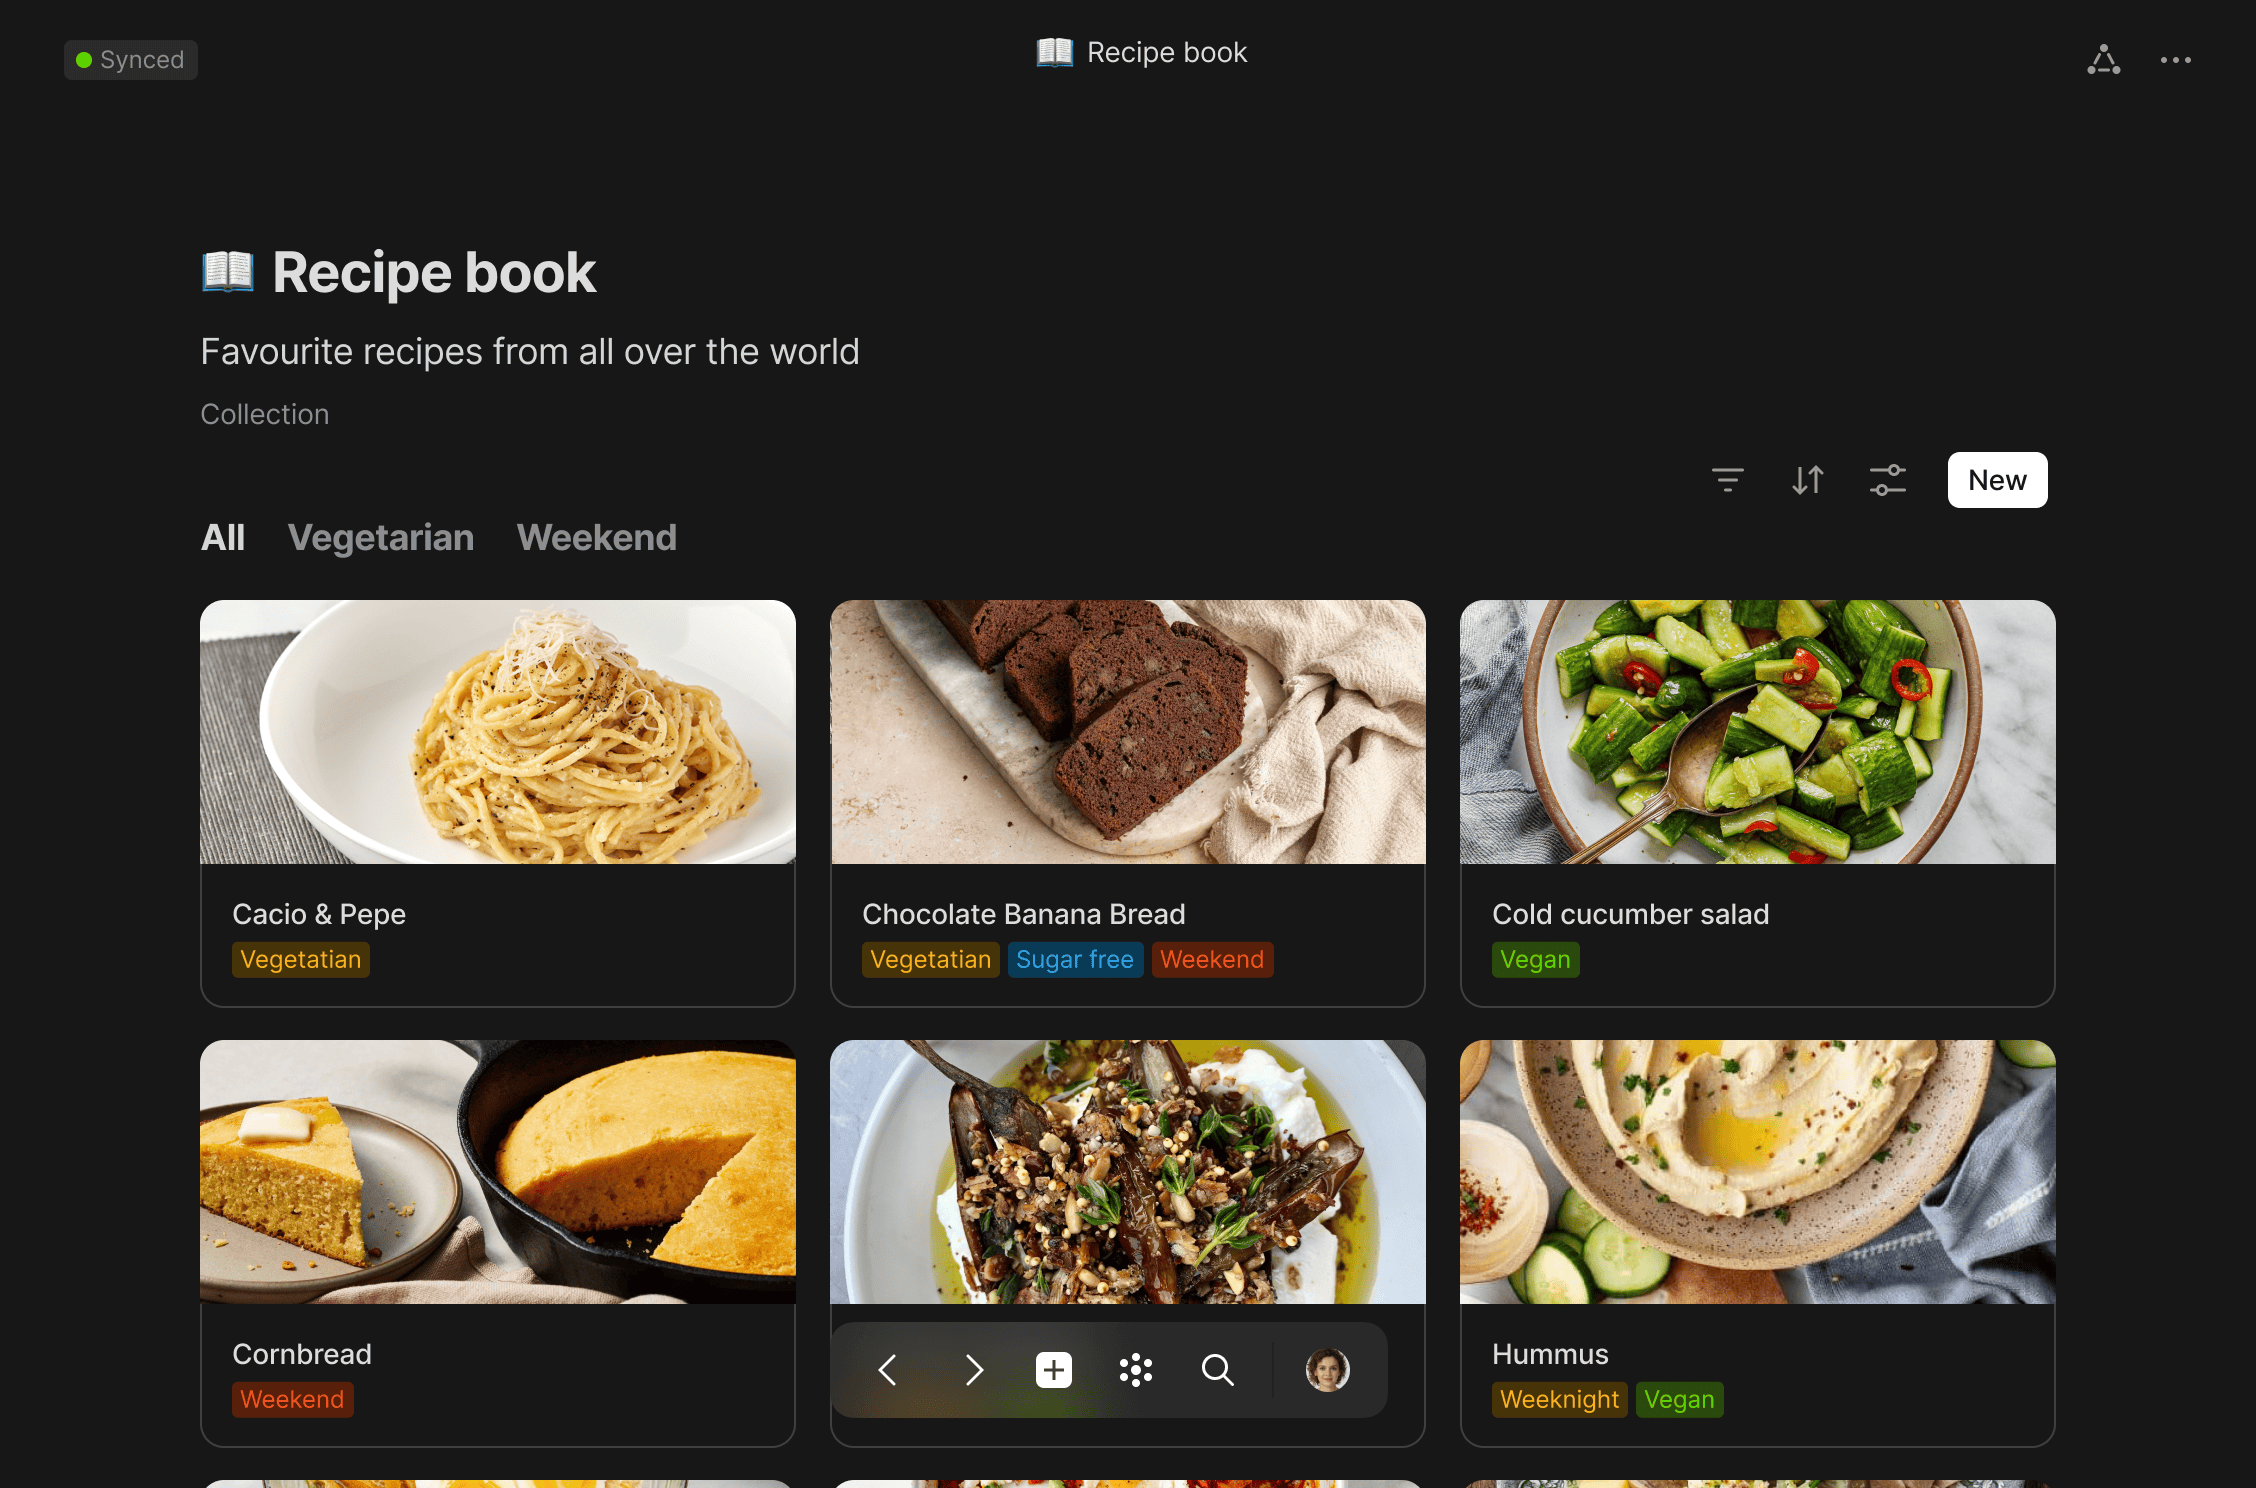
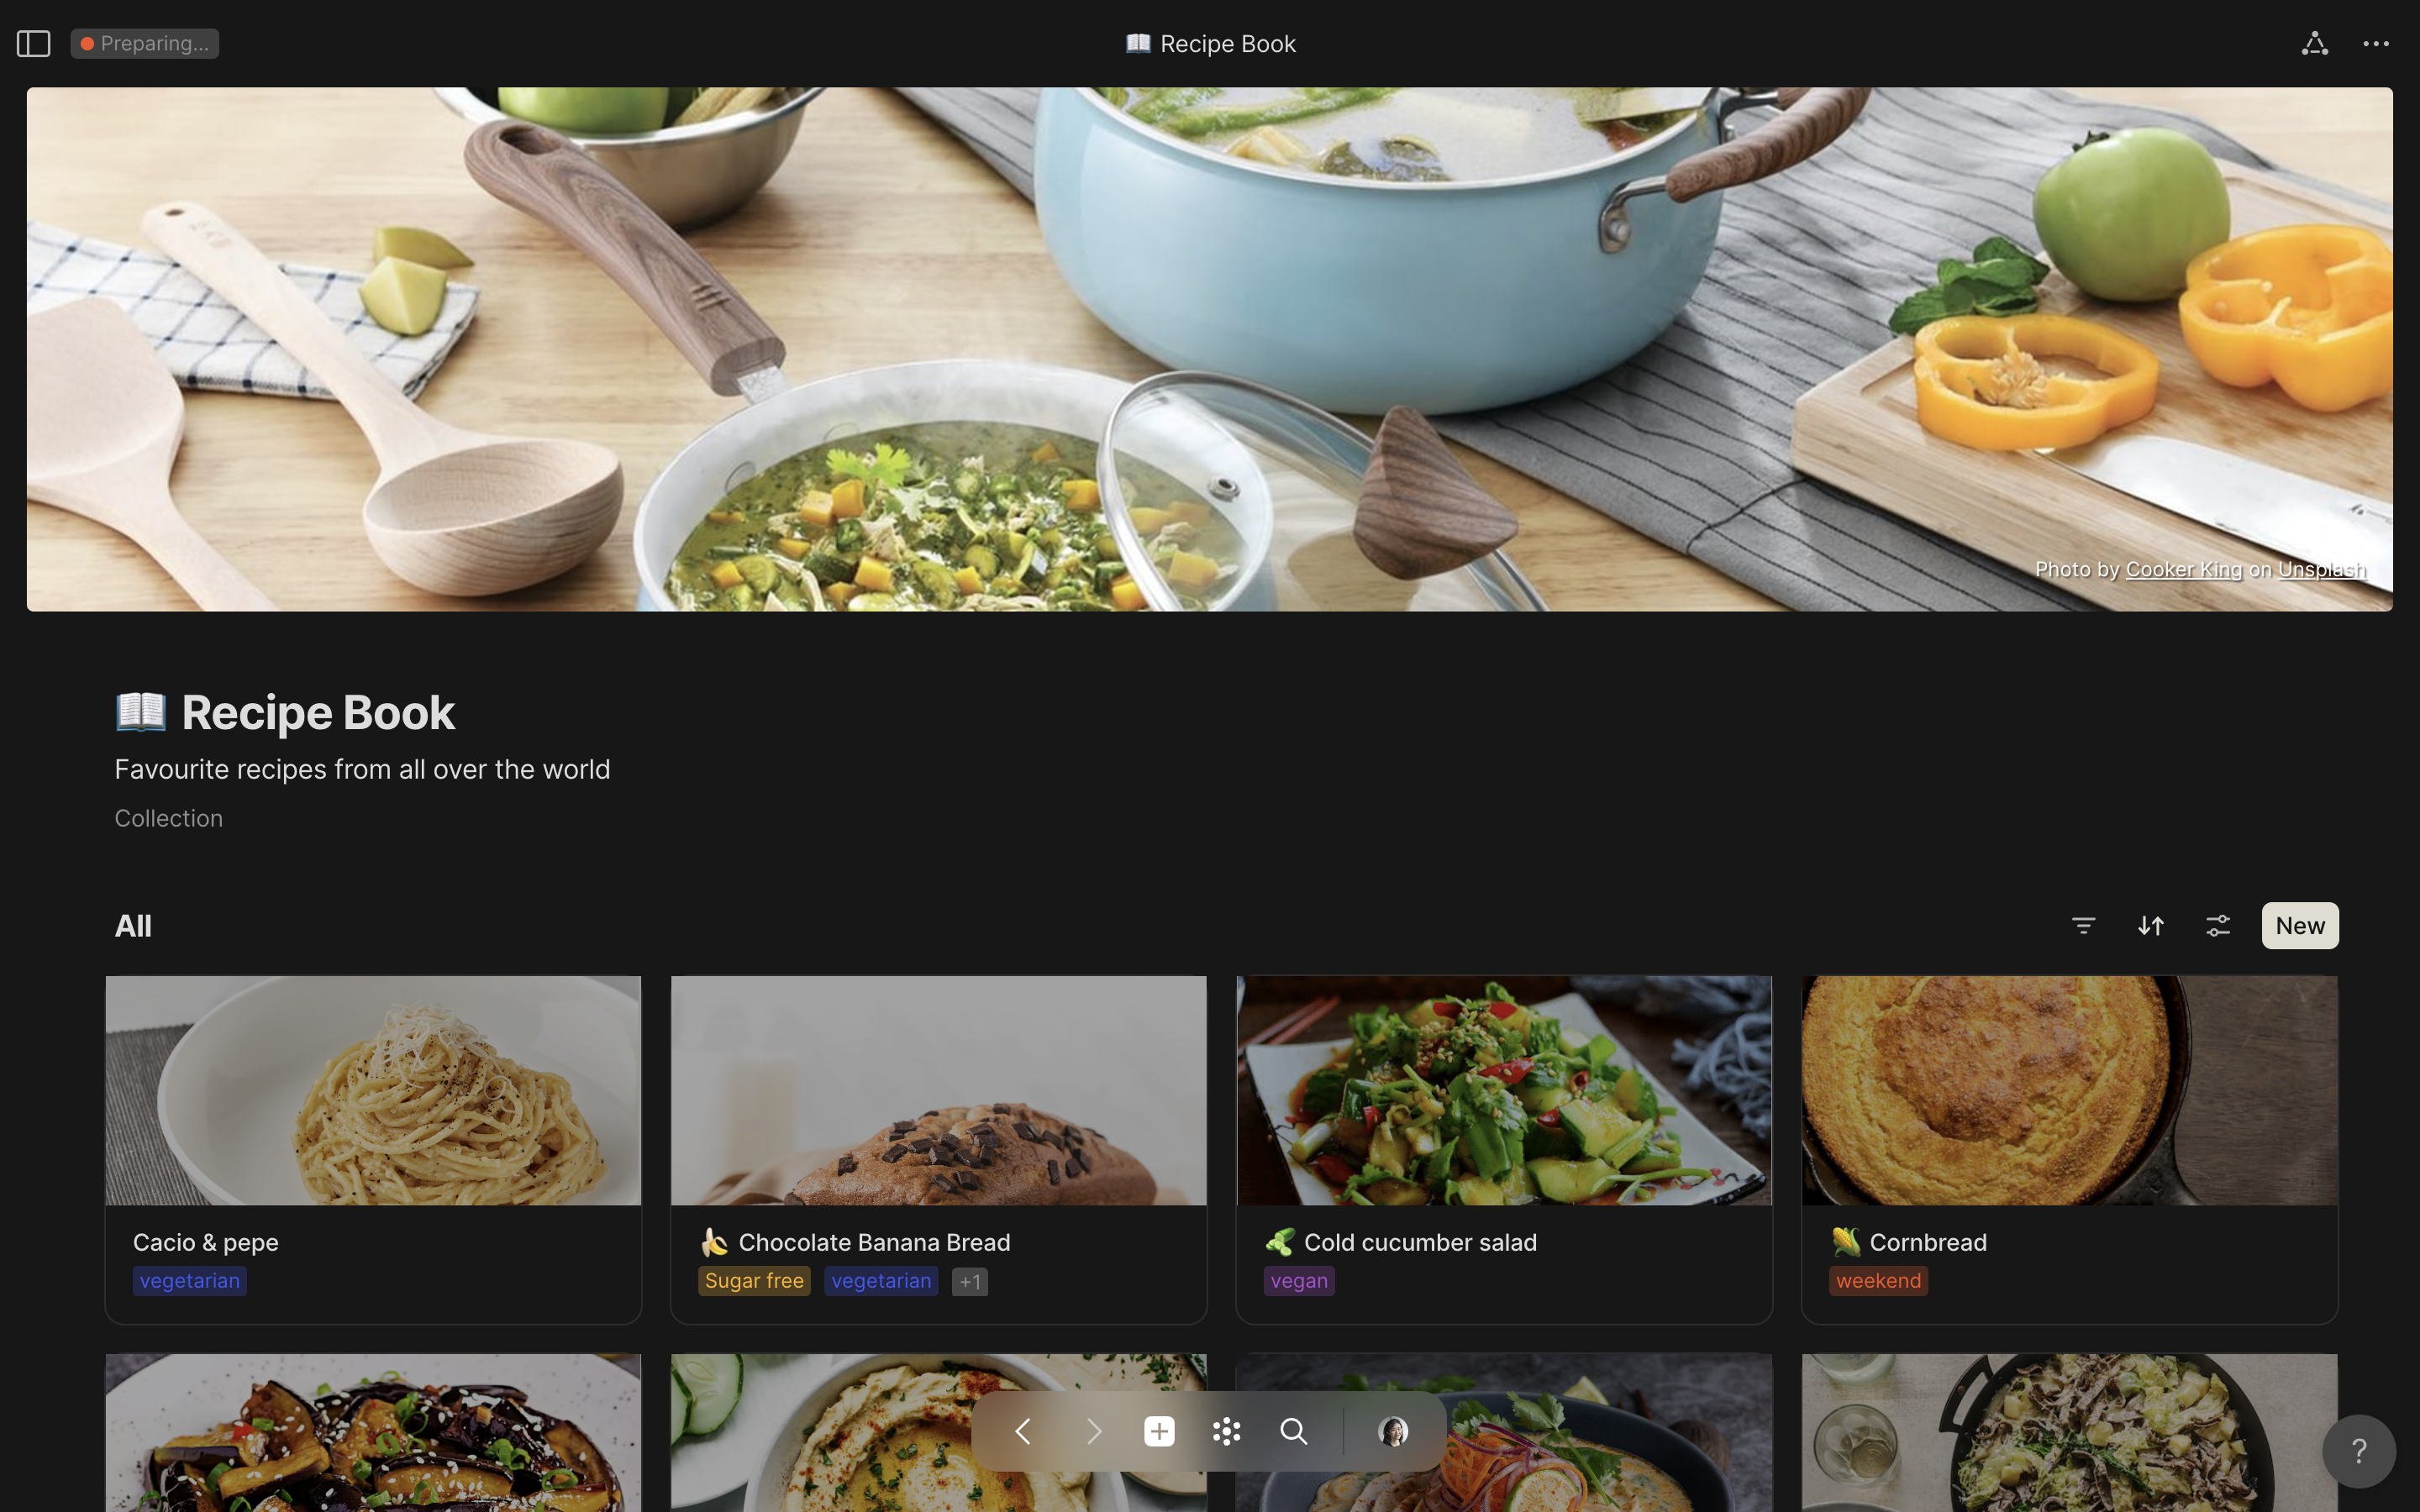
Good food, good mood. Categorize recipes based on your personal needs and create meal plans that suit your time, taste, and dietary preferences

{% hint style="info" %}
You can import this use case to your channel using this [link](https://gallery.any.coop/?experience=recipe_book_and_meal_planner).
{% endhint %}

<div><figure><img src="/files/wFo3jE04c69WHzdbckVt" alt=""><figcaption></figcaption></figure> <figure><img src="/files/MHd5yayYQfKEuXiPgNwt" alt=""><figcaption></figcaption></figure></div>

For more use cases, please check out our [ANY Experience Gallery](/anytype-docs/advanced/community/any-experience-gallery). You can either access it directly from the app by navigating to the bottom of your spaces sidebar or by clicking [this link](https://gallery.any.coop/).


# Memberships

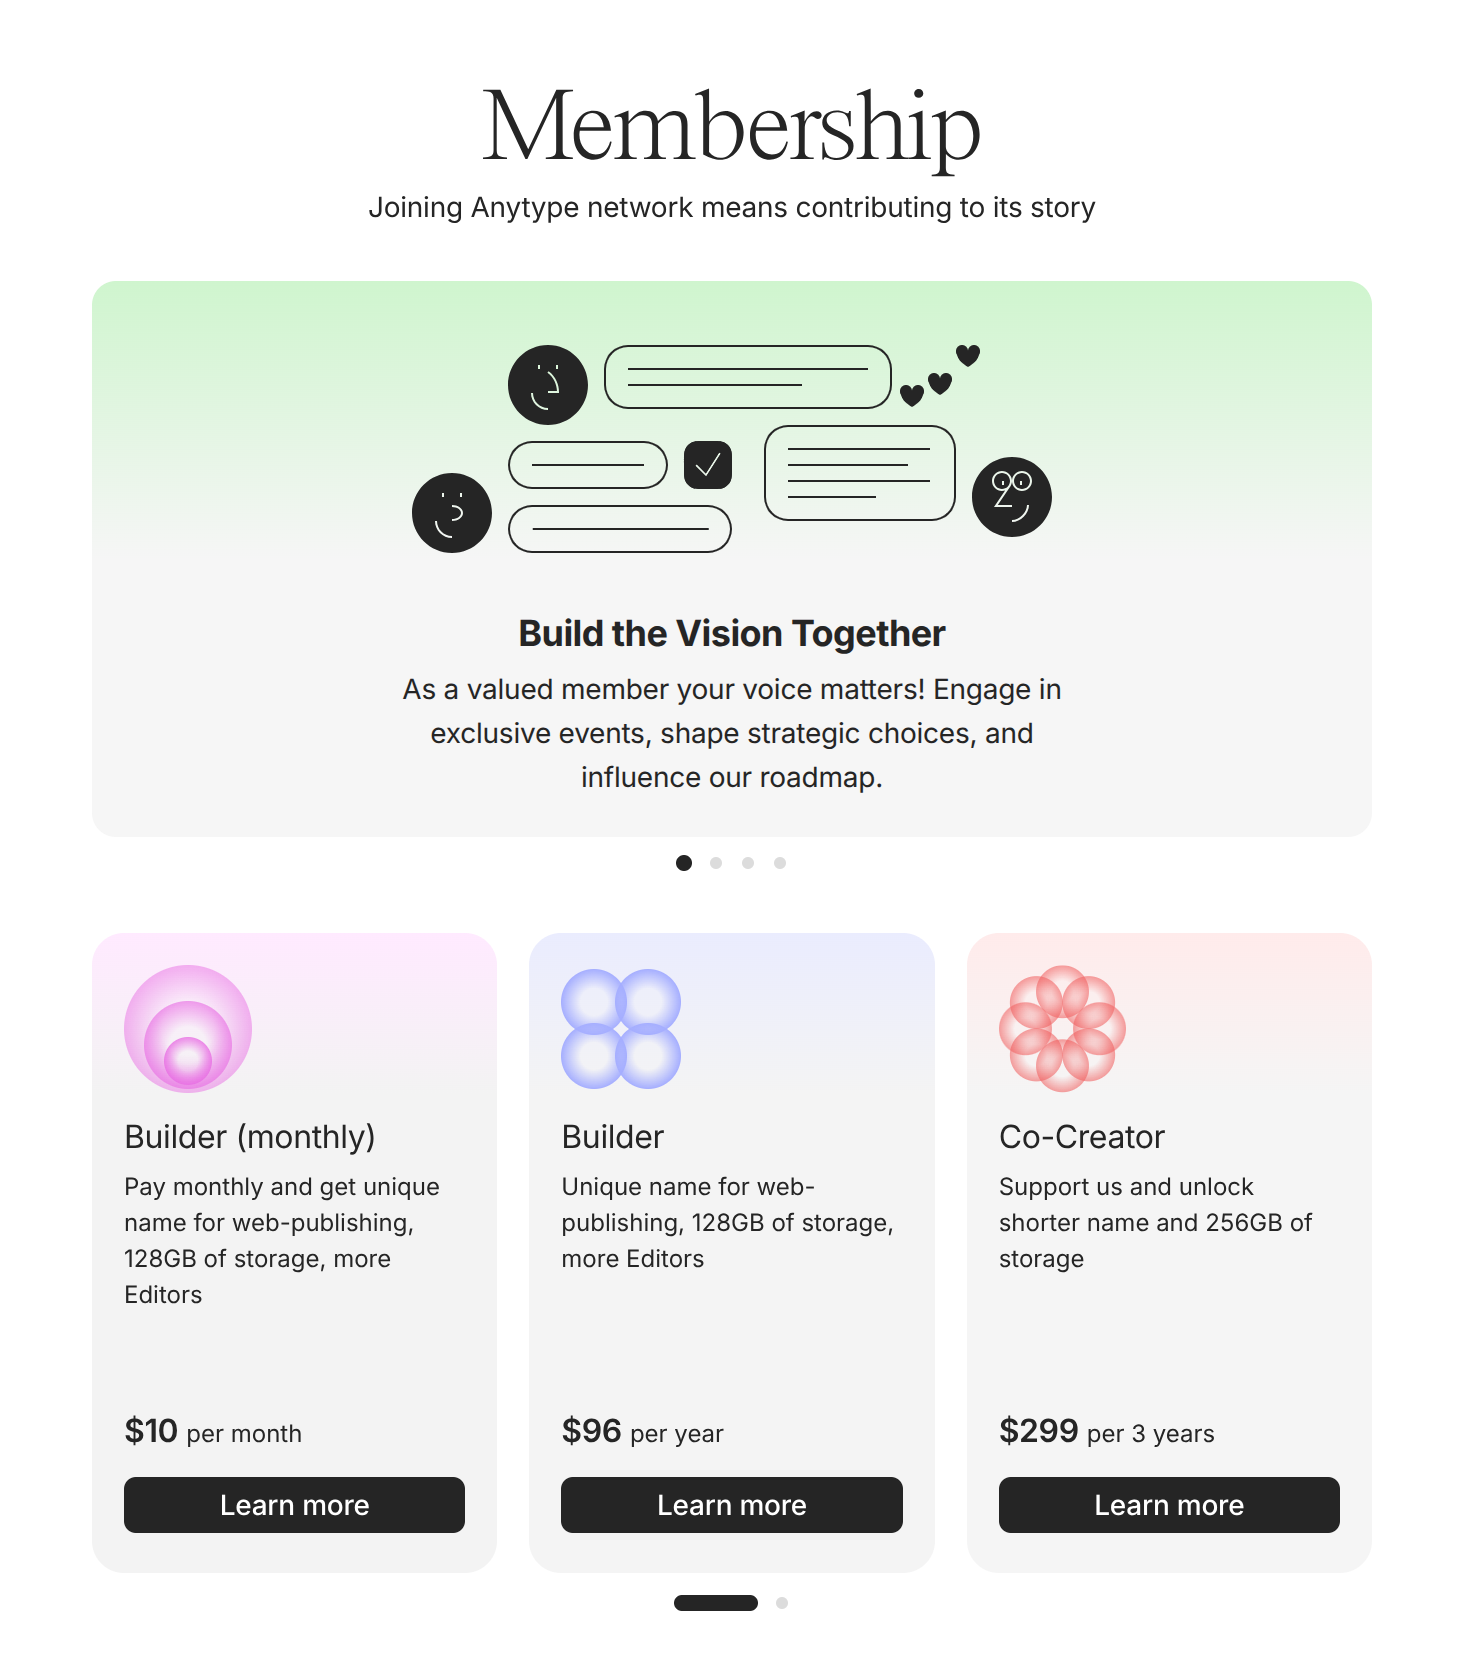
Our memberships are designed to reflect the same core principles that have always guided Anytype’s development: unrestricted access to our software and an open ecosystem where contributions are fairly rewarded.

For more information about the philosophy behind our membership and its planned evolution, please visit this blog post: [Our Membership Philosophy](https://blog.anytype.io/our-memberships-philosophy/).

## Membership Model & Plans

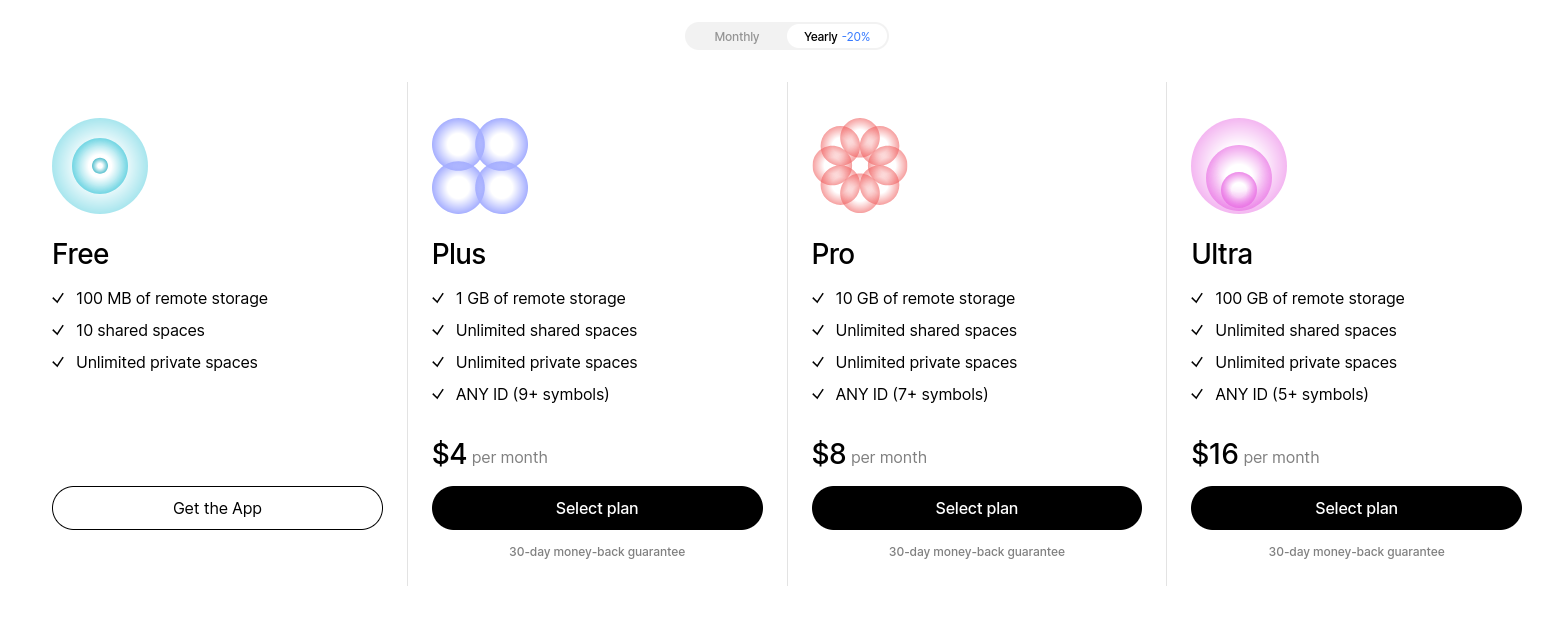
<figure><img src="/files/o44H5kWRkzqg0T42U8y5" alt=""><figcaption></figcaption></figure>

**Free Membership:**

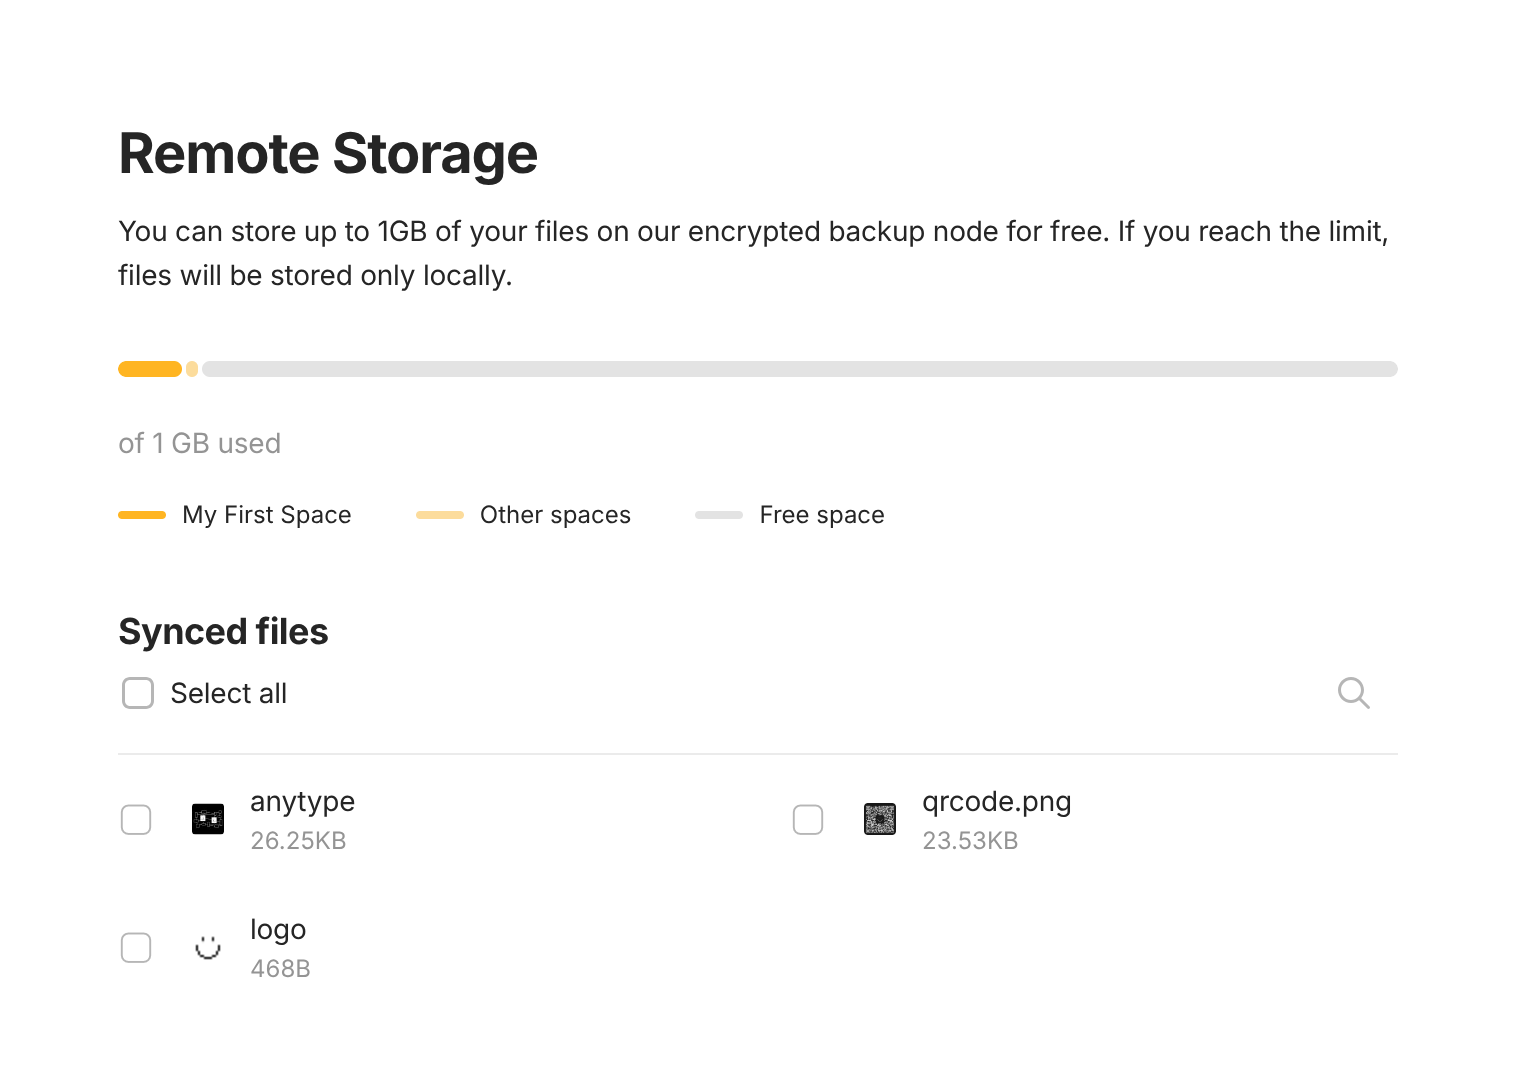
* 100 MB of remote storage
* 10 shared spaces
* Unlimited private spaces

**Plus Membership:**

* 1 GB of remote storage
* Unlimited shared spaces
* Unlimited private spaces
* ANY ID (9+ symbols)

**Pro:**

* 10 GB of remote storage
* Unlimited shared spaces
* Unlimited private spaces
* ANY ID (7+ symbols)

**Ultra:**

* 100 GB of remote storage
* Unlimited shared spaces
* Unlimited private spaces
* ANY ID (5+ symbols)

## Pricing for Contributors

We offer a 50% discount to active contributors to our codebase, gallery, tutorials, and community. Email us at <association@anytype.io> to receive your discount.

If you believe that your contribution status is incorrect, please write us at <association@anytype.io>.

## Pricing for Self-Hosters

Self-hosters can manage the limits of Viewers/Editors they invite to their Channels themselves. Those who would like to purchase a name in the Anytype naming system or access priority support, can purchase a membership at the same price as other beta testers.

In the future, we will introduce membership discounts for self-hosters. For those who would like to support the network in the meantime, we welcome your donation [here](https://stripe.pay.anytype.io/b/4gw0337MrdvbejK28f) (thank you!).

## FAQ

<details>

<summary>What happens to my shared channels if I choose not to renew my membership?</summary>

You can choose *not* to renew your paid membership up to any moment before the membership cycle renews. Please do so by visiting the site of the payment provider you used to pay for your membership (Stripe, App store, Google Play).

**Your global name**

Your name will be released and free for purchase one year or 3 years from when you first purchased your membership, depending on which kind of membership you purchased

**Your spaces**

When you do not renew your membership, all participants of your shared spaces (including yourself) will see a popup notification with two options: *Delete* or *Export* the space. Only if participants export the space and re-import it to a new space, will they continue to have access to the space data through Anytype (though changes will no longer be synced).

**Your data**

Encrypted backups of your data will be deleted from the Anytype backup node after 30 days.

</details>

<details>

<summary>What payment methods can I use?</summary>

All major credit cards are accepted. Memberships are priced in USD and will be converted to your local currency using conversion rates on Stripe, if you purchase your membership from the Desktop app.

If you purchase your membership from the iOS or Android apps, payment will be processed by the App Store or Play Store, and prices will be automatically adjusted to your local currency by the respective platform.

</details>

<details>

<summary>What if I want to add additional members to my channel?</summary>

In our next iteration of memberships, we will have a tier for B2B and educational use cases, with the option to add up to 20 additional editors per space.

</details>

<details>

<summary>What happens if I exceed the storage &#x26; sync limits?</summary>

Your spaces will stop syncing with each other through the backup node and use local sync/storage only.

</details>

<details>

<summary>Is there a student / educational plan?</summary>

Students or faculty members are eligible for a [50% discount](https://edu.anytype.io/#apply) on all of our membership plans.

</details>


# Refund policy

1. You may cancel your subscription at any time and continue using the service until the end of billing cycle.
2. You may request a full refund within 30 days of the initial purchase.
3. The service is non-refundable after 30-days period, and any refund given will be at the sole discretion of the Company.
4. Payments made in crypto are non-refundable.
5. To request a refund, [contact customer support](mailto:care@anytype.io) with your transaction details and reason for the refund.


# Features

### App Comparison

For a comparison between Anytype and Notion, check out our article:

{% embed url="<https://blog.anytype.io/notion-alternative/>" %}

Or if you are wondering what are the differences between Evernote and Anytype, check out this other article from our blog:

{% embed url="<https://blog.anytype.io/evernote-alternative/>" %}

### Requested Features

{% embed url="<https://github.com/orgs/anyproto/projects/1/views/1>" %}

* API and plugins
* Formulas
* Reminders and notifications
* AI assistant
* Transclusion
* Whiteboard / canvas
* Web app
* Tags as an Object

#### Implemented

* Calendar - [0.36.0](https://community.anytype.io/t/anytype-desktop-0-36-0-released/12198)
* Webclipper - 0.39.0 (available for [Chrome](https://chromewebstore.google.com/detail/anytype-web-clipper/jbnammhjiplhpjfncnlejjjejghimdkf?hl=en) and Firefox soon)
* [Collaboration](/anytype-docs/getting-started/collaboration) - [0.40.0](https://community.anytype.io/t/anytype-desktop-0-40-0-multiplayer-released/20219)
* [Inline Latex](/anytype-docs/getting-started/object-editor/blocks#inline-latex) - [0.42.0](https://community.anytype.io/t/anytype-desktop-0-42-0-released/22993#p-83725-inline-latex-scientist-5)
* [Other Features](/anytype-docs/advanced/feature-list-by-platform/other-features#simple-formulas-calculations) - [0.44.0](https://community.anytype.io/t/anytype-desktop-0-44-0-released/25865)
* [Dates](/anytype-docs/advanced/feature-list-by-platform/dates) as an Object - [0.44.0](https://community.anytype.io/t/anytype-desktop-0-44-0-released/25865)
* RTL - [0.45.0](https://community.anytype.io/t/anytype-desktop-0-45-0-released/26702)
* [Web Publishing](/anytype-docs/getting-started/web-publishing) - [0.45.0](https://community.anytype.io/t/anytype-desktop-0-45-0-released/26702)


# Local API

Release 0.46.X marks an exciting and long-awaited moment in Anytype’s evolution: **the first iteration of our Local API** is here! It opens up powerful new possibilities for an ecosystem of plugins, automations and third-party integrations.

### Anytype Local API (Developer Preview)

Our API is now available and directly included with the desktop app, running entirely on localhost. It operates fully offline, meaning you can build and use integrations without any cloud dependencies - even while flying!

This initial release targets developers, and we’re eager to see what the community creates with it!

{% hint style="danger" %}
I**mportant Security Notice:** By providing an API key or using extensions, you grant limited access to your Anytype vault, enabling operations such as editing or deleting objects. Ensure you **use only trusted extensions**.
{% endhint %}

### Key Highlights

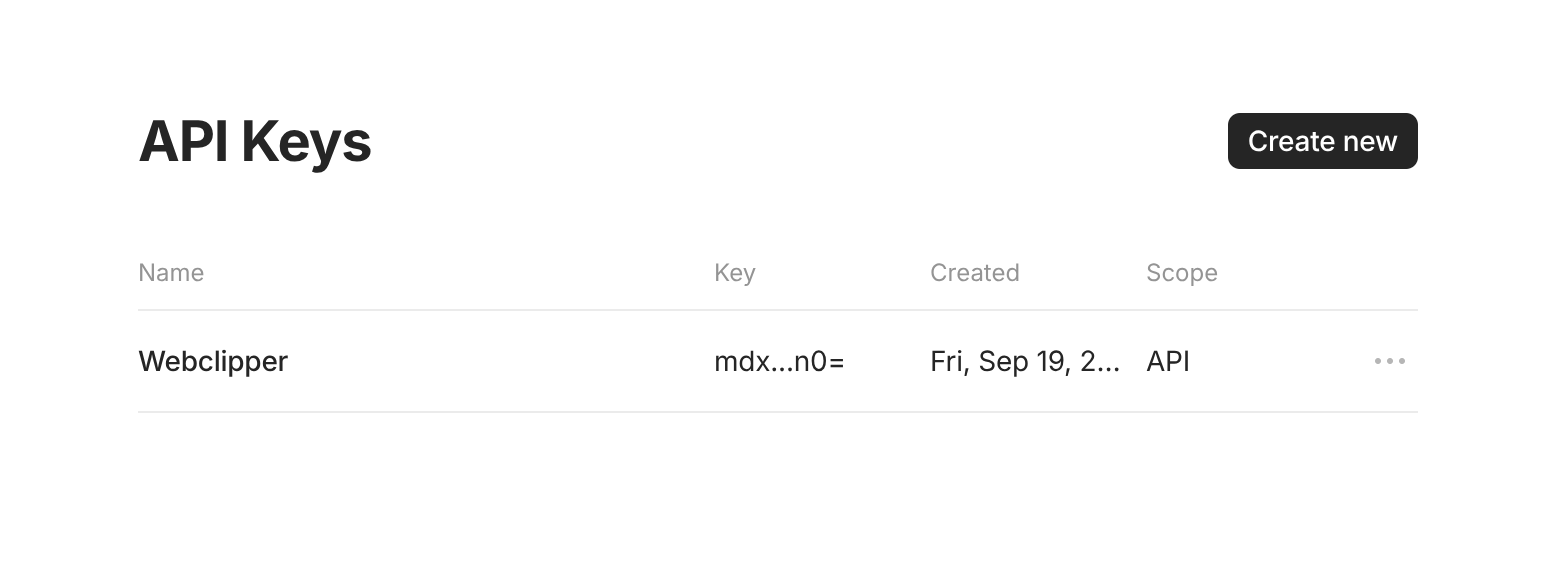
* **Secure Authentication:** Authenticate once via a 4-digit challenge in the desktop app, generating an API key. This key acts as a bearer token to authenticate subsequent requests. Additionally, API keys can be managed and generated directly through the desktop client's settings, making it easy to share keys with third-party integrations.
* **Comprehensive Documentation:** The OpenAPI specification and full documentation are available on our new [Developer Portal](https://developers.anytype.io/).
* **Robust API Capabilities:** Endpoints offer core Anytype functionality: creating objects, editing, querying and much more.
* **Growing Developer Ecosystem:** Early SDKs and community-driven tools are already underway: Python and Go clients, MCP server and Raycast extension.


# Raycast Extension (macOS)

Our long-awaited API is beginning to take shape! The first step is Raycast integration, allowing you to create, read, and delete Channels, Objects, and Types, as well as search across them, all from Raycast on macOS.

[Install the Raycast Extension here](https://www.raycast.com/any/anytype)

<figure><img src="/files/NrRUvd8YiqJtrH2PNzgE" alt=""><figcaption></figcaption></figure>

### Update - AI

We've introduced several enhancements based on your requests and feedback, plus Anytype for Raycast is now an AI Extension – search through channels and objects using natural language or create new ones just by instructing <kbd>@anytype</kbd>.

* Improved Pinning & Navigation: Pin objects, types, members and channels for quicker access. Objects of a certain Type now appear below their templates for better organization.
* Better Collection Management: Create objects directly within collections and browse collection items with ease.
* Customization & Visibility: Choose <kbd>Open Object in Anytype</kbd> as the default action, show custom properties in the Detail sidebar, toggle metadata in object details and apply templates when creating new objects.

<figure><img src="/files/fWksT8elaw5VcTGWhhqu" alt="" width="563"><figcaption></figcaption></figure>

### Update - Local API

As a companion to our Local API, we’ve just shipped great improvements for our Raycast extension.

Here’s what’s new:

* **Quickly create** new channels, objects, types, properties, or tags with the shortcut `CMD+N` while browsing your channels.
* **Easily edit** your selected items (channels, objects, types, properties or tags) using `CMD+E`.
* **Conveniently add objects** to lists either through the new `Add object to list` command or directly from the context menu `CMD+K`.

<figure><img src="/files/CsJeqBbXtQcmCfXLkM94" alt=""><figcaption></figcaption></figure>

### Privacy

Our API runs locally on your machine, works without internet connection and requires authentication for a client (eg. raycast extension) to retrieve & access data.

To accomplish this, Raycast initially pairs with the app through the 4 digit pop-up. This notifies you about giving the extension limited access to your account.

The API key is stored in encrypted local storage of the extension and will be used to fetch data from the app (to display channels, objects etc.).

Therefore, no other applications than the authorized ones can access your data through the API.


# Custom CSS

Original shared by [LavaC](https://community.anytype.io/u/LavaC) on our community forum:

{% embed url="<https://community.anytype.io/t/tutorial-of-custom-css/14234>" %}

For assistance with this CSS guide or CSS in general, please comment in the original topic linked above.

### Where <a href="#where-1" id="where-1"></a>

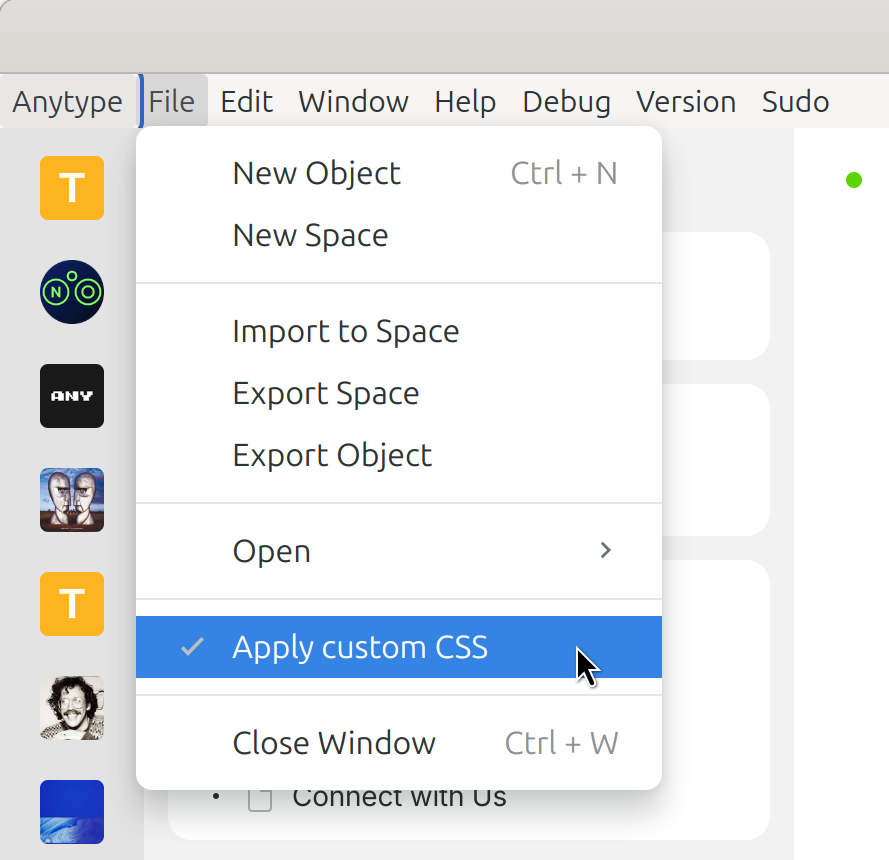
To enable the Custom CSS style sheet, go to `Menu > File > Apply Custom CSS`.

<figure><img src="/files/8avqxwYkme4fXjFE39tx" alt=""><figcaption></figcaption></figure>

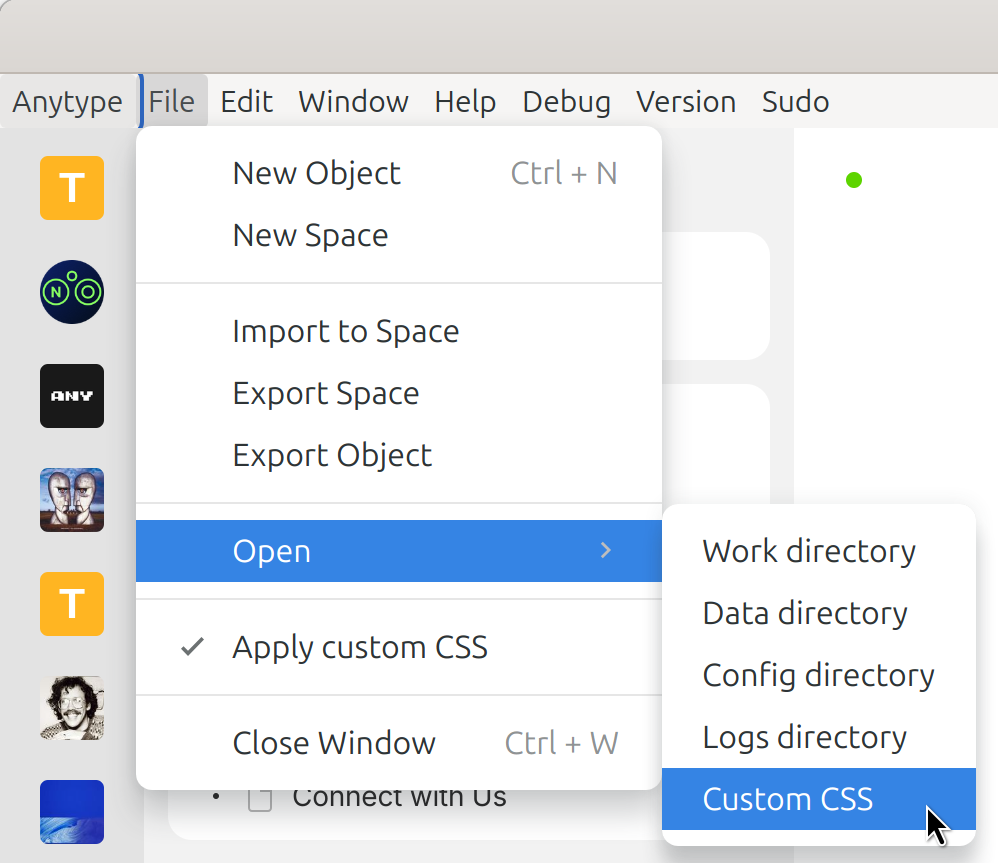
To edit the custom CSS file, go to `Menu > File > Open > Custom CSS`.

<figure><img src="/files/Szc9rwiSIYFLuwSXb88D" alt="" width="375"><figcaption></figcaption></figure>

### How <a href="#how-2" id="how-2"></a>

In order to take into beginners, many methods in this article are not best practices. If you understand CSS, you can likely skip most of the contents.

#### Theme color <a href="#theme-color-3" id="theme-color-3"></a>

When developing software, styles variables are usually set first as a baseline. Anytype is the same. If you want to change to your own style, generally start from here.

These variables are usually under the `:root` selector, we can see these in Dev tools.

<figure><img src="https://community-static.anytype.io/optimized/2X/8/8c798a22e6bddd7bd190043a2ec7c226fcf5cf24_2_690x408.png" alt=""><figcaption></figcaption></figure>

For example, `--color-text-primary` seems to be the color variable for the darkest black text, so we can write it this way in the custom.css file:

<figure><img src="https://community-static.anytype.io/original/2X/b/bbefbe5a417032384cde12b1e80e4b2f480ded68.png" alt=""><figcaption></figcaption></figure>

After saving, you can refresh Anytype by pressing `(Command/Ctrl) + r`.

> Of course, you can also directly modify and view the effects in Dev tools.

At this point, we can see that the red I just wrote overrode the default value, so my text has all turned red.

<figure><img src="https://community-static.anytype.io/optimized/2X/0/0e16feda708cfeee241bc7128caa3f802a09c66d_2_690x384.png" alt=""><figcaption></figcaption></figure>

Below is part of the custom.css I modified referring to [Solarized 18](https://en.wikipedia.org/wiki/Solarized), which is actually like a word filling game, change these variables more to see where they take effect, and then you’ll know what to modify next.

<figure><img src="https://community-static.anytype.io/optimized/2X/0/0a67ca485d41ba2d1e72dd5b30b5cae7f489f82e_2_690x394.jpeg" alt=""><figcaption></figcaption></figure>

```css
:root {
    --color-text-primary: #002b36;
    --color-text-secondary:	#586e75;
    --color-text-tertiary: 	#839496;
    --color-text-inversion: #eee8d5;
    --color-shape-primary: 	#586e75;
    --color-shape-secondary: 	#eee8d5;
    --color-shape-tertiary: 	#eee8d5;
    --color-shape-highlight-medium: rgba(79, 79, 79, 0.08);
    --color-shape-highlight-light: rgba(79, 79, 79, 0.04);
    --color-control-accent: #252525;
    --color-control-active: #b6b6b6;
    --color-control-inactive: #dcdcdc;
    --color-control-bg: #fff;
    --color-bg-primary: #fdf6e3;
    --color-bg-loader: rgba(255,255,255,0.7);
    --color-system-accent-100: #ffb522;
    --color-system-accent-50: #ffd15b;
    --color-system-accent-25: #ffee94;
    --color-system-selection: rgba(24, 163, 241, 0.15);
    --color-system-drop-zone: rgba(255, 187, 44, 0.25);
    --color-yellow: #ecd91b;
    --color-orange: #ffb522;
    --color-red: #f55522;
    --color-pink: #e51ca0;
    --color-purple: #ab50cc;
    --color-blue: #3e58eb;
    --color-ice: #2aa7ee;
    --color-teal: #0fc8ba;
    --color-lime: #5dd400;
    --color-green: #66B395;
}
```

#### Fonts <a href="#fonts-4" id="fonts-4"></a>

The attribute related to fonts in CSS is called [font-family 3](https://developer.mozilla.org/en-US/docs/Web/CSS/font-family). In order to ensure that all text applies the same font, we generally put the styles on the `body` tag.

```css
body {
    font-family: "霞鹜文楷", "jetBrainsMono";
}
```

Of course, the premise for it to take effect is that you have this font on your computer, if not, you can install this font on your computer or choose to import the font online.

<details>

<summary>Import font online</summary>

[<img src="https://community-static.anytype.io/optimized/2X/d/d1348ecf28fafeb4c079d5cd9ba343b30ee6f9d2_2_690x494.png" alt="image" data-size="original">](https://community-static.anytype.io/original/2X/d/d1348ecf28fafeb4c079d5cd9ba343b30ee6f9d2.png)\
[![image](https://community-static.anytype.io/optimized/2X/a/aaf23f71f95b30839021c2489a9153cc46f2b8be_2_690x271.png)](https://community-static.anytype.io/original/2X/a/aaf23f71f95b30839021c2489a9153cc46f2b8be.png)\
[![image](https://community-static.anytype.io/optimized/2X/d/d29da78fce6ac4d052c0b030fd322fab4fef2a1a_2_690x458.png)](https://community-static.anytype.io/original/2X/d/d29da78fce6ac4d052c0b030fd322fab4fef2a1a.png)\
[![image](https://community-static.anytype.io/optimized/2X/8/87c8c15932c29ee8bd91d58928d2958209db39e3_2_690x107.png)](https://community-static.anytype.io/original/2X/8/87c8c15932c29ee8bd91d58928d2958209db39e3.png)\
[![image](https://community-static.anytype.io/optimized/2X/6/690391b23293397bb0844789dee9d500300a3028_2_690x435.png)](https://community-static.anytype.io/original/2X/6/690391b23293397bb0844789dee9d500300a3028.png)

</details>

#### Dark Mode <a href="#dark-mode-5" id="dark-mode-5"></a>

The styles in dark mode need to be wrapped within the `html.themeDark`.

```css
/* Default applies to light mode */
.blocks {
    .block.blockText.textCallout>.wrapContent{
        border-radius: 30px;
    }
}

html.themeDark {
    /* Applies to Dark mode */
    --color-text-primary: red;
    .blocks {
        .block.blockText.textCallout>.wrapContent{
            border-radius: 2px;
        }
    }
}

```

#### Other elements <a href="#other-elements-6" id="other-elements-6"></a>

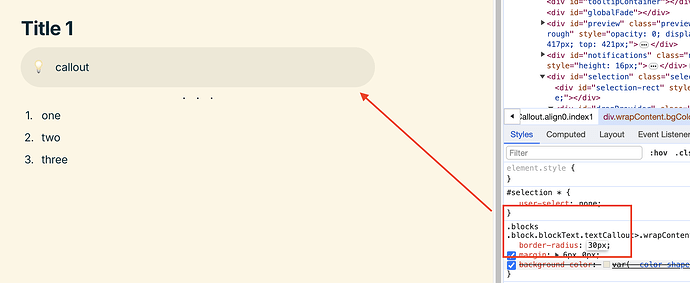
If you want to modify a particular element, you can use the Dev tools function in the upper left corner, and then select the element you want to modify, at which time you can see the styles related to it in the **Styles** column.

<figure><img src="https://community-static.anytype.io/optimized/2X/3/3d111c1232f10345c8584f5a2cf15ec36cba8864_2_690x460.png" alt=""><figcaption></figcaption></figure>

You can try directly modifying the values inside to see what effects it would produce.

<figure><img src="https://community-static.anytype.io/optimized/2X/6/6ec5d48153fd5abfd34274a2c9cfb736de865a14_2_690x283.png" alt=""><figcaption></figcaption></figure>

If you think the effects are not bad, you can copy all this content to your custom.css stylesheet to save.

<figure><img src="https://community-static.anytype.io/original/2X/8/8c83f1c7406a1a651cac26da10c6429bd59f2dcb.png" alt=""><figcaption></figcaption></figure>

#### Change Icons <a href="#change-icons-7" id="change-icons-7"></a>

The icons in Anytype are implemented using SVG.

<details>

<summary>For example the relation icons</summary>

[<img src="https://community-static.anytype.io/optimized/2X/6/6d596177b0b332db51cd793630c415891538f8f7_2_672x500.png" alt="image" data-size="original">](https://community-static.anytype.io/original/2X/6/6d596177b0b332db51cd793630c415891538f8f7.png)

The text starting with `data:image/svg...` is the Base64 data converted from SVG.\
You can decrypt this data on a dedicated [website 1](https://base64.guru/converter/decode/image/svg) to get the SVG image.

</details>

If you want to customize your own icon, you can convert SVG to Base64 format, which can be achieved on a dedicated [website](https://base64.guru/converter/encode/image/svg).

As for the source of SVG icons, I recommend using this [website 4](https://pictogrammers.com/libraries/).

> It is best not to choose SVG that is too complicated, otherwise the resulting Base64 text will be too long.

After obtaining the corresponding Base64 text and replacing it, we have successfully replaced it.

```css
.header .icon.relation {
  background-image: url(data:image/svg+xml;base64,PD94bWwgdmVyc2lvb......);
}
```

![image](https://community-static.anytype.io/original/2X/3/30b788e54c7daa2db54352ca4ff721ecc6d2e027.png)

**If you think the original icon is very good and just want to change the color, there is also a way to achieve it, but it will be a bit complicated.**

```css
.header .icon.relation {
  // The content of the url in the next line is the content of the `background-image` attribute of this icon. 
  mask-image: url(data:image/svg+xml;base64,.......);
  mask-repeat: no-repeat;
  background: red; // the color you want
}
```

If you have used PS, you should be able to guess that this is a similar mask function, but unfortunately the final result is not very smooth.\\

<figure><img src="https://community-static.anytype.io/original/2X/7/72dbdcf71ef643f5873aa7ea1ea814bf282dfec5.png" alt=""><figcaption></figcaption></figure>

### Examples

{% embed url="<https://community.anytype.io/t/anytype-mist-light-dark-a-brand-new-anytype-theme/16329>" %}


# Dates

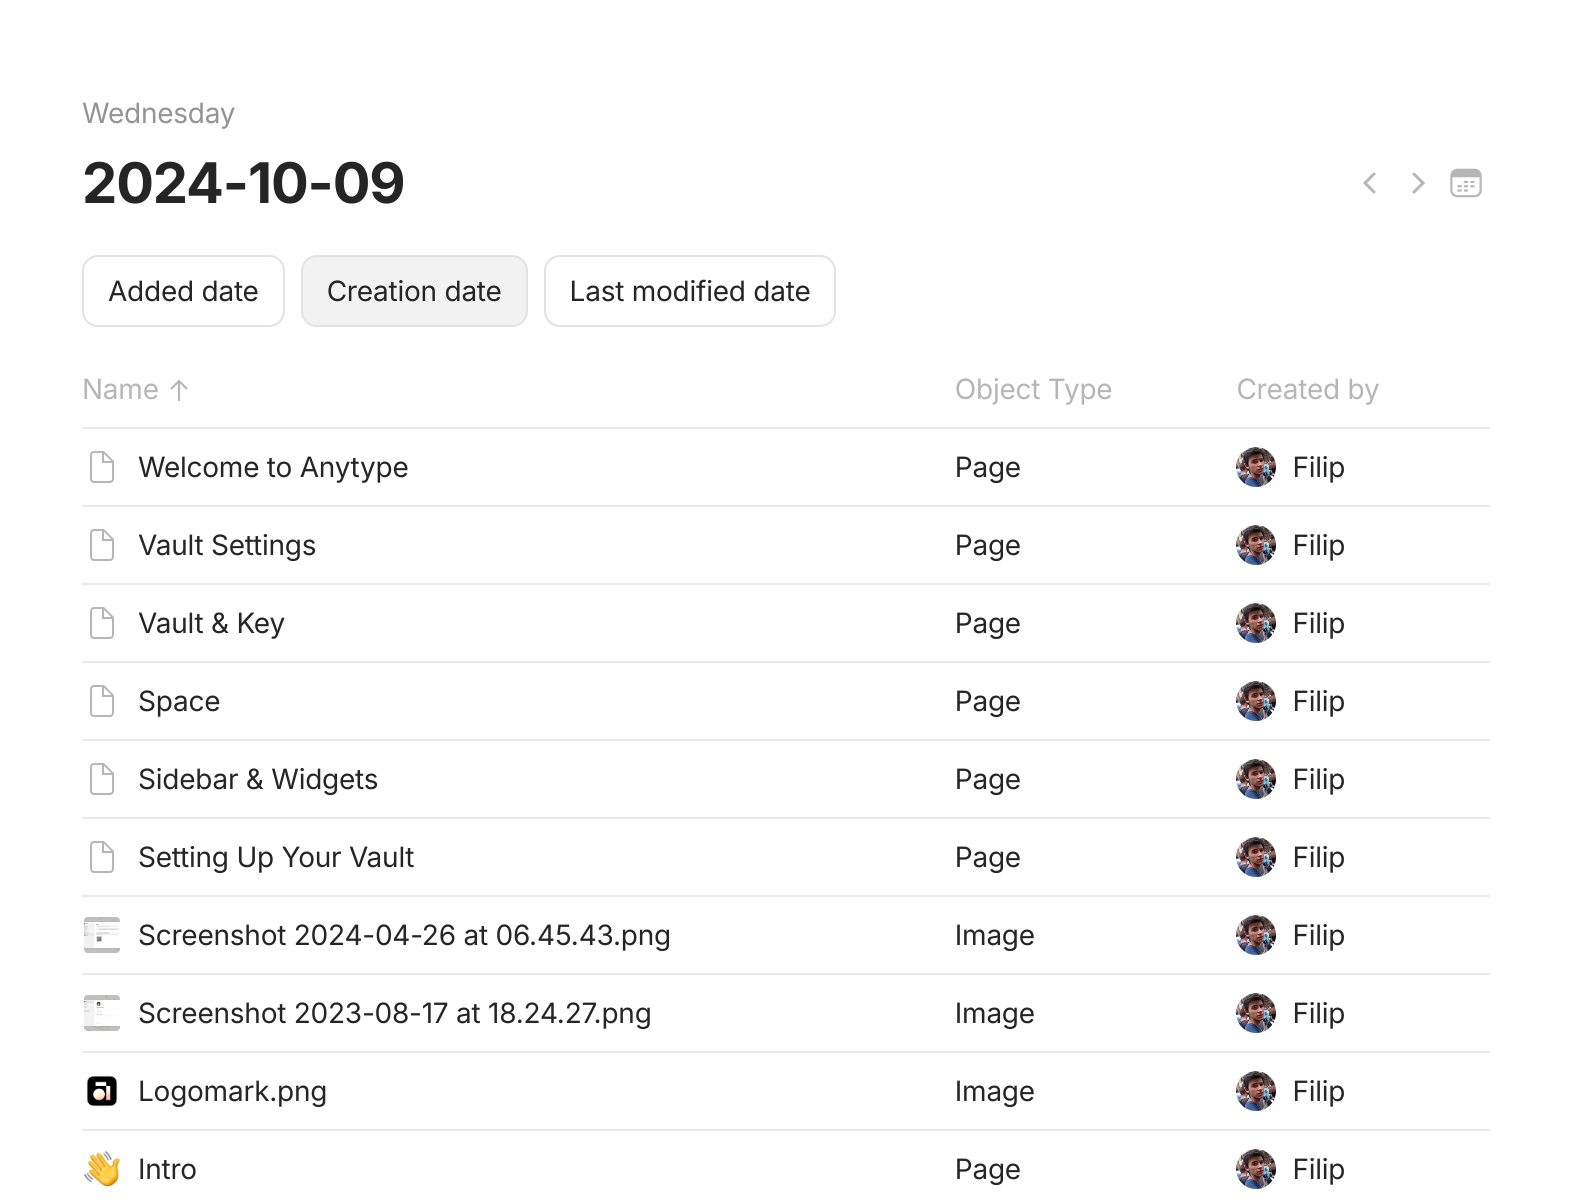
You can open any date as a separate object and view the entire context related to that date.

<figure><img src="/files/Ky9L0Tx4bIztgtCsw3w7" alt=""><figcaption></figcaption></figure>

This includes [mentions (@date)](/anytype-docs/getting-started/object-editor/linking-objects#date-mentions), automatically created dates and custom date properties.

Date is also accessible from properties, layouts, graph, calendar view and more.


# Graph

Finally a dive into your graph of objects.

{% hint style="warning" %}
Available on desktop only.
{% endhint %}

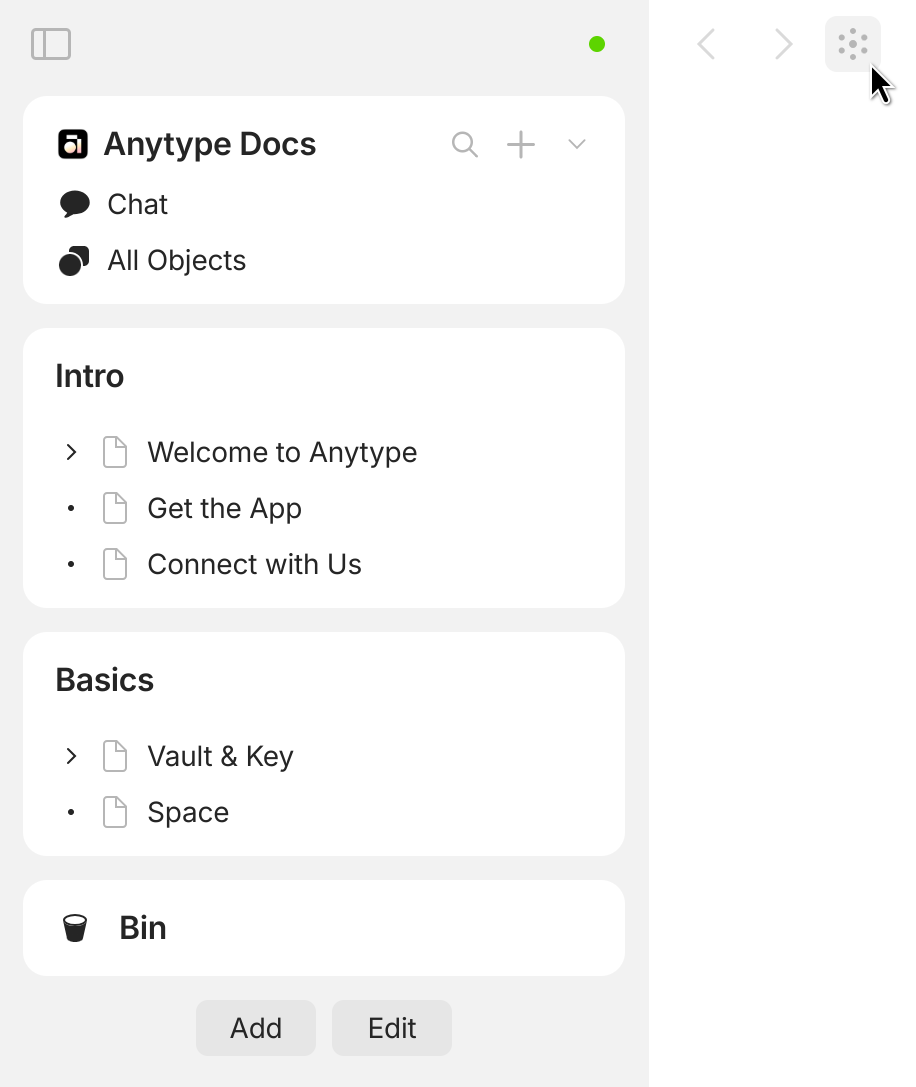
From anywhere in the app, you'll see the graph icon at the top and next to your sidebar:

<figure><img src="/files/bWJqzpbl2Z7nGixXiWzU" alt="" width="375"><figcaption></figcaption></figure>

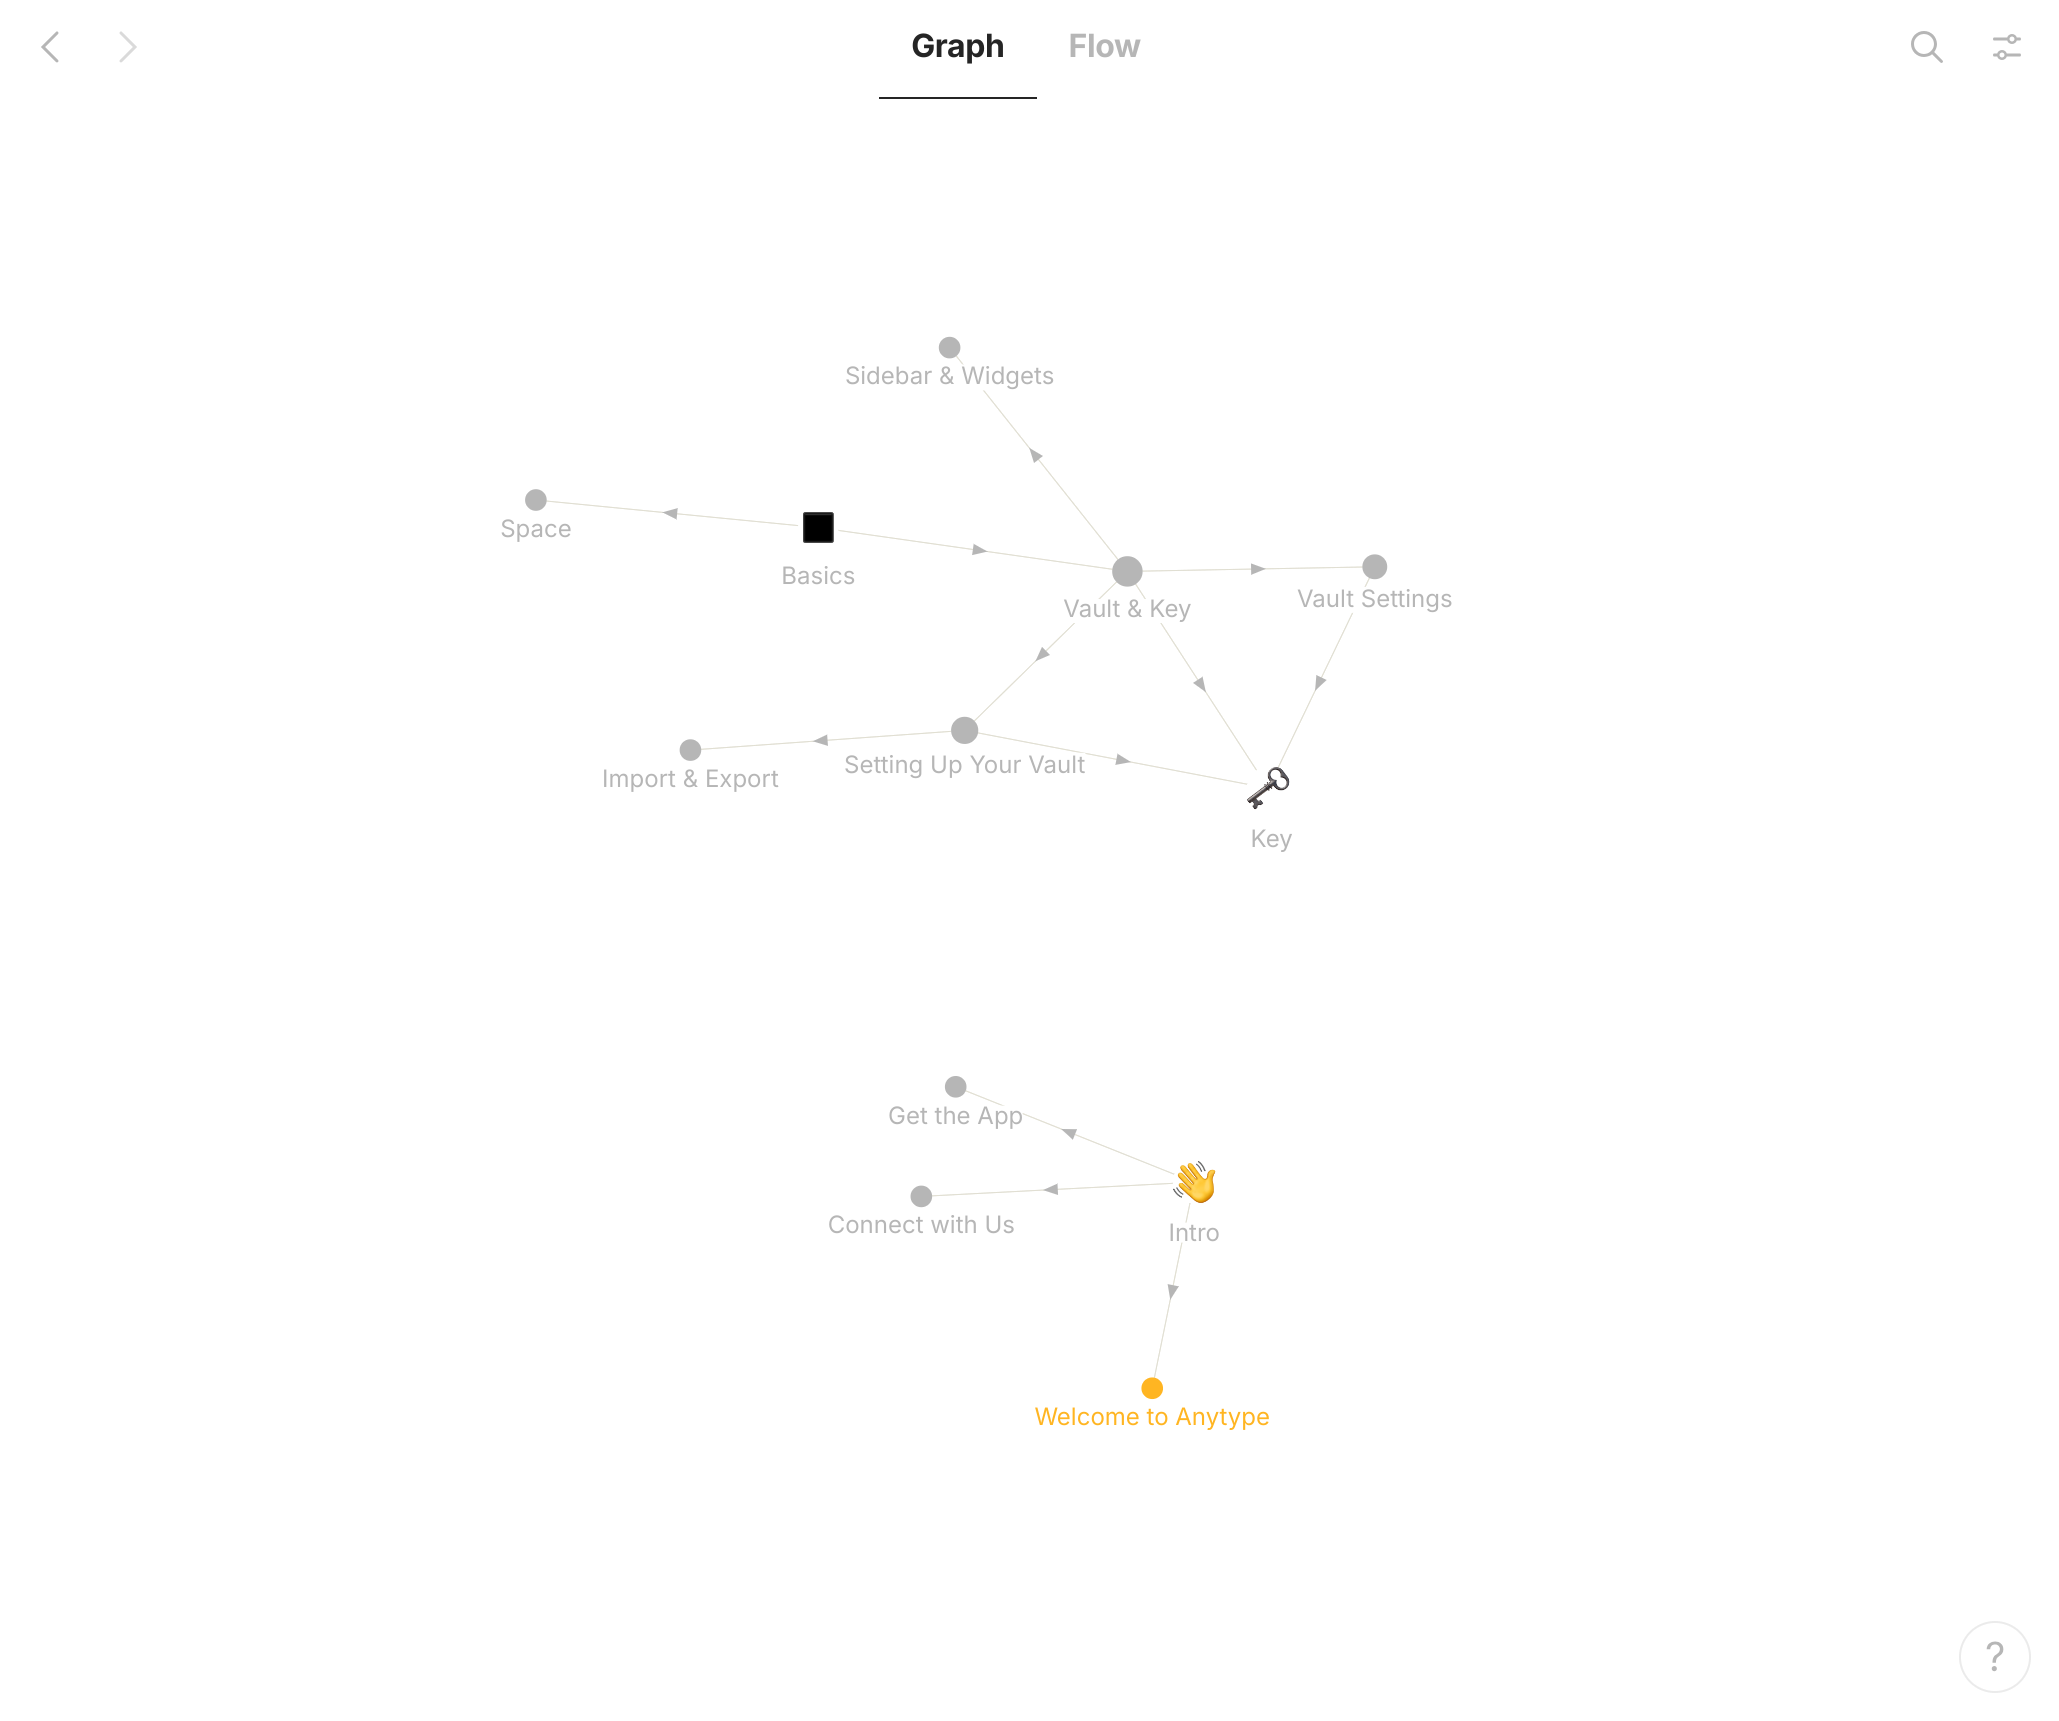
In the Graph you can see which Objects are connected together, and the direction everything flows.

<figure><img src="/files/YpQ38g4EUdbTqBd0pCNu" alt="" width="563"><figcaption></figcaption></figure>

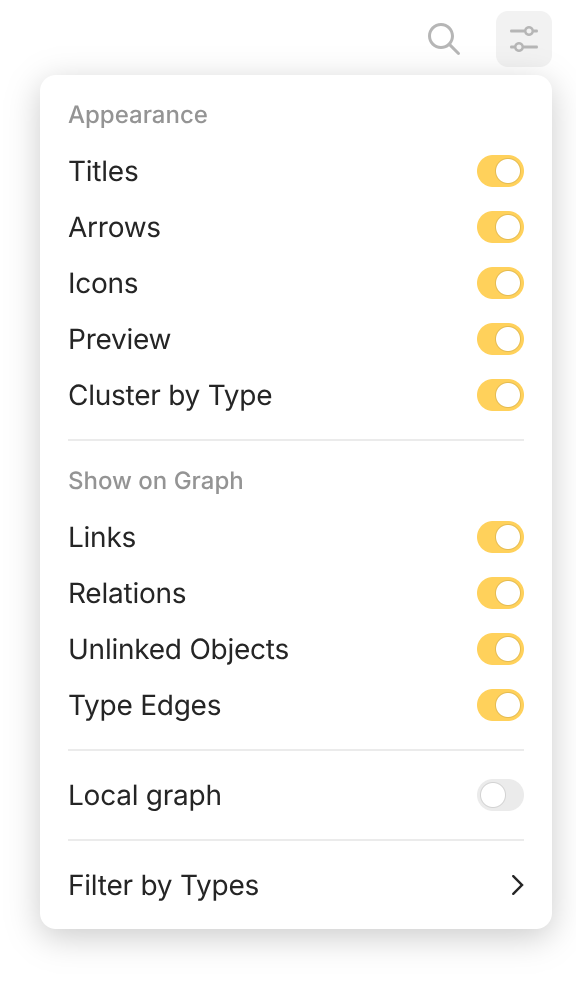
On the top right of the screen in your Graph, you can **search** and optimize some settings.

Toggle appearances for title, arrows, and icons.

Optimize viewing links, Properties, and unlinked objects. **If you are missing some objects, check to show unlinked objects.**

<figure><img src="/files/JIyW4oFRgzublnseg7FA" alt="" width="288"><figcaption></figcaption></figure>


# Other Features

{% hint style="warning" %}
All of these features are available on desktop only.
{% endhint %}

### Custom Storage Location

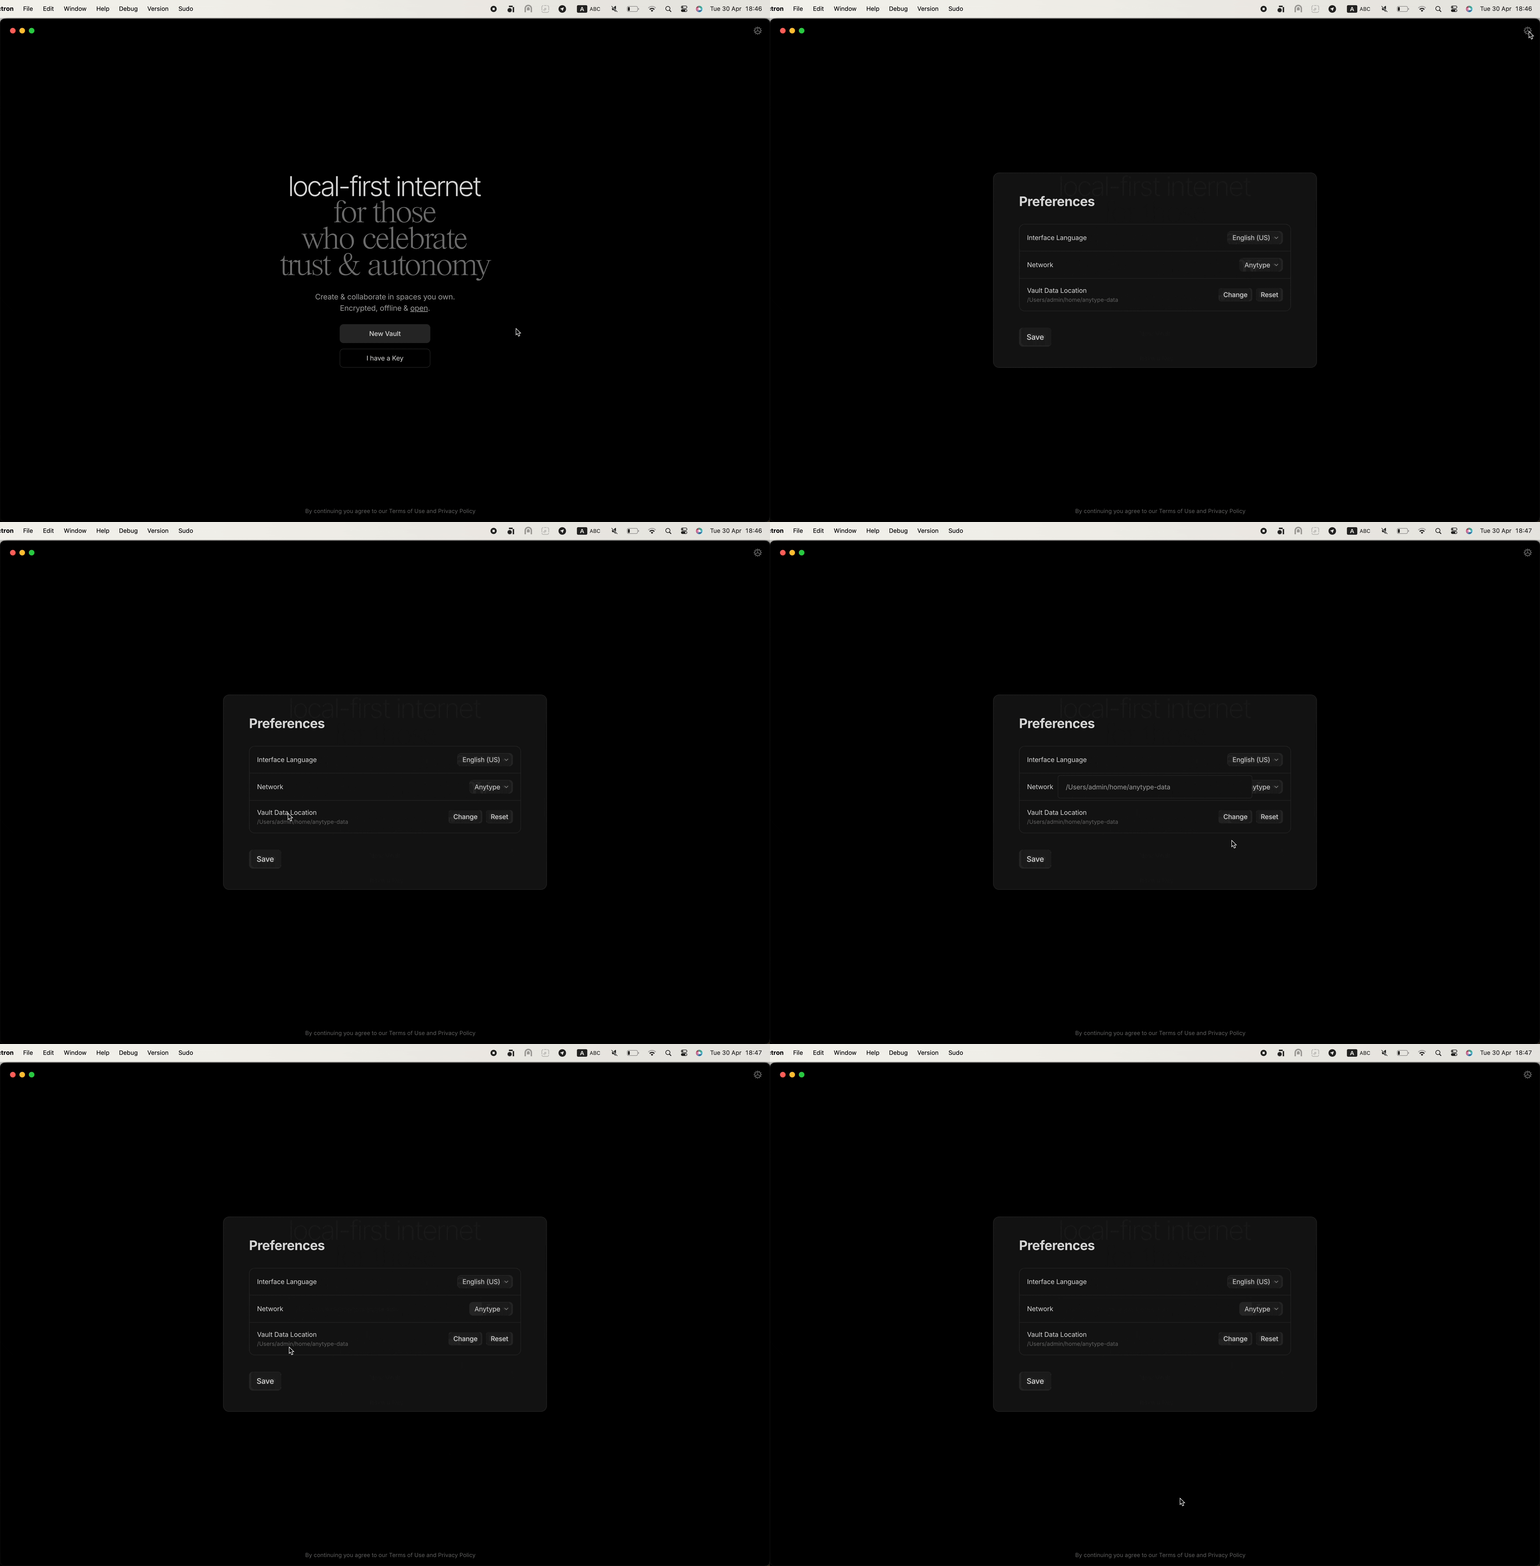
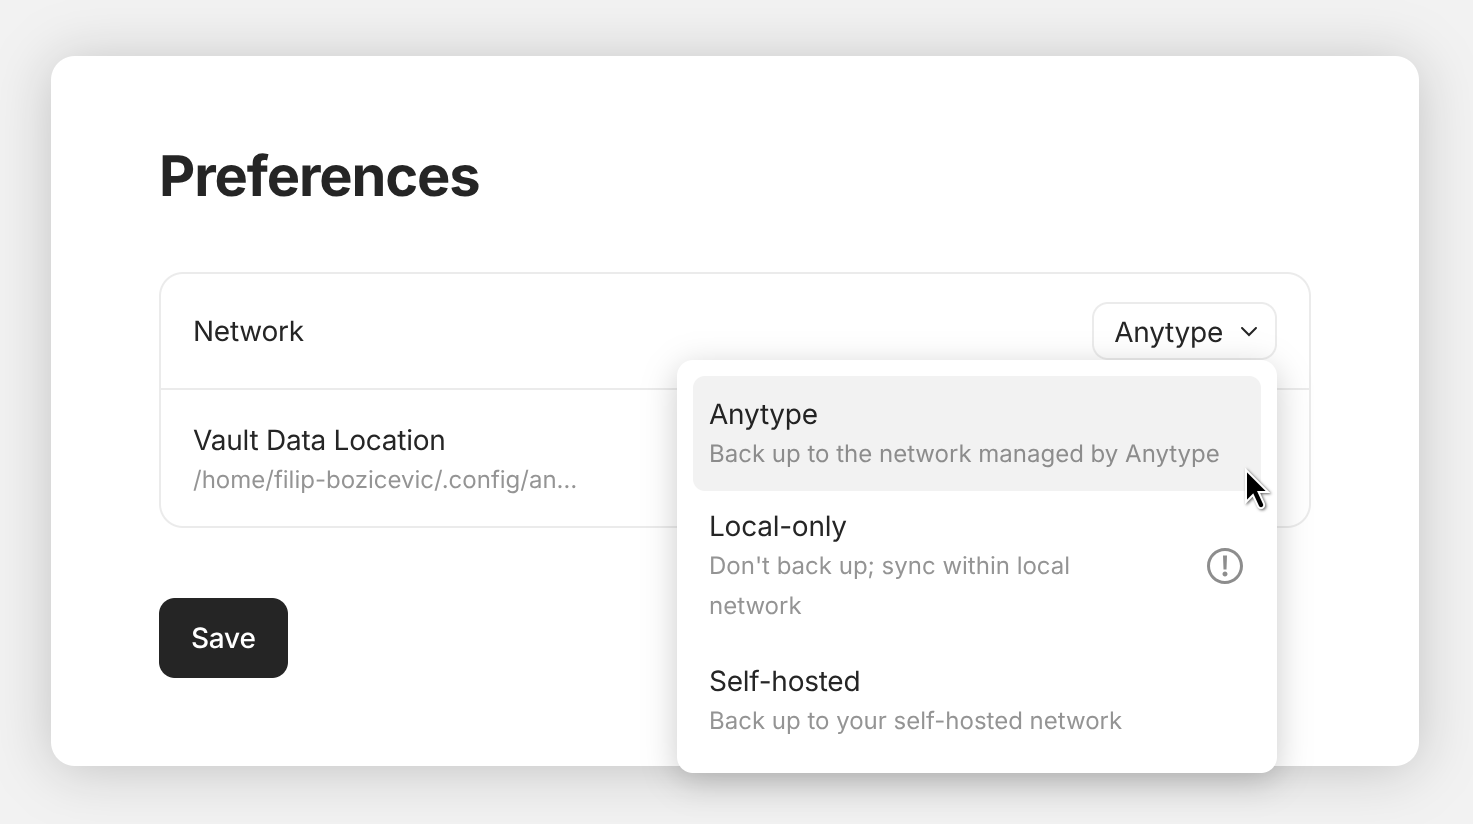
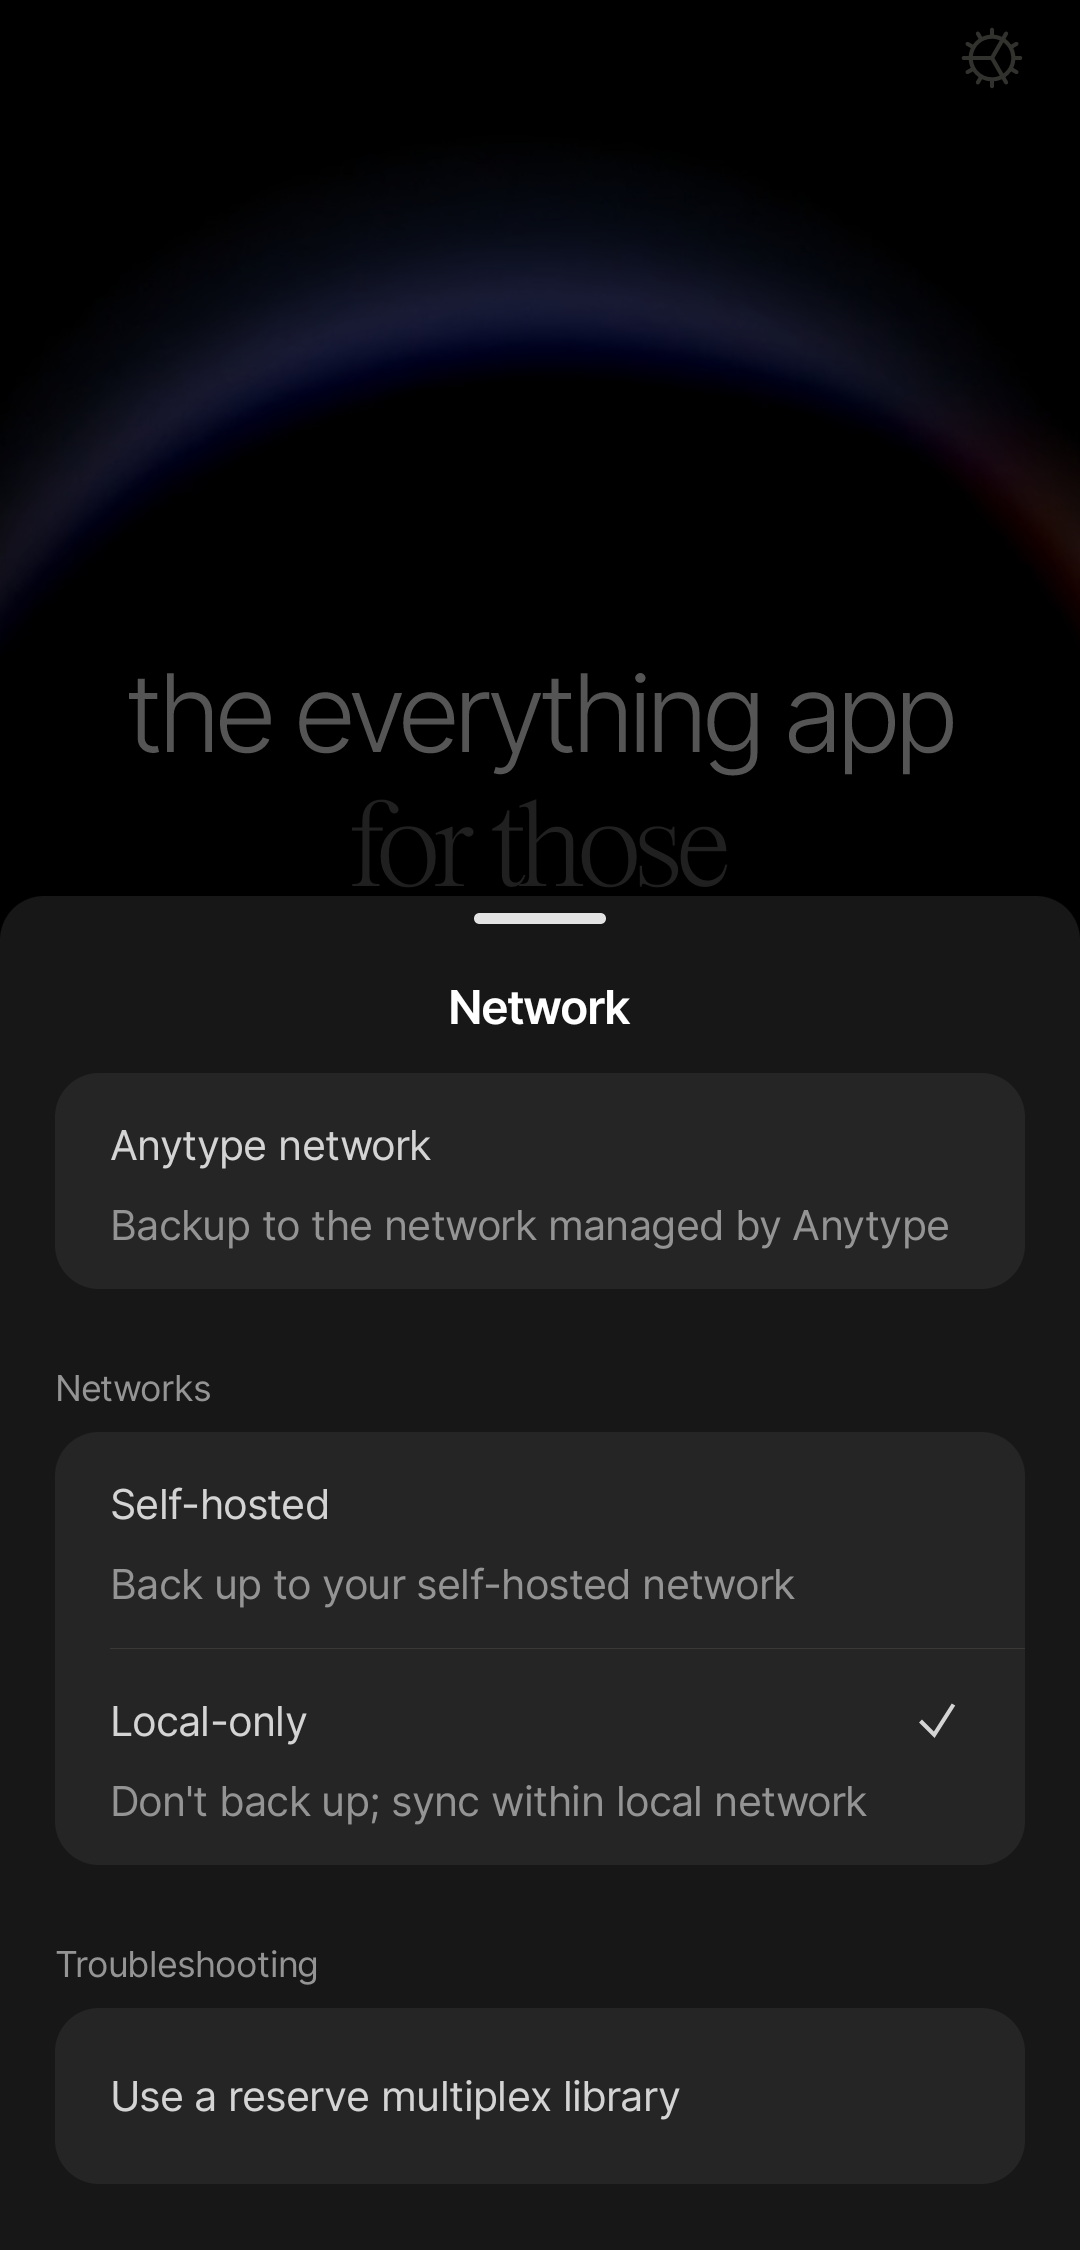
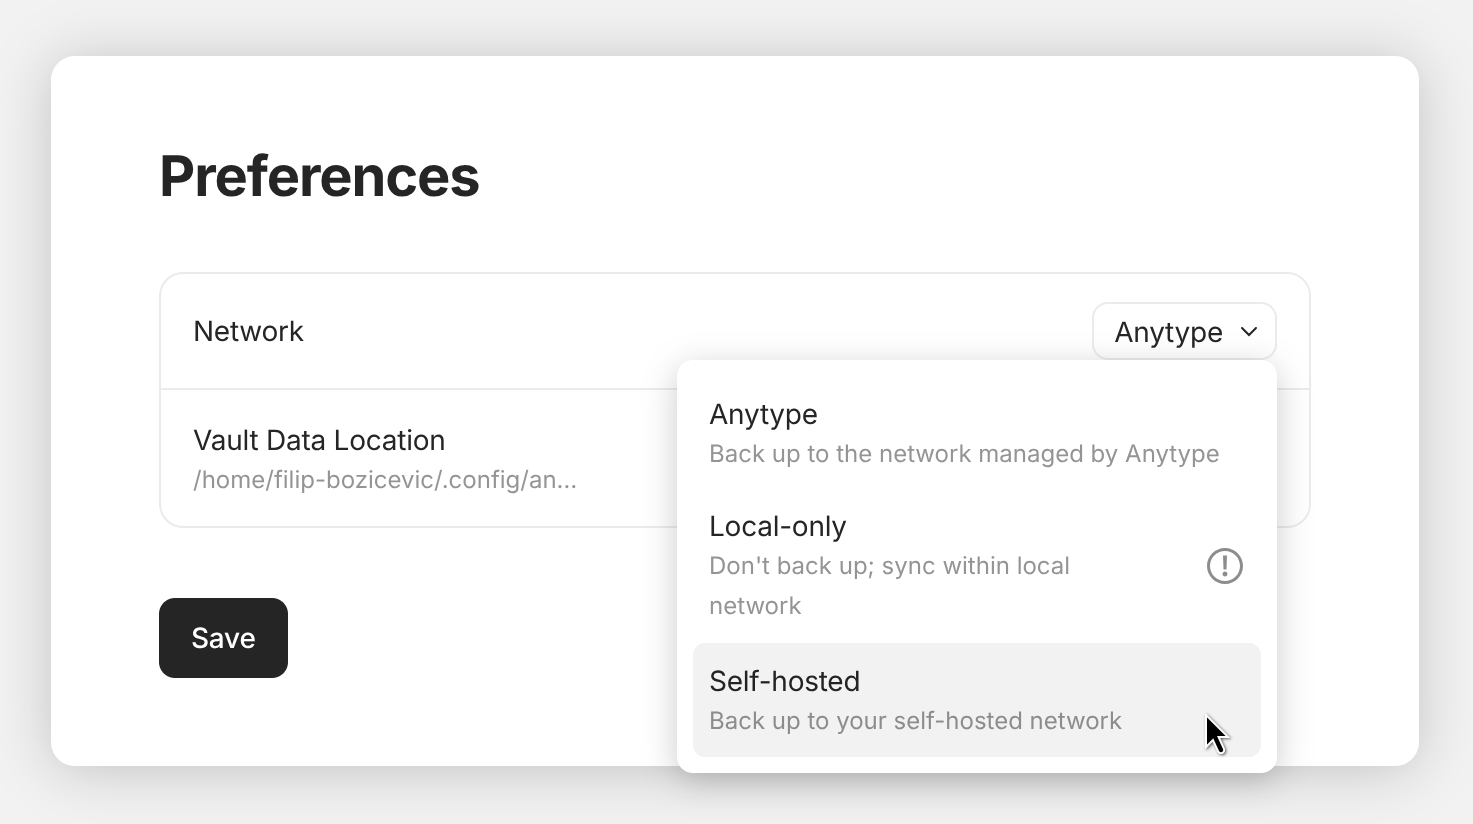
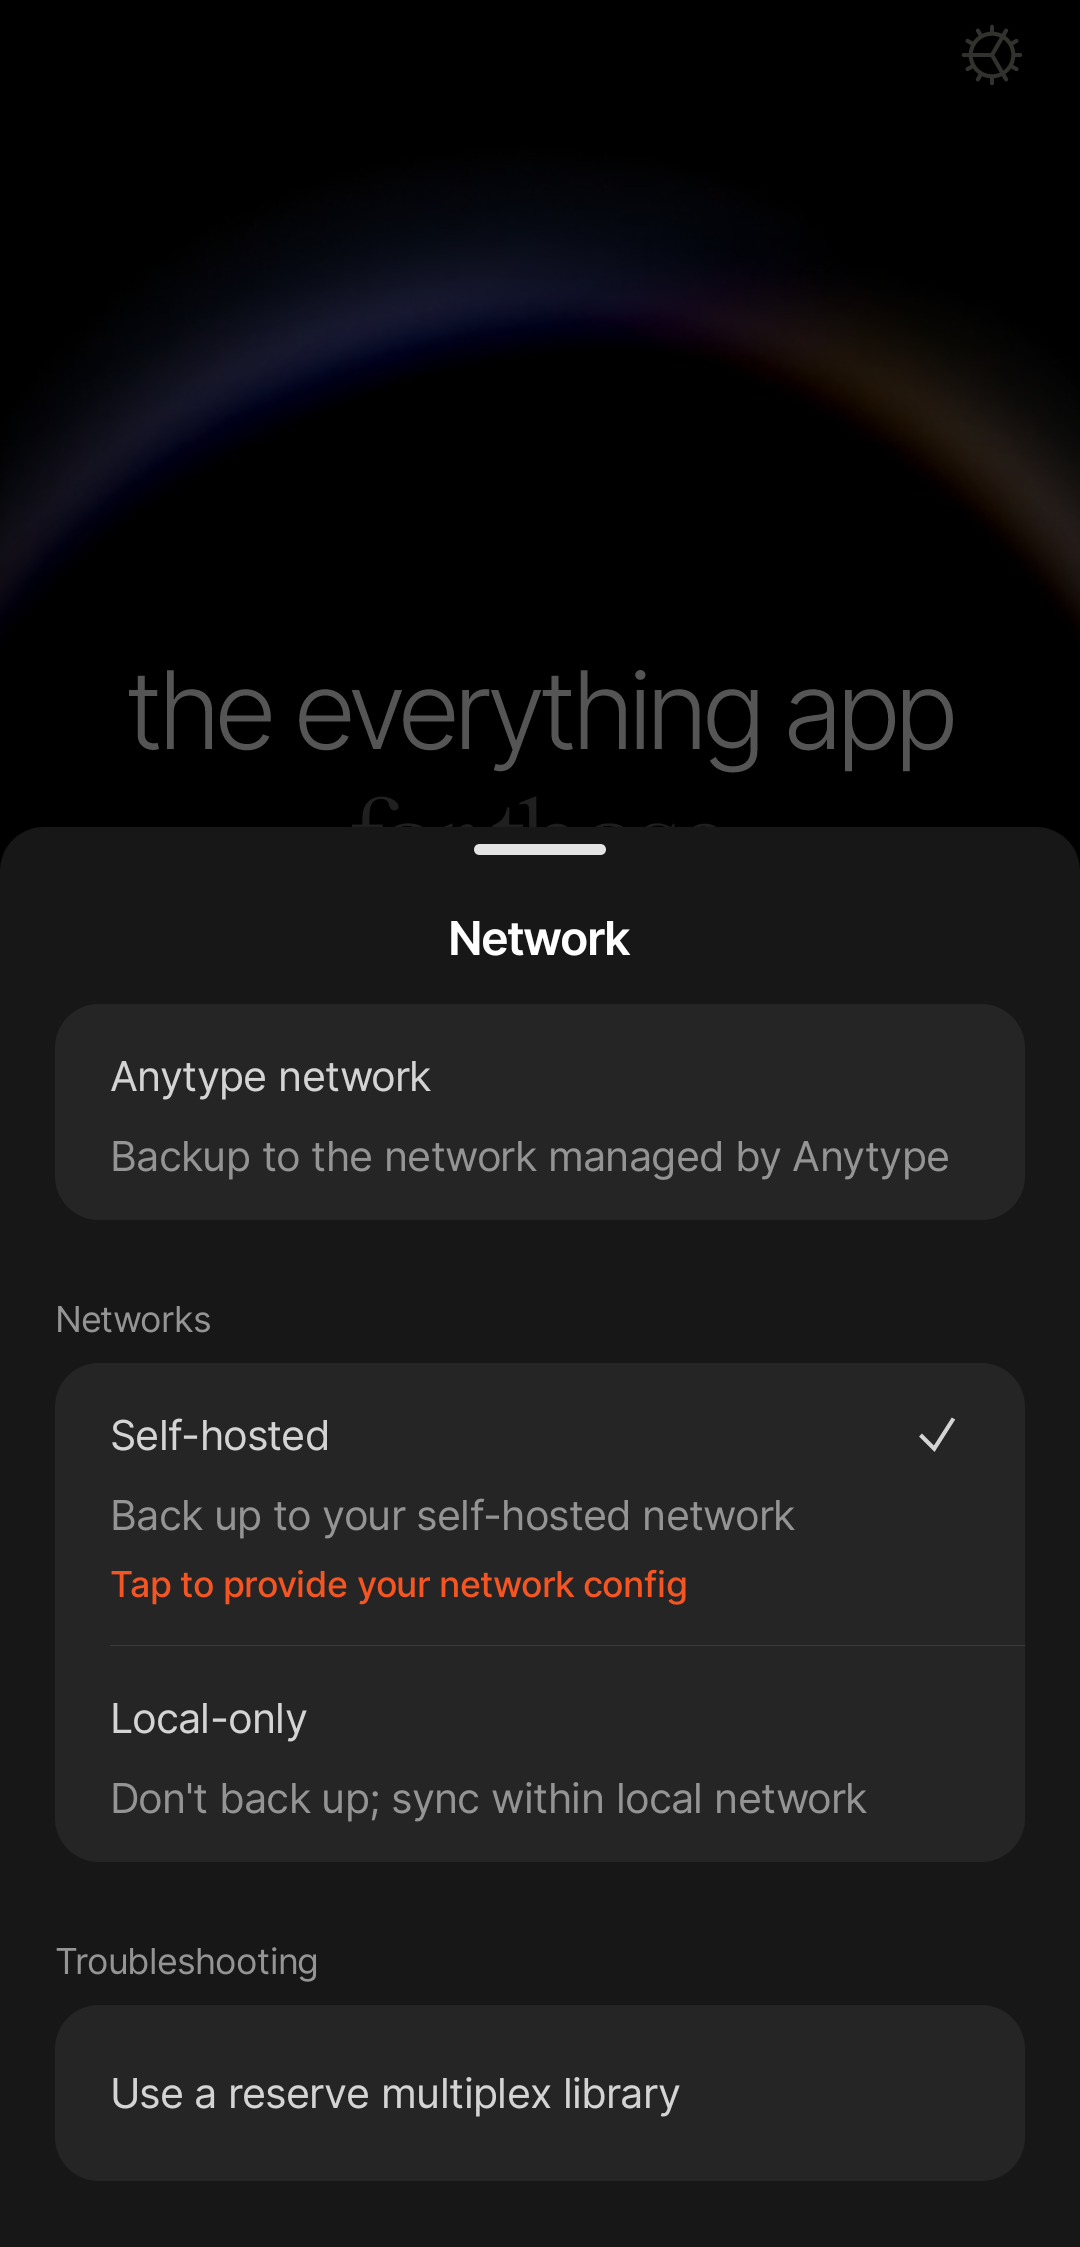
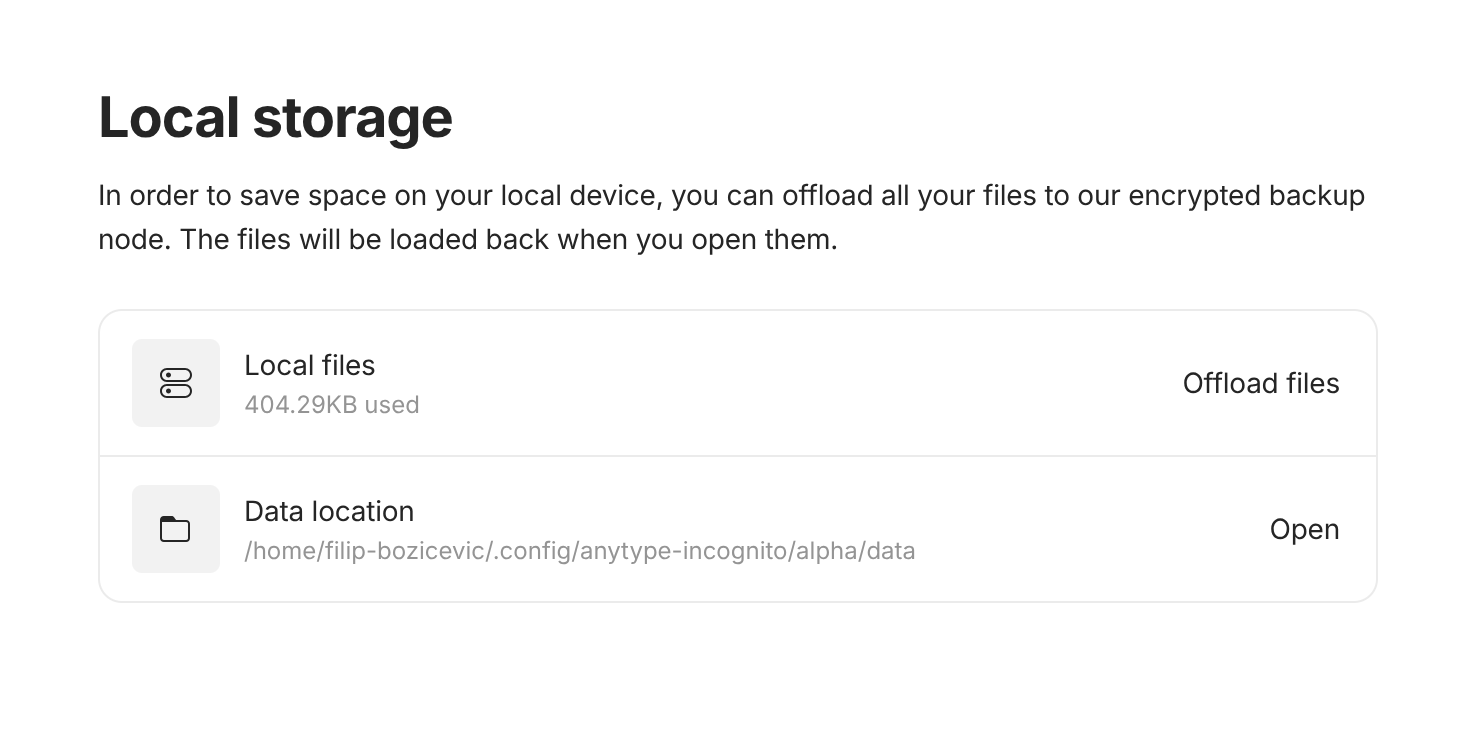
When creating a Vault, it’s now possible to select the storage location on your hard drive. If your Vault has already been created, you can also change the location and retrieve the data from the network. To do so, first logout, then tap the settings wheel on the black login screen.

<figure><img src="/files/3oxsriTCEcvC5bGI0H4s" alt="" width="563"><figcaption></figcaption></figure>

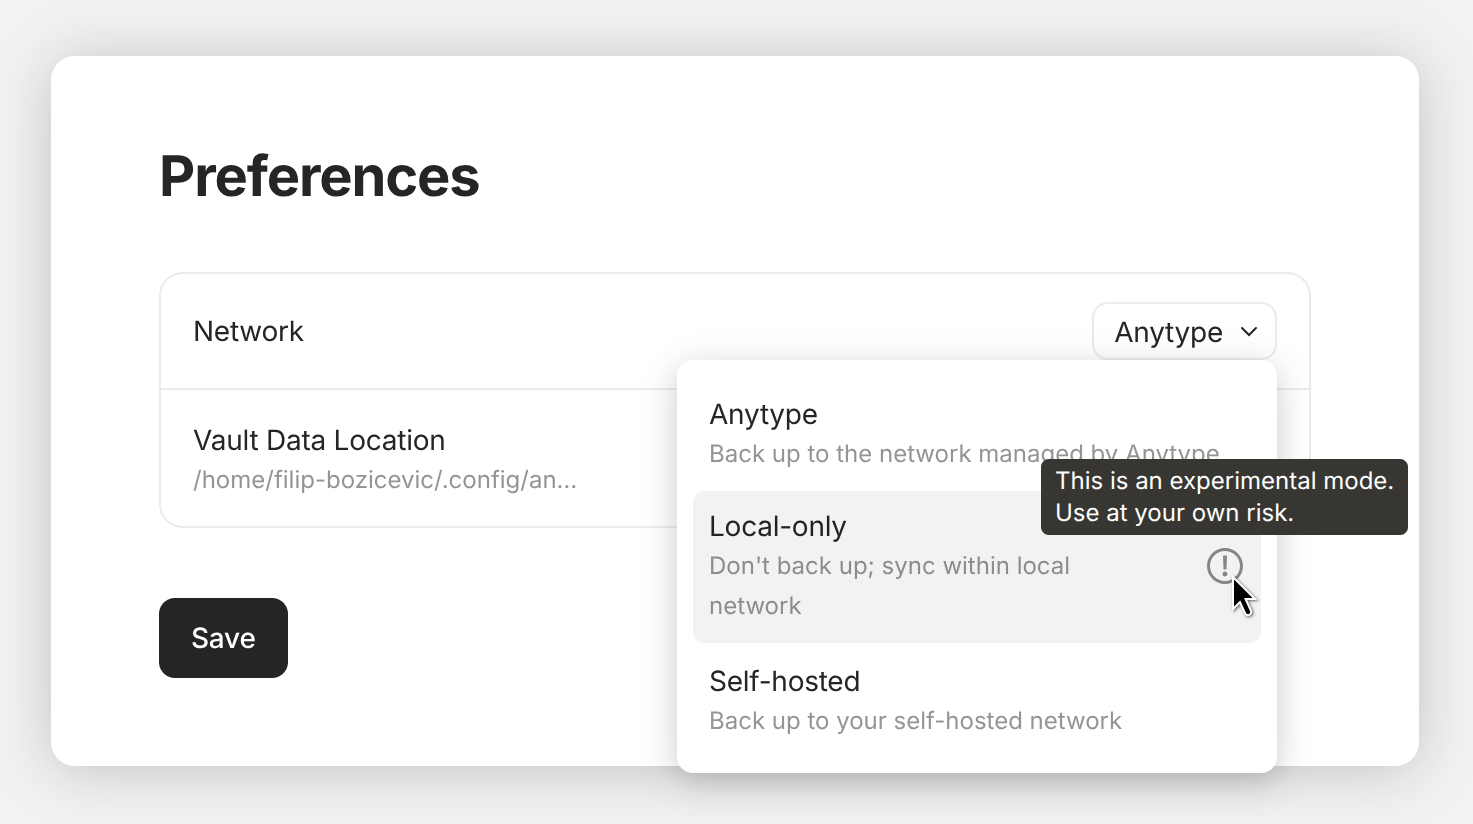
{% hint style="danger" %}
Please be cautious when using local-only mode, as your data can only be transferred to a second device via peer-to-peer (P2P) connection.
{% endhint %}

#### External drives and cloud providers

To store your data on an external drive, you just need to mount the drive first, and then follow the steps from [#custom-storage-location](#custom-storage-location "mention").

We don't recommend using cloud providers like Google Drive or iCloud since you might end up with sync conflicts / issues.

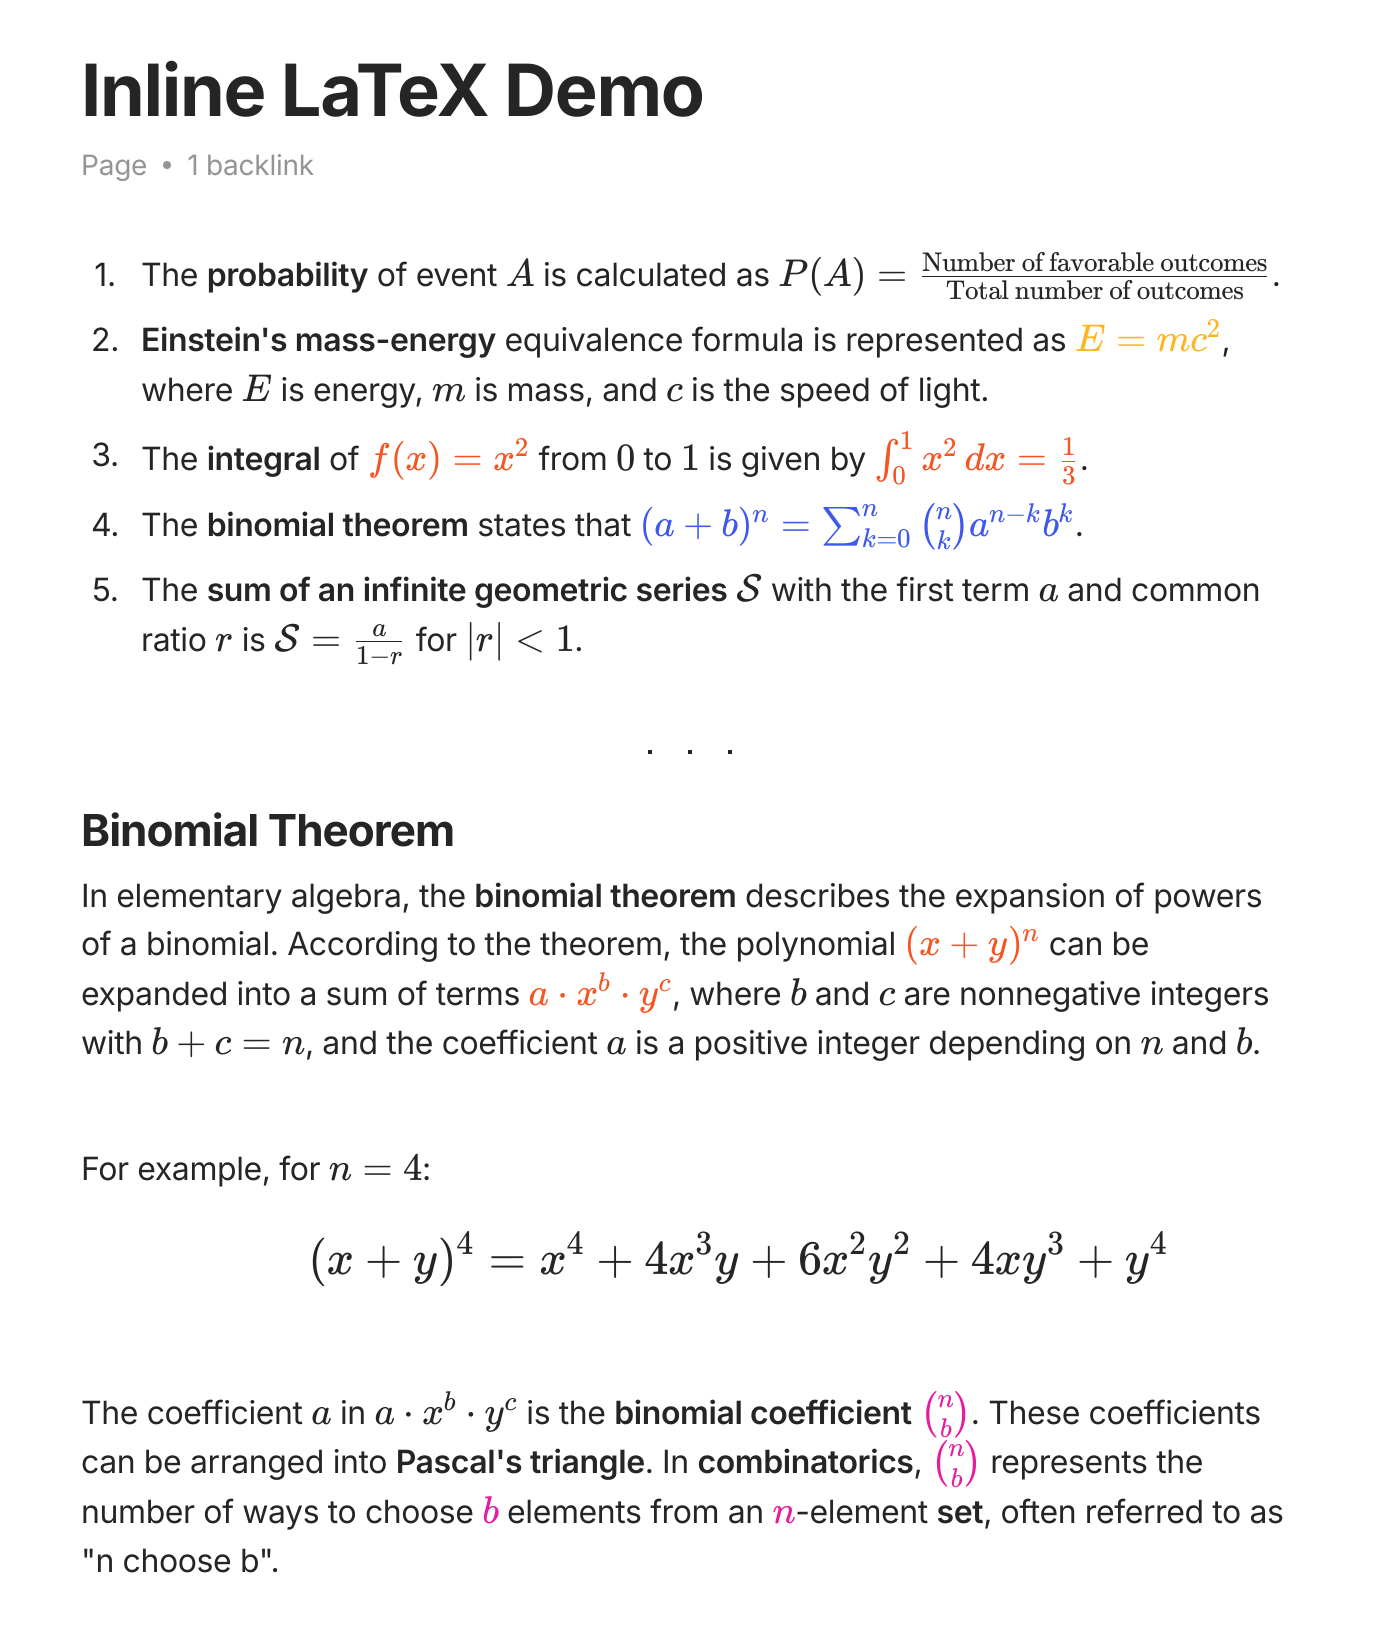
### Inline Latex

You can easily add mathematical notation right into your text by wrapping your formulas with `$` symbols, making it possible to include complex equations and formulas!

<figure><img src="/files/mRVNDsj3g72V4FXM5Lvf" alt=""><figcaption></figcaption></figure>

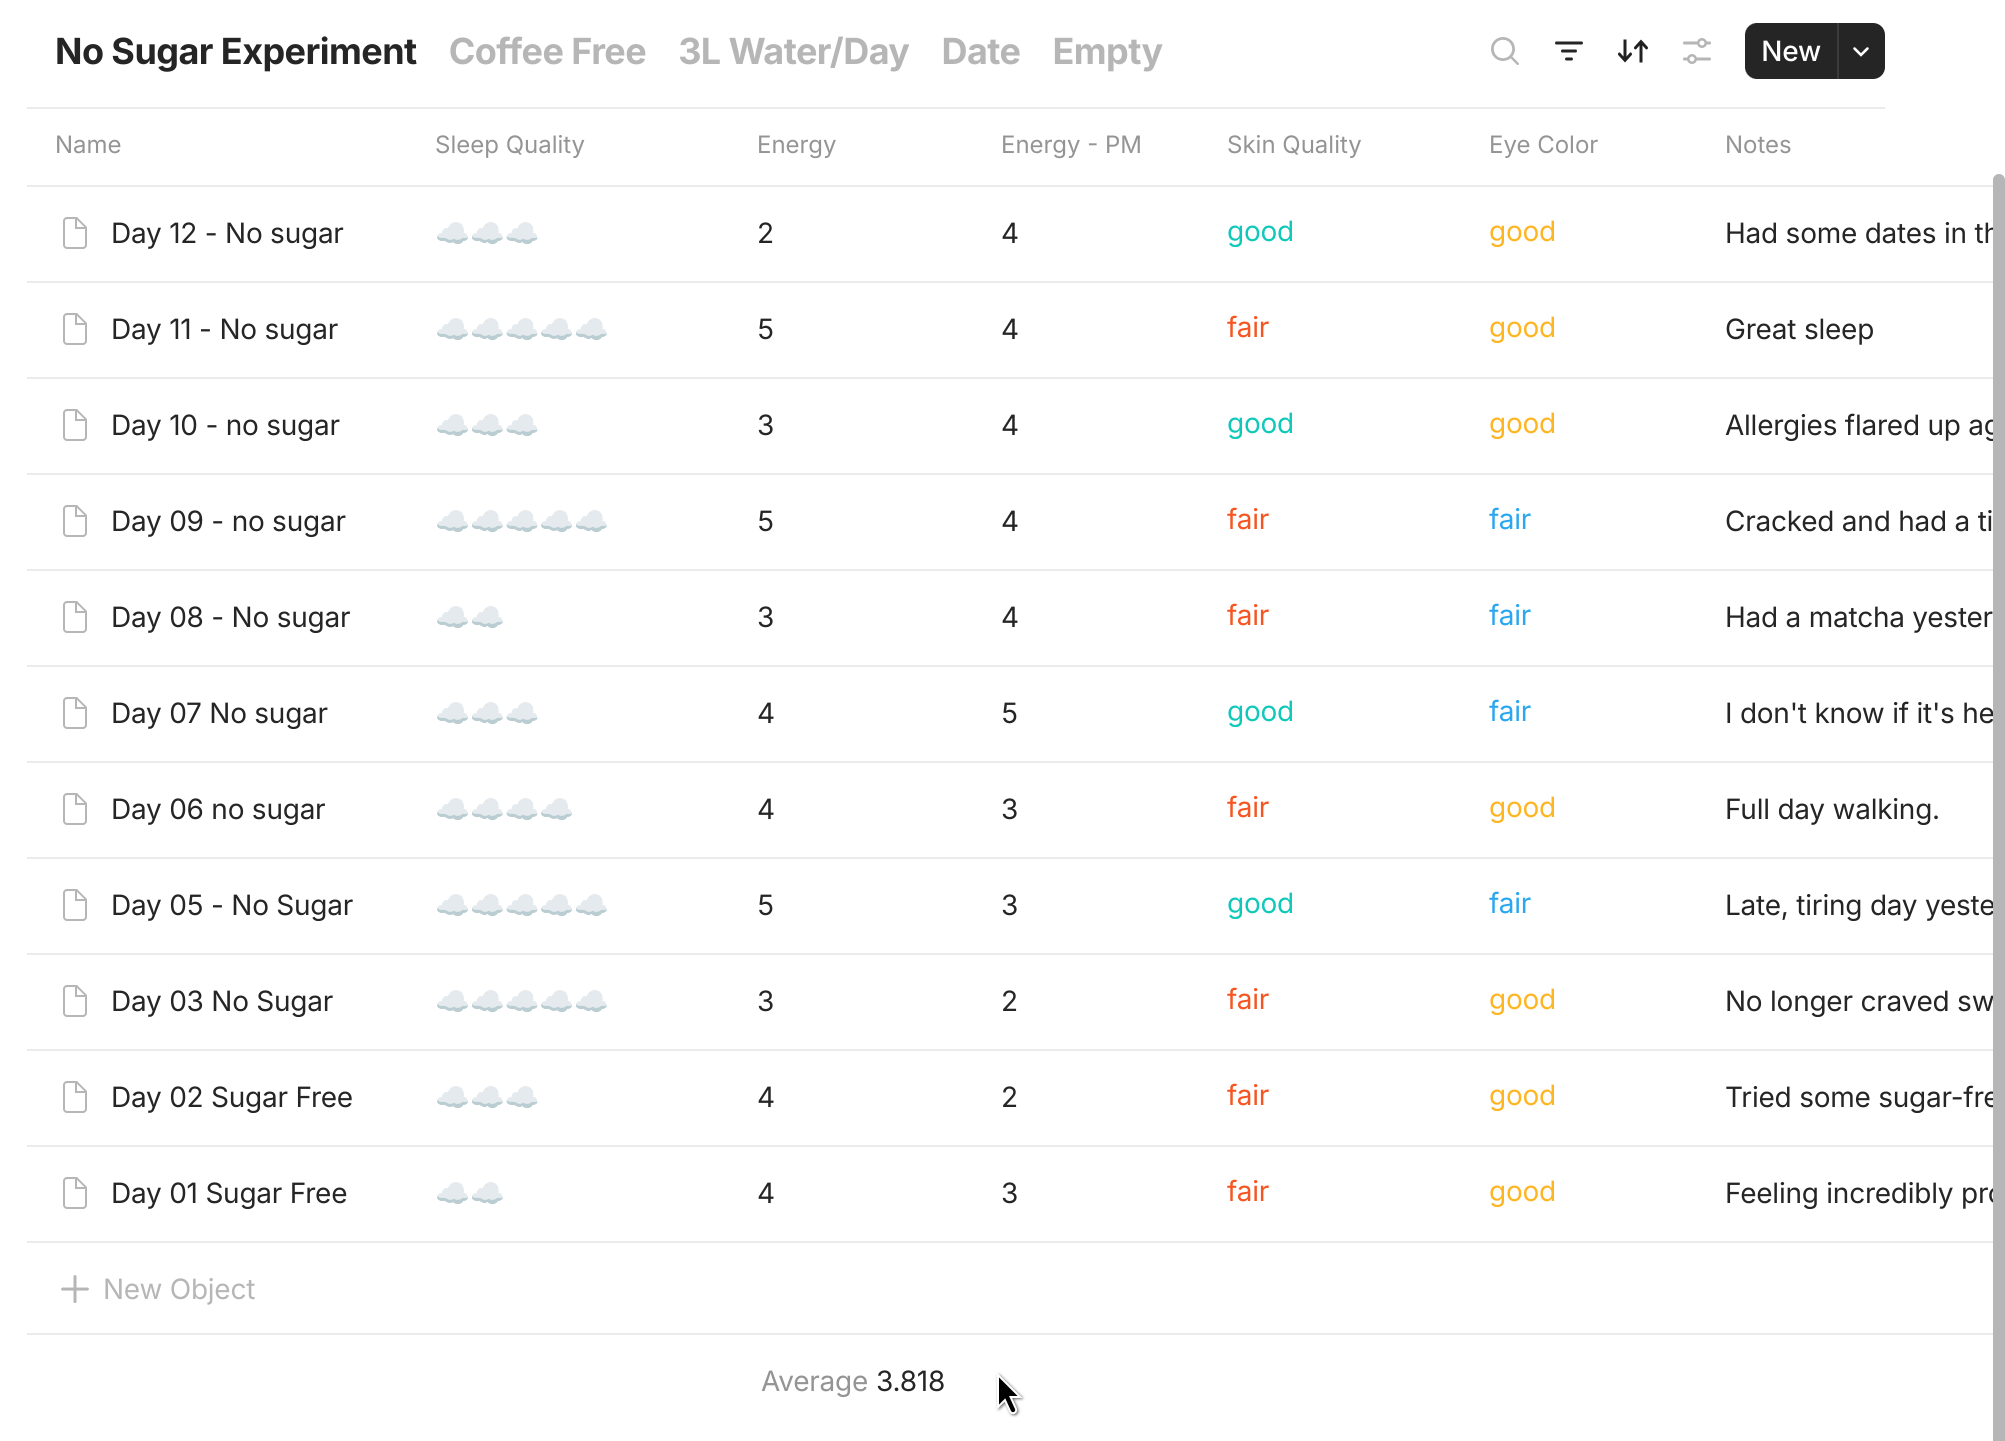
### Simple Formulas

You can count objects in the Grid view and perform simple math and aggregation functions with all types of properties.

<figure><img src="/files/2yigSZzpfv8Dw21J0sxh" alt="" width="563"><figcaption></figcaption></figure>

### Embed Blocks

<figure><img src="/files/00T1I91Ts0wB5SOt3Hk0" alt="" width="563"><figcaption></figcaption></figure>

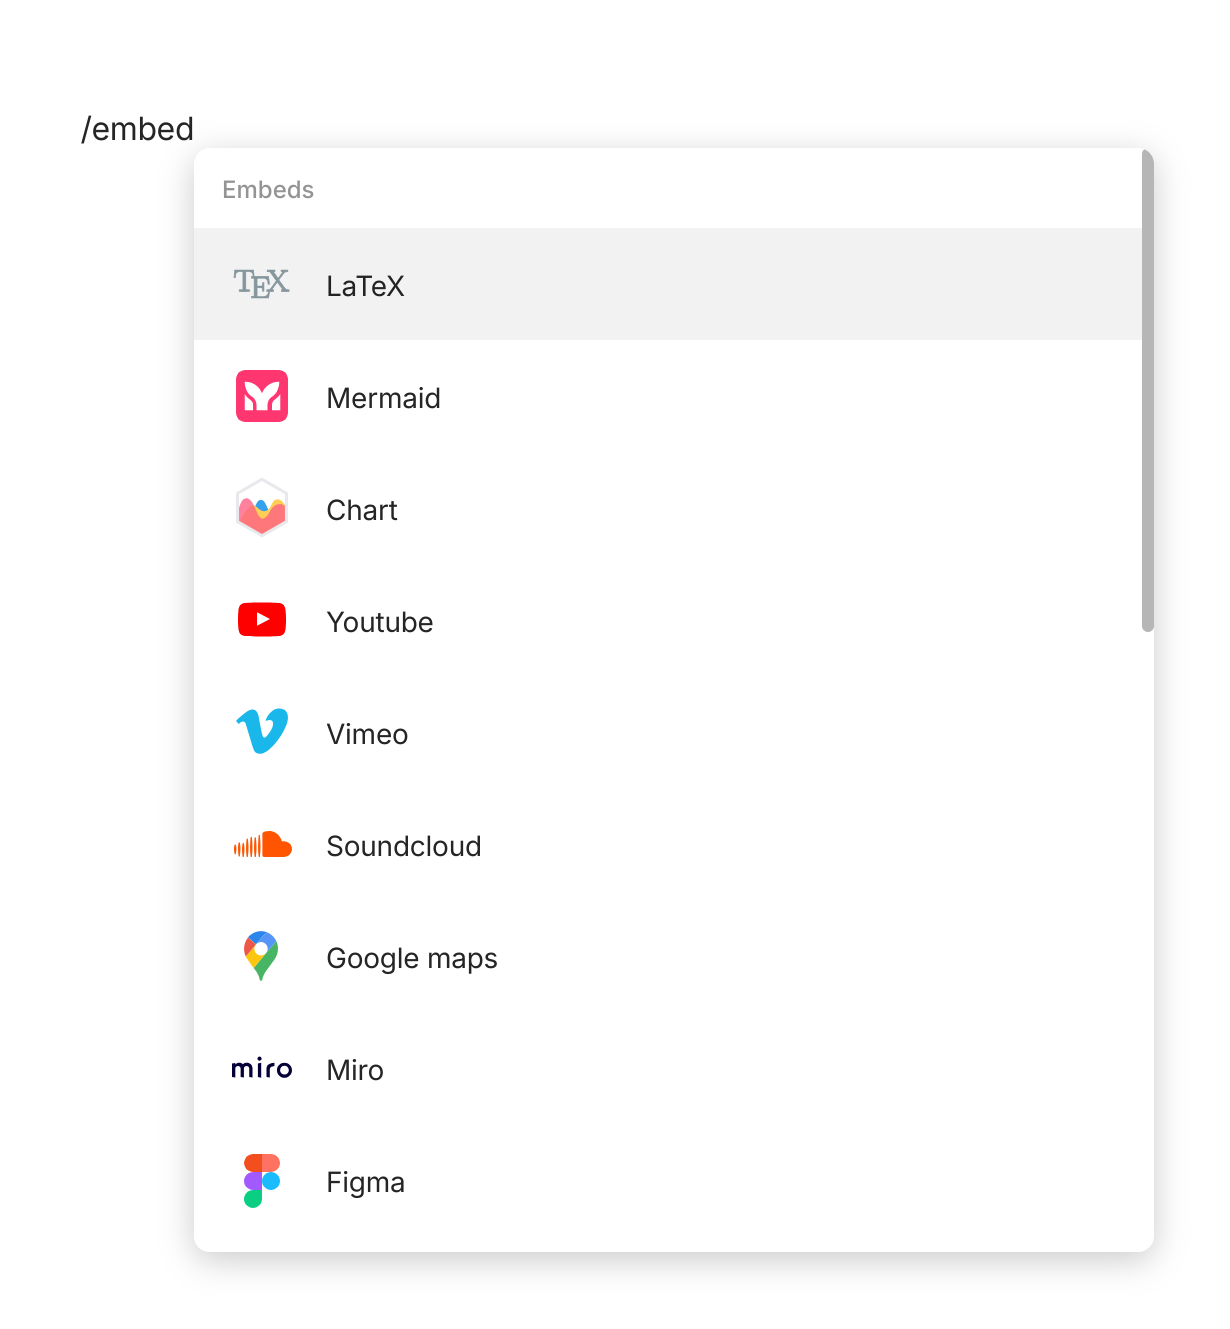
Simply type /embed in the editor to pull up a menu of currently supported embeds.

Some examples include: Mermaid diagrams, Youtube videos, Miro boards, Google Maps, and several more.

Some file types can also be embedded: audio, video, image and pdf.

### Inline Queries / Collections

<figure><img src="/files/GezeElACBk64lTsVB7wM" alt="" width="563"><figcaption></figcaption></figure>

We’ve added a new block type - inline query. You can create an inline query using command: `/inline`.\
Once created, select an existing query as a source, or create a new one. Any changes you make to the inline query icon, or name will be synced with the source set. Meanwhile, views will not synced, but copied, which means you can tweak views to your current needs without worrying that your source query will be impacted.

### Table of Contents

A new ToC menu on the right side of the editor makes it easier to navigate and manage long pages. For a steady overview while editing, you can also open it in the sidebar.

{% embed url="<https://drive.google.com/file/d/1c-ZZEazJN1SRRtq1JrtaTIcJlTLtms5j/view?usp=drive_link>" %}

### Tabs

You can now open multiple Objects side by side in a tab bar, just like in a browser. Open any Object in a new tab from the context menu, with Cmd+Click / Ctrl+Click, or from Widgets.

Choose between two modes in Settings > Preferences: **Contextual**, where the tab bar appears only when you have more than one tab open, or **Always visible**.

Drag tabs to reorder them, drag a tab out of the window to open it in a new window, and your open tabs are restored when you relaunch the app.

<figure><img src="/files/CWnyuYKyxbVhdBW7guDQ" alt=""><figcaption></figcaption></figure>

### Advanced Filters

Filters now support complex logic. You can combine multiple conditions using AND / OR, and group related rules together to build precise queries – like finding all tasks that are either high priority or due this week.

Add an advanced filter from the filter menu and define your conditions in the dedicated bar.

<figure><img src="/files/Kj40SfP4NgFOCEsRGhUl" alt=""><figcaption></figcaption></figure>


# Data & Security


# Import & Export

{% hint style="warning" %}
Available on desktop only.
{% endhint %}

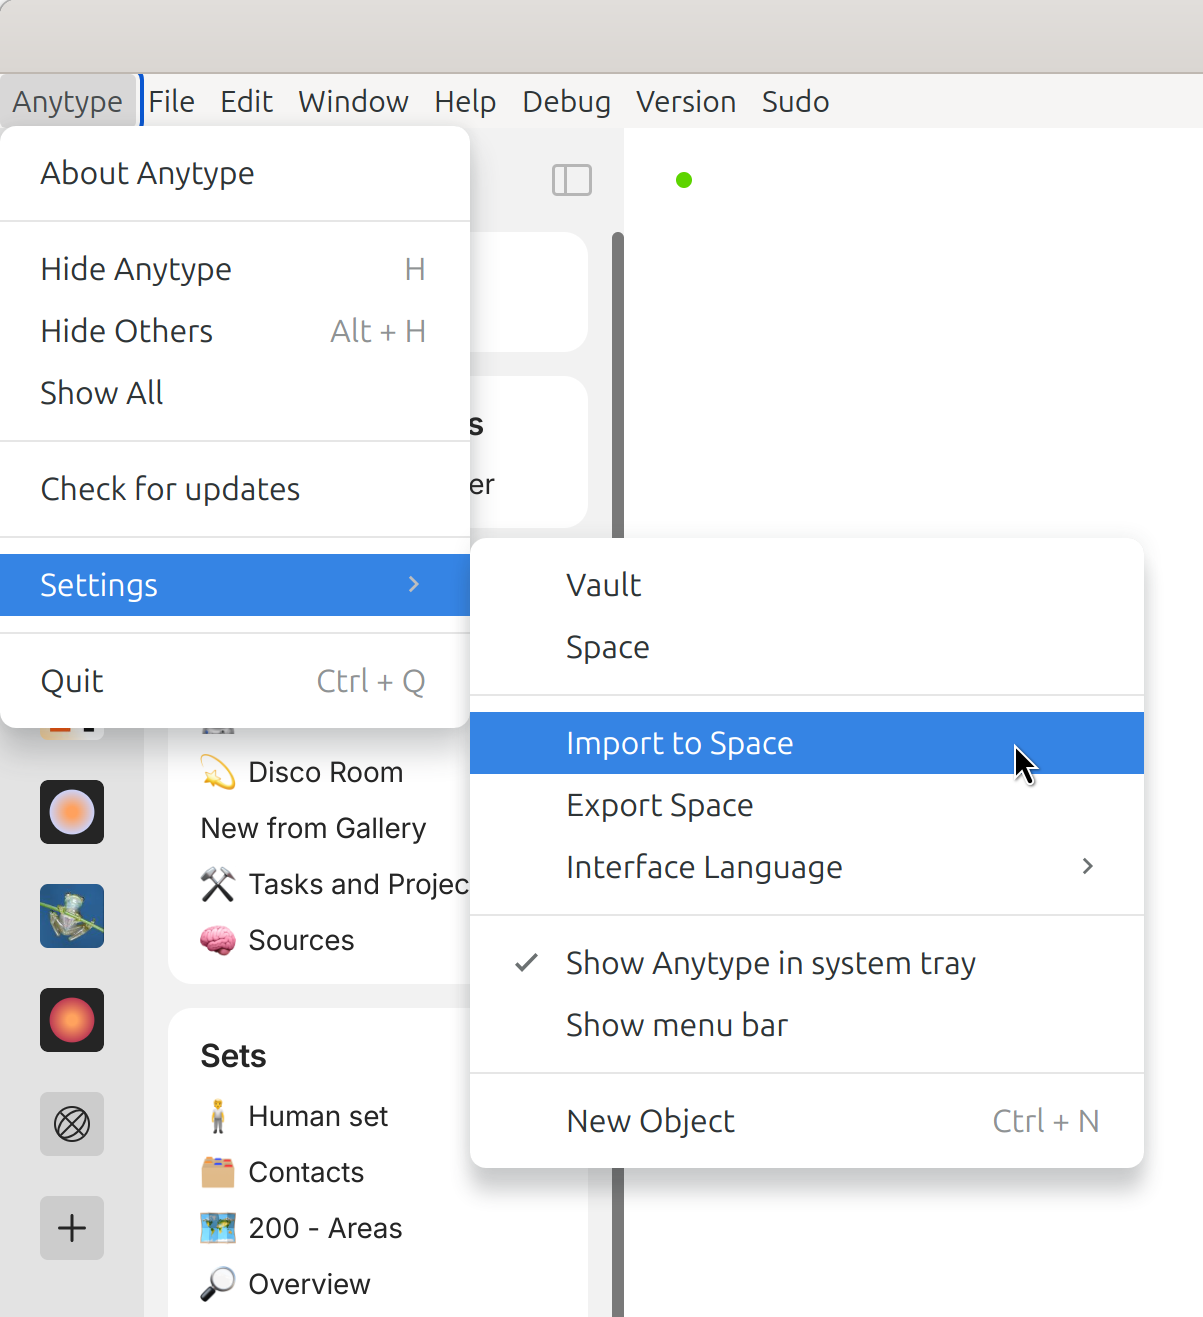
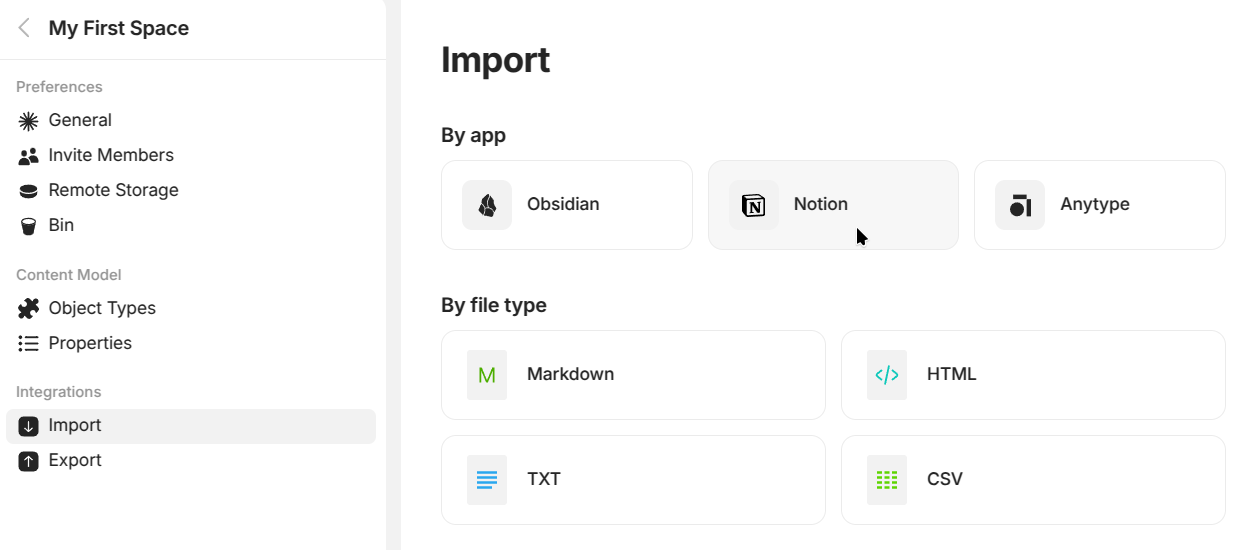
You can import or export from your channel by navigating to **Anytype > Settings > Import to Channel / Export Channel** in the menu bar:

<figure><img src="/files/VGSZIobDNAJoGVUXsDmk" alt="" width="375"><figcaption></figcaption></figure>

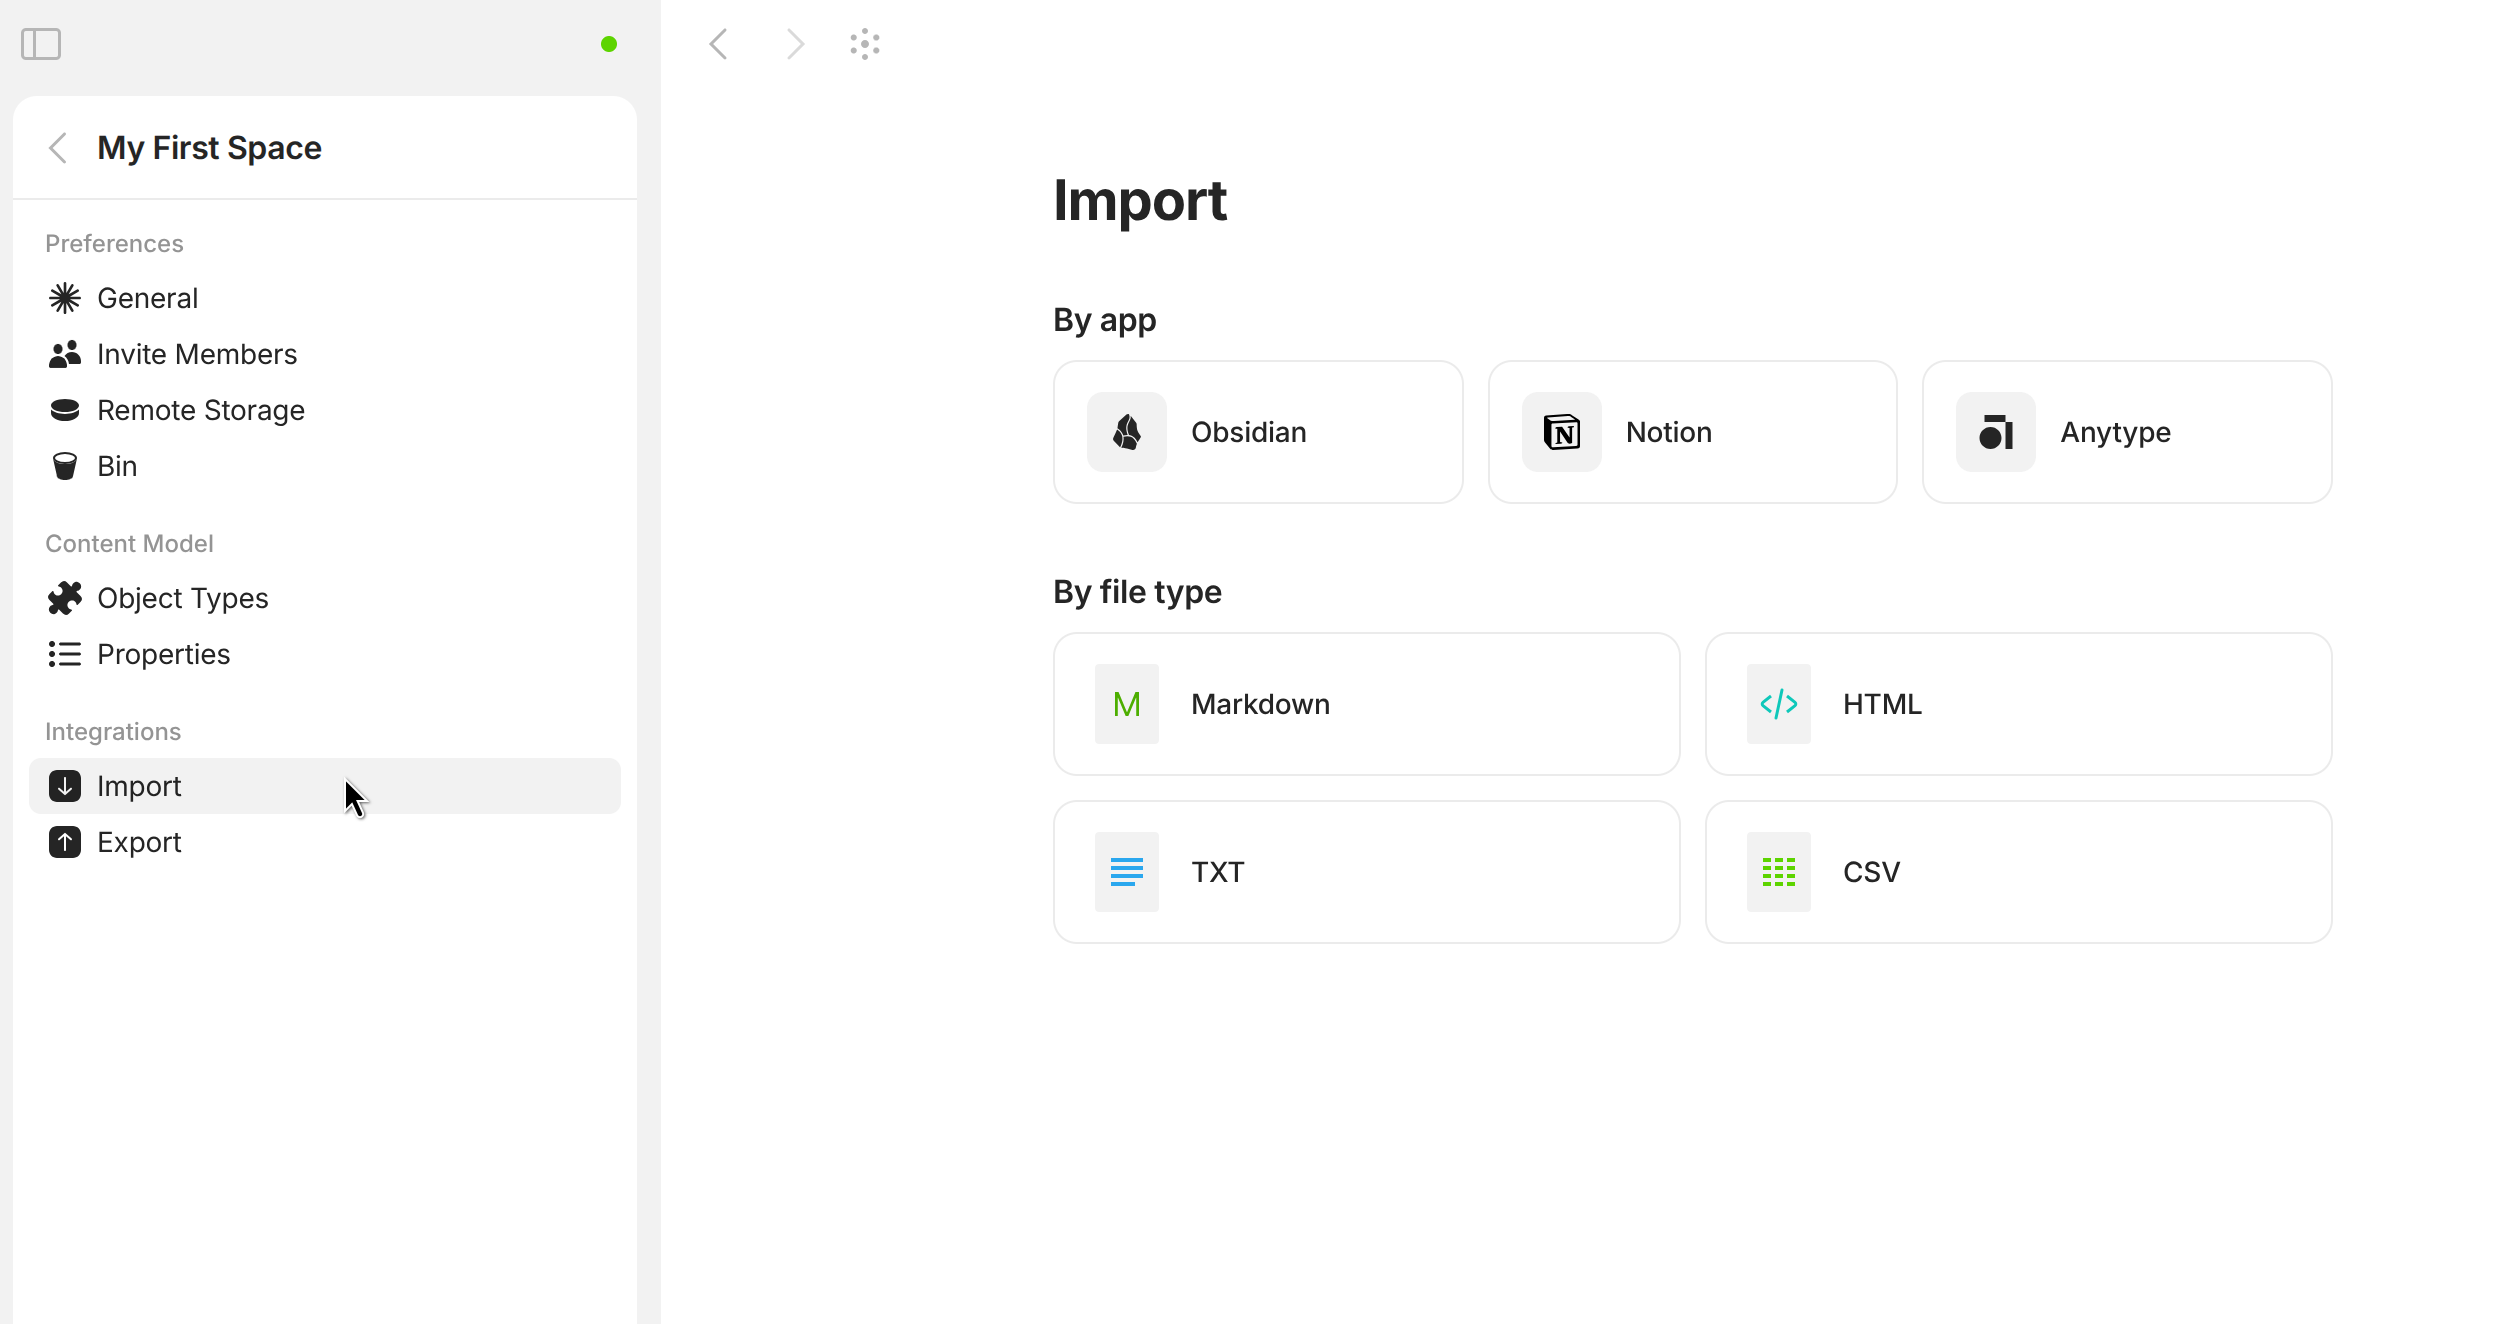
Alternatively, you can find the Import / Export Channel options under the Integrations section of your [Space Settings](/anytype-docs/advanced/settings/space-settings#integrations):

<figure><img src="/files/gvMSUmDoEhrnqqhRAsZu" alt=""><figcaption></figcaption></figure>

It's also possible to simply type “Import” or “Export” in the Search Menu.

### Import

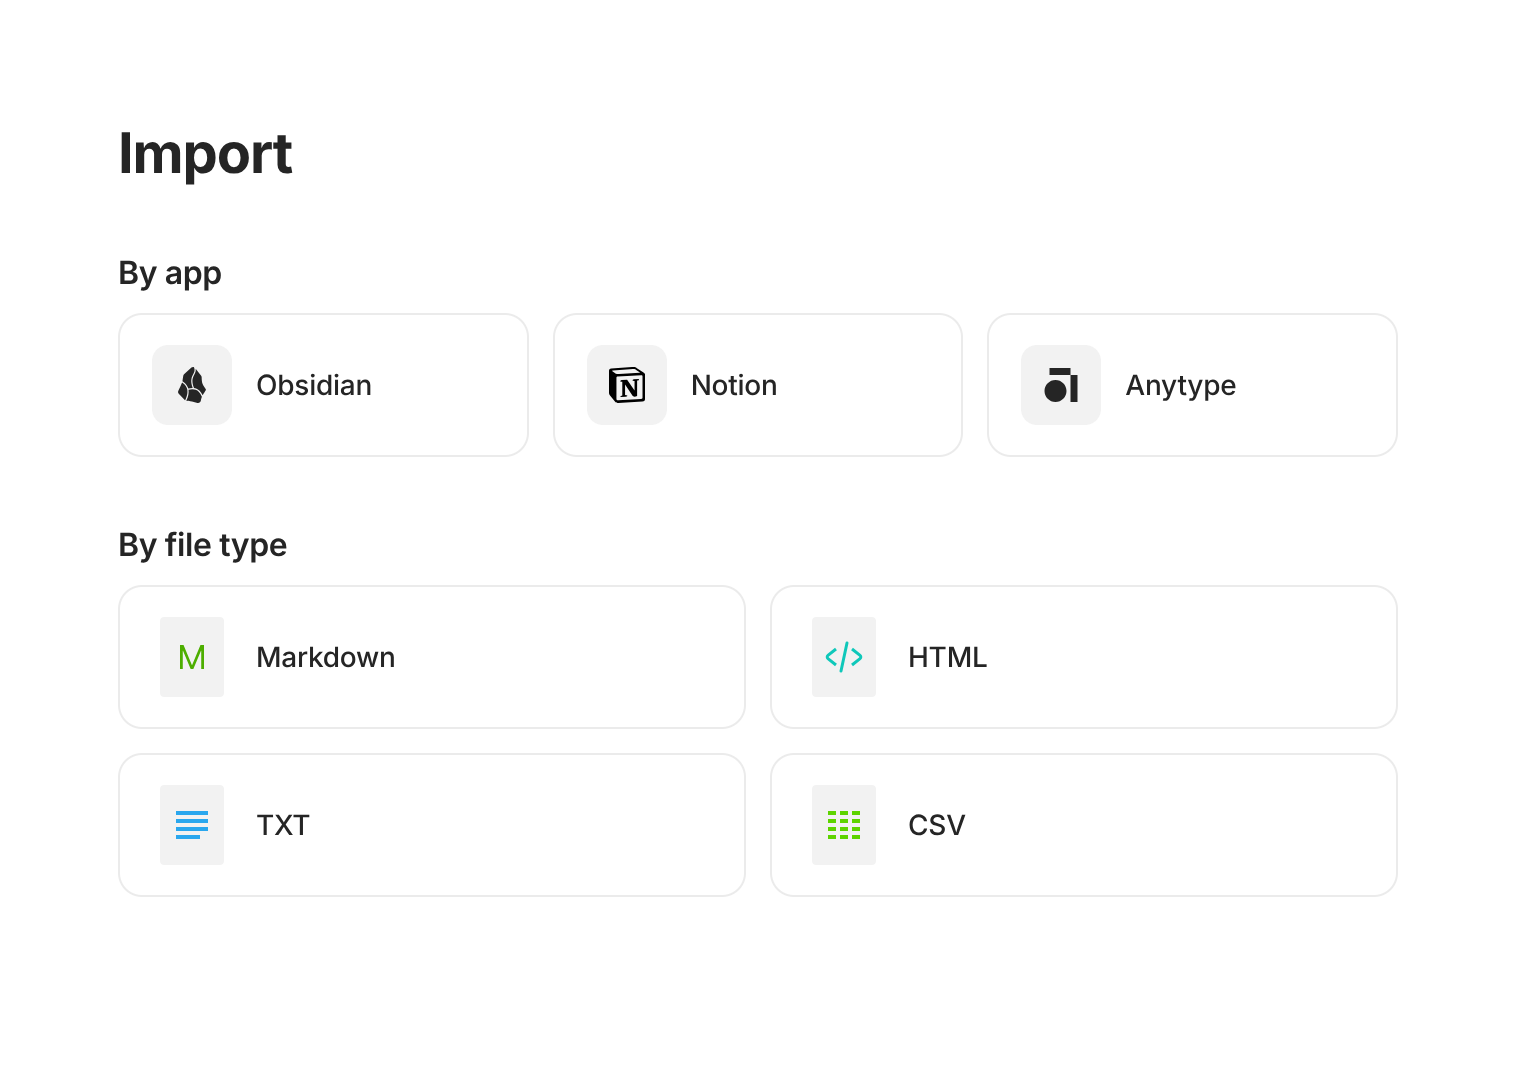
We currently offer support for importing the following:

* By app:
  * Obsidian
  * [**Notion**](/anytype-docs/advanced/data-and-security/import-export/migrate-from-notion)
  * **Any-Block**:
    * **Protobuf**
    * **JSON**
* By file type:
  * **MD (Markdown)**: You can import individual `.md` files or a zip file containing multiple Markdown files.
  * **HTML**
  * **TXT**
  * **CSV:** It is possible to map columns to existing pre-installed properties like Phone, E-mail, etc. by just using the same title.

After your import is done, a new collection should appear in your pinned widget in your sidebar. All of your imported objects should be there.

<figure><img src="/files/rvNPJa0fPxEMdmBsHI35" alt="" width="324"><figcaption></figcaption></figure>

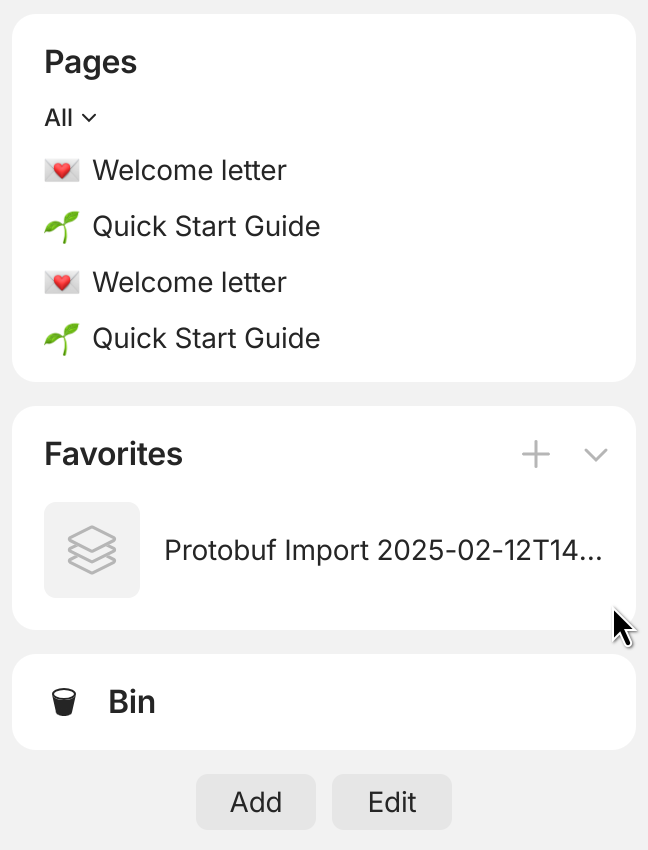
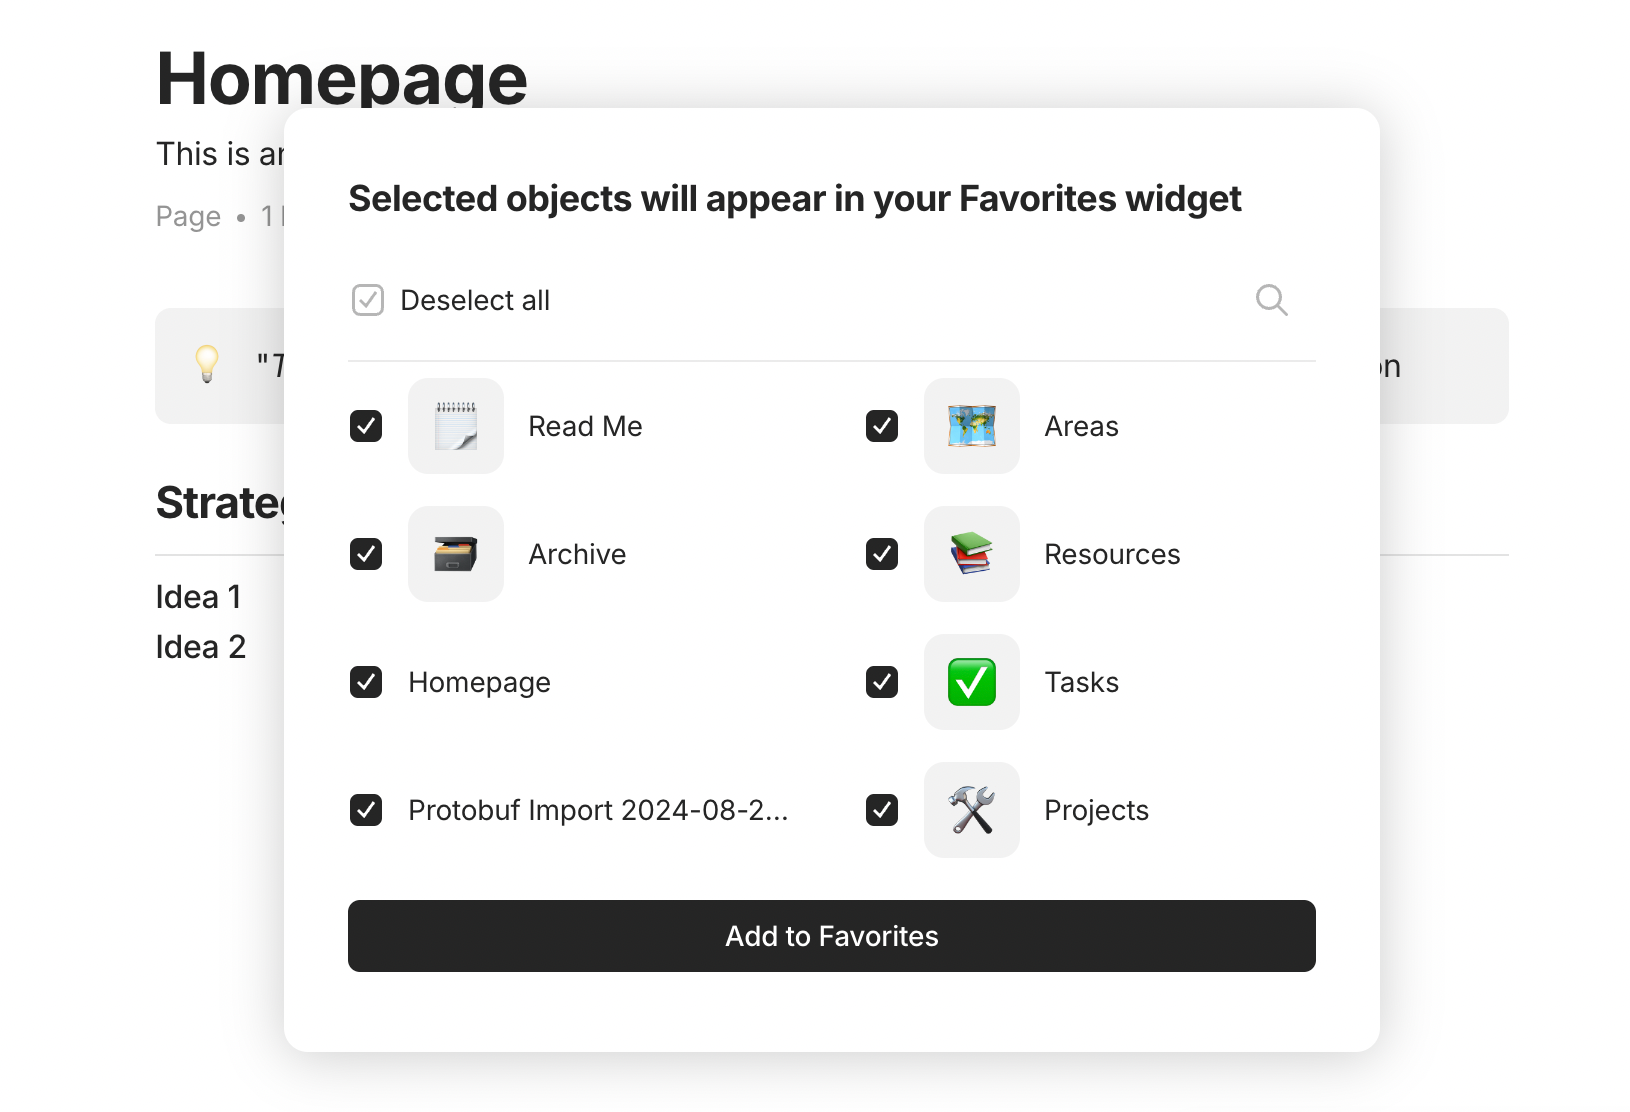
You will also be asked which objects from your imported files you want to add to your Pinned section:

<figure><img src="/files/v1PT1adybxEtZMXf7Jem" alt="" width="375"><figcaption></figcaption></figure>

### Export

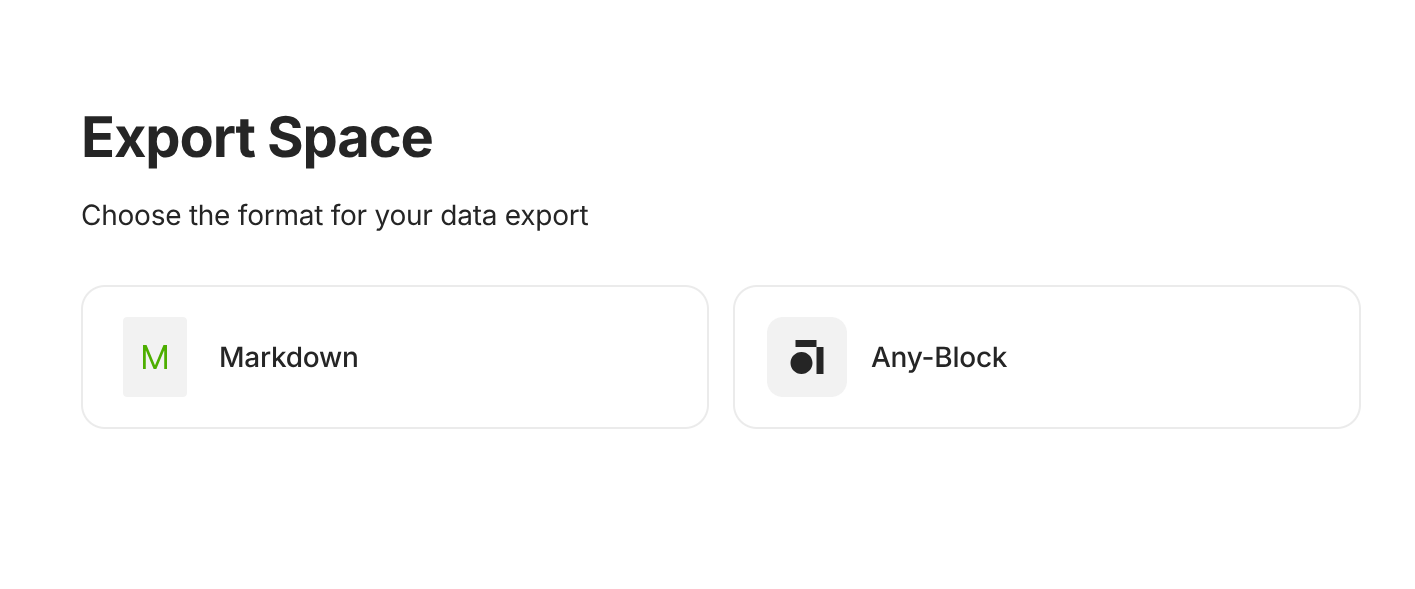
We currently offer support for exporting in the following formats:

* **Markdown**
* **Any-Block** (both Protobuf and JSON)


# Migrate from Obsidian

#### Step 1: Export from Obsidian

* Clean up your notes
  * Convert embeds like `![[Note Title]]` into simple links `[[Note Title]]`
  * Remove or convert plugin-specific syntax, such as Dataview queries, Templater fields, etc.
* Locate your vault
  * Open the Vault switcher (shown at launch or via `File → Open Vault`).
  * Right-click the vault you want to export and choose “Reveal in system explorer.”

#### Step 2: Import into Anytype

* Open `Channel Settings → Import → Obsidian` and click on Import files.
* Select your vault folder (or a subfolder) for import.
  * On some platforms (like Linux and Windows), folder selection may not be supported.\
    In that case, compress the folder into a .zip archive and import the archive instead.
* Anytype will process the contents and automatically create a separate object for each Markdown file.

{% hint style="info" %}
**Content mapping**

* `[[Internal Links]]` → become linked objects in Anytype, so the connections between your notes are preserved.
* `#tags` → become values in the Tag property. You can use them to filter, group or search across objects.
* Frontmatter (the `---` metadata at the top) → becomes object properties.
  {% endhint %}


# Migrate from Notion

### Step 1: Create the integration in Notion

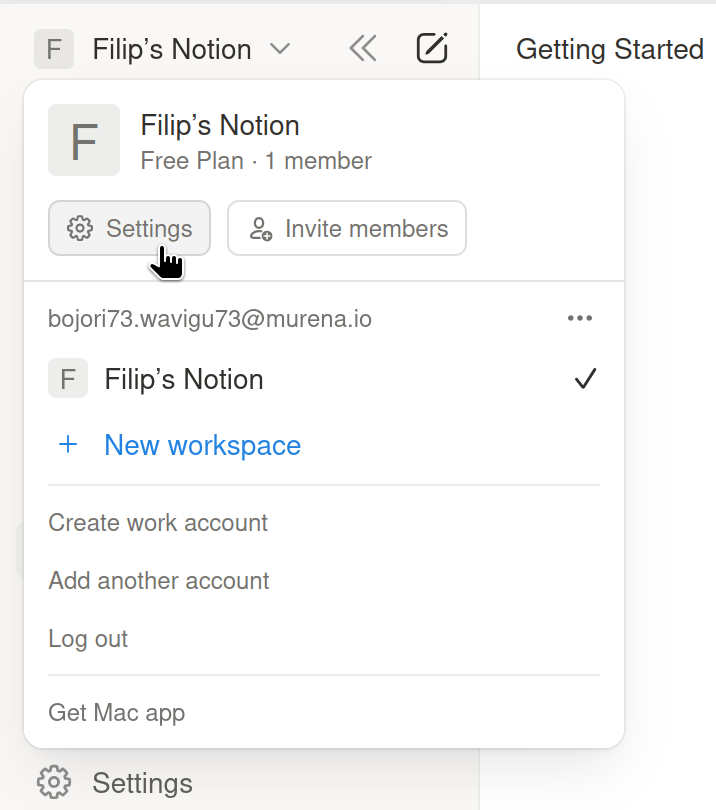
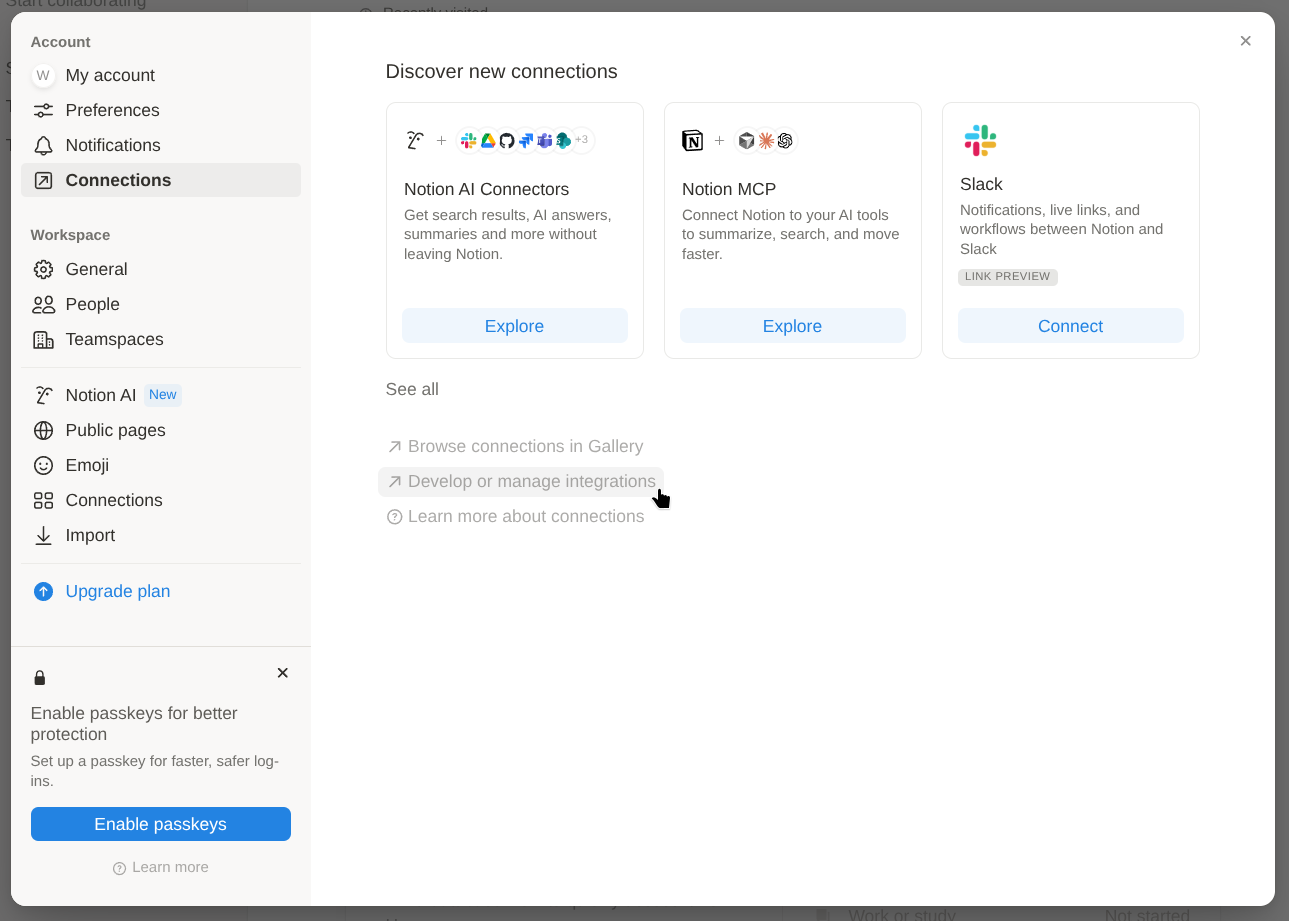
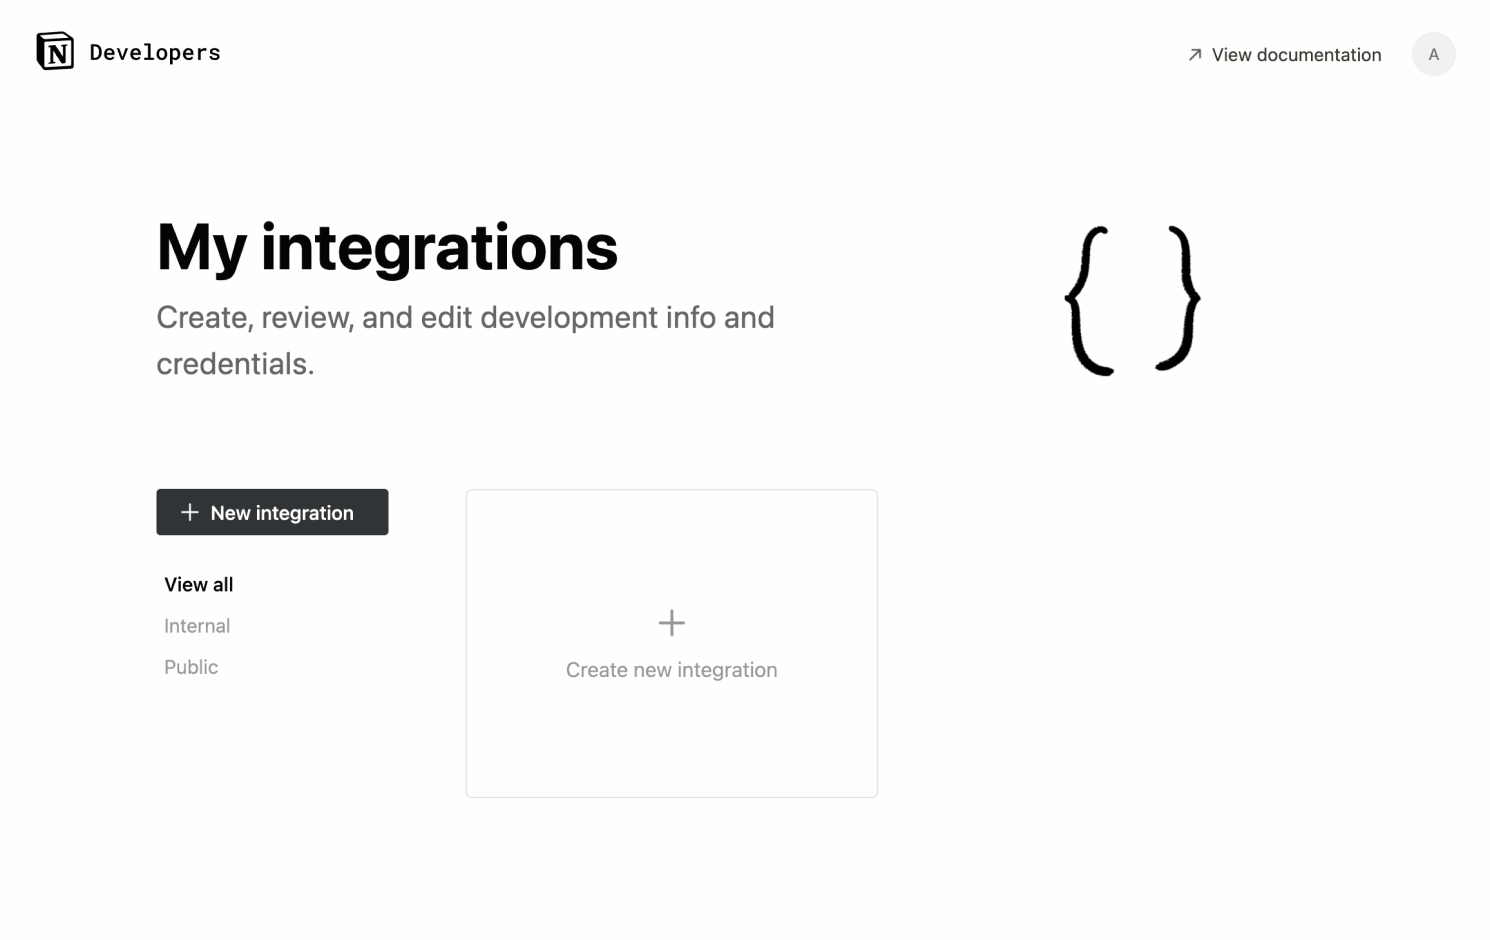
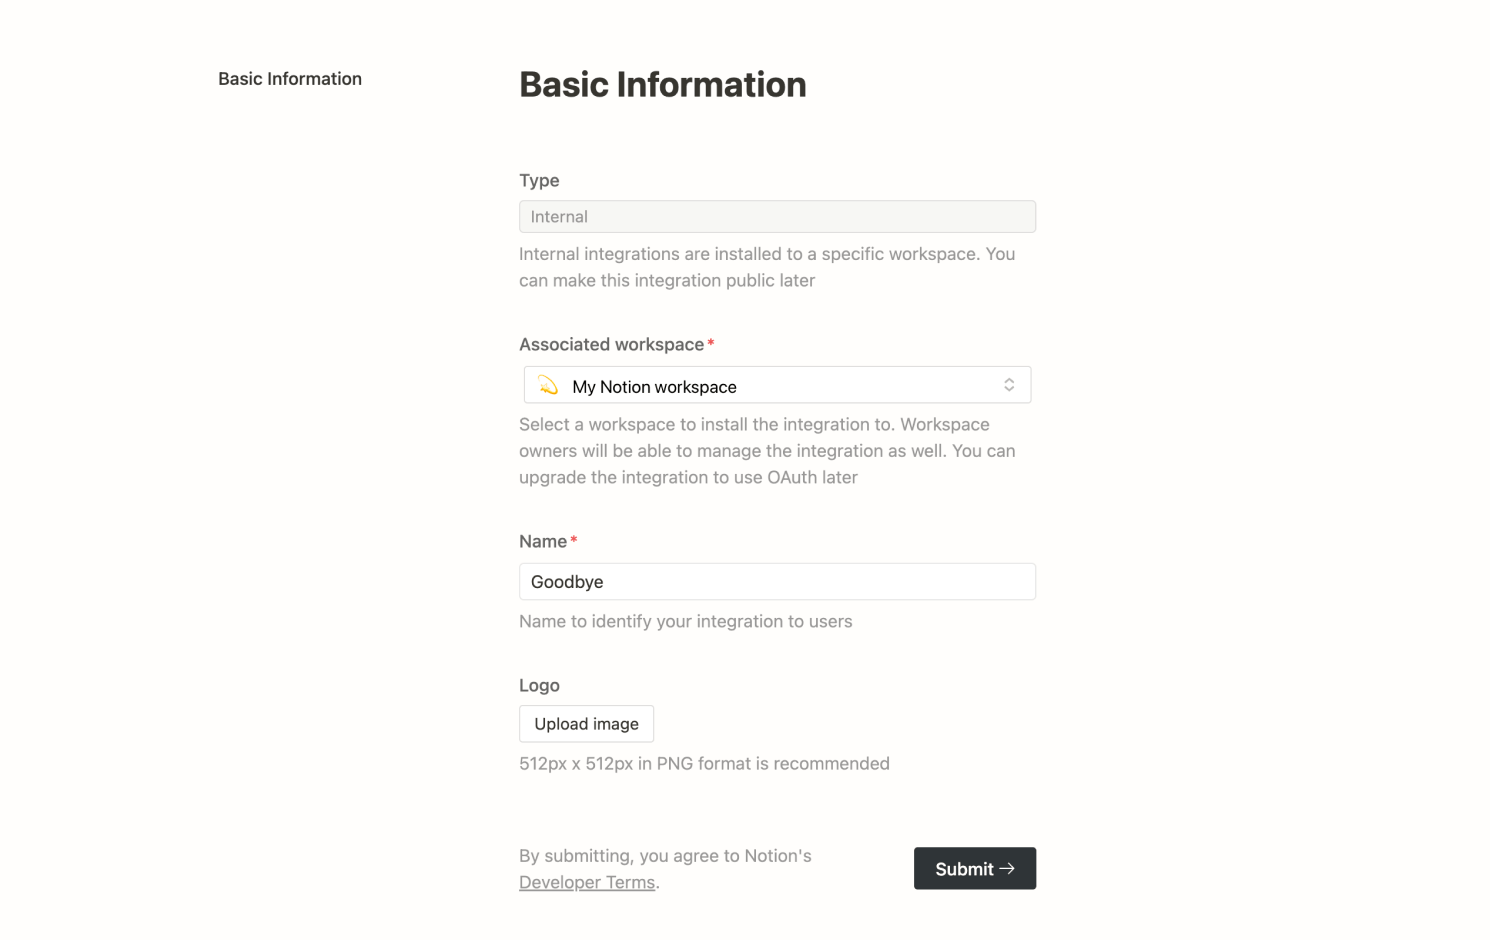
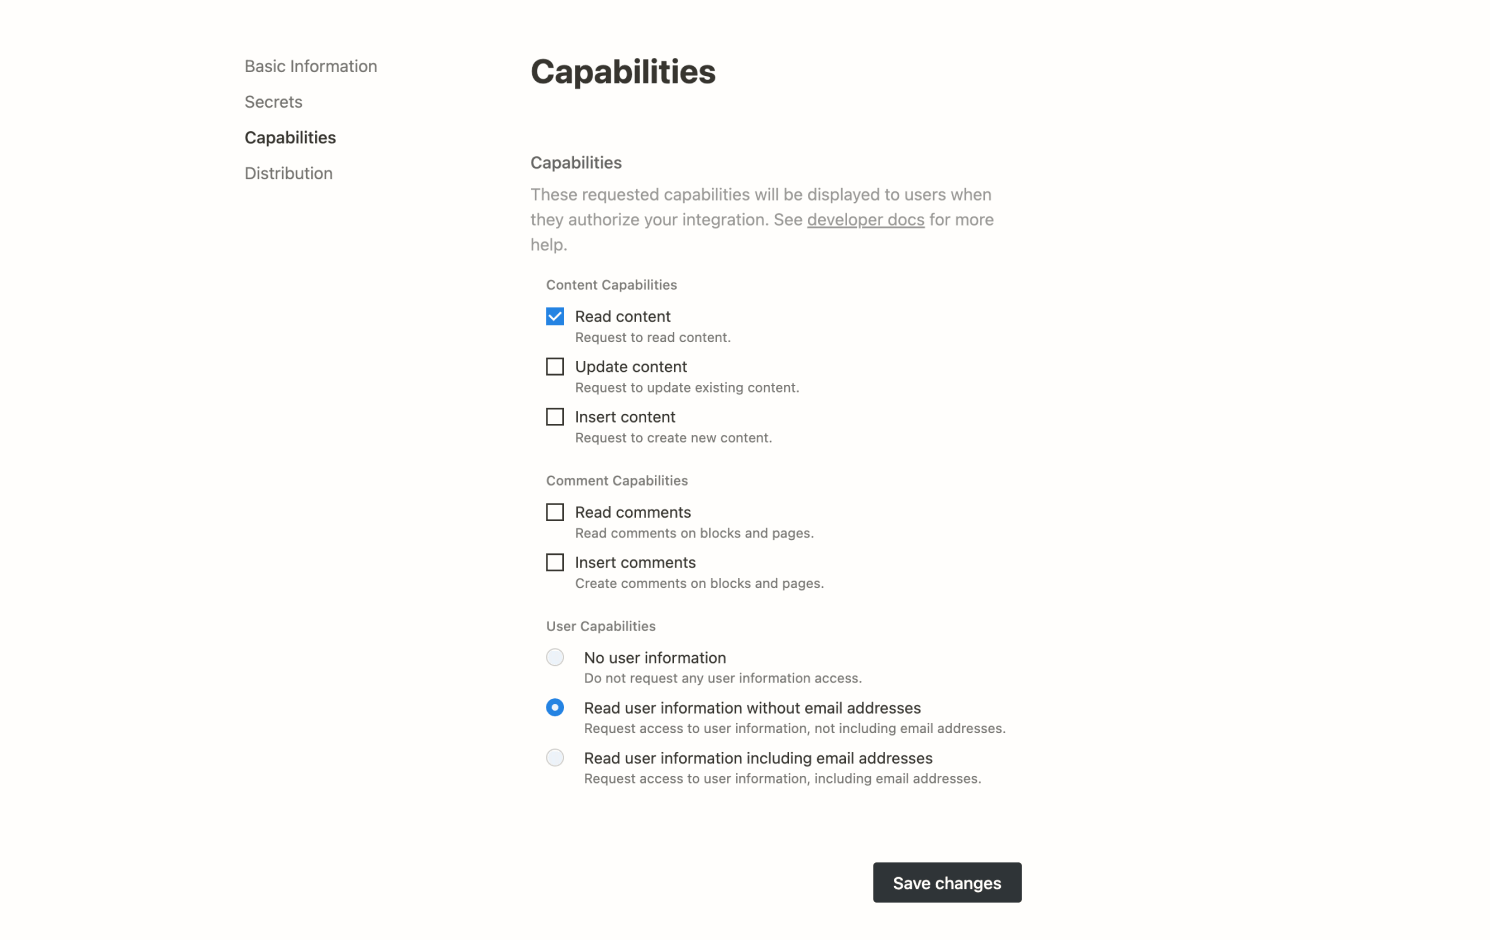
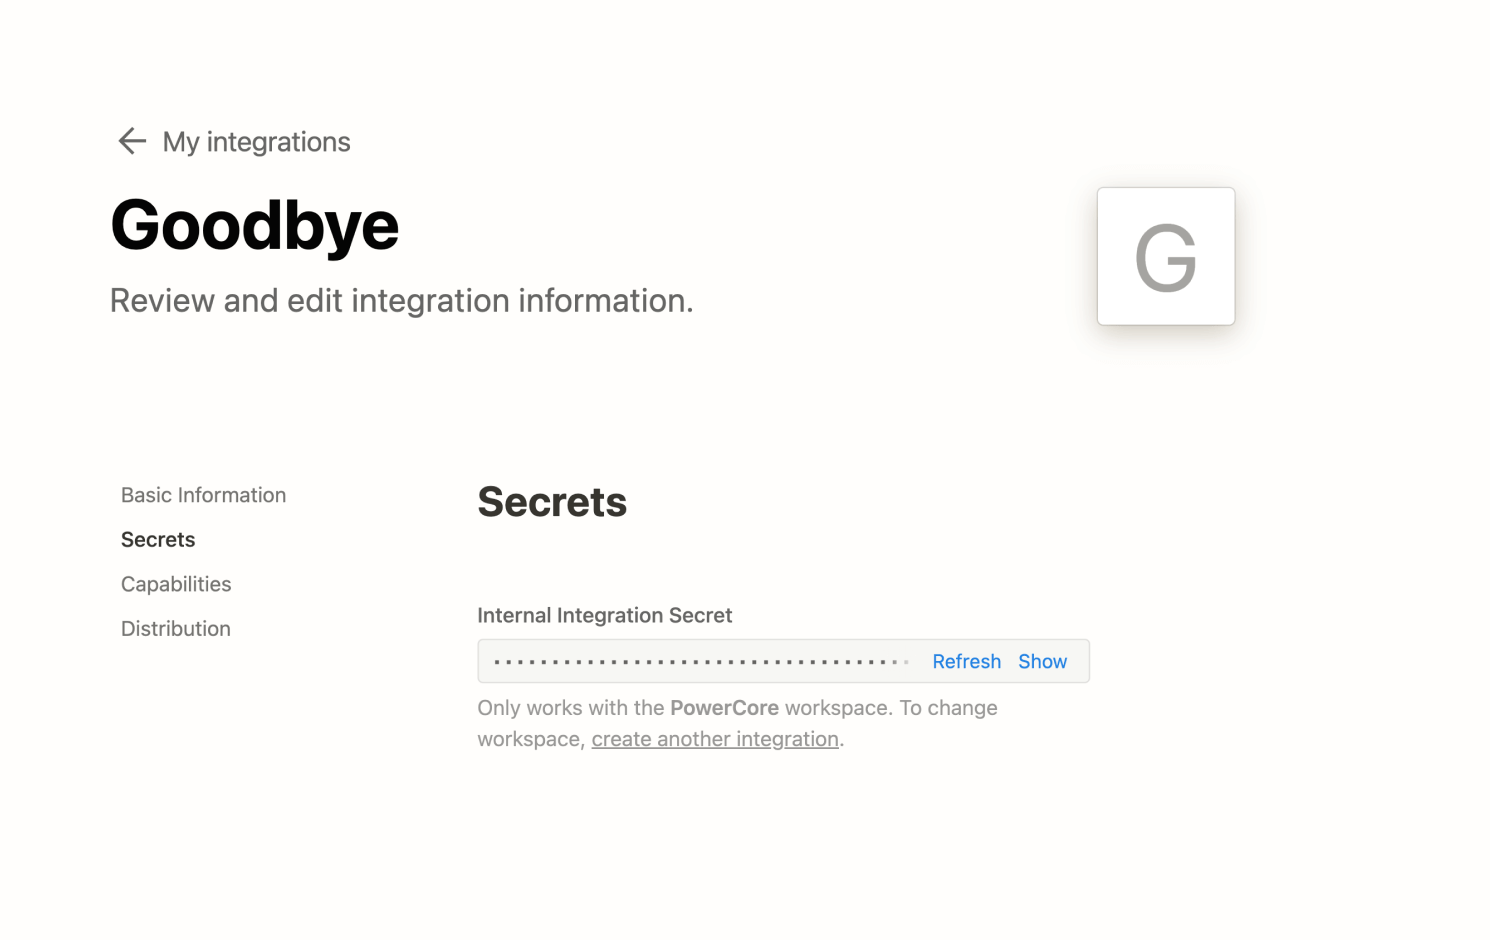
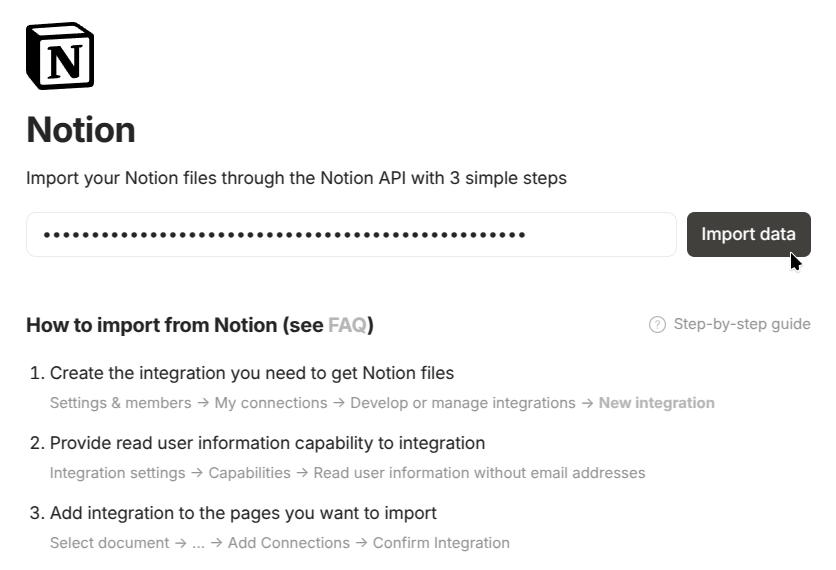
1. In Notion, **open Settings.**\\

   <figure><img src="/files/FMk2RYNTPqIaaJd9jc4M" alt="" width="358"><figcaption></figcaption></figure>
2. **Open "Connections" and then click "Develop or manage integrations" (or** [**go directly to the page**](https://www.notion.so/profile/integrations)**).**

   <figure><img src="/files/0mdfcKwF2jI4qCC7Z8gZ" alt="Open My Connections" width="500"><figcaption></figcaption></figure>
3. **Create "New integration".**

   <figure><img src="/files/EvME5SpBvcLvOUIdPImD" alt="Create new integration" width="500"><figcaption></figcaption></figure>
4. **Save a Name for the integration with your selected workspace, and type set to "Internal".**

   <figure><img src="/files/BXqJuN7KWNtUfmatn6cC" alt="Set Name for integration" width="500"><figcaption></figcaption></figure>
5. **Important!**\
   Go to **Capabilities** and select the following capabilities, then press **Save changes**:

* Read content
* Read user information

  <figure><img src="/files/oTM24IzxtgTO0a4FgvSB" alt="Select capabilities" width="500"><figcaption></figcaption></figure>

6. **Important!**\
   Go to **Access** and select the Teamspace you want to import. Then press **Update access**. Ensure that you select all root pages to avoid broken links in Anytype after the import.
7. **Copy Internal Integration Secret** for connecting and importing your data.

   <figure><img src="/files/F7qhgNMf4pb5gmsqToEu" alt="Copy Internal Integration Secret" width="500"><figcaption></figcaption></figure>

### Step 2: Run the integration in your Anytype space

1. To **prepare for a smooth import**:

* Use a good internet connection, especially if you have a large number of files.
* Keep your computer plugged into power.
* Disable sleep mode on your computer to allow the import process to complete without interruptions.

{% hint style="info" %}
Some Notion data may **not be imported correctly** as not all Notion features are supported in Anytype.
{% endhint %}

2. In your Anytype space's settings (click on your space's name in the top left), **select "Import" and choose "Notion"**.

   <figure><img src="/files/qWT4s0s5qQlhMy3VWbaA" alt="Connect to Anytype integration" width="500"><figcaption></figcaption></figure>
3. **Enter the Integration Secret** and **click "Import data"**.

   <figure><img src="/files/tds35pY12d0pm8xQCnu7" alt="Press Confirm" width="500"><figcaption></figcaption></figure>

### FAQ

<details>

<summary>Why wasn't some Notion data imported correctly?</summary>

As not all Notion features are supported in Anytype, we cannot guarantee that all Notion data will be imported correctly.

Examples:

* User mentions (@) will be converted to plain text.
* Date ranges are imported as text.
* Formulas & summary data are imported as values.

</details>

<details>

<summary>Why do I see "page not found" instead of links after importing from Notion to Anytype?</summary>

This issue occurs when you have links to pages that are not nested within your Notion workspace structure. These pages may not have been properly connected to the integration during the import, leading to broken links in Anytype.

**Solution:**

* **Check Page Connections:** Ensure that all pages in your Notion workspace are connected before starting the import process. If a page is not properly connected to the integration, it may not import correctly. See the Step 2 of the [Notion Import Step-by-Step Guide](#notion-import-step-by-step-guide) for more details.
* **Repeat the import:** If a page did not import, add a missing Connection and repeat the import.

</details>

<details>

<summary>Why are some files missing after importing from Notion to Anytype?</summary>

There are two main reasons for missing files:

* **Missing Connection:** Make sure that the page containing the files in Notion is properly connected to the integration before import. If this connection is missing, the files may not be imported.
* **Slow Internet Connection:** If you have a slow internet connection and a large number of files, the links to these files might expire during the download process, resulting in missing files.

**Solution:**

* **Ensure Proper Connection:** Double-check that all pages and their respective files are connected in Notion before importing.
* **Use a Faster Internet Connection:** If possible, use a faster internet connection during the import process to prevent link expiration.
* **Manually Add Missing Files:** If files are missing after the import, you may need to manually upload them to Anytype.

</details>

<details>

<summary>Why did the Notion import to Anytype take so long?</summary>

The import process uses the Notion API to ensure data is transferred as accurately as possible. This method, though more reliable than exporting to Markdown, requires multiple queries. Over time, Notion may start rate-limiting these queries, leading to delays.

**Solution:**

* **Plug in Your Device:** Make sure your computer is plugged into a power source during the import.
* **Disable Sleep Mode:** Prevent your computer from going to sleep to allow the import process to continue uninterrupted.
* **Be Patient:** Allow the import process to run until it completes. It may take some time, especially if there is a large amount of data.

</details>

<details>

<summary>I have some other problem with Notion import, or I no longer have access to my Notion workspace</summary>

If you encounter issues with the Notion import (which works via the Notion API) or you lose full access to your Notion workspace, you can export your workspace from Notion as Markdown & CSV files and import them into Anytype using the Markdown import option.

Be aware that importing via Markdown & CSV files is more lossy compared to using the Notion API. This is because Notion’s way of linking documents and CSV files may not be fully preserved in the Markdown format, potentially leading to loss of structure or links between documents.

**Solution:**

* **Export from Notion:** In your Notion workspace, export your data as Markdown & CSV files.
* **Import into Anytype:** Use Anytype’s Markdown import feature to bring the exported content into your Anytype workspace.

</details>


# Migrate from Evernote

One of our community members created a tool that lets you import your Evernote notes inside Anytype. The full guide can be found on our [community forum](https://community.anytype.io/t/a-tool-to-import-evernote-notes-to-anytype/11483), and the GitHub repository here:

{% embed url="<https://github.com/Shampra/EvernoteToAnytype>" %}


# Privacy & Encryption

### Privacy <a href="#privacy" id="privacy"></a>

All of your data is private in Anytype. Only you have the encryption keys. No one at Anytype can decrypt your data. So if you lose your phrase, we can’t restore access. Likewise, no one in Anytype or anyone else can read the content of your Anytype.

### Encryption <a href="#keychain" id="keychain"></a>

* Your objects are stored both locally and on nodes in an encrypted format, which can only be decoded using encryption keys. They are different for each document, and we have a certain hierarchy of keys.
* To be able to search through the documents efficiently, we create indexes of your data locally on the basis of the encrypted objects. Think of that as two different storages: one for data, the other for indexes. We decrypt these encrypted objects on the fly with your keys, perform some logic and then save the results (i.e. indexes) locally. These indexes are not encrypted, but here we assume that only you have access to your local data, i.e. the access to your local computer is not compromised.
* These indexes are not synced anywhere and they stay only on your computer. For example, if you have two devices, each of them will have its own index storage

{% hint style="danger" %}
We have a prerequisite that the user’s machine is non-compromised and trusted. Basically, if a device is compromised, there are plenty of attack vectors, including RAM scanning and passphrase keylogging, which makes local encryption much less useful. We will definitely make additional encryption later. **For now, we recommend turning HDD encryption and device password on.**
{% endhint %}

#### Tech details <a href="#tech-details" id="tech-details"></a>

Here are some technical details on encryption and data storage:

* Anytype stores the history of changes for each object you’ve created.
* Every object’s change has 2 encryption layers with different keys.
* The first layer is used to connect changes within an object, e.g. "all this encrypted data belongs to the object with id \<abc>".
* The second layer is used to encrypt the actual data. We use AES with stream encryption with CFB mode.
* When you create a new change for an object, we periodically send it to our backup node (with only the first-layer key). More info about sync [here](https://tech.anytype.io/any-sync/overview).
* Anytype backup nodes have access to the first layer key, so it can group changes for the object and send them in one pack when you want to restore your data.
* Anytype backup nodes HAVE NO access to the second layer, so it can’t read the actual changes to the data.

### Key

#### Why do we use a seed phrase as a Key?

The primary purpose of a seed phrase is to provide a secure and convenient method for backing up and restoring encrypted information. By utilizing a seed phrase, we can recover our private keys and access our data even if our devices are lost, stolen, or damaged. It acts as a master key that unlocks the gateway to our data, making it an indispensable tool for long-term data preservation and security.

Seed phrases follow a standardized protocol called BIP-39 (Bitcoin Improvement Proposal 39), which ensures compatibility across different wallets and applications. The BIP-39 protocol also introduces a checksum to detect transcription errors, minimizing the risk of loss due to human error.

#### Can Anyone Obtain My Key?

The strength of your key lies in its ability to safeguard your digital assets. When properly generated, managed, and stored, it is nearly impossible for anyone to obtain your key without your consent or knowledge. Keys are generated using complex mathematical algorithms, and the sheer number of possible combinations makes it extremely challenging for an attacker to guess or brute-force their way to your key.

{% hint style="info" %}
**Combinations:** 5,444,517,870,735,015,415,413,993,718,908,291,383,296

**Cost To Crack:** $38,029,518,006,846,883,000,000,000 USD
{% endhint %}

However, it's crucial to understand that the responsibility of protecting your key ultimately lies with you. While it may be tempting to store it digitally for convenience, these methods can introduce vulnerabilities. Instead, it is recommended to write down your key on a physical medium, and store it securely in a location known only to you. Avoid storing your Key on devices connected to the internet or in cloud storage, as they can be compromised by hackers or unauthorized access.

#### What's the risk of creating two Vaults with the same Key?

The chance of two people having the same 128-bit mnemonic is about 1 in 2¹²⁸ (roughly 3.4 × 10³⁸)—vastly more than the number of grains of sand on Earth. Even generating billions of keys per second for 100 years wouldn’t come close to causing a collision. In short, key collisions are virtually impossible.


# Networks & Backup

By default, everyone joins the **Anytype Network** when they create a new vault. They can later switch to either [Self-hosted](/anytype-docs/advanced/data-and-security/self-hosting/self-hosted) or [Local-only](/anytype-docs/advanced/data-and-security/self-hosting/local-only) if they wish.

Every Anytype user has access to a remote backup node provided by Anytype. Its capacity is currently limited to 1 GB. Objects and other content have no impact on this limit; only files are limited. If you go over the limit, a warning will appear, and you'll be able to ask for more storage.

Our infrastructure is hosted in Zurich based data centers within Europe. Production currently runs on Google Cloud Platform, with plans to move to dedicated European hosted servers.

The domains we use for our Anytype network are:

* For syncing: `*.anyclub.org`
* For our analytics: `*.anytype.io`

### How to switch back to Anytype network

We strongly recommend using dedicated identities for each network. If you are switching from a Self-hosted network, export all your channels, and import them into a new identity after switching the network mode.

Please note that all your devices should be manually switched to Anytype Network mode.

#### Desktop

1. Log out from your current identity.
2. On the onboarding screen, click a gear icon in the top right corner.
3. In the “Network” field choose the “Anytype” option.
4. Click the “Save” button.
5. Create a new identity or log in with an existing one.

<figure><img src="/files/L0D72efGmiKYV0bt7SwE" alt=""><figcaption></figcaption></figure>

#### Mobile

1. Log out from your current identity.
2. On the onboarding screen, click a gear icon in the top right corner.
3. Click on “Anytype” in the “Networks” sub-menu.
4. Create a new identity or log in an existing one.

<figure><img src="/files/QXykbf86ntsRcRVde5vp" alt="" width="375"><figcaption></figcaption></figure>


# Self-hosted

To back up your channels and data to a self-hosted network, you need to have a network configuration. If you don’t run your own network yet, see this [how-to guide](https://tech.anytype.io/how-to/self-hosting). There's also a [docker image](https://github.com/anyproto/any-sync-dockercompose) that's maintained by the team. One of our developers also created this video guide for anyone who wants to set up their own self-hosted network:

{% embed url="<https://drive.google.com/file/d/1PI28cosN4ad-bdgRxM2gDJRiAYw_9mW4/view?usp=drive_link>" %}

### How to switch to a self-hosted network

We strongly recommend using dedicated identities for each network. If you already have an identity in Anytype Network and want to switch to a self-hosted network, export all your channels, and import them into a new identity after switching the network mode.

Please note that all your devices should be manually switched to the same self-hosted network.

#### Desktop

1. Log out from your current identity.
2. On the onboarding screen, click a gear icon in the top right corner.
3. In the “Network” field choose the “Self-hosted” option.
4. Upload your self-hosted network configuration (\*.yml file) to the corresponding field.
5. Click the “Save” button.
6. Create a new identity or log in with an existing one.

<figure><img src="/files/nADrOVejoJZBsz1wbZuo" alt=""><figcaption></figcaption></figure>

#### Mobile

1. Log out from your current identity.
2. On the onboarding screen, click a gear icon in the top right corner.
3. Click on “Self-hosted” in the “Networks” sub-menu.
4. Click on “Tap to provide your network configuration” to upload your self-hosted network configuration (\*.yml file).
5. Create a new identity or log in an existing one.

<figure><img src="/files/3CKuVSbE7XsFh7yg5wf7" alt="" width="375"><figcaption></figcaption></figure>


# Local-only

If you don't want to use any backup solutions at all, you can use our local-only mode. This will disable the backup node completely, and you will only be able to sync between your devices if they are connected to the same local network. Regularly exporting your channels or backing up your work directory is recommended if you decide to use this mode since your data is not backed up anywhere else.

### How to switch to local-only mode

#### Desktop

1. Log out from your current identity.
2. On the onboarding screen, click a gear icon in the top right corner.
3. In the “Network” field choose the “Local-only” option.
4. Click the “Save” button.
5. Create a new identity or log in with an existing one.

<figure><img src="/files/Mz6gRMQFvZBxxKEI3yh8" alt=""><figcaption></figcaption></figure>

#### Mobile

1. Log out from your current identity.
2. On the onboarding screen, click a gear icon in the top right corner.
3. Click on “Local-only” in the “Networks” sub-menu.
4. Create a new identity or log in an existing one.

<figure><img src="/files/QXykbf86ntsRcRVde5vp" alt="" width="375"><figcaption></figcaption></figure>


# Storage & Deletion

### Storage <a href="#storage" id="storage"></a>

Anytype is offline first; hence, all data you create will be stored locally first. After that, the data is synced to the backup node and your devices for redundancy. We use a private [IPFS](https://docs.ipfs.tech/concepts/what-is-ipfs/) network to handle storage. It is a Peer-To-Peer file system that facilitates decentralized data storage across devices. Local P2P is supported, meaning that you can sync between your devices directly if they are connected through the same local network. This will work no matter what network mode you use, and it's the only way to sync between your devices if you are using local-only mode.

#### Media <a href="#media" id="media"></a>

Media files are not directly downloaded in overall syncing to save bandwidth. Instead, when that file is requested, it is streamed to your device from the backup node or your devices on the network. For example, if you have a 4K Video, it will be streamed from the backup node or P2P devices to your device. So when you open an object with an image, it downloads. When you press play on video & audio, it begins to download. After that, this file will be stored in the application cache.

Furthermore, we use the deduplication feature to reduce storage. For example, if the same picture is uploaded three times, there is only one image copy stored to reduce storage consumption.

You can remove all the media content from your mobile device via the clear cache option in iOS and Android. This will remove all the data altogether and force the app to sync once again entirely. Since the media download works on-premise, you will remove all cached media and clear some storage.

You can also manage your files on desktop by going into `Channel settings -> Manage Channel -> Manage files`.

{% hint style="info" %}
Files are stored inside `flatfs dir` in encrypted fragments, so they can’t be accessed outside of Anytype.
{% endhint %}

### Deletion <a href="#deletion" id="deletion"></a>

To delete objects in Anytype, you will first need to move them to the [Bin](/anytype-docs/advanced/data-and-security/data-storage-and-deletion/finding-your-objects). Afterwards, you can remove them completely from all devices by permanently deleting them from the bin. All your devices will also delete them when getting online. This action is irreversible, so please be careful.

The deleted objects are still accessible in read-only mode, either from the bin, or through previously added links. You are also able to restore these objects directly through the read-only mode without needing to go through the bin.

Types and Properties created by Anytype can't be deleted at the moment, but might be deletable in future releases.


# Bin

Before permanently deleting your objects, you'll first need to move them to the bin.

<figure><img src="/files/SJe2V9AIvGUAFG0lZjXM" alt="" width="375"><figcaption></figcaption></figure>

To permanently delete your objects, you will first need to locate and open the Bin.

You can either find it at the bottom of your sidebar as a widget or you can find it in your [Channels](/anytype-docs/getting-started/vault-and-key/space) settings by navigating to `General > Bin`.

<div><figure><img src="/files/U1zHDXCmYlTnqonOKmcs" alt=""><figcaption></figcaption></figure> <figure><img src="/files/5P11f2hikjC8WEDuHG4J" alt=""><figcaption></figcaption></figure></div>

After opening the Bin, if you would still like to permanently delete some of your objects, you will first need to select them, and then you can click on the `Delete permanently` button to get rid of them forever.

You can use the same process to restore your objects instead.

<figure><img src="/files/HDfVAC0aItJOhr5WJmts" alt=""><figcaption></figcaption></figure>


# Data Erasure

Since we don't have access to your Anytype data, and we have no way to connect your Anytype ID to your email address, there is no way for us to delete your data. This means that you can only delete it yourself, and through the app.

### Delete or Reset Your Vault / Account

In the top menu, Click "Anytype", open Settings, Login Key, and select **Delete vault.** This will delete your vault, and your Key:

<figure><img src="/files/ZdhUT8rXSbMArskc4wGT" alt=""><figcaption></figcaption></figure>

### Other Data

For everything else (forum posts, support tickets, and email subscriptions), please contact us at <support@anytype.io>, and we'll delete these for you.


# Analytics & Tracking

{% hint style="info" %}
It will be possible to opt-out of analytics in the [future](https://github.com/orgs/anyproto/projects/1/views/1?pane=issue\&itemId=29227689).
{% endhint %}

While the product is still in pre-release, we use analytics services to help us understand performance of the app as a whole, adoption of certain features, and how the latter impacts retention.

Analytics consists of two parts: low-level analytics at the network level and app usage analytics at the client level. Both types are anonymous and do not analyze the content you are working with, as it is encrypted.

{% hint style="info" %}
If you switch to self-hosted or local-only network mode, Anytype Network does not collect low-level analytics. However, app usage analytics are still reported.
{% endhint %}

**Amplitude** is the main service we use for tracking *events* inside the app. It allows us to track metrics such as:

* How many users joined in the past month & how many dropped
* How many Objects, Blocks, Sets, and Custom Types were created (and average that per number of active users)
* How much time people spend in the app, on average
* Which devices are used to log in to the app

We use these to understand our main product metrics and whether overall, we’re moving in the correct direction. While we can track frequency and adoption of events, *we cannot in any way track the content you create.*

In practice, this means that we know for instance that custom Types are very popular, but we cannot see what these custom types are (nor which Objects you’ve created with those types).

Besides Amplitude, our engineering teams use Sentry to track the prevalence of crashes.

{% hint style="info" %}
The only way to disable analytics at the moment is to either block outgoing connections to analytics-related hosts, or to edit the relevant source code and rebuild the client for your own use.
{% endhint %}


# Settings


# Vault Settings

You can access your vault settings from one of these 3 places:

<div><figure><img src="/files/PePi2TiQX3NedfEIgr8k" alt="" width="328"><figcaption></figcaption></figure> <figure><img src="/files/IHGCDKjQyQjUz7FTVgrr" alt="" width="375"><figcaption></figcaption></figure> <figure><img src="/files/HE0KGFUacxNGrQzuhl01" alt="" width="375"><figcaption></figcaption></figure></div>

## Profile

Here you can add your **name, bio,** and **profile picture.** Your profile represents an Object in your Anytype Graph which you can freely link to other Objects.

<figure><img src="/files/DekEM1ZueQWnLbXuSSEW" alt=""><figcaption></figcaption></figure>

## Application

### Preferences

<figure><img src="/files/1Bm0t4cSjPcyNHQD4IP8" alt=""><figcaption></figcaption></figure>

#### Appearance

**Set color mode:** Choose between light, dark or auto color modes.

#### Editor Personalization

**Open objects in fullscreen:** You can decide whether you want all objects to be opened in fullscreen by default.

#### App Appearance

**Link to object style:** You can decide which style should the /link command use by default (either card or text).

**Automatically show and hide sidebar:** With this option disabled the sidebar won't automatically pop out when you hover over the left side of the screen.

**Show Anytype in system tray:** Anytype will always stay running in the background, but you have the option to either have it show in the system tray or not.

**Show menu bar:** This setting will show the default menu bar for your OS.

### Language & Region

<figure><img src="/files/dwPijnGJHlG904KiDjOK" alt=""><figcaption></figcaption></figure>

#### **Language & Spelling**

**Spellcheck Languages:** You can enable automatic spellcheck from 40+ languages, or disable the spellcheck.

**Interface Language:** You can choose amongst the community-translated versions to localize your interface.

#### Date & Time

**Date & Time formats**: Here you are able to choose which date and time formats you want to use across your whole vault.

**Use relative dates:** You can decide whether you want relative dates like today / tomorrow to be used, or whether you want all dates to show the exact date.

**Week starts on**: You can now choose whether your week starts on Sunday or Monday. Head to your updated settings to make the switch in the date-picker.

### Pin Code (Desktop)

If you want more privacy, like when sharing a computer, you can set up a PIN code. This will lock the app and keep your Key safe. You'll just need to enter the PIN each time your Anytype session ends (after 1 minute, 5 minutes, 10 minutes, or 1 hour) or when you need to access your Key.

<div><figure><img src="/files/ADQBycWPwAn4vQaSsF9A" alt=""><figcaption></figcaption></figure> <figure><img src="/files/OCnlidylqlYmueSyNzsP" alt=""><figcaption></figcaption></figure></div>

{% hint style="warning" %}
We do not store this data so we cannot help you in recovering your vault in the case it is lost. Make sure to write down your pin code next to your Key.
{% endhint %}

## Vault & Key

### Login Key

<figure><img src="/files/B60KktYEnFghumQuJXQK" alt=""><figcaption></figcaption></figure>

You can access your Key or scan the QR code to connect your mobile device. For more details, please check [Key](/anytype-docs/getting-started/vault-and-key/key).

**Vault Deletion:** Also, if you would like to delete your vault, you can do it in this section.

### Membership

<figure><img src="/files/2f1MriqBvZVNxNKh1nQE" alt=""><figcaption></figcaption></figure>

You can manage your [Membership](/anytype-docs/advanced/monetization) plans here.

## Data Management

### Local Storage

<figure><img src="/files/Z9zU7bxfmvseJ99YmH8j" alt=""><figcaption></figcaption></figure>

**Local Files:** You can choose to offload files stored in Anytype to our Anytype Network.

**Data Location:** You can also decide where your data is stored (desktop only).

### Channels

<figure><img src="/files/BvF4YQdEWnt2Hd3omVWG" alt=""><figcaption></figcaption></figure>

Here you can find a list of all of your channel, your access roles and their network status.

### My Sites

<figure><img src="/files/hy89lutPOvTVyOgX62YD" alt=""><figcaption></figcaption></figure>

Here you are able to find and manage all objects that you've previously published.

### API Keys

<figure><img src="/files/Ka2eucKl2l63yVXp88D9" alt=""><figcaption></figcaption></figure>

Here you are able to find and manage all API keys that you have you've previously created.


# Channel Settings

You can access your channel settings by clicking on the 'Settings' button in the top left-hand corner of the sidebar.

<figure><img src="/files/Y7C8Da2FM2n2rJ6p8qI6" alt="" width="333"><figcaption></figcaption></figure>

### Preferences

<figure><img src="/files/MWvGQLF8qltuGhvzfcQ7" alt=""><figcaption></figcaption></figure>

#### **Choose your** channel **icon**

Your channel icon is automatically generated during the onboarding process. To change it, simply click on the icon and choose from your library or upload your own image.

<figure><img src="/files/El2xSetinKbA9TlIoNpr" alt="" width="375"><figcaption></figcaption></figure>

#### **Choose your** channel **name**

To change your channel name, simply click on the `Edit info` button in the top right corner, choose a name, and click on `Save` to confirm.

<div><figure><img src="/files/QHxYmUgdzDrFAgs492pg" alt=""><figcaption></figcaption></figure> <figure><img src="/files/Ky9cpkmMybjfuKDGBcB9" alt=""><figcaption></figcaption></figure></div>

#### **Collaboration**

Set your message notification settings to either enable all, mentions only, or disable all.

<figure><img src="/files/DUQxHqRNbC5WavuLdE4F" alt="" width="375"><figcaption></figcaption></figure>

#### **Choose your homepage**

Your homepage is what you will see each time you open Anytype. By default, it's set to Last opened Object in spaces and to Chat in a chats, which cannot be changed.

However, you can customize your homepage using the drop-down menu in your channel settings. You can choose to display your graph, the last object you opened, or a specific object you created.

<div><figure><img src="/files/52NaXKxBVMnnbOyCjZHN" alt=""><figcaption></figcaption></figure> <figure><img src="/files/qMhJb5KTBqaeSjG3z7hW" alt=""><figcaption></figcaption></figure></div>

#### **Choose channel type**

In this section, you can switch between a space and a chat.

#### **Default object type**

This option lets you define which Object Type will be used when creating an Object by default.

<figure><img src="/files/0fKZsDY0wLIZMZ4UH25X" alt="" width="375"><figcaption></figcaption></figure>

#### **Delete your** channel

To delete your channel, click the `...` menu and select <mark style="color:red;">`Delete Channel.`</mark>

<figure><img src="/files/EOHQ05Gm80P4f9lZ6Ahw" alt="" width="375"><figcaption></figcaption></figure>

#### Transfer Channel Ownership

Channel ownership can now be transferred to another member. This allows Channels to be handed over as roles change, without recreating them or losing history.

After the transfer, you become an Editor, and the new owner takes full control, including the ability to transfer ownership again.

<div><figure><img src="/files/7HB5VQdcHkHUsjrPI3Bf" alt=""><figcaption></figcaption></figure> <figure><img src="/files/2wPG9IF3oojZ4s4VMpkD" alt=""><figcaption></figcaption></figure></div>

### Invite Members

Click on the Invite link button to manage access to your channel. For more information, please check out [Collaboration](/anytype-docs/getting-started/collaboration).

<figure><img src="/files/w4JA879RpfGQn6WZXqbw" alt=""><figcaption></figcaption></figure>

You can also use the QR code to share your channel more easily.

<figure><img src="/files/5SBmwvqc5fuvoUQV1iCo" alt=""><figcaption></figcaption></figure>

A list of all of your channel members can also be found here.

<figure><img src="/files/35omOsmpKezQtMhOuLN5" alt="" width="375"><figcaption></figcaption></figure>

### Remote Storage

Locate and manage your files, check your remaining remote storage, and view storage usage of all your channels here.

<figure><img src="/files/gAUGZ06JrIPe3tzfsi9s" alt="" width="375"><figcaption></figcaption></figure>

### Bin

Another place from where you can access your [Bin](/anytype-docs/advanced/data-and-security/data-storage-and-deletion/finding-your-objects) .

### Content Model

The central place to manage both your Types and Properties. For more information on how to manage them, go to either [Types](/anytype-docs/getting-started/types) or [Properties](/anytype-docs/getting-started/types/relations).

<div><figure><img src="/files/MaypMWAHvczS5KxiWx0X" alt="" width="325"><figcaption></figcaption></figure> <figure><img src="/files/Hufr3YDsB1SRl3G5DUxc" alt="" width="324"><figcaption></figcaption></figure></div>

### Import & Export

You can find all of our import and export options under the **Integrations** section.

For a more detailed look into our import and export options, please head out to [Import & Export](/anytype-docs/advanced/data-and-security/import-export) instead.

<div><figure><img src="/files/FCfCBaWTnSi88E2ePz7F" alt=""><figcaption></figcaption></figure> <figure><img src="/files/5SePseStwZ9abJcnwWrK" alt=""><figcaption></figcaption></figure></div>


# Keyboard Shortcuts

We've expanded the number of actions available for keyboard shortcuts, giving you more control than ever before.

* Re-assignable Shortcuts: Most shortcuts can be customized, while some remain fixed.
* Dual Key Combos: Certain actions support two different key combinations for added flexibility.
* Import/Export Mappings: Easily back up or transfer your shortcut configurations.
* Categories: Shortcuts are grouped into different categories for better navigation.

{% hint style="info" %}
You can check all keyboard shortcuts in the app by clicking on `? > Keyboard shortcuts` in the bottom left corner of the app.
{% endhint %}

<figure><img src="/files/NIOeVV86Ql0Ks97Onfas" alt=""><figcaption></figcaption></figure>


# Community


# Forum

{% embed url="<https://community.anytype.io/>" %}

In our community, you'll find various **categories** and **tags** in which you can find previous posts from others who may have had similar experiences to yours.

### How to Join the Community?

If you want to post in the Anytype Community, you'll need an account.

In your desktop app, click the **?** (Help) button in the lower right corner of your sidebar, then "[Join Our Community](https://community.anytype.io/invites/sig5xTU4ZZ)".

<figure><img src="/files/RbcMDTBmrubHQoAMMRAa" alt="" width="563"><figcaption></figcaption></figure>

Alternatively, find the menu bar at the top of the window just below the title bar, and then click on `Help > Report a Bug.`

<figure><img src="/files/vchNmMuuN58w0Vx1uBM5" alt=""><figcaption></figcaption></figure>

### Squash that bug!

Experiencing something weird? Tell the team and let's get it solved. We want this application to be as spotless as possible.

When creating a bug report on the Community Forum, you'll be presented with template which will give our team the precise information necessary to comprehend the issue. We kindly ask you to please follow this format as explicitly as you can.
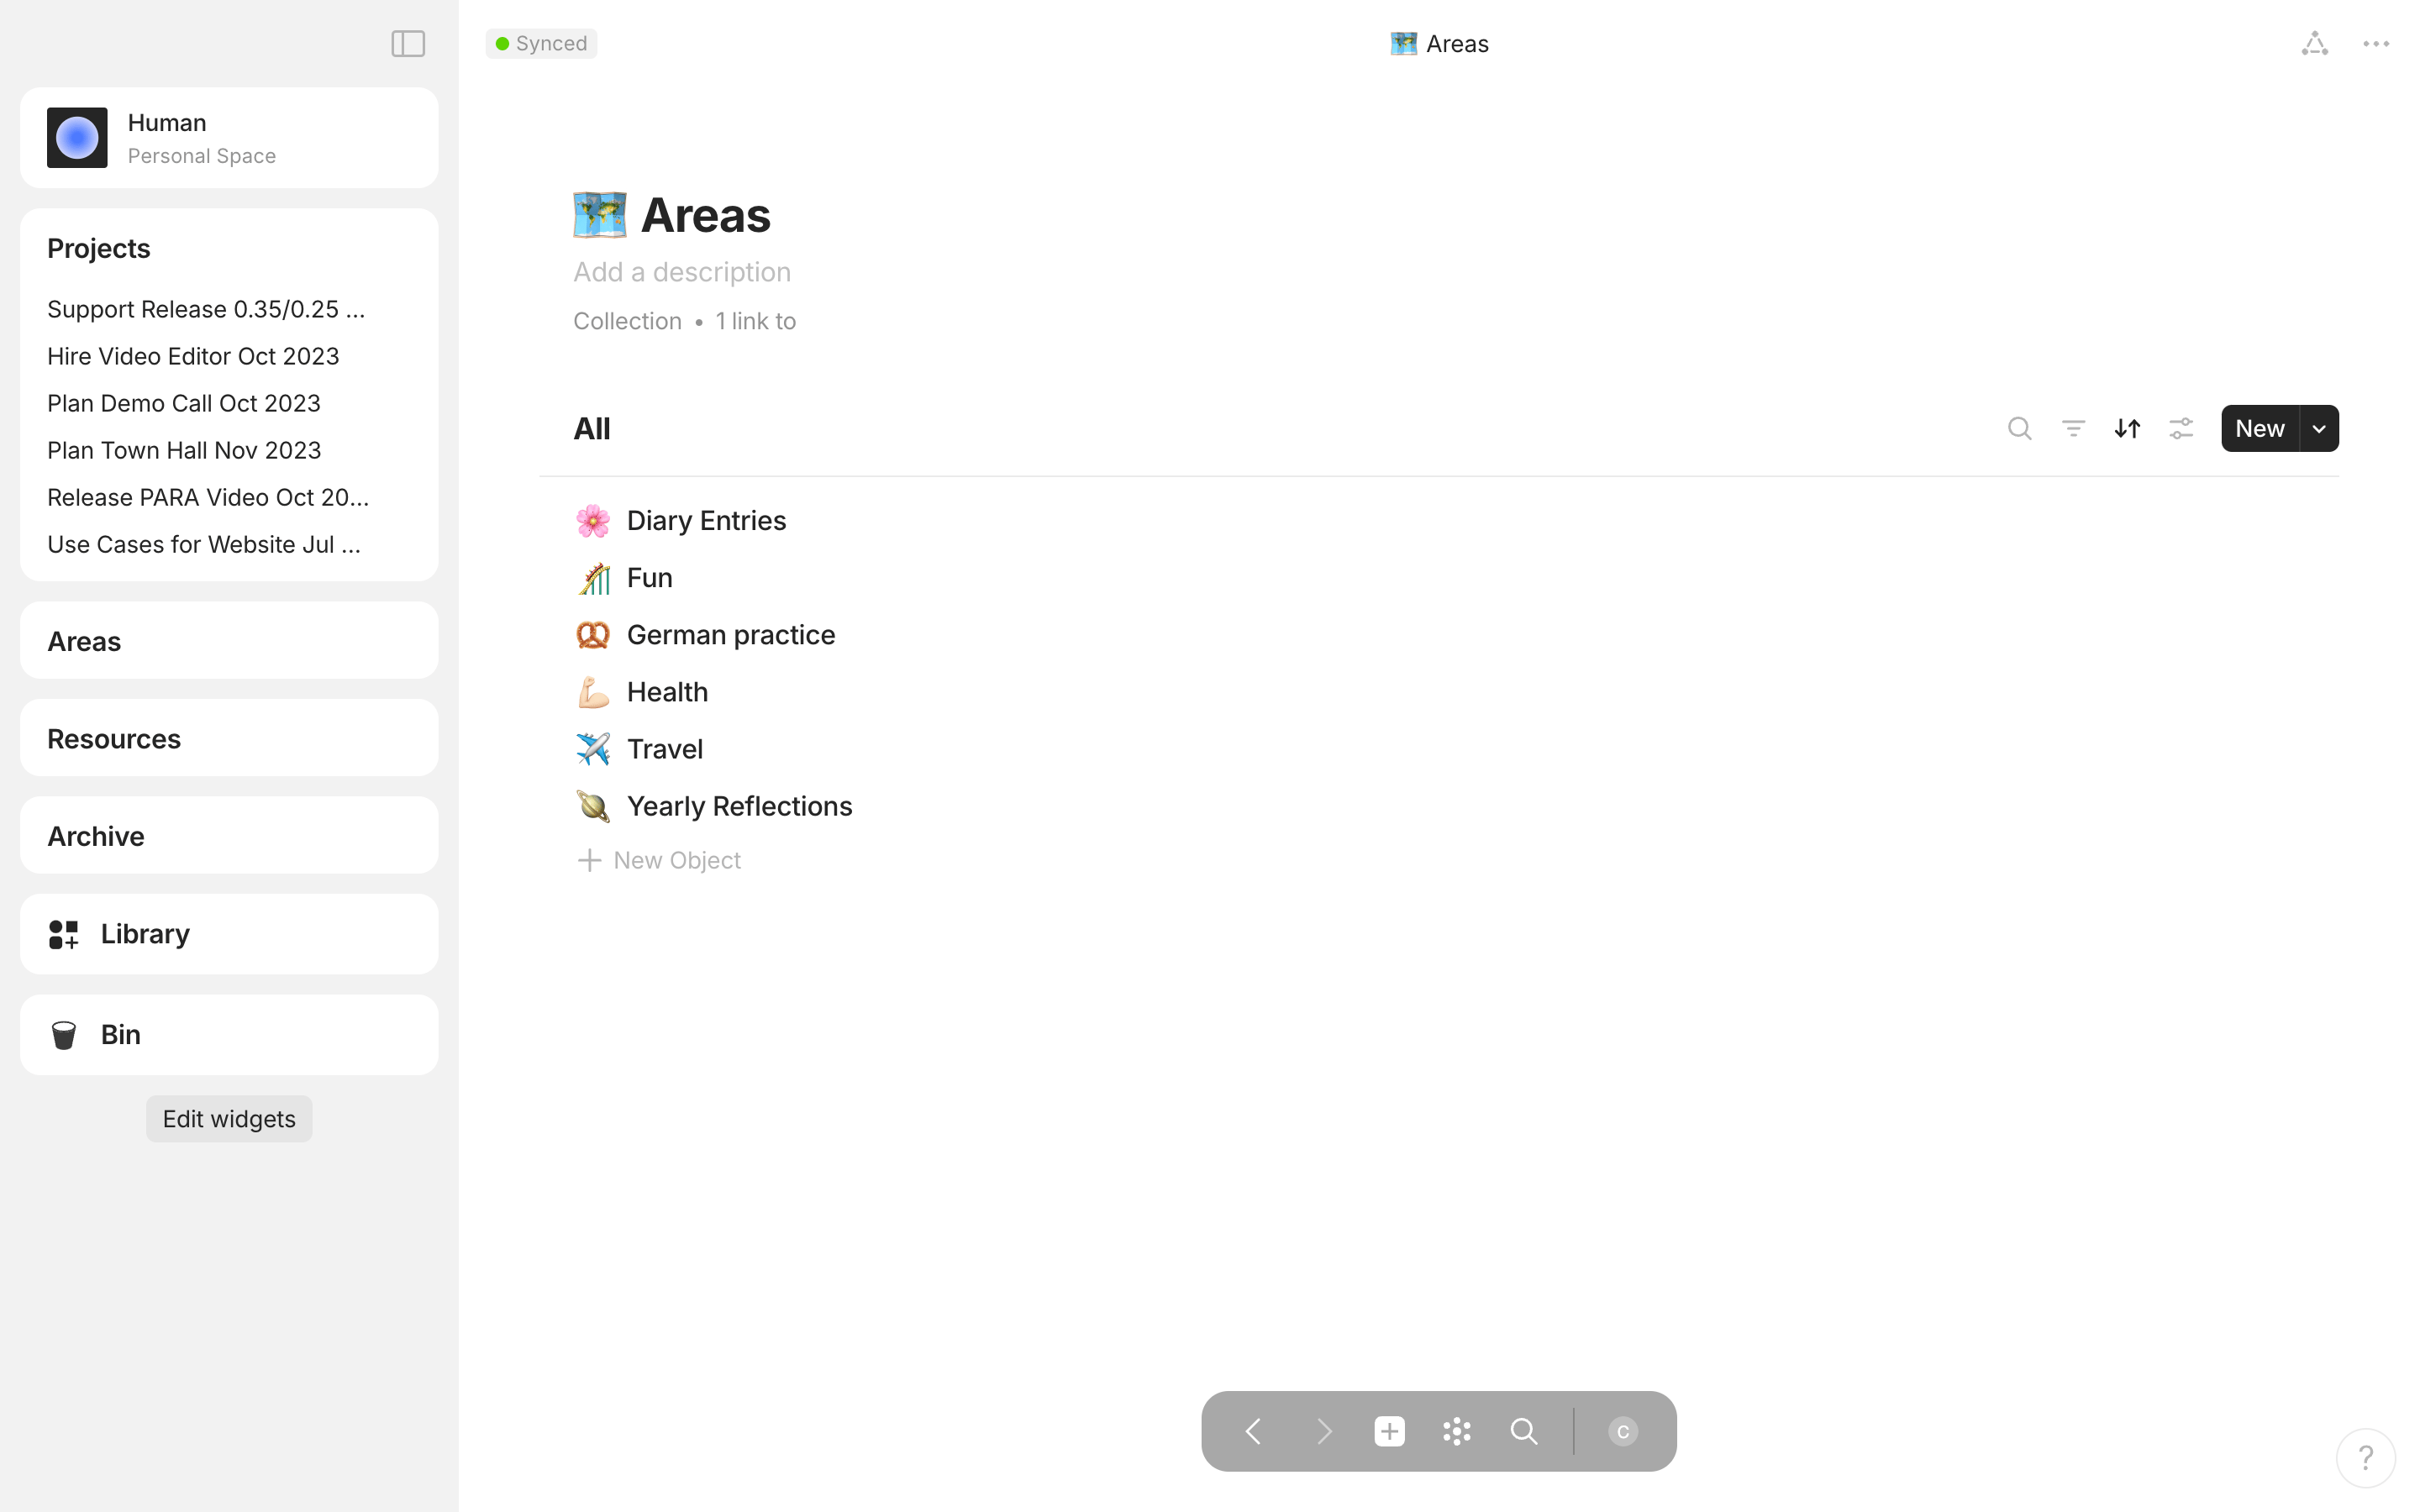
Providing a clear and accurate explanation of the bug you encountered will assist our Mods and Nightly Ops team in reproducing the issue. This will establish that the problem is widespread and should be escalated to our dev team for more immediate attention.
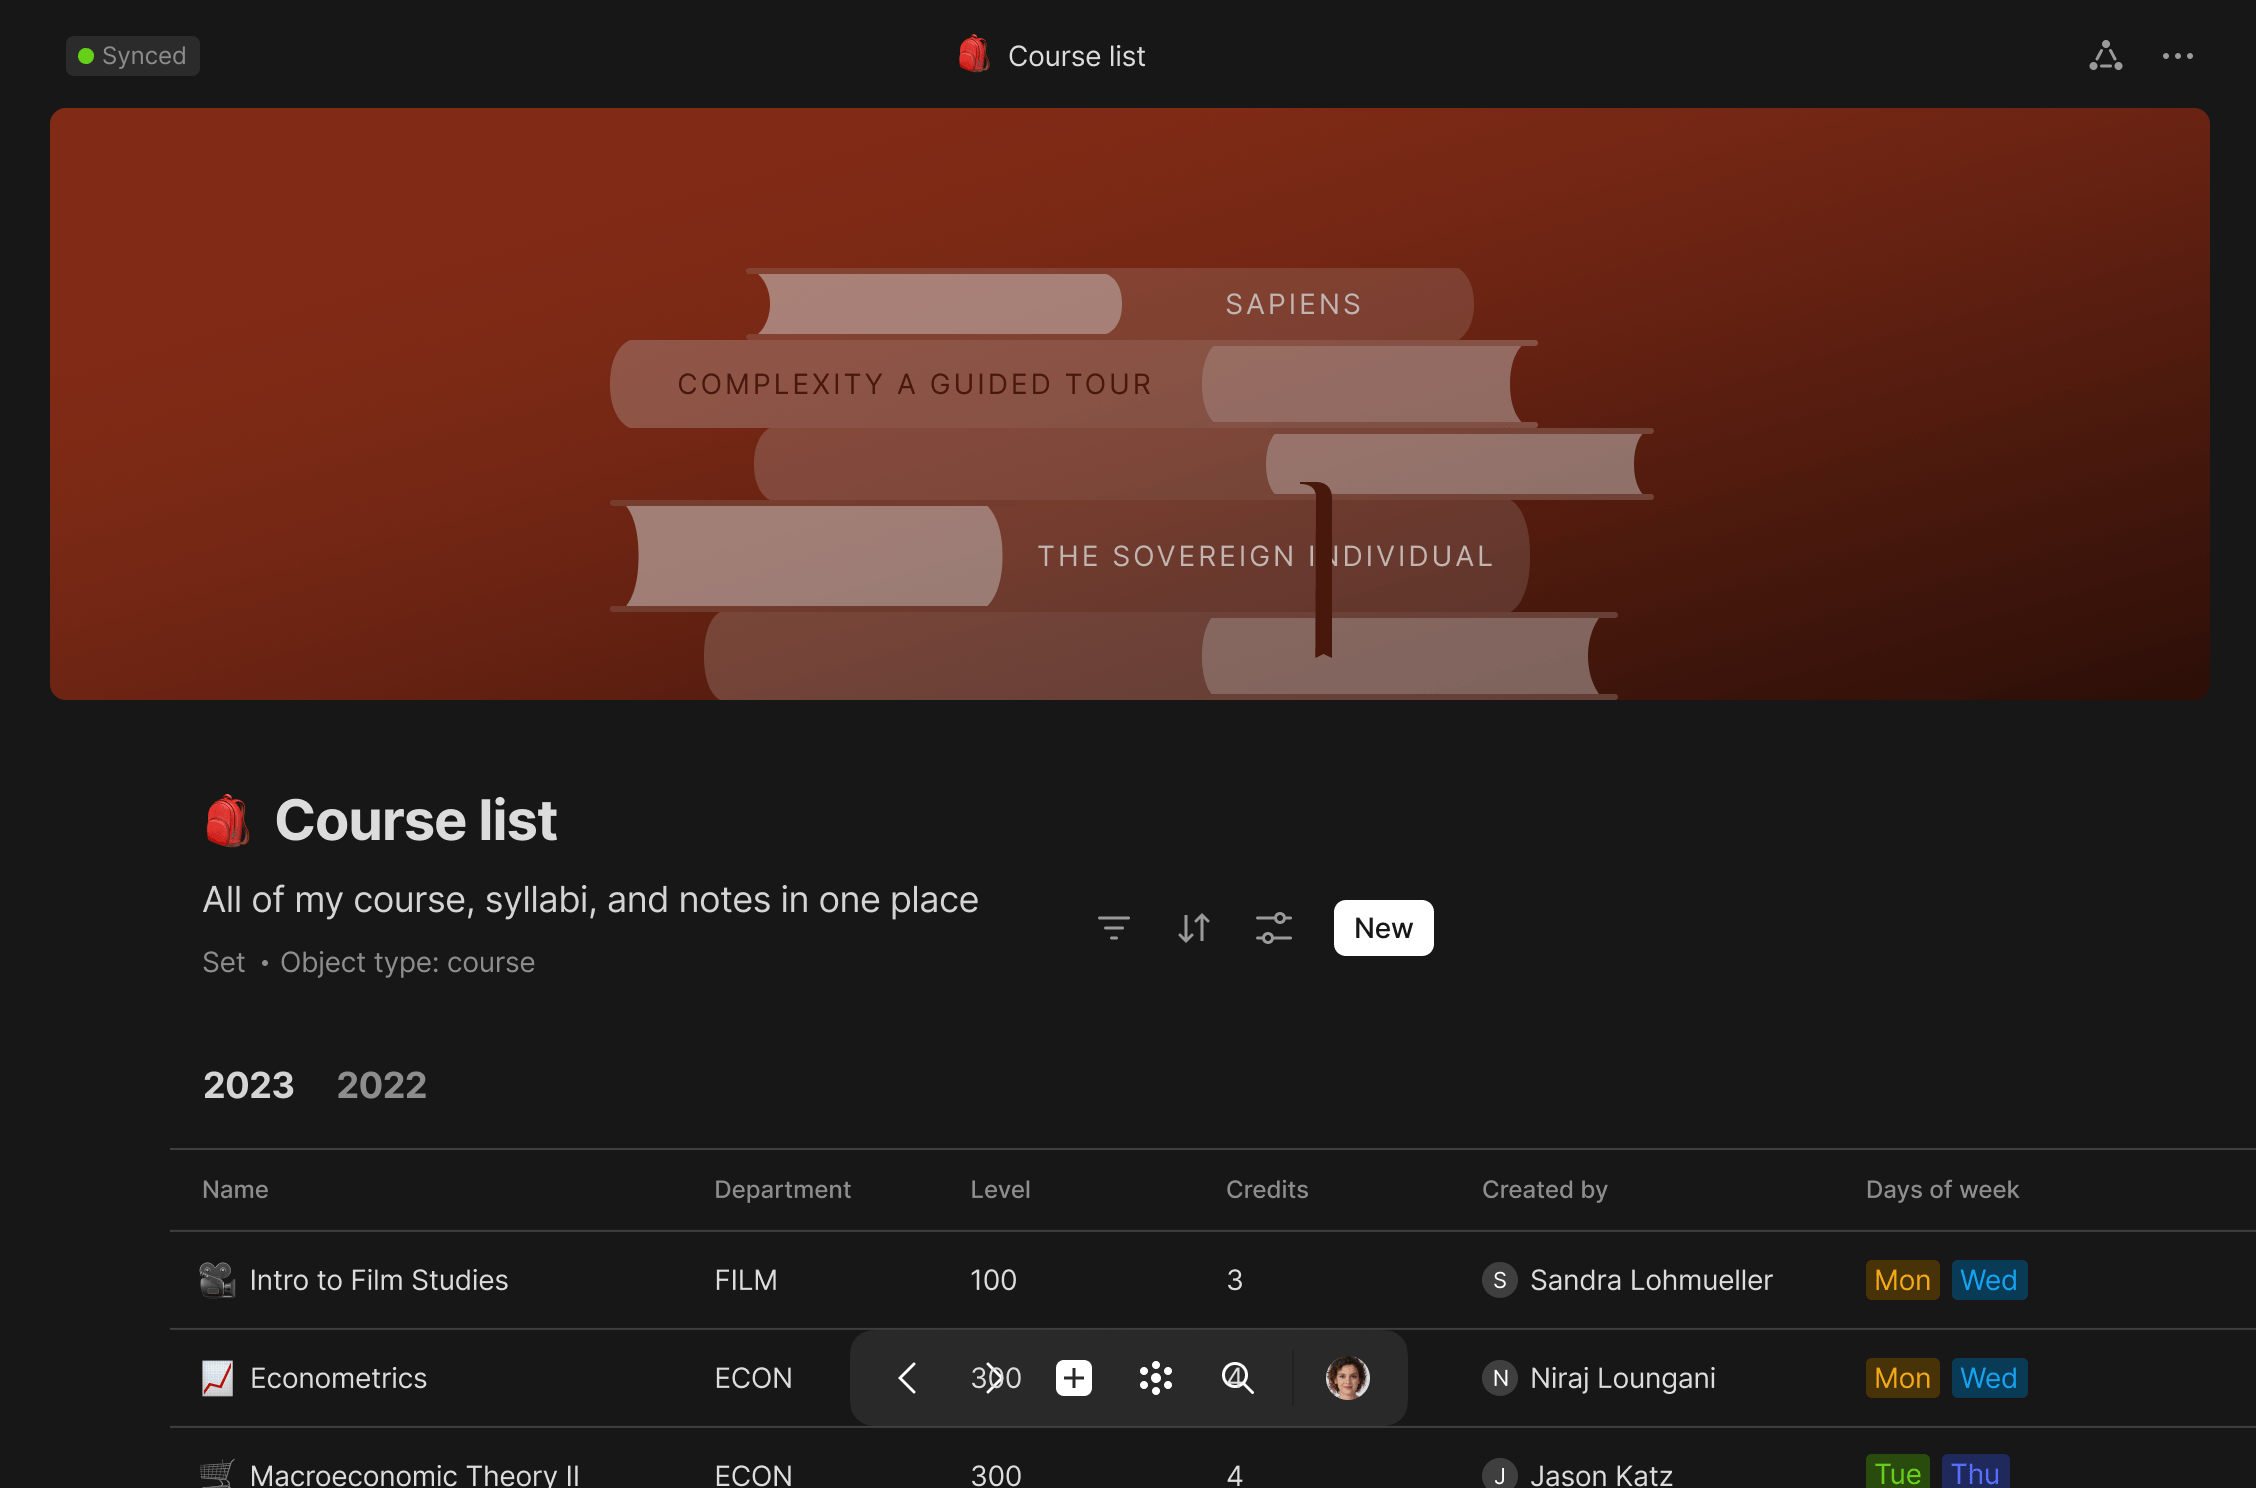
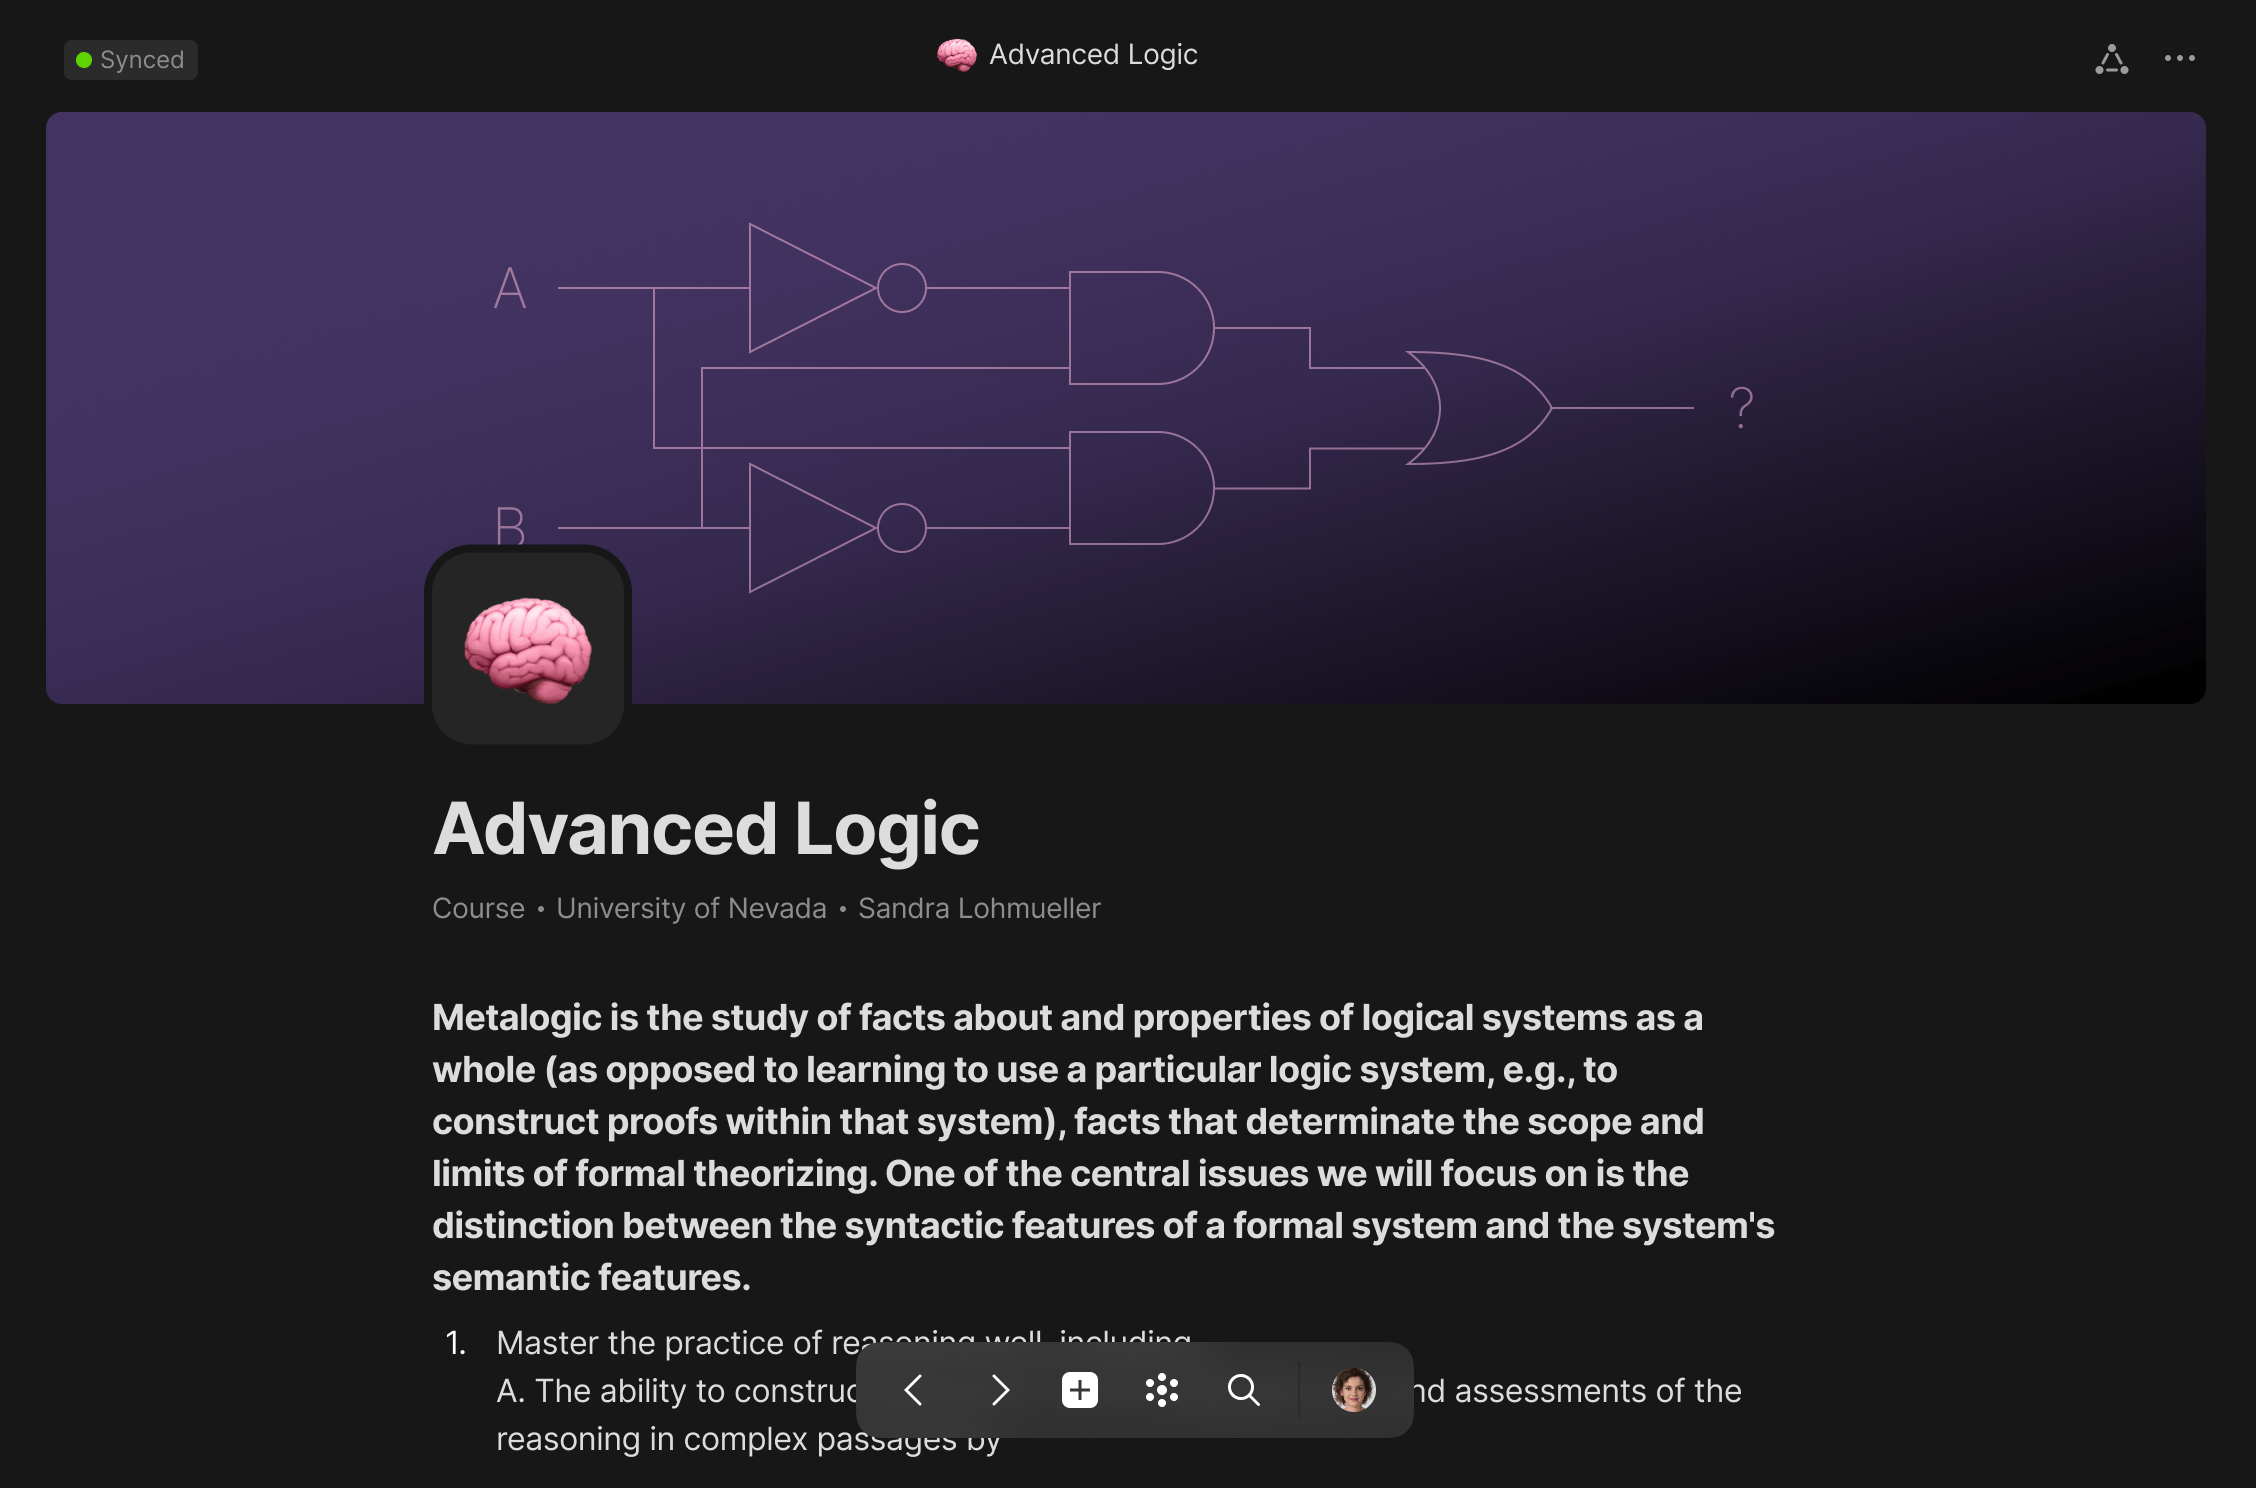
{% hint style="info" %}
You can find your **Technical Information** by going to `Help > Technical Information` on desktop, or `Profile > About > Tech info` on mobile.
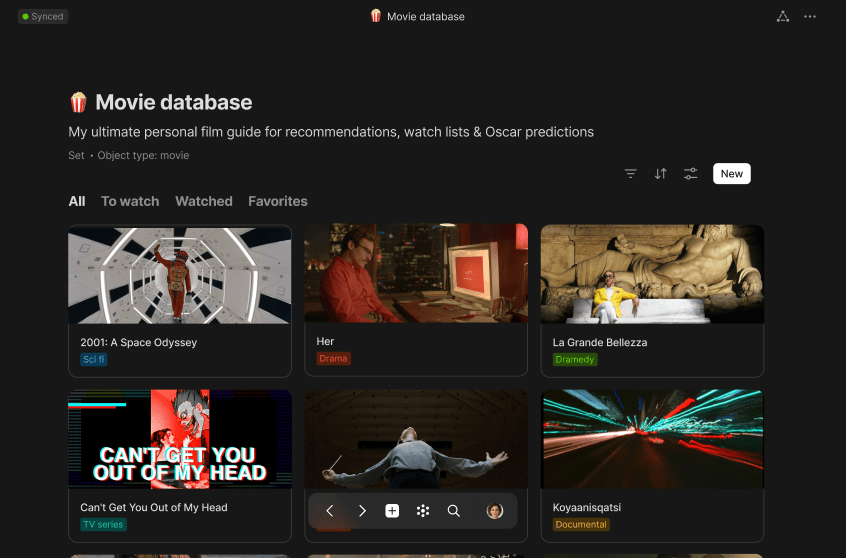
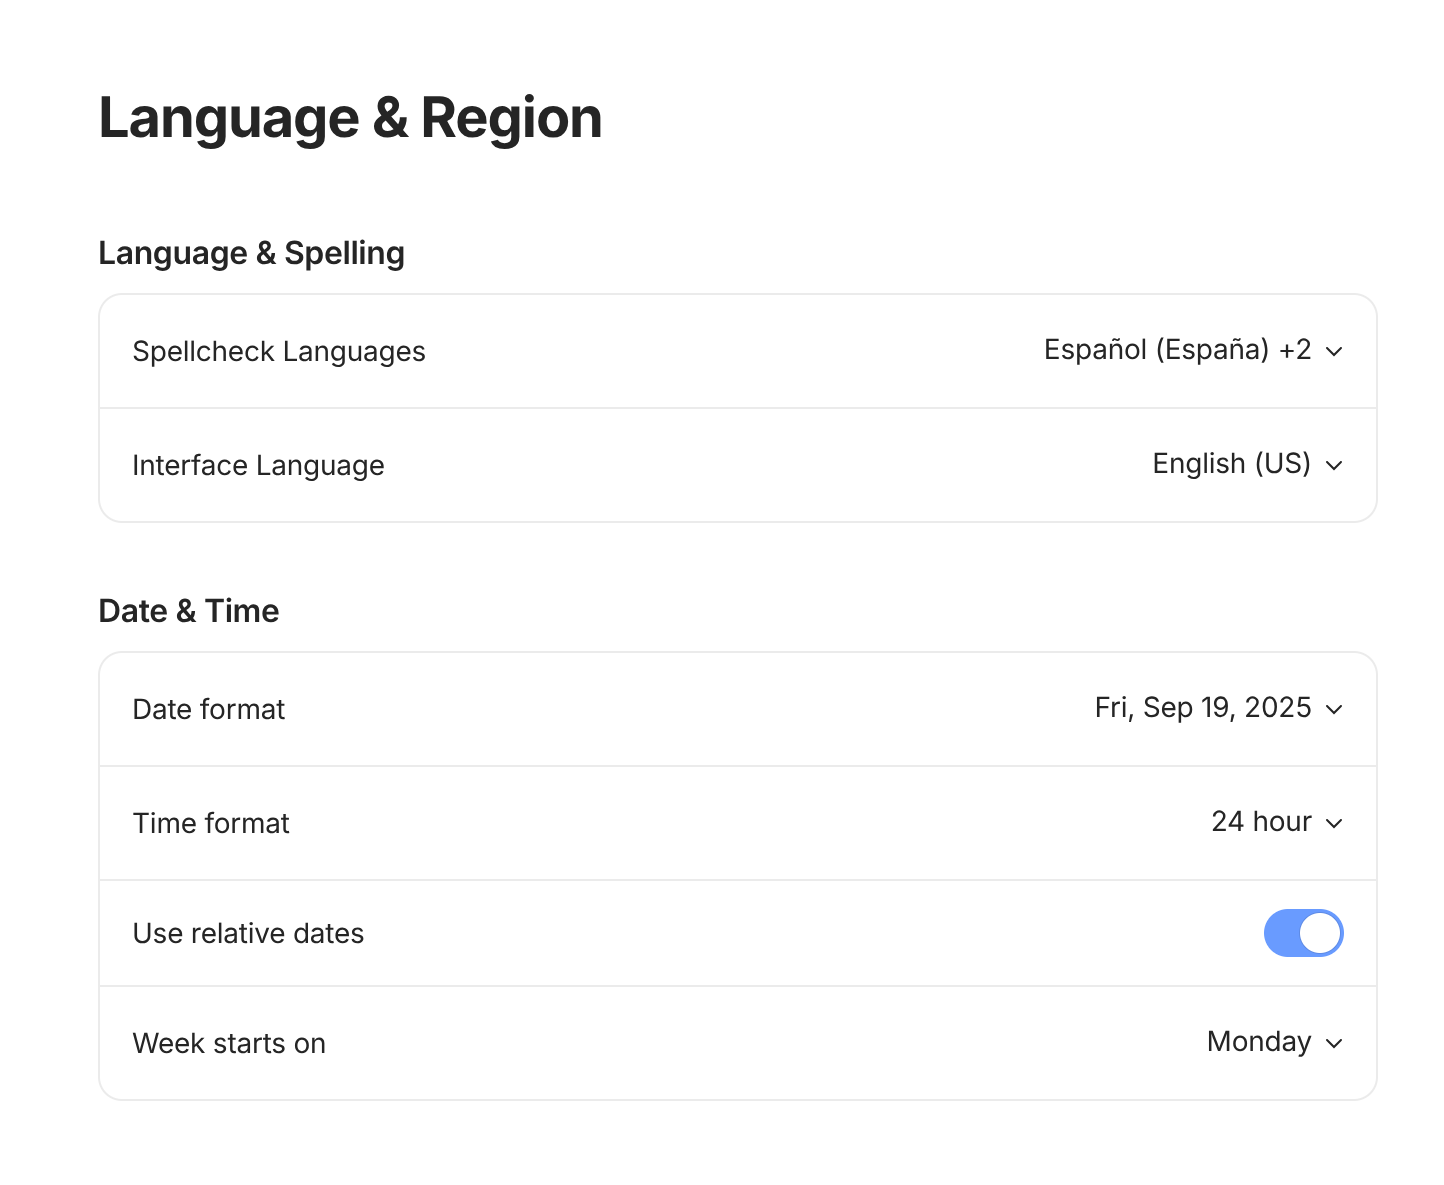
{% endhint %}

{% embed url="<https://community.anytype.io/c/bug-report/7>" %}

### Request a Feature & Vote

This is the place to post, contribute to, & vote for all things related to feature requests & new feature development!

We prioritize our building agenda based on what is most desired by our community.
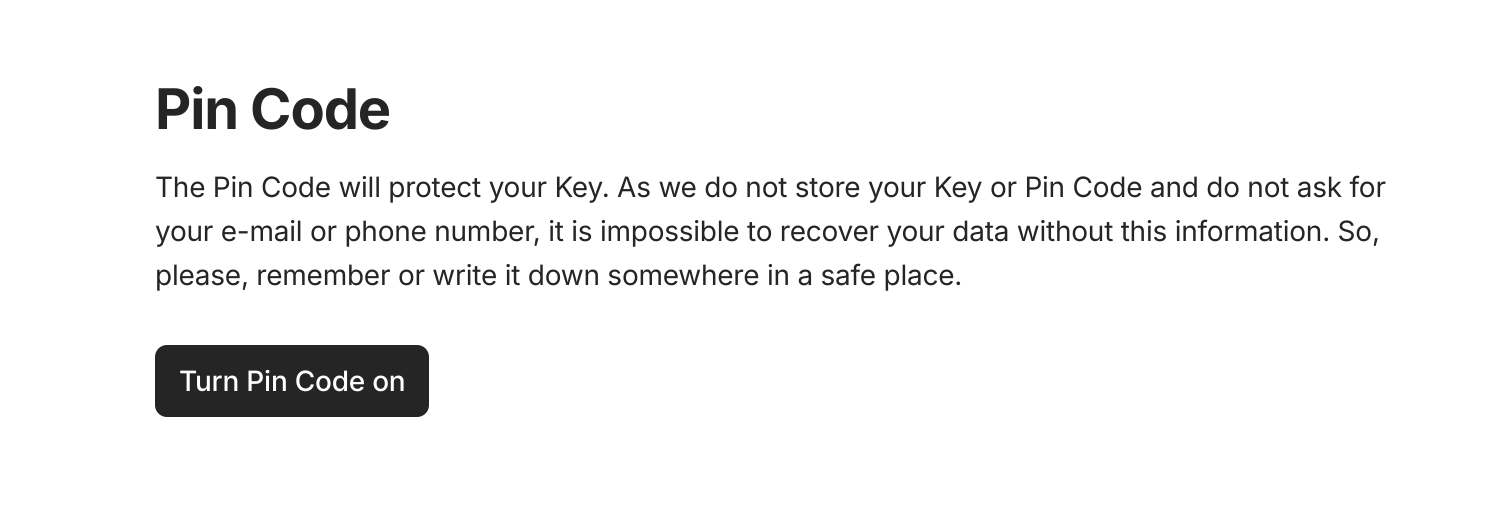
So if there is something you want to see happen, go out and vote for it!

Beware! Search for a topic before, see if it already exists *before* adding a new recommendation. You wouldn't want to be that guy...

{% embed url="<https://community.anytype.io/c/feature-requests/>" %}

### Get help from the community and Any Team!

Are you looking for some help building and using your Anytype? If these docs didn't help you enough, you can always check and see if someone in the community has asked a similar question.

If you need suggestions of what to build or inspiration from seeing how others are using Antype, you can find an abundance here.

This is the place to get some assistance or shout-out if you have questions unrelated to feature requests or bugs!

{% embed url="<https://community.anytype.io/c/any-help/8>" %}

### Share Your Feedback

We love to keep the campfire chat going all day n all night!

To discuss anything related to Anytype.

Any-thing.

Well, just those which you feel don't make the cut for any of the other categories.

Those posts can go into this category.

#### We love to hear your thoughts and feedback.

Tell us your first impressions, give us feedback or suggestions for feature optimizations.

Have you created something in Anytype that you want to show off? Share it with the community!

We're talking templates, use-cases organization ideas, layouts, etc.

{% embed url="<https://community.anytype.io/c/any-talk/10>" %}


# Open Any Initiative

## **How to contribute**

If you are a developer and want to contribute to the Anytype ecosystem, please check `CONTRIBUTING` docs inside a repository.

Follow us on [Github](https://github.com/anyproto) and join [Contributors Community](https://github.com/orgs/anyproto/discussions) to build Anytype together.

If you want to learn more about why we chose to open up our code, check the article below:

{% embed url="<https://blog.anytype.io/our-open-philosophy/>" %}

For any questions about our licenses, please check <https://legal.any.coop/>, and for any tech questions, please check <https://tech.anytype.io/>.


# ANY Experience Gallery

### Installing Experiences from the Gallery

To make browsing and installing experiences easier, the Experience Gallery has now been added to Anytype. Open your channels navigation tab, tap ‘Gallery’, and install the experience of your choice.

Alternatively, you can open the Gallery in your browser by clicking on the link below:

{% embed url="<https://gallery.any.coop/>" %}

### Creating and sharing with others

We’re excited to introduce the [Gallery](https://gallery.any.coop/) – a way for you to share your ANY Experience with other users. We’re sure you’re proud of your setups for knowledge management, task tracking, studying approaches, and so on. This is your chance to share your setups with the community so they can get the most out of Anytype!

To create and share your own ANY Experience, follow these steps (you will need a Github account for this):

1. Create a new channel which includes only the types, properties, widgets, templates, and objects you want to share. This will avoid accidental sharing of sensitive data from your primary channel. Please note: the name and icon of this new channel will be displayed for everyone who will install your ANY experience.
2. When the channel is ready, export it in Any-Block JSON format. Click on the channel name in the top-left corner, click “Export Channel”, choose “Any-Block” option and set up following export settings:
   1. File format – JSON,
   2. Turn on “Zip archive”
   3. Turn on “Include files”
3. Make one or several screenshots which show important features of your ANY experience. Save these screenshots in .png format.
4. Now, having created an exported channel and screenshots, you can upload them to the Gallery. Explore existing Experiences in the [Gallery](https://gallery.any.coop/) to get examples of naming, descriptions, and screenshots. Then, please login to Github, follow [this link](https://github.com/anyproto/gallery/issues/new?assignees=\&labels=experience\&projects=\&template=new_experience.yml) to create a request and fill the form:
   1. Give a title to the request
   2. Drag and drop exported Zip archive to the “Experience” field
   3. Write a title for your experience in the “Title” field; it should be unique, pretty short, and written in English
   4. Drag and drop .png screenshots to the “Screenshots” field
   5. Write an English description for the experience in the “Description” field
   6. Choose one or several categories which suit for your experience in the “Categories” field
   7. If the content inside the Experience is not in English, please choose the language in the “Language” field
   8. For now, all experiences are published under the MIT license; please confirm that you agree with it, that you have rights for posting such content, and that there is not harmful content in the experience in the “Terms” section
   9. When ready, click “Submit new issue” button
5. Someone from Open Any Team will review your submission, and, when approved, the experience will be published in the [Gallery](https://gallery.any.coop). You will be recognized as a contributor in our [Github](https://github.com/anyproto/contributors) and on our [website](https://anytype.io/contributors).


# Nightly Ops

We’re inviting enthusiastic users to test our apps and help shape their future. As such a volunteer, you’ll get early access to new features and the chance to provide valuable feedback before the public release.

### How to join: <a href="#p-95537-how-to-join-1" id="p-95537-how-to-join-1"></a>

* Submit a [**request**](https://community.anytype.io/g/Nightly/members) to be added to the Nightly group.
* We’ll send you all the necessary instructions and the link to join the the Anytype channel.

### What you’ll do: <a href="#p-95537-what-youll-do-2" id="p-95537-what-youll-do-2"></a>

**1. Get access to our early app versions**\
\* where you'll have an opportunity to try new features and share your thoughts in advance.

**2. Join the Nightly Ops channel in Anytype**\
\* where you can also share your feedback, since it’s all about **Chat** <img src="https://community.anytype.io/images/emoji/apple/speech_balloon.png?v=12" alt=":speech_balloon:" data-size="line"> now.


# FAQ

<details>

<summary>How to recover my Key from my OS key storage manager?</summary>

**Mac**

If you’re using a Mac, Anytype’s default setting is to store your key in the native Keychain Access app. It doesn’t get stored anywhere else. Whether your passwords are backed up to iCloud depends if you have that option enabled in your settings. You can check [Apple’s support page](https://support.apple.com/en-us/HT204085) for more information on iCloud password backups.

We’ve set up this system as a safety net for users who might otherwise lose their Key. We’re pursuing different options for the future, but for the time being, this is how it works.

If you logged in with your key on your mac, then you can find it here:

1. Click and open Finder from the dock.
2. Click on Applications & open Utilities.
3. Open the Keychain Access app.
4. On the sidebar: select Default Keychains: login
5. Find & open your Anytype instance in the list
6. Check the “Show password” box to reveal your key

**Windows**

Your key is stored in the [Credentials Manager](https://support.microsoft.com/en-us/windows/accessing-credential-manager-1b5c916a-6a16-889f-8581-fc16e8165ac0). If you are unable to read a password via the Credential Manager (Show button is missing), you can use [this PowerShell script](https://gist.github.com/requilence/de8da32adc44d4786559789debb3bf88). Save it to your computer, right-click in the File Explorer and press "Run with PowerShell".

**Linux**

You can use [seahorse](https://wiki.gnome.org/Apps/Seahorse/) to find your key if you are using [GNOME Keyring](https://wiki.gnome.org/action/show/Projects/GnomeKeyring?action=show\&redirect=GnomeKeyring).

</details>

<details>

<summary>Which standard do you follow to create my Vault’s Key?</summary>

We use the [**BIP39**](https://medium.com/coinmonks/mnemonic-generation-bip39-simply-explained-e9ac18db9477) standard to generate a mnemonic phrase, which is then used to derive your Vault's private key.

</details>

<details>

<summary>What are the minimum specs?</summary>

* For Desktop, Electron follows Chrome, and they follow [vendor support policies](https://support.google.com/chrome/a/answer/7100626?hl=en).\
  At the moment that means:
  * Win 10+
  * macOS 12 Monterey and up
  * 64-bit Ubuntu 18.04+, Debian 10+, openSUSE 15.5+, or Fedora Linux 39+
* For Android (if installed through Google Play), it's Android 8.0 and a 64-bit device with a minimum of 4GB of RAM.
* For iOS, it's iOS 17.

</details>

<details>

<summary>Where is Anytype installed?</summary>

* In Windows 10 or above, it is usually located:\
  `C:\Users\<username>\Appdata\Local\Programs\anytype`\
  **username** stands for the name of your user aka working directory.
* For MacOS, it's: `HDD > Users >`*`Username`*`> Library > Application Support > anytype`
* For Linux, you'll find your work directory in `~/.config/anytype`
* For Android, it’s your default location, usually: \_device/data/app\_​.\
  We also store some caches: *device/data/data/io.anytype.app*\
  Anytype directory is stored in a protected app data folder, which isn’t accessible by the user on Android devices.
* For iOS, it's the standard install path determined by the iOS.

</details>

<details>

<summary>Are there any network requests when using local-only mode?</summary>

We can guarantee that there are no network requests to our Anytype Network, but our telemetry will still send requests (you will be able to opt-out later on). Additionally, the client still needs to to send requests for some of the features (embedding blocks, fetching bookmarks, etc.) to work properly.

</details>

<details>

<summary>What to do if I'm asked to enter my key / recovery phrase each time on Linux?</summary>

Linux users may be asked for their Key each time they log in. To resolve this issue, please install a keychain. The most popular is [GNOME Keyring](https://wiki.gnome.org/action/show/Projects/GnomeKeyring?action=show\&redirect=GnomeKeyring). Additionally, ensure that you have met all the [dependencies](https://github.com/anyproto/anytype-ts#dependencies) beforehand.

</details>

<details>

<summary>Why is there no browser version of Anytype?</summary>

There's no browser version of the app. Anytype is a stand-alone software, that works on desktop or mobile devices. There are many points of vulnerability in-browser apps that would compromise our commitment to data security and encryption.

</details>

<details>

<summary>Can I use two separate Vaults at the same time?</summary>

Here's a tweak that works only on desktop: you need to create a separate shortcut for your other Vault and add the `--user-data-dir="$path"` flag to the launch command (i.e. `--user-data-dir="D:\Anytype"`).

</details>

<details>

<summary>Can I install Anytype on a Chromebook?</summary>

There are a few ways you can install Anytype on a Chromebook, but probably the easiest one is to use an [AppImage](https://download.anytype.io). For the full guide from one of our community members, please click [here](https://community.anytype.io/t/guide-to-use-anytype-on-a-chromebook/12181).

</details>

<details>

<summary>Does Anytype have a bug bounty program?</summary>

As a non-profit organization that hasn’t reached a sustainable income yet, we don’t have any guaranteed bug bounty program. If you can prove that you found a critical vulnerability in our applications but don’t want to disclose it, we can discuss a potential reward. Please check this [page](https://github.com/anyproto/.github/blob/main/docs/SECURITY.md) from our GitHub for more information.

</details>

<details>

<summary>What can I do if I can't open Anytype links through a browser?</summary>

You can still open any Anytype links by simply pasting them in the global search menu within Anytype and hitting enter.

</details>

<details>

<summary>How can I create columns?</summary>

You can use the orange 'handle' to the left of each block to create parent/child blocks or new columns in your editor by dragging and dropping them.

<div><figure><img src="/files/UM1aOP6BfrqmYWSIydwf" alt=""><figcaption></figcaption></figure> <figure><img src="/files/X8Sy1kPLbdL9yNOuXkUa" alt=""><figcaption></figcaption></figure></div>

</details>

<details>

<summary>Why can't I search inside objects on iOS?</summary>

Currently, this feature is unavailable on iOS.

</details>

<details>

<summary>Why can't I search or batch select objects inside queries on mobile?</summary>

These features are currently unavailable on both iOS and Android.

</details>

<details>

<summary>Why does it say that my key is too short?</summary>

This issue is usually resolved by adding a space at the end after pasting your key.

</details>

<details>

<summary>Can guests of my channel use Anytype from local-only mode?</summary>

Unless they are all part of the same local network, guests will need to be connected to the Anytype network in order to see all changes in the channel.

</details>

<details>

<summary>What are some of the things that are not yet supported on mobile?</summary>

* Columns
* [Other Features](/anytype-docs/advanced/feature-list-by-platform/other-features#inline-latex)
* [Other Features](/anytype-docs/advanced/feature-list-by-platform/other-features#inline-queries-collections)
* Kanban, Calendar, and Graph Views
* [Other Features](/anytype-docs/advanced/feature-list-by-platform/other-features#simple-formulas)
* [Other Features](/anytype-docs/advanced/feature-list-by-platform/other-features#embed-blocks)
* [Custom CSS](/anytype-docs/advanced/feature-list-by-platform/custom-css)
* [Other Features](/anytype-docs/advanced/feature-list-by-platform/other-features#custom-storage-location)
* [Graph](/anytype-docs/advanced/feature-list-by-platform/graph) & Flow
* [Import & Export](/anytype-docs/advanced/data-and-security/import-export)
* PIN Code

</details>

<details>

<summary>Why do I have an Entry Space?</summary>

Vaults created before version 0.44.0 have an Entry Space. You are free to delete this channel if no longer needed, or you can migrate your data to a different channel by using the [Import & Export](/anytype-docs/advanced/data-and-security/import-export) feature.

</details>


# Troubleshooting

1. Ensure that the time on your computer is correct. If the local time is more than 2 hours off, a connection might not be possible.
2. Check if you’re using a proxy, VPN, firewall, or a company network to connect. If yes, try connecting without these to see if it makes a difference.
3. Attempt the connection outside of corporate networks or similar setups.
4. Use your mobile device as a Wi-Fi hotspot for your desktop and try connecting through that.
5. Try to Log in from another device (& network).

For more specific issues:

<details>

<summary>How can I share StackGoroutines log if I'm stuck on login on mobile?</summary>

1. If a hang occurs at StartAccount, you can [tap on Enter My Vault 5 times](https://drive.google.com/file/d/1V4muGfFDNDb98ZVp213-YmbnVv3Vx_tX/view?usp=drive_link).
2. The Rpc.Debug.StackGoroutines command will return a log file.
3. You can share it using any convenient method.

</details>

<details>

<summary>What to do if my storage amount is not properly reflected in the app?</summary>

Navigate to `Debug > Reconcile` in the top menu bar, and restart the app.

</details>

<details>

<summary>What can I do if I don't get asked to choose my anyname after buying a membership?</summary>

Please either type <anytype://main/membership> in your browser or inside Anytype global search, and restart the app.

</details>

<details>

<summary>What to do if I'm having graphical issues?</summary>

Try deleting the GPUCache folder under `~/.config/anytype`.

</details>

<details>

<summary>What should I do if I'm unable to connect to the Anytype network?</summary>

You should download and run our AnySync Netcheck Tool, which you can find [here](https://github.com/anyproto/any-sync-tools/tree/main/any-sync-netcheck), along with instructions on how to do so.

</details>


# AnySync Netcheck Tool

A simple tool that checks the ability to connect to Anytype nodes. It was created to test network and TLS (sync) issues.

The *Netcheck* Tool opens a connection to the coordinator nodes to establish communication with the libp2p protocol and *AnySync* handshakes, to attempt to execute network configuration requests.

***

### Download <a href="#p-42130-download-2" id="p-42130-download-2"></a>

You can download the version for your OS here:

{% embed url="<https://github.com/anyproto/any-sync-tools/releases>" %}

The .zip contains all our tools, but the sync check procedure requires only **“any-sync-netcheck”**.\
(The other file is our [self-hosting tool](https://github.com/anyproto/any-sync-tools/blob/main/any-sync-network/README.md).)

### Installation <a href="#p-42130-installation-3" id="p-42130-installation-3"></a>

**Build from source:**

`go install github.com/anyproto/any-sync-tools/any-sync-netcheck@latest`

***

#### Running The Tool <a href="#p-42130-runing-the-tool-5" id="p-42130-runing-the-tool-5"></a>

Execute the file named:

* `any-sync-netcheck`
* *or* `any-sync-netcheck -v` for a verbose output

***

#### Result <a href="#p-42130-result-6" id="p-42130-result-6"></a>

* If your sync is **working as expected**, your output log should look something like this:\\

  <figure><img src="/files/41JFI8hU4MscPOKAj0Pz" alt=""><figcaption></figcaption></figure>
* **If the tool detects any errors:** please provide all details about your network setup, including VPN, proxy, firewalls, and antivirus. In this event, we may request you to run a trace-route or other system tools for further analysis later on.

***

#### Send to Anyteam <a href="#p-42130-send-to-anyteam-7" id="p-42130-send-to-anyteam-7"></a>

Send the resulting log and your network specs to <support@anytype.io>.


# Connect

If you have any questions or concerns, please email us at <support@anytype.io>.

<table data-view="cards"><thead><tr><th></th><th></th><th data-hidden data-card-target data-type="content-ref"></th></tr></thead><tbody><tr><td><h3>Newsletter</h3></td><td>Stay on top of product updates, company news, and musings from the Anyteam</td><td><a href="https://anytype.io/?popup=mailinglist">https://anytype.io/?popup=mailinglist</a></td></tr><tr><td><h3>Forum</h3></td><td>Help us in polishing and improving Anytype</td><td><a href="/pages/ryPmD74cakhPq10RWMp6">/pages/ryPmD74cakhPq10RWMp6</a></td></tr><tr><td><h3>Twitter</h3></td><td>Catch some hot takes on what's happening in the industry</td><td><a href="https://twitter.com/anytypelabs?lang=en">https://twitter.com/anytypelabs?lang=en</a></td></tr><tr><td><h3>GitHub</h3></td><td>Contribute to the Anytype ecosystem</td><td><a href="/pages/C8XArnKIHpXEfIzn9AtW">/pages/C8XArnKIHpXEfIzn9AtW</a></td></tr><tr><td><h3>Blog</h3></td><td>Read updates and announcements from the Anyteam</td><td><a href="https://blog.anytype.io/">https://blog.anytype.io/</a></td></tr><tr><td><h3>Reddit</h3></td><td>Post questions about anything you're interested in</td><td><a href="https://www.reddit.com/r/Anytype/">https://www.reddit.com/r/Anytype/</a></td></tr><tr><td><h3>Positive Sum</h3></td><td>Join our little corner of the internet where we share our ideas about building the next wave of technology</td><td><a href="https://positivesum.any.org/">https://positivesum.any.org/</a></td></tr><tr><td><h3>Telegram</h3></td><td>Chat with our team and community members</td><td><a href="https://t.me/anytype">https://t.me/anytype</a></td></tr><tr><td><h3>YouTube</h3></td><td>Watch some fun educational content about why data ownership matters</td><td><a href="https://www.youtube.com/c/anytype">https://www.youtube.com/c/anytype</a></td></tr></tbody></table>


# 文档

Here you'll find guides, glossaries, and tutorials to help you on your Anytype journey.

{% embed url="<https://www.youtube.com/watch?v=dh_3NHY5eVs>" %}

Anytype 是一款本地优先的端对端（E2E）加密软件，旨在作为创建和存储数字资产的安全场所。

你可以使用 Anytype 创建并连接你的任务、笔记、想法、文档、工作流程等。

未来的版本将允许你与其他人共享工作并且安全地开展协作。我们的长期愿景是让 Anytype 实现大规模协作，创建一个全球互联的知识存储库。

浏览这里的文档，了解关于产品使用、账户故障排除和数据隐私的更多信息。

如需了解更多信息，请访问我们的 [网站](https://anytype.io) 或 [常见问题](https://anytype.io/faq/) 页面。

### 精选指南

<table data-view="cards"><thead><tr><th></th><th></th><th></th><th data-hidden data-card-target data-type="content-ref"></th><th data-hidden data-card-cover data-type="files"></th></tr></thead><tbody><tr><td><strong>深入探讨：对象集</strong></td><td>了解如何通过对象集将你的工作效率提升 10 倍</td><td></td><td><a href="/pages/nSBYwNCm5RryiQ1pivO9">/pages/nSBYwNCm5RryiQ1pivO9</a></td><td><a href="/files/crimCGZEKEPZDhMIsjaG">/files/crimCGZEKEPZDhMIsjaG</a></td></tr><tr><td><strong>每日日志</strong></td><td>在你的私人空间中培养每天写日记的习惯</td><td></td><td><a href="/pages/SiNL5Xa3gl2UKtxWiBnk">/pages/SiNL5Xa3gl2UKtxWiBnk</a></td><td><a href="/files/nXsSPl9ZlxSpkJJK40of">/files/nXsSPl9ZlxSpkJJK40of</a></td></tr><tr><td><strong>旅行 Wiki</strong></td><td>将一切内容整合到一个能够离线访问的地方</td><td></td><td><a href="/pages/cgfHL2ylqyY4e2bXy4fL">/pages/cgfHL2ylqyY4e2bXy4fL</a></td><td><a href="/files/m10RoXvDxqWaPaUXdCYY">/files/m10RoXvDxqWaPaUXdCYY</a></td></tr></tbody></table>


# 入门

{% hint style="info" %}
这是 2023 年 6 月的一段 demo 电话会议。

如果你想参与下次与 Anyteam 的公开电话会议，请点击 [**此处**](https://lu.ma/anytype)！
{% endhint %}

我们的联合创始人 Zhanna 与社区讨论了 Anytype 的使命，以及为什么我们认为本地优先、尊重隐私和 p2p 同步的应用程序是存储你的想法的必要基础。

{% embed url="<https://www.youtube.com/watch?v=UAEzfjIRgIg>" %}

Charlotte 展示了 Anytype 的基本设置，并以每日日志和图书集合为例，介绍了 Anytype 的主要功能。最后我们以参与者的问答环节作为结束。

{% embed url="<https://www.youtube.com/watch?v=y7Qt1WAS-z4&t=1751s>" %}


# 联系我们

We'd love to keep in touch. Find us online to stay updated with the latest happenings in the Anyverse:

别忘了加入我们的 [社区论坛](/anytype-docs/documentation_cn/she-qu/community-forum) 以及 [“开源一切”倡议](/anytype-docs/documentation_cn/she-qu/join-the-open-source-project)！

<table data-view="cards"><thead><tr><th></th><th></th><th data-hidden data-card-target data-type="content-ref"></th><th data-hidden data-card-cover data-type="files"></th></tr></thead><tbody><tr><td><h4>新闻邮件</h4></td><td>随时了解产品更新、公司新闻和来自 Anyteam 的想法</td><td><a href="https://anytype.io/?popup=mailinglist">https://anytype.io/?popup=mailinglist</a></td><td></td></tr><tr><td><h4>博客</h4></td><td>阅读 AnyTeam 的更新和公告</td><td><a href="https://blog.anytype.io">https://blog.anytype.io</a></td><td></td></tr><tr><td><h4>Twitter</h4></td><td>了解行业内正在发生的热点事件</td><td><a href="https://twitter.com/anytypelabs?lang=en">https://twitter.com/anytypelabs?lang=en</a></td><td></td></tr><tr><td><h4>YouTube</h4></td><td>观看一些有趣的教育内容，了解数据所有权为何如此重要</td><td><a href="https://www.youtube.com/c/anytype">https://www.youtube.com/c/anytype</a></td><td></td></tr><tr><td><h3>Reddit</h3></td><td>发布你感兴趣的任何问题</td><td><a href="https://www.reddit.com/r/Anytype/">https://www.reddit.com/r/Anytype/</a></td><td></td></tr><tr><td><h3>Telegram</h3></td><td>与我们的团队和社区成员聊天</td><td><a href="https://t.me/anytype">https://t.me/anytype</a></td><td></td></tr></tbody></table>


# 设置你的账户

Let's get started using Anytype! Find out what you can customize in this chapter.

### 下载应用程序

在 [download.anytype.io](https://download.anytype.io) 上查找适用于你的操作系统的最新版 Anytype

Anytype 被安装于：

* 在 Windows 10 或更高版本中，通常位于：\
  `C:\Users\<username>\Appdata\Local\Programs\anytype2\Anytype.exe`\
  **username** 代表你的用户名，也即工作目录。
* 对于 MacOS，通常为：` HHD > Users >`` `` `*`Username`*` `` ``> Library > Application Support > anytype `
* 对于 Linux，你可以在 `~/.config/anytype` 中找到你的工作目录
* 对于 Android，是你的默认位置，通常是：\_device/data/app\_​.\
  我们还存储了一些缓存在：*device/data/data/io.anytype.app*\
  Anytype 的目录存储在受保护的应用数据文件夹中，安卓设备的用户无法访问该文件夹。
* 对于 iOS，则是由 iOS 决定的标准安装路径。

{% hint style="info" %}
Anytype 没有浏览器版本。Anytype 是一款在桌面端或移动设备上工作的独立软件。浏览器应用程序存在许多漏洞，会损害我们对数据安全和加密的承诺。
{% endhint %}

### 创建账户

如果你还没有创建账户，只需点击 **注册（Join）** 然后按照提供的说明操作即可轻松创建账户。

#### 使用你的恢复短语登录

相反，如果你已经有一个账户，请点击 **登录（Login）** 然后输入你的恢复短语（recovery phrase）来继续。

{% hint style="danger" %}
将你的 [恢复短语（Recovery Phrase）](/anytype-docs/documentation_cn/shu-ju-an-quan/what-is-a-recovery-phrase) 保存在安全的地方，不要与任何人分享！
{% endhint %}

#### 使用二维码登录

除了使用恢复短语登录外，如果你的桌面端设备就在附近，还可以使用二维码更快地登录。

要使用二维码登录，只需导航到你的恢复短语。

设置 > 恢复短语。

在你的恢复短语下方，你会发现模糊的二维码，点击图像后它就会清晰地显示出来。

用移动端设备扫描此代码，应用程序就会设置完成。

### 迁移现有数据

如果你想要导入现有的数据，可以查看 [空间设置](/anytype-docs/documentation_cn/jian-jie/setting-up-your-profile/space-settings#import-and-export)。


# 账户设置

Customize your profile, set up additional security, or delete your account

### 个人资料

在这里，可以添加你的 **姓名，简介，** 以及 **个人资料头像。** 你的个人资料代表着【Anytype 关联图谱 (Graph)】中的一个【对象 (Object)】，你可以自由地将它链接到其他的【对象】。

<figure><img src="/files/GJiPwFYzfix5rgx6HrD9" alt=""><figcaption></figcaption></figure>

### 首选项

\*\*默认对象类型：\*\*你可以选择一种默认的【对象类型】（从默认或你自己的【类型】中选择）——它定义了每次使用 + 按钮创建新的【对象】时所打开的对象类型。

\*\*拼写检查语言：\*\*你可以从 40 多种语言中启用自动拼写检查，或者禁用拼写检查。

**界面语言：** 你可以从社区翻译版本中进行选择，实现界面的本地化。

{% hint style="info" %}
RTL （从右至左的文本方向）尚未被完全支持。
{% endhint %}

<figure><img src="/files/XqzdQIrHz0gq0oD178ta" alt=""><figcaption></figcaption></figure>

### 外观

你可以设置颜色模式（明亮、深色或跟随系统），并启用/禁用自动显示侧边栏功能：

<figure><img src="/files/Ug2Uby4SxO2IYv9bIke8" alt=""><figcaption></figcaption></figure>

### Pin 码

{% hint style="info" %}
此功能目前只在桌面端上可用。
{% endhint %}

如果你需要一些额外的隐私，例如在共享电脑时，你可以设置一个 Pin 码，在使用期间锁定应用程序并保护你的恢复短语。每次 Anytype 会话过期（1 分钟、5 分钟、10 分钟或 1 小时）或想访问恢复短语时，都需要输入密码：

{% hint style="warning" %}
我们不会存储此数据，因此当你丢失 Pin 码后无法帮助你恢复。请务必在恢复短语笔记的旁边记下你的 PIN 码。
{% endhint %}

### 数据管理

**本地文件**。你可以选择将存储在 Anytype 中的文件卸载到我们的加密备份节点，以此节省本地设备上的空间。

**删除账户**。此外，如果想删除自己的账户，也可以在这里进行操作。

### 恢复短语（Recovery Phrase）

你可以访问恢复短语或扫描二维码来连接你的移动端设备。有关更多详细信息，请查看 [恢复短语（Recovery Phrase）](/anytype-docs/documentation_cn/shu-ju-an-quan/what-is-a-recovery-phrase)。


# 空间设置

Customize your space

### 自定义空间

在这里个性化你的 [空间](/anytype-docs/documentation_cn/ji-chu/space)。在应用程序的左上角，可以找到你的空间名称和设置。

单击空间名称将打开你的空间设置。

这些是你空间中可以自定义的选项：

1. 自定义你的 **空间图标**
2. 添加你的 **空间名称**
3. 选择你的 **主页（Homepage）**

### 选择你的空间图标

你的空间图标会在引导过程中自动生成。如果要更改，只需点击图标，然后从 emoji 菜单中选择或上传你自己的图片。

<figure><img src="/files/FUjzHcyBlgOZFh31LPZ3" alt=""><figcaption></figcaption></figure>

### 选择你的主页（Homepage）

每次打开 Anytype 时，你都会先看到自己的主页。默认情况下，你的主页被预设为“仪表板”对象（一个 Page），能帮助你在空间内导向。

不过，你可以通过空间设置中的下拉菜单，在关联图谱（Graph）、上次打开的对象或你创建的某个对象中进行选择，从而更改你的主页。

<figure><img src="/files/z9AnErSWDzBWDxkYCdvF" alt=""><figcaption></figcaption></figure>

### 导入 & 导出

你可以通过 Anytype > 空间设置 > 集成 > 导入到空间/导出空间，来导入或导出到你的空间。

在应用的导入方面，我们目前只提供 **Notion** 的导入，在文件格式方面，我们目前提供这些格式：

* Markdown
* HTML
* TXT
* CSV
* Any-Block
  * Protobuf
  * JSON

{% hint style="info" %}
由于 Anytype 中尚未包含 Notion 的所有功能，因此某些 Notion 数据可能无法被正常导入。
{% endhint %}

当你导入完成后，侧边栏的收藏夹小部件中会出现一个新的集锦。所有导入的对象都会出现在那里。

在导出格式方面，我们目前提供 **Markdown** 和 **Any-Block**（Protobuf 和 JSON）两种格式。

### 移动端的空间设置

点击屏幕下方导航栏最右侧的按钮。

即可打开设置和账户信息。

你可以用自己选择的 emoji 符号或上传的照片来个性化空间。

在 **空间名称** 下方更改你的空间名称。

在 **账户和数据** 下面更改账户个人资料的名称和图像。


# 侧边栏 & 小部件

How do we customize and edit?

侧边栏由可自定义的小部件组成，能让你预览和导航到你的【对象】。

默认情况下，侧边栏包含链接到 [【资料库 (Library)】](/anytype-docs/documentation_cn/ji-chu/anytype-library) 和【废纸篓】的小部件。

一般来说，使用 Anytype 编辑器创建的 *任何* 对象都可以用作小部件，并使用链接或树状图的视图格式进行显示。【对象集合 (Sets)】 和 【集锦 (Collections)】 - 包含对象的【对象】 - 能够以包含对象列表的小部件的形式使用。

此外，Anytype 还为 *非对象的* 小部件提供了多个选择，你可以在侧边栏中添加或移除，包括：

* 收藏夹（Favorites）：所有被你标星收藏的对象，与对象类型无关
* 对象集合（Sets）：类型为【对象集合】的所有对象
* 集锦（Collections）：类型为【集锦】的所有对象
* 最近编辑（Recently edited）：你最近编辑过的对象（跨设备全局同步）
* 最近打开（Recently opened）：你最近打开过的对象（针对特定设备）

{% hint style="info" %}
这些小部件中的【对象】无法被手动排序。你需要创建自己的小部件才能实现这一目的。
{% endhint %}

### 自定义你的侧边栏小部件

在侧边栏的底部有一个 "编辑小部件 "按钮，点击后，会显示为侧边栏添加或删除小部件的选项。

点击“添加”，将会让你选择小部件来源。同样，小部件来源可以是你之前创建的任何对象，也可以是上面的小部件选项的列表。

在桌面端，还可以直接将对象拖放到侧边栏中。

### 调整你的小部件外观

根据小部件来源的不同，你可以选择不同的布局。

可以以“链接”或“树状图”小部件的方式，查看在编辑器中创建的单个【对象】（页面 (Pages)、笔记 (Notes) 等）。“链接”小部件只显示对象的名称，而“树状图”小部件则显示与来源对象通过一级和二级链接相连的所有对象。

<figure><img src="/files/e7d9eceyYxu2IHYQQzwg" alt=""><figcaption><p>上图中，“Self”小部件使用树状图视图显示，而“Home”小部件则使用链接视图显示。</p></figcaption></figure>

另一方面，从对象集合（Sets）和集锦（Collections）创建小部件时，你将会看到“列表”或“紧凑型列表”的视图选项。这两种视图都能预览指定的对象集合/集锦中包含的对象，但行间距和描述预览会有所不同。

<figure><img src="/files/GZBHSc1BSdSJjb1puEsW" alt=""><figcaption><p>见上图，“Disco Room”小部件分别以紧凑列表（上）和列表（下）的形式显示。</p></figcaption></figure>

### 移动端小部件

#### 组织你的小部件

在移动设备上打开 Anytype 时，你会看到当前的 **【小部件】** 以及底部的 3 个导航选项。

你的 **小部件** 可以自定义，就像桌面端应用程序侧边栏中的小部件一样。

要编辑和移动小部件：滚动到列表底部，在【废纸篓】下方可以找到“编辑小部件”。

点击这个按钮之后，你会在每个小部件的角落看到一个灰色的小减号。现在你就可以删除、添加或者重新排列小部件了。

#### 使用小部件

小部件是自定义和优化 Anytype 移动端用法的最佳方式，是你最好的朋友。

为移动端设置小部件，可以让你创建快速访问入口，并管理你的偏好访问对象。

将特定的【对象】添加到顶部，便于快速访问。

把【对象集合】添加到小部件，比如任务管理，来快速查看你接下来要做什么。


# 简洁的仪表板

Set up your Anytype to easily navigate to frequently-used pages for work, life, or school.

{% embed url="<https://www.youtube.com/watch?v=NCVeIW28tq0>" %}


# 其他导航

## 旧的主页

<figure><img src="/files/oIlYMiel9SH1pLRZwM5M" alt=""><figcaption></figcaption></figure>

Alpha 版应用的主页已经被移除，取而代之的是新的侧边栏和小部件。如果你非常喜欢这种布局，可以尝试使用带有相簿（Gallery）视图的集合来重新创建它。

## 移动端导航

在移动设备上，导航采用极简化设计。

你有 3 个选项：搜索、新建对象和个人资料。

**搜索** - 浏览最近的对象，搜索具体的对象。

**新建对象** - 创建新对象、页面（page）、笔记（note）等。

**个人资料** - 查看你的个人资料、账户、设置等。


# 概览

Working your way through the anytype primitives

<figure><img src="/files/FnRFVkA8OdYgg4YcYRm2" alt=""><figcaption></figcaption></figure>

要充分利用 Anytype，需要熟练掌握基本的术语以及各部分之间如何配合。从简单的笔记到复杂的仪表板，最终到你自己的小网络，你都要用到这些基本组件。

它们包括：

* [空间](/anytype-docs/documentation_cn/ji-chu/space)：你的对象关联图谱的容器——在 beta 阶段，这相当于你的账户。Anytype 的未来版本将允许具有不同访问入口控件的多个空间。
* [对象（Objects）](/anytype-docs/documentation_cn/ji-chu/object-editor)：Anytype 的基础构成。它们代表着账户中最小的可链接组件；每个对象都是你的图谱中的一个节点（node）。
* [块（Blocks）](/anytype-docs/documentation_cn/ji-chu/object-editor/blocks)：【对象】内实际内容的容器。块的行为由它的【块类型】定义。
* [类型（Types）](/anytype-docs/documentation_cn/ji-chu/types)：对象的分类系统。所有对象都必须有一个类型。
* [布局（Layouts）](/anytype-docs/documentation_cn/ji-chu/types/layouts)：定义【对象】的总体外观和感觉，并决定可以对【对象】执行的操作。
* [模板（Templates）](/anytype-docs/documentation_cn/ji-chu/types/templates)：为特定的类型而预保存的内容格式，可在创建【对象】的时候应用。模板针对某个特定的类型，而类型可以有多个模板。
* [关联（Relations）](/anytype-docs/documentation_cn/ji-chu/relations)：对象的连接器；要么是共享的属性，要么是被定义的链接。
* [资料库（Library）](/anytype-docs/documentation_cn/ji-chu/anytype-library)：所有【类型】和【关联】所在的地方。
* [链接](/anytype-docs/documentation_cn/ji-chu/linking-objects)：通过关联或直接地在对象之间建立联系。
* [关联图谱（Graph）](/anytype-docs/documentation_cn/ji-chu/graph)：非分层的数据结构，包含了你在空间中创建的所有对象，以及它们之间的联系。
* [对象集合（Sets）](/anytype-docs/documentation_cn/ji-chu/sets)：实时查询具有某种共同特征（即【类型】或【关联】）的所有【对象】。
* [集锦（Collections）](/anytype-docs/documentation_cn/ji-chu/collections)：手动将多个对象整理到一个对象当中。


# 空间

**【空间】** 是你的对象关联图谱的容器。

你可以创建多个独立的空间（最多 10 个），每个空间都有自己的对象关联图谱、小部件侧边栏，以后还会有隐私设置。

只需点击你的个人资料图片，即可创建新空间，或浏览现有的空间。使用侧边栏顶部的空间管理菜单，来自定义你的空间设置或删除你的空间。


# 对象（Objects）

Let's discover what Objects are, and how to use them to optimize your work.

### 对象是什么？

忘掉你对知识管理工具的了解。

在 Anytype，我们创建了这样一个概念：你创建的一切都是【对象】。页面 (Pages)、笔记 (Notes)、食谱 (Recipes)、图书 (Books)、电影 (Movies)、音频 (Audio)、人类 (Humans)，*全部都是*！

这些都是按 **【类型 (Types)】** 来组织和分类的 **【对象 (Objects)】**。

你可以通过 \*\*【关联 (Relations)】\*\*将不同的 **【类型】** 连接起来，并在 \*\*【关联图谱 (Graph)】\*\*中查看可视化效果。

你会在 \*\*【资料库 (Library)】\*\*中看到，你能够创建新的【类型】。

简而言之，【对象】是你所创建的内容的概括统称。如果一个【对象】属于页面（Page）、笔记（Note）或其他你创建的【类型】——

【对象】就会按照它的【类型】被组织。

它是你关联图谱中的一个节点，最小的可链接单元，并且按类型来区分。


# 块（Blocks）

Understanding blocks, editing, and customizing to your preference.

你的对象由不同类型的块组成，用来组织你的信息，所有【块】放置的地方叫做【画布 (Canvas)】。Anytype 的基于块的编辑器，与博客或网站建设工具的工作原理非常相似。

所有块样式都来自于命令菜单，点击编辑器左侧橙色的 `+` 符号，或输入 `/` 即可访问。

在这里，你会看到二十多种不同的块类型，它们可以添加到你的对象中。

<figure><img src="/files/7iNrdpBW7m93baGhkDro" alt=""><figcaption></figcaption></figure>

### 设置块样式

你可以一次选择一个或多个块，然后批量编辑，创建不同的标题和文本样式，比如复选框（checkbox）、项目符号（bullet）或数字（number）。

<figure><img src="/files/HIe4AUEua8WuFKgnNoBm" alt=""><figcaption></figcaption></figure>

### 拖放来改变样式

你可以使用每个块左侧的橙色“手柄”，在编辑器中创建父/子块或新的列。

{% embed url="<https://www.loom.com/share/00021ba3598447309722ec3a408d33ac?sid=eb244417-2273-4ab2-8da3-bd47e62e82cf>" %}

### 嵌入块

只需在编辑器中简单地输入“/嵌入”（"/embed"），就能调出当前支持的嵌入块菜单。

当中包括 Mermaid 图、Youtube 视频、Miro 白板、Google 地图等等。


# 如何创建对象

How do you create an object?

### 导航菜单

左键单击加号按钮，就会立即创建一个新对象，类型是你在空间设置中设定的默认对象类型。

右键单击加号按钮，会出现一个菜单，其中有标准类型以及你最近使用过的【类型】。

### 正斜杠命令

使用 Anytype 时，你可以键入“/”来创建一个新的【对象】。这将显示你已创建过的【对象】列表。只需选择要创建的【对象】，它就会链接到你当前的位置。

<figure><img src="/files/mRCe25tRhD7tUVkHuCQm" alt=""><figcaption></figcaption></figure>

你也可以在这里链接到已经存在的【对象】。

### 使用快捷键

要快速创建一个新的【对象】，可以使用这个快捷键：⌘+N

它会执行与点击导航栏中“+”号相同的操作。

### 转换为对象

如果你在处理现有的【对象】中的某些内容，并且想只将某个块转换为【对象】，你可以通过操作菜单中的任一操作来实现：

1. 将鼠标悬停在激活中的块的左侧，然后点击那 3 个点的操控杆。
2. 使用键盘快捷键 ⌘+/ 。

<figure><img src="/files/tQVSmzzVOAOdvbVI5Vc7" alt=""><figcaption><p>操作菜单</p></figcaption></figure>


# 定位你的对象

### 使用关联图谱

要找到你的所有对象以及它们之间的联系，可以从【关联图谱 (Graph)】中寻找主要事实来源。

在此处阅读有关 [关联图谱（Graph）](/anytype-docs/documentation_cn/ji-chu/graph)的更多信息。

### 浏览所有内容

另外，默认情况下会有一个“All Objects”的集合，会以列表形式显示你所有的对象以及它们的类型。

这个对象名为“All Objects”且使用这个 emoji 图标： :globe\_with\_meridians:

### 使用搜索

最后手段，如果你还是找不到想找的内容，可以尝试搜索。

要使用搜索，点击你导航栏上的放大镜。

<figure><img src="/files/GWP0jtM2zYFhRdzn4xu8" alt=""><figcaption></figcaption></figure>

{% hint style="info" %}
上述搜索功能目前不会在关联中搜索。
{% endhint %}


# 类型（Types）

Types are the classification system we use to categorize Objects

就像在物理世界中一样，【类型】是用来定义彼此完全不同的【对象】。

香蕉在本质上不同于沙发。香蕉的功能、属性以及与其他对象的关系，更类似于苹果和橘子，而不是沙发。因此，我们可以将苹果、橙子和香蕉归类为 *水果*，而沙发则属于另一个类别：*家具*。

根据同样的原则，在 Anytype 中，有两个需要牢记的重要概念：

1\) 每个对象（Object）都有一个【类型】，这个类型在创建【对象】时被定义（之后可以更改）

2\) 不同的【类型】用于定义彼此完全不同的【对象】

在你的 Anytype 图谱中，同事、朋友和邻居都可能被视为：*Human* 类型。以下是一些可能存在于你的图谱中的其他【类型】：

* Task（任务）
* Note（笔记）
* Book（图书）
* Movie（电影）
* Idea（想法）

你可以自行决定【类型】的范围大小，但一般情况下，建议使用常规【类型】对你的【对象】进行分类，并通过 [【模板 (Templates)】](/anytype-docs/documentation_cn/ji-chu/types/templates/deep-dive-templates) 进一步细化【类型】的使用。

你可以随时通过侧边栏 \_【资料库 (Library)】\_小部件中的【类型库 (Types Library)】来查看和管理你的【类型】。


# 创建新类型

How to create new types from the library and your editor

[资料库（Library）](/anytype-docs/documentation_cn/ji-chu/anytype-library) 是管理、搜索和创建新类型的中枢。

### 在资料库创建类型

点击搜索栏，输入要创建的类型名称。下拉菜单中将出现 Anytype 资料库中所有匹配的术语。你可以选择其中任何一个，它们就会新安装到你的类型库中。如果你想创建自己的类型，只需选择 `+ 创建 "类型名" 类型` 的选项即可。

<figure><img src="/files/baTN0eEzHpPg9cxid4qZ" alt=""><figcaption></figcaption></figure>

如果选择了创建你自己的类型，则会自动打开【类型】页面。在这里，你可以为类型添加模板和关联，它们会在你每次创建这种类型的对象时自动应用。

<figure><img src="/files/LtMrydtCHIX9lohGRjal" alt=""><figcaption></figcaption></figure>

如果你认为这个【类型】没有意义，可以使用角落的三点菜单从空间中删除该类型。请谨慎操作；如果某个类型从你的资料库中被删除，那么该类型的任何对象都将会显示警告信息。

<figure><img src="/files/UlrJlH3uoSLHyAxPE3Gq" alt=""><figcaption></figcaption></figure>

### 在对象编辑器创建类型

如果你在创建对象时想到了新的对象类型，可以立即创建一个新类型。这种情况下，使用类型选择菜单的方法，与使用类型库中搜索栏的方法相同。新类型将会自动添加到【类型库】中，同时，你可以继续编辑当前新类型的对象。

<figure><img src="/files/SxSAI7tzWWvbgIySWH1R" alt=""><figcaption></figcaption></figure>

如果你在 *创建对象后* 决定将其转换为新的对象类型，也可以点击对象类型，选择“更改类型”，然后输入你要创建的类型名称。

<figure><img src="/files/Wt63QUx7RlOqi4V3tmbT" alt=""><figcaption></figcaption></figure>

你在对象编辑器中创建的所有类型，都可以通过上面的步骤在类型库中进行编辑。


# 布局（Layouts）

\*\*【布局 (Layouts)】\*\*定义了【对象】的总体外观和感觉，并决定可以对【对象】执行的操作。

目前，用户可以为自己的【对象】选择四种基本布局，我们计划在未来让社区贡献者能够创建新的布局。

你可以通过 [类型库](/anytype-docs/documentation_cn/ji-chu/anytype-library/types) 为每种类型选择推荐的对象布局，也可以为每个 [模板（Templates）](/anytype-docs/documentation_cn/ji-chu/types/templates)选择不同的布局。

你可以在【对象】标题上方、封面和图标按钮旁边找到对象布局菜单。在这里你可以更改对象的布局，或设置布局宽度。有些布局甚至允许你更改文本对齐的方式。


# 模板（Templates）

Building & using templated through types.

### 理解模板

模板（Templates）是 Anytype 中最受欢迎的工作方式之一，可以帮助扩展和个性化你创建对象的流程。使用【模板】，你可以：

* 为某些对象类型自定义你想要的【布局】和【关联】
* 每次添加新的【对象】时，自动重复使用这个相同的结构

【模板】基于【类型】保存，每个【类型】可支持多个【模板】。例如，你可以为学术、小说或非小说等不同种类的图书设置不同的【模板】。

### 如何创建模板

添加【模板】有以下三种方式：

1\) 导航到【类型库】 → 单击要创建【模板】的【类型】 → 单击 + 开始创建新模板 → 给你的【模板】命名并添加【关联】和格式 → 【模板】会自动保存

2\) 如果你正在一个【对象】中，并想将你的工作保存为【模板】，可以这样做：点击右上角的 `···` → 点击 + 用作模板，你的内容就会自动保存为这种【对象类型】的新【模板】。

3\) 如果你正在一个【对象集合】或【集锦】中，并且想创建或编辑模板，可以这样做：\找到【集合】或【集锦】视图中右上角的 `创建|▾` -> 点击 `▾` 按钮打开模板样式。然后使用 `+` 按钮创建一个新模板，或者点击模板按钮右上角的 `···` 然后选择 `编辑模板`、`创建副本` 或者 `删除`。

### 使用和管理模板

根据你创建新对象的方式，要么会自动应用默认模板，要么会要求你自己选择一个模板。

<figure><img src="/files/HhOIsufq6rpFkS5CR1BK" alt=""><figcaption><p>选择模板</p></figcaption></figure>

你还可以通过【类型库】为每种【类型】选择默认模板，或者为每个【对象集合】和【集锦】的视图选择默认模板。

<figure><img src="/files/fpfkYhnkkOdBZzQFRJKK" alt=""><figcaption><p>为对象集合选择默认模板</p></figcaption></figure>

你可以在【类型库】中，对每种【对象类型】已添加的【模板】进行查看、编辑、复制或删除。


# 深入探讨：模板

{% embed url="<https://www.youtube.com/watch?v=DIReqsBST7Q>" %}


# 关联（Relations）

### 理解关联 <a href="#understanding-relations" id="understanding-relations"></a>

关联（Relations）是 Anytype 中组织与连接你的【对象】和知识的关键。在 Anytype 中，【关联】有两种功能：

* \*\*定义属性：\*\*你可以使用【关联】来定义某个【对象】的属性。
  * 例如，在 Anytype 中创建一个任务（Task）时，可以添加像 *状态（Status）* 这样的关联：已完成/未完成，或者 *优先级*：低、中、高。
  * 如果想象成一个数据库，那么【关联】代表的是每一行的列标题（其中 A 列是它的【对象】）。
  * 设置完属性之后，就可以根据在【对象集合】视图中定义的【关联】来对你的【对象】进行排序和筛选。

![](https://files.gitbook.com/v0/b/gitbook-x-prod.appspot.com/o/spaces%2FMBWIxXziUmcK7h7uvLnI%2Fuploads%2F79DbEaExZn85mNW3Ifsz%2Fimage.png?alt=media\&token=4813e44e-2291-4fe5-9832-6dac24823967)

* \*\*定义联系：\*\*你还可以使用【关联】来将一个【对象】连接到另一个【对象】。
  * 还是以任务为例子，你可以添加这个【关联】：*分配给..（Assignee）*，然后将 Anytype 中的另一个【对象】指定到这个任务。
  * 如上所述，你可以在【对象集合】或【关联图谱】的视图中查看分配给..（Assignee）这个【关联】。


# 添加新的关联

#### 添加和管理关联 <a href="#adding-and-managing-relations" id="adding-and-managing-relations"></a>

在编辑器中，你可以像添加块一样，使用 `+` 按钮或行内的 `/` 菜单来为你的【对象】添加【关联】。你还可以通过【关联面板】管理某个【对象】的【关联】：将鼠标悬停在【对象】名称上方会出现一个三角形图标，这个面板显示了这个【对象】的所有关联。

**精选关联（Featuring Relations）**

你可以添加、精选或者修改现有的【关联】。由于【精选关联】会直接显示在标题下方，因此，你可以通过【精选关联】来优先显示与某个【对象】最相关的【关联】。在【关联面板】中，你可以通过点击任一关联右侧的 ★ 来精选这个【关联】。

{% embed url="<https://vimeo.com/749076155?embedded=true&source=vimeo_logo&owner=177568036>" %}

#### 关联的类型 <a href="#types-of-relations" id="types-of-relations"></a>

以下是 Anytype 中当前可用的【关联】类型：

* **文本（Text）**：接受文本作为输入。
* **数字（Number）**：接受所有数字。即将会推出不同的格式。
* **日期（Date）**：日期，可选的时间信息。
* **状态（Status）**：你可以自定义并选择的一系列分类关系，如 X、Y 或 Z。
* **标签（Tag）**：另一种没有限制的单个字符串。
* **邮箱/电话/URL（Email/phone/URL）**：URL、电子邮件、电话号码的特殊格式。
* **复选框（Checkbox）**：带有布尔值、字符串或对象链接的对象。
* **媒体（Media）**：可以查看、播放或下载的音频、电影或图片。
* **对象（Object）**：对某个特定对象的引用，如某人、某任务或某文件。


# 创建新的关联

How to create new relations from the library and your editor

[资料库（Library）](/anytype-docs/documentation_cn/ji-chu/anytype-library) 是管理、搜索和创建新的关联的中枢。

### 在资料库中创建新的关联

点击搜索栏，输入要创建的关联名称。下拉菜单中将出现 Anytype 资料库中所有匹配的术语。你可以选择其中任何一个，它们就会新安装到你的关联库中。如果你更想创建自己的关联，只需选择 `+ 创建关联 "关联名称"`。

如果你选择了创建自己的关联，则会自动打开【关联】页面。

如果你认为这种【关联】没有意义，可以使用角落的三点菜单从空间中删除该关联。

### 在对象编辑器创建关联

要即时创建新的关联，你可以按照 [添加新的关联](/anytype-docs/documentation_cn/ji-chu/relations/create-a-new-relation#adding-and-managing-relations) 中的说明进行操作，使用关联选择菜单的方法与使用【关联库】中搜索栏的方法相同。这个新的关联会自动添加到【关联库】中，同时，你可以继续编辑当前的对象。

你在对象编辑器中创建的所有关联，都可以通过上面的步骤在【关联库】中进行编辑。


# 反向链接

该功能目前以最小化可行的形式（MVP）发布，将在未来进行改进。

反向链接和正向链接已经以【关联】的形式实现，可以在任何对象的【关联面板】中找到。

默认情况下，如果一个对象已有反向链接，反向链接会显示为一个指示反向链接数量的精选关联，点击其中的链接将会跳转到对应的对象。如果一个对象没有反向链接，就不会显示为精选关联，但仍可以在关联面板中被找到。


# 资料库（Library）

{% hint style="danger" %}
【资料库 (Library)】小部件当前在 iOS 上不可用。请使用桌面端应用来编辑【类型】。
{% endhint %}

在桌面端或 Android 设备上，它在【导航栏】底部的【废纸篓】上方：

![](/files/zKStVzZvmFS3VxXZiINd)


# 类型库

### 当你打开类型资料库时，你会看到 **Anytype 库** 以及 **我的类型（My Types）**。

Anytype 库是 Anytype 默认自带的类型，有些是你已经在使用的，有些是我们希望能带给你灵感的。

我们期待你在未来的贡献，创建更多的使用案例和类型！

![](https://github.com/anyproto/docs/blob/main/zh-CN/.gitbook/assets/image%20\(11\).png)

在【我的类型】中，打勾标记显示了当前你的库中有哪些类型。

如果点击类型名称，你就会看到为这个类型所创建的模板。

### 在【我的类型】库中，有你保存和创建的类型。

默认类型无法被删除。

你也可以在 Anytype 资料库中间的搜索栏 [创建新类型](/anytype-docs/documentation_cn/ji-chu/types/create-a-new-type)。


# 关联库

### 选择页面顶部中央的标签来查看【关联】。

\*\*【关联】\*\*资料库的组织方式与 **【类型】** 相同，但图标略有不同。

点击 Anytype 关联库中的【关联】，就可以将其安装到你自己的关联库中。

![](/files/G4qn6Aqd3SwFbqa3J0EO)

若要 [创建新的关联](/anytype-docs/documentation_cn/ji-chu/relations/create-a-new-relation-1)，在搜索栏中输入标题， 然后选择“+ 创建关联”。

在 **【我的关联 (My Relations)】** 选项卡中，可以访问你已经在 Anytype 中安装的所有【关联】。

![](/files/iFr7RkhLBlDSXKxogTqi)

点击某个 **【关联】**，将打开一个包含利用了此【关联】的全部对象的【对象集合 (Set)】视图。


# 链接

### 创建新链接

#### 链接到 Anytype 中的另一个对象

直接在画布（canvas）中这样做：

1. **【块链接】。** 输入斜杠字符 ("/") 来唤出命令栏，然后在菜单中寻找 `添加链接到对象（Link to Object）`。这种链接可能以文本或者卡片的形式呈现。
2. **【行内链接】**。输入 @ 即可唤出【对象】选择器菜单。

在弹出的【对象】菜单中选择一个【要关联的某类型对象】，就可以形成【关联】。

#### 链接到设备上的外部对象

如果要在桌面端上添加指向外部【对象】的链接，请以 **file:/// 开头** 然后加上本地文件的目标地址。例如：

* file:///Users/Alex/Downloads/Protocol-Berg.pdf — 打开PDF；
* file:///Users/Alex/Downloads/my\_budget.xlsx — 打开电子表格 (Excel, Numbers)。

要添加这样的链接，与添加新的网页链接一样，选择“链接到网站”（Link to website）。

#### 提及日期

你可以使用 **【行内链接】** 来快速链接到绝对日期或相对日期。

一些例子：

* @now or @today
* @tomorrow
* @nextweek
* @nextmonth
* @24/8/2023

{% hint style="info" %}
遗憾的是，在我们的移动端应用程序上暂未可用。
{% endhint %}

### 检查现有链接

#### 图谱上的关联

在你的文档中，可能会有多个引用或连接，它们连接到你的库中的其他东西。【关联图谱 (Graph)】是可以实现这一点的可视化工具。将【对象】连接到其他【对象】，连接到人（Humans）抑或是任务（Tasks）。

在此处了解有关 [关联（Relations）](/anytype-docs/documentation_cn/ji-chu/relations) 以及 [关联图谱（Graph）](/anytype-docs/documentation_cn/ji-chu/graph) 的更多信息。

![](/files/t8WwYltCcO2c2DrKowuy)

#### 使用【流程】

检查哪些【对象】被链接在一起的另一种选择是，使用在【图谱 (Graph)】视图中，旁边的【流程 (Flow)】选项卡。

在屏幕顶部中间位置，你能看到切换到 **【流程】** 视图的选项卡。它会显示你当前查看【对象】的前后链接的【对象】。

#### 集锦（Collections）

集锦视图也是使用链接来管理要显示的内容。若要将一个现有的【对象】添加到一个【集锦】中，使用【对象】的上下文菜单（右上角的三点）中的 \*\*添加链接到对象（Link To）\*\*选项。


# 关联图谱（Graph）

Finally a dive into your graph of objects.

{% hint style="danger" %}
图谱功能目前在移动端应用上不可用。
{% endhint %}

### 在应用中的任何位置，你都可以在底部导航面板中看到关联图谱的图标

<figure><img src="/files/yk0Y6HaVxeex8PoR6xKh" alt="" width="375"><figcaption><p>找到导航面板中间的关联图谱图标</p></figcaption></figure>

### 打开【关联图谱】，查看所有对象以及它们的关联。

在这里，你可以看到哪些【对象】连接在一起，以及所有对象的流向。

![](/files/pda6DXvpARo2IuQCpg4E)

在【图谱】视图的右上方，你可以执行 **搜索** 以及优化调整部分设置。

切换标题、箭头和图标的外观。

优化对链接、关联和孤立对象的查看。如**如果你发现缺少某些对象，检查孤立对象是否被设置为显示。**

![](/files/1UnwCQC4T5tSz1QuUF3x)


# 对象集合（Sets）

A live search of all Objects which share a common Type or Relation

### 理解对象集合

很多人把【对象集合】与数据库相提并论，但两者有一个关键区别：【对象集合】不会像常规的数据库那样 *存储*【对象】。

【对象集合 (Sets)】是根据筛选条件和几个可以自定义的二级筛选条件，来查看你的部分【图谱】和你创建的【对象】的一种方式。可以把集合看作是一个实时过滤器，或者是对共有特定条件（具体来说是【类型】或【关联】）的【对象】进行实时查询。

#### 【对象集合】有两个主要功能：

1. **组织和访问对象**\
   \
   我们经常收到以下需求：*怎样找到我创建的所有笔记（Notes）？*\
   \
   有一种简单的方法，根据【类型】创建一个【对象集合】。\
   比如：【笔记 (Note)】类型，它将显示你在 Anytype 中创建的每个【笔记】。\
   \
   如果你有经常要访问的特定笔记，可以根据添加到这些笔记中的【关联】来过滤。\
   \
   例如：创建日期、标签、优先级。(从这个意义上说，【关联】的用法就像“属性”一样）。\
   \
   接着，你可以将你的【集合】固定到【收藏夹】菜单，让它在你的【侧边栏】上，就像一个放着符合某些特定条件的所有【对象】的文件夹。
2. **编辑对象**\
   \
   【对象集合】还提供了一种在【列表视图】中快速编辑【对象】的方法。\
   \
   你可以使用【集合】中的【多选对象】来一次性删除多个【对象】，或者批量更新【对象类型】。在【关联菜单】（右上角）中添加到【集合】的所有【关联】，都会被所有通过“+ 新建对象”按钮创建的新【对象】所采用。


# 创建对象集合

### 你可以使用左下角的 + 或者编辑器中的 / 快捷键菜单来创建【对象集合】。

然后，你需要选择是按【类型】创建【集合】（可列出某一【类型】的全部【对象】），还是按【关联】创建【集合】（可列出包含所选【关联】的全部【对象】）。

你也可以在新文档的对象类型切换按钮中，根据其【类型】创建一个【集合】。

![](/files/rRAWNQlQ3sTx6ZCAv8NX)

### 接下来，你需要确定你创建的【集合】的目的。

例如，项目管理的集合可能需要“项目（Project）”类型，而对于阅读清单的集合，则可能是“图书（Book）”类型。在库中，选择一个【对象类型】，点击“创建”，然后选择“新建对象集”。

这将创建一组包含所有“图书（Book）”【类型】的【对象】的对象集合。

这样，就可以对你的 Anytype 中的所有图书对象进行组织管理。

![](/files/n3B6unQFS7jgCerhpprF)


# 关联、排序和筛选的自定义

### 通过集合为对象显隐与添加关联

你可以点击右侧的筛选器，将【关联】批量添加到【对象集合】中，而不用逐个【对象】去添加。

在这里，你可以打开或关闭你想查看的任何【关联】、添加另一个【关联】或新的关联，以及编辑【对象集合】的【视图】。

![](/files/UgGh0FfoUHpwcMUaXV7p)

你可以在创建 **【类型】** 的过程中添加任意【关联】，它们会自动添加到你的新 **【对象】** 当中。

在此处查阅有关 [创建新类型](/anytype-docs/documentation_cn/ji-chu/types/create-a-new-type) 的更多信息。在新建【类型】的过程中，你会在标题和【模板】的下方看到【关联】的选项。

![](/files/GvVdJhunZ9gQQZ15YEO9)

### 排序和筛选

你还可以根据之前添加到【对象集合】中的任何关联，对你的集合进行排序和过滤。


# 深入探讨：对象集

Short demo on how to use Sets to quickly access and manage Objects in Anytype.

{% embed url="<https://www.youtube.com/watch?v=FFSGVOQ5wT8>" %}


# 集锦（Collections）

A folder-like structure where where you can visualize and batch edit objects of any type

### 理解集锦

【集锦】的外观和布局与【对象集合】相似，但是功能不同。

与【对象集合】及上一章节中所解释的相反，【集锦】不会根据【对象类型】进行筛选，而是对所有【类型】都开放。

集锦可以用来组织各种不同的对象，并将它们存储在一个地方。

你不会受到只能查看单一【对象类型】的限制，也就是你在一个集锦中可以拥有多种不同的类型。

### 示例

如果你正在安排你一周的备餐（meal prep），你可能会有一些食谱（recipes）、配料（ingredients）以及一份购物清单（shopping list）。

你使用的主要类型可能是食谱（Recipes）和配料（Ingredients）。

在一个【集锦】中，你可以将所有的这些【类型】无缝地组织到一起。


# 每日笔记

95% of our thoughts are repetitive. Cultivate a practice of daily journaling to start noticing thought patterns and develop new ideas.

{% embed url="<https://www.youtube.com/watch?v=Cl-sG9MialM>" %}

你可以用这个 [链接](https://gallery.any.coop/?experience=daily_journal) 的方法将这个用例导入到你的空间。


# 旅行 Wiki

Travel with half the hassle. Put everything you need in one place, so you don't need to fuss over wifi while traveling.

{% embed url="<https://www.youtube.com/watch?v=eSuYrgsRPMs>" %}

你可以用这个 [链接](https://gallery.any.coop/?experience=trip_planner) 的方法将这个用例导入到你的空间。


# 学习笔记

One place to keep your course schedule, syllabus, study notes, assignments, and tasks. Link it all together in the graph for richer insights.

{% embed url="<https://www.youtube.com/watch?v=Yu2-fkiKTdE>" %}

你可以用这个 [链接](https://gallery.any.coop/?experience=study_hub) 的方法将这个用例导入到你的空间。


# 电影数据库

Let your inner hobbyist run wild and create an encyclopaedia of everything you love. Use it for documenting knowledge you collect over the years.

{% embed url="<https://www.youtube.com/watch?v=fwZ_bx53uh4>" %}

你可以用这个 [链接](https://gallery.any.coop/?experience=movie_database) 的方法将这个用例导入到你的空间。


# 食谱 & 膳食计划

Good food, good mood. Categorize recipes based on your personal needs and create meal plans that suit your time, taste, and dietary preferences

{% embed url="<https://www.youtube.com/watch?v=I-TISp9vfk8>" %}

你可以用这个 [链接](https://gallery.any.coop/?experience=recipe_book_and_meal_planner) 的方法将这个用例导入到你的空间。


# PARA 笔记法

We tested Tiago Forte's popular method for note taking and building a second brain.

{% embed url="<https://www.youtube.com/watch?v=rgBS46Scw4Q>" %}

### 使用下面链接的文件将这个用例导入到你的空间

* 导入后，你的空间名称将会被覆盖，但你可以将它修改回去
* 小部件不会自动出现；你需要根据这个用例的对象自己创建它们


---

[Next Page](/anytype-docs/llms-full.txt/1)