> For the complete documentation index, see [llms.txt](https://doc.anytype.io/anytype/llms.txt). Markdown versions of documentation pages are available by appending `.md` to page URLs; this page is available as [Markdown](https://doc.anytype.io/anytype/create/editor.md).
# Editor
Anytype is a block-based editor and all [Pages](https://app.gitbook.com/o/Ssa9i5QAuI6HhV4jXCLv/s/uI82XLdf1100Q75OKbEQ/~/edit/~/changes/46/creation/object-editor/format#page-format) are built with blocks, which makes your content flexible and easy to use. The editor is the primary way for you to build documents on Anytype.
## How it works
**Blocks** are the building pieces of every Object, think of them as lego bricks for every document. When you open an Object and start editing, you're adding and arranging Blocks — paragraphs, headings, images, lists, embeds, and so on. Each Block is independent and can be moved, restyled, or replaced without affecting the others.
If you've used Notion, this concept will be familiar. If you've used Microsoft Word or Google Docs, the difference is that Blocks are **discrete units** — you can drag them, nest them, turn one type into another, or build columns by placing them side by side.
## Adding Blocks
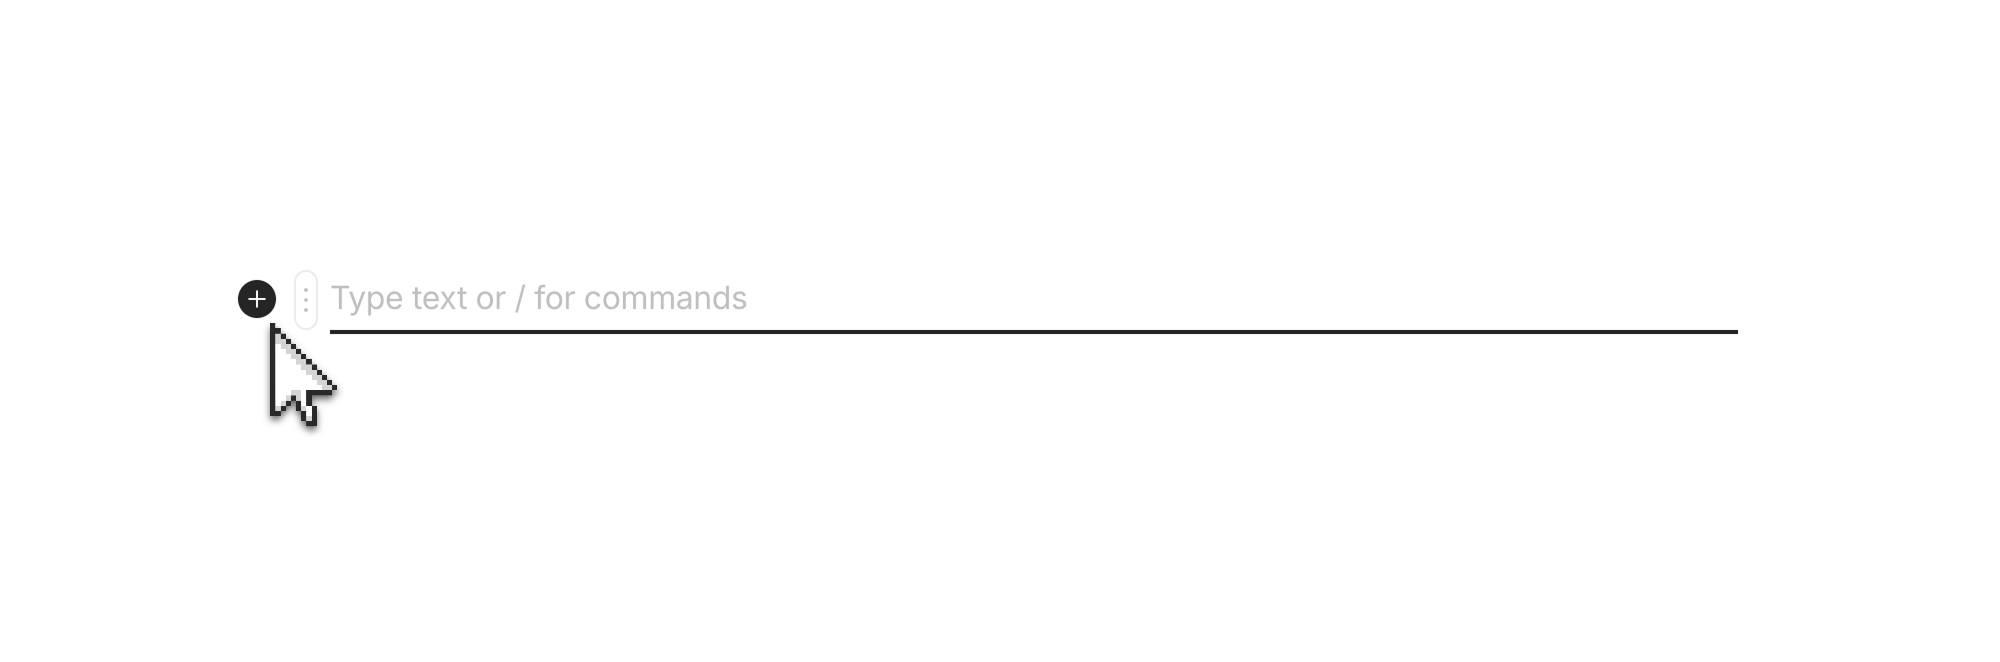
You can access the different kinds of blocks via the **Block Menu** using the plus button or slash command.
#### Plus button
Hover over the left side of any block. A plus icon appears — click it to insert a new block above. The same menu as the slash command opens.
#### Slash menu
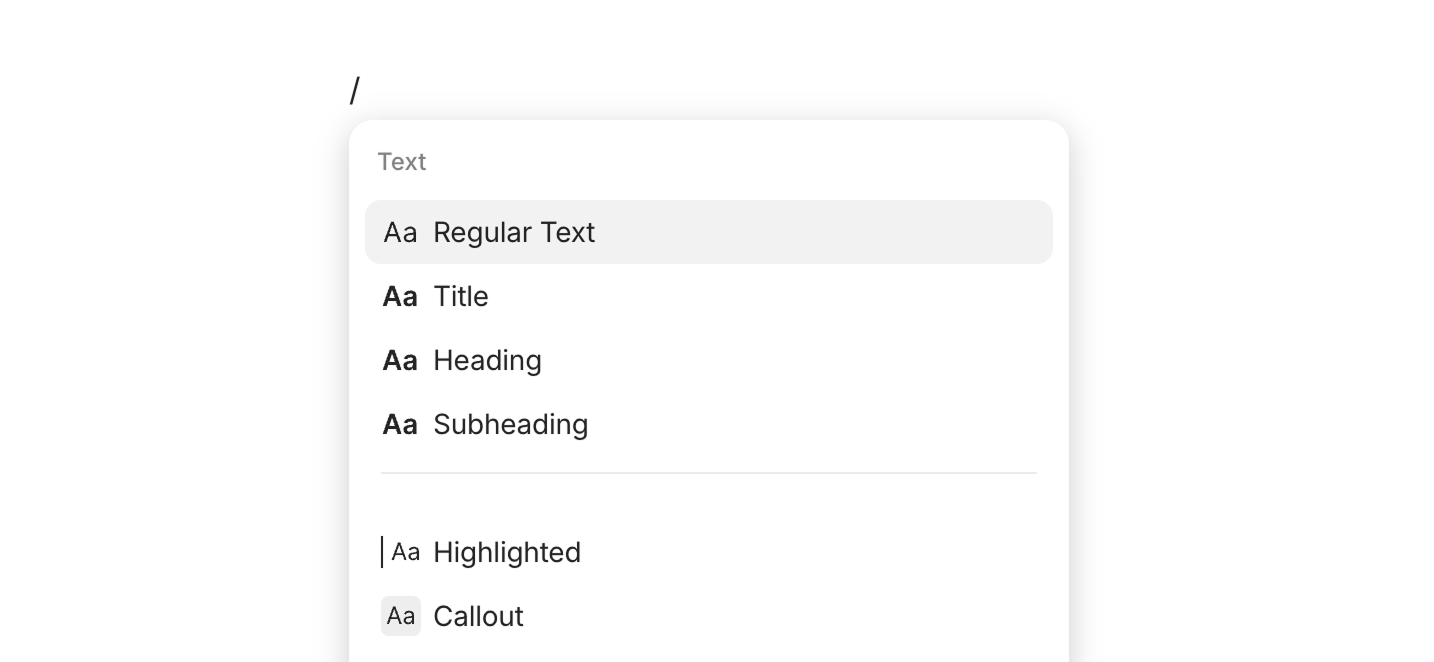
Type `/` anywhere in the editor. A menu appears with every available block type, organized by category. Type a few characters of the block name to filter — `/h2` for Heading 2, `/code` for code block, `/image` for an image.
This is the fastest way once you know what you want.
#### Keyboard shortcuts
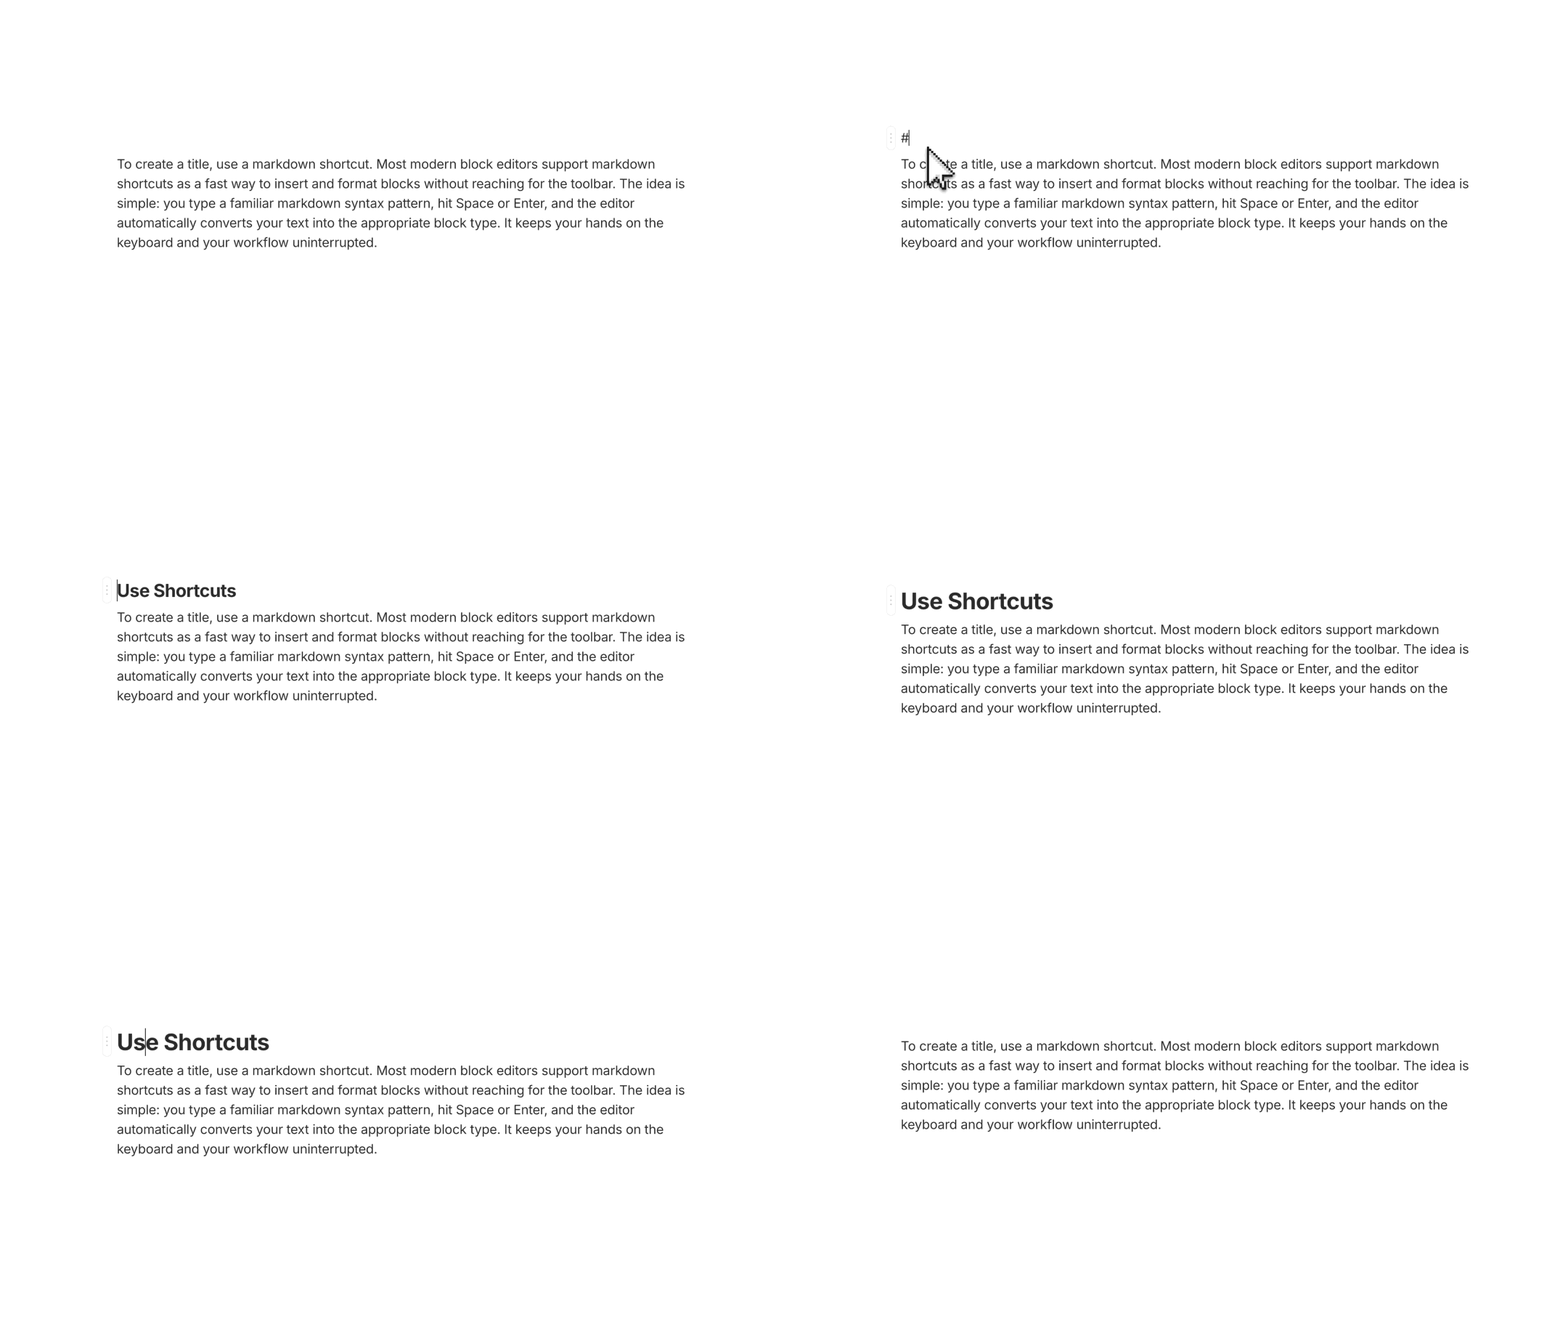
For text-style blocks, you can use Markdown-style keyboard shortcuts at the start of a line. Press space after the shortcut and the block transforms.
| Type this | To create |
| ---------- | ----------------- |
| `#` | Heading 1 |
| `##` | Heading 2 |
| `###` | Heading 3 |
| `>` | Toggle |
| `*` or `-` | Bullet point |
| `1.` | Numbered list |
| `[]` | Checkbox / to-do |
| ` ``` ` | Code block |
| `---` | Divider |
| `#>` | Toggled Heading 1 |
| `##>` | Toggled Heading 2 |
| `###>` | Toggled Heading 3 |
## Styling Blocks
#### Single block
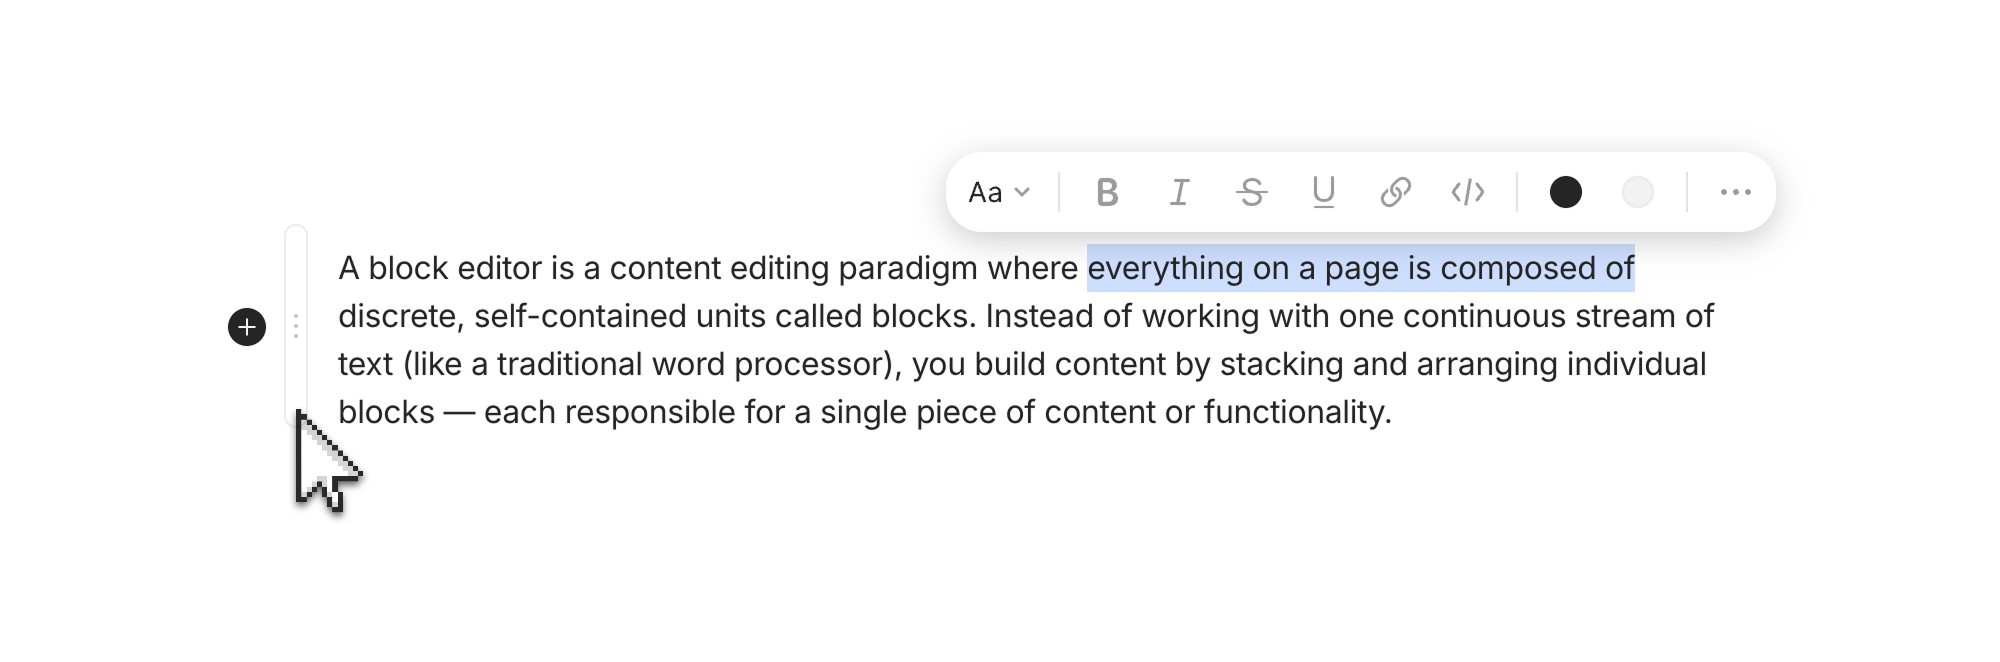
Click anywhere in a block to focus it. The block's options appear:
* **Block handle** (three dots on the left) — for moving, deleting, or transforming
* **Plus button** (+ button on the left) — for inserting a new block
* **Inline toolbar** (in some blocks) — for inline style formatting
#### Multiple blocks
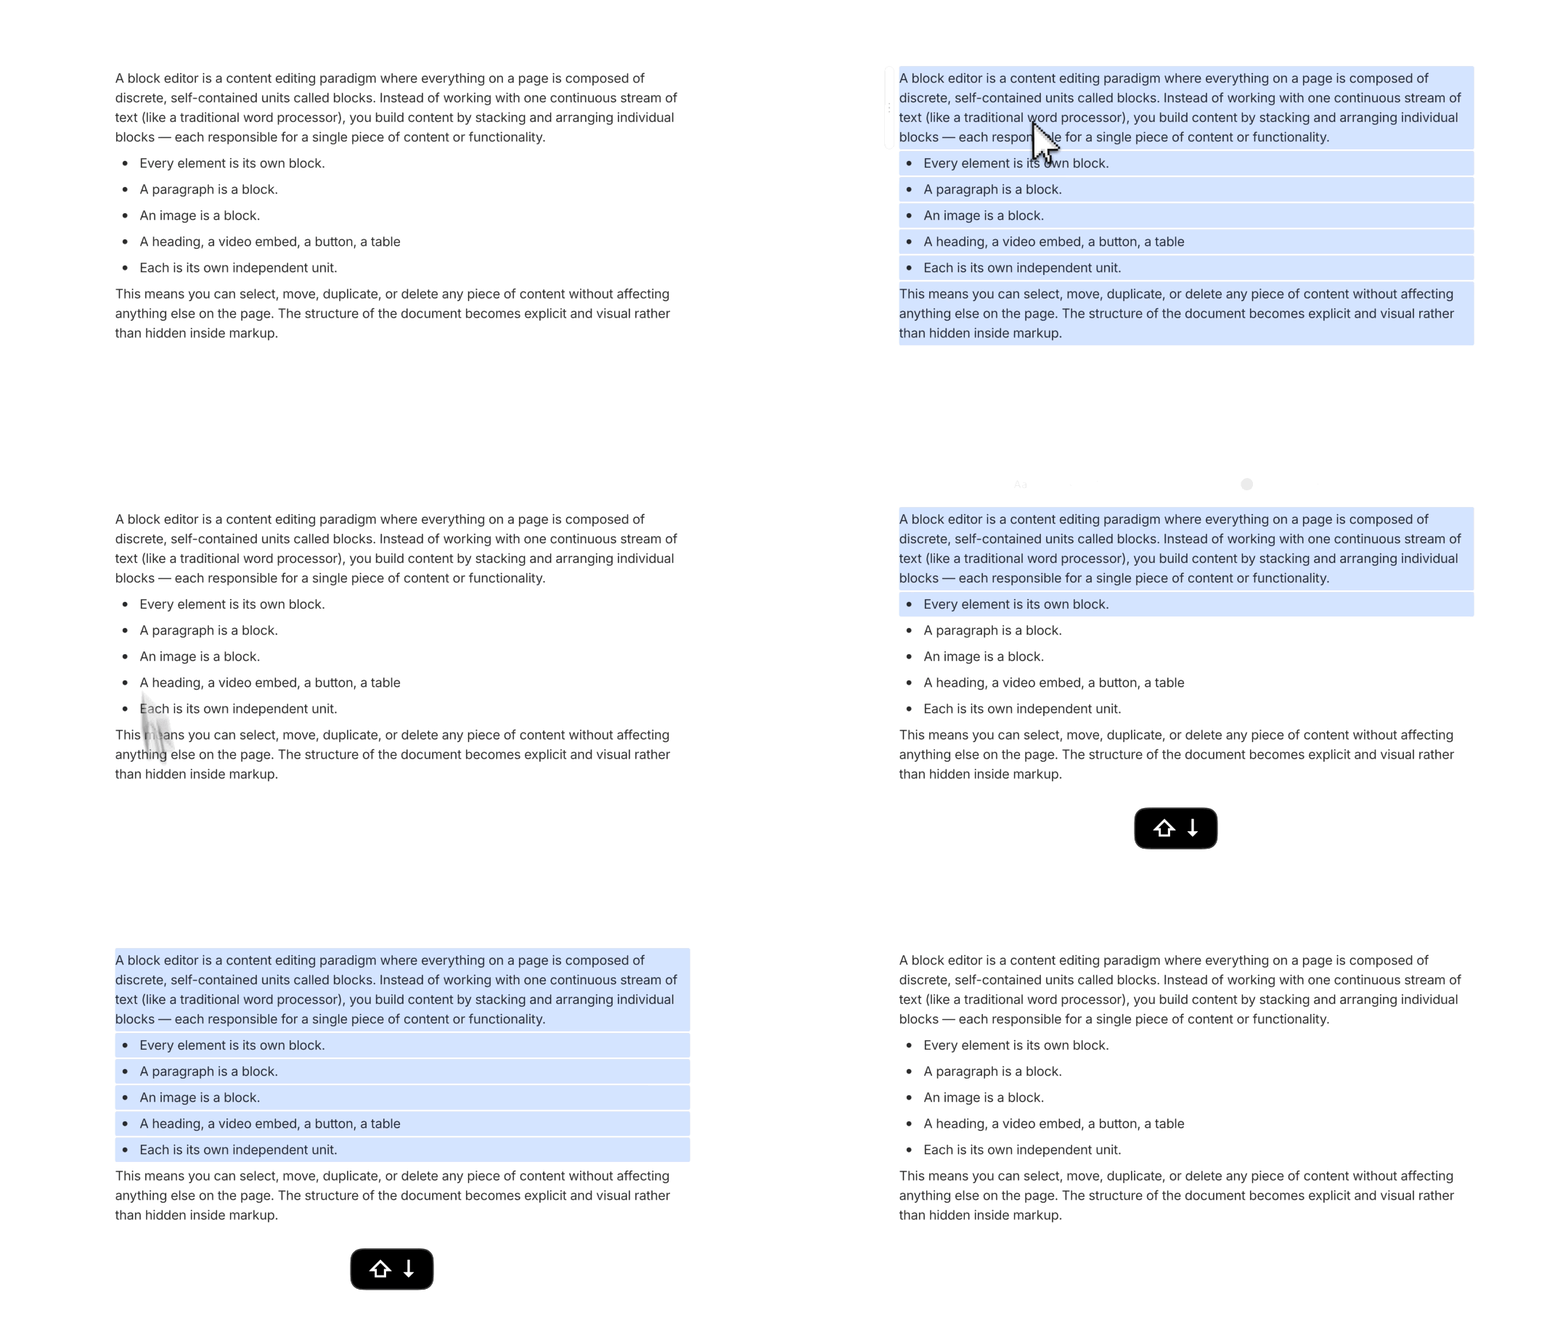
Click on a block, hold Shift, and click on another to select all blocks between. Alternatively you can click and drag with your mouse to highlight as many blocks as you'd like to select. You can then:
* **Drag** them as a group to a new location
* **Delete** them all at once
* **Apply formatting** (bold, italic, color) to all selected text
* **Convert** them all to a different block type (e.g., turn five paragraphs into bullet points)
#### Inline styling
Within any text block, you can format individual characters or words. Highlight the text and a floating toolbar appears with these options:
* **Bold** — `Cmd/Ctrl + B` or `**text**`
* **Italic** — `Cmd/Ctrl + I` or `*text*`
* **Strikethrough** — `Cmd/Ctrl + Shift + S` or `~~text~~`
* **Inline code** — `Cmd/Ctrl + Shift + L` or backticks: `` `code` ``
* **Underline** — `Cmd/Ctrl + U`
* **Link** — `Cmd/Ctrl + K`, then paste a URL or search for an Object
* **Highlight color** — select text, choose a color from the toolbar
* **Text color** — same as highlight, in the toolbar
* **Quote in discussion** — copies text into a [Discussions](/anytype/collaborate/discussions.md) post.
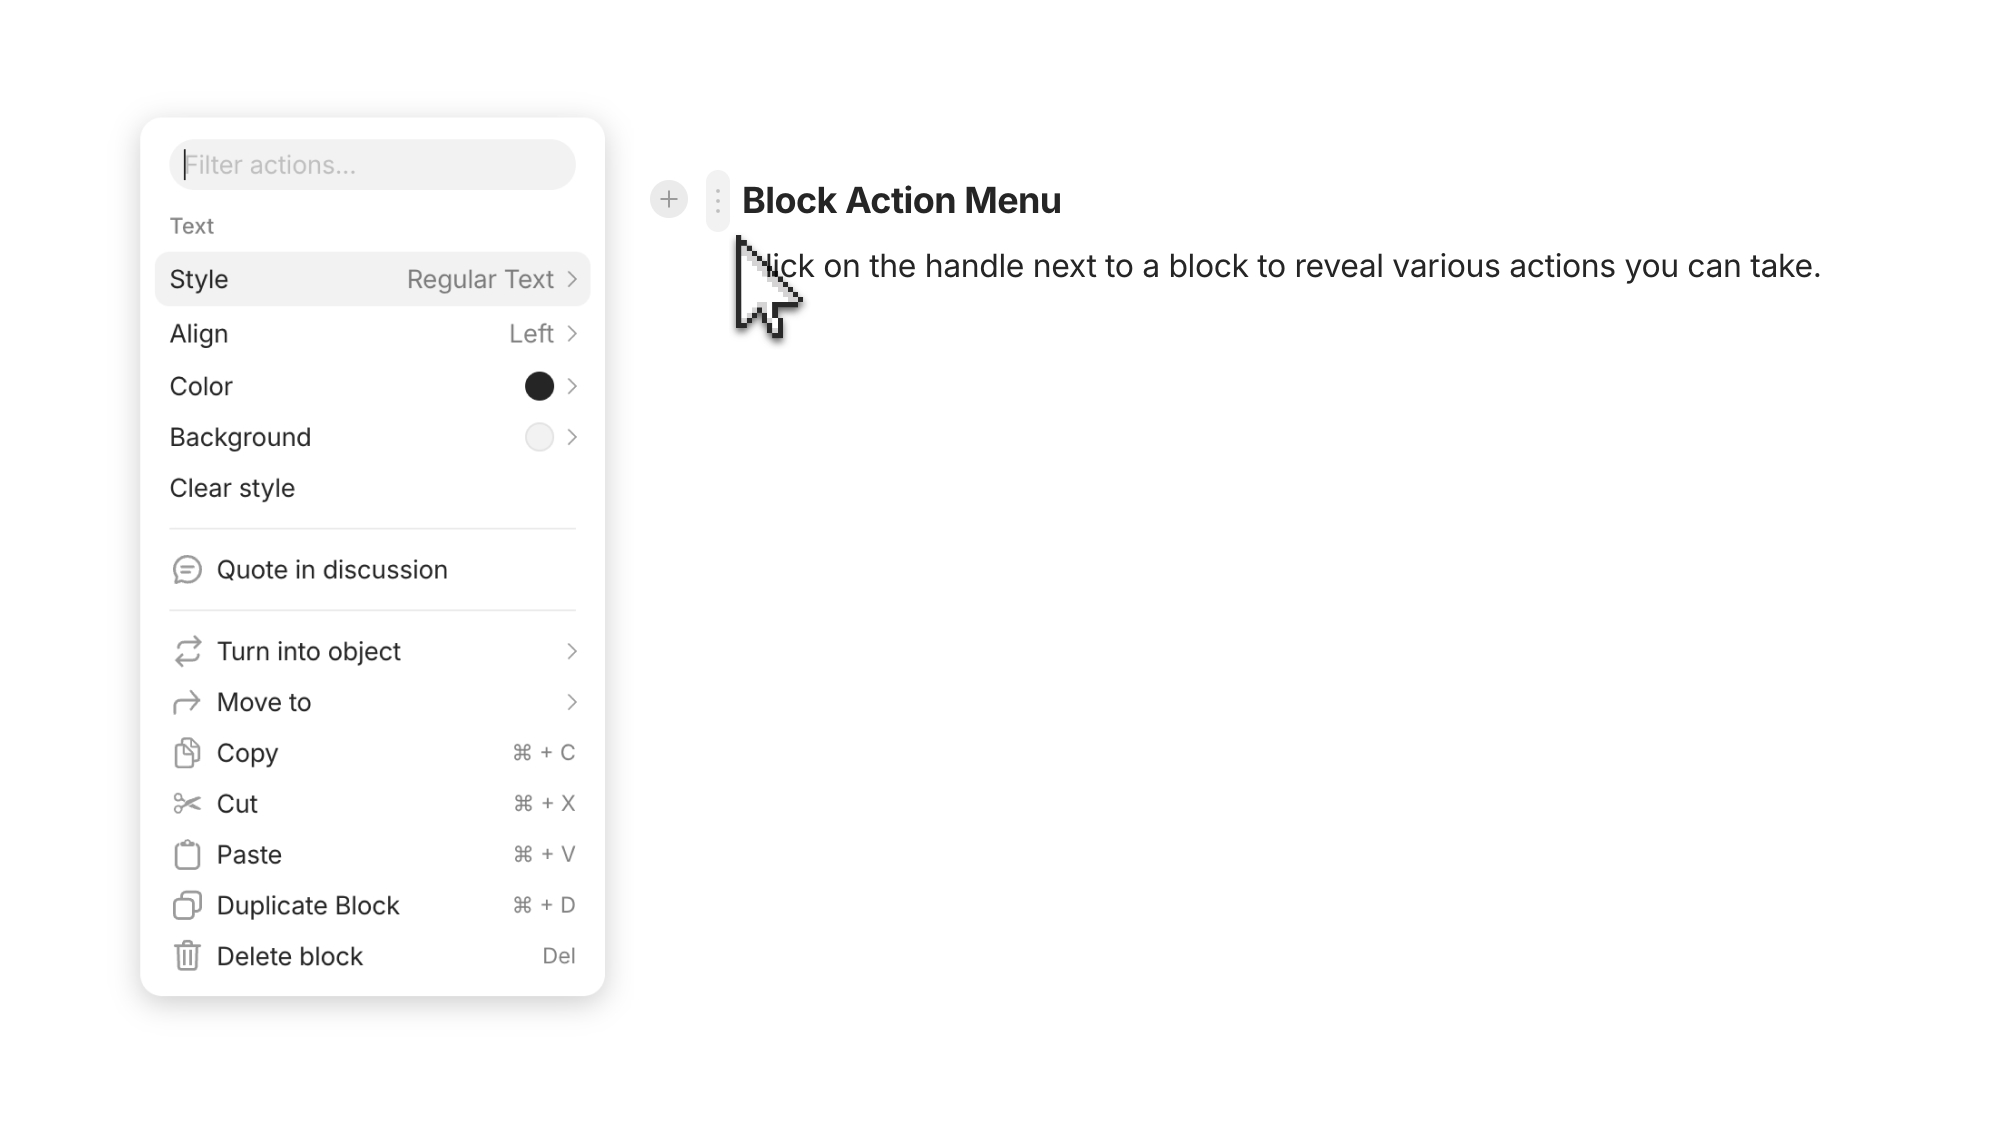
#### Block handles
Every block has a handle on its left side that opens the Block Options Menu:
* **Turn into** — convert a block into another block type, such as a sentence → heading or a numbered list → bulleted list.
* **Color** — change the text color
* **Background** — change the background color
* **Move** — to relocate the block to another object
* **Copy / Cut / Paste / Delete / Duplicate**
* **Quote in discussion** — start a thread on this specific block
You can also right-click any block to access the same menu.
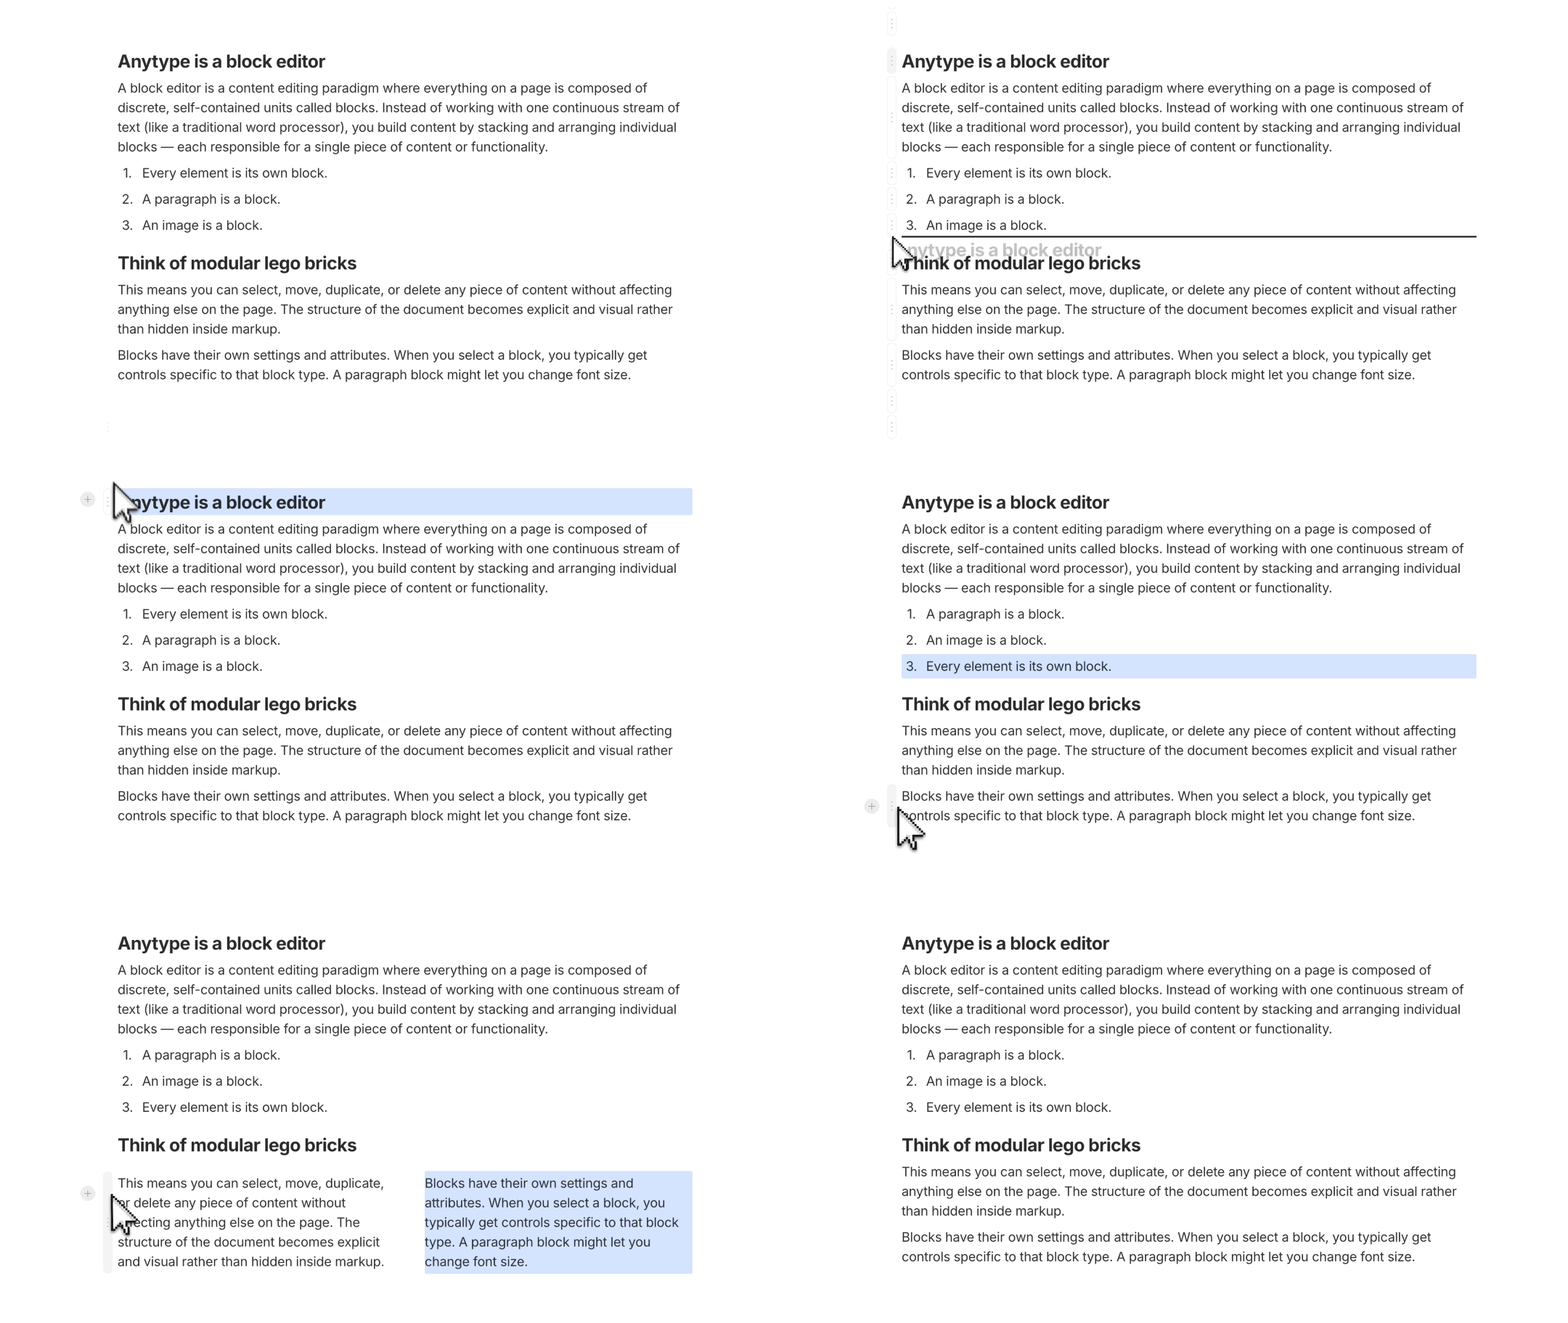
The block handle isn't just for menus — it's a drag handle to move blocks around. Click and hold, then drag the block:
* **Up or down** to a different position in the same Object
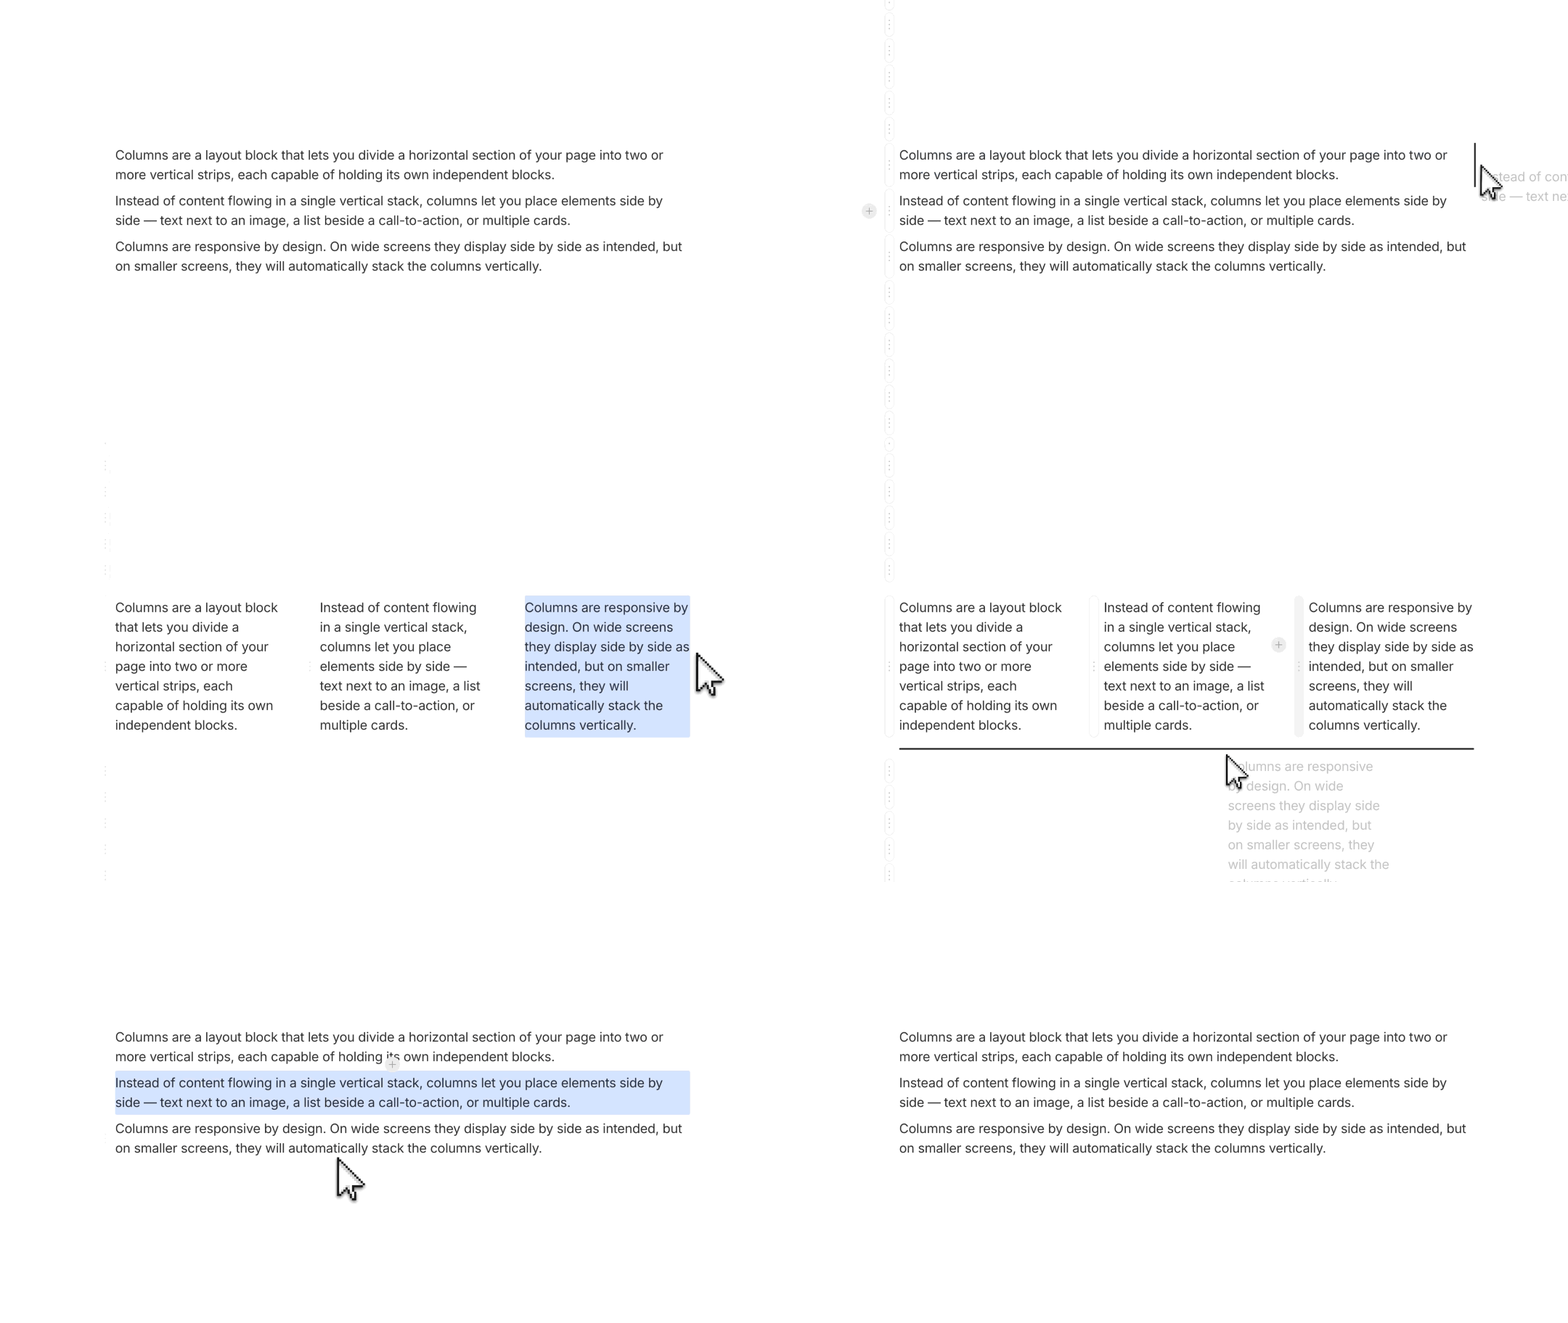
* **Left or right** of another block to create a column
* **Out of a nested list** to outdent it
* **Onto a sub-Object link** to add the block as content in that Object
#### Indenting and nesting
Most block types support nesting — paragraphs, images, list items, toggles, and headings can all have children.
* `Tab` to increase the indentation (indent)
* `Shift + Tab` to decrease the indentation (outdent)
#### Columns
Columns work with all block types. You can put text next to images, embeds next to lists, or any other combination. This is the closest equivalent to a desktop publishing layout — useful for project pages and dashboards. You can place blocks side by side to create columns:
1. Click the block handle (six dots) on the left of a block.
2. Drag the block to the right side of another block until you see a vertical drop indicator.
3. Release. The two blocks now sit side by side.
Repeat to add more columns. To break a column back into a single column, drag a block back below or above its sibling.
## Tips
{% hint style="info" %}
**Toggled Headings + Table of Contents = best long-page navigation.** With both turned on, you can collapse sections you're not editing and use the Table of Contents to jump between sections. See [Toggled Headings](/anytype/create/editor/toggled-headings.md).
{% endhint %}
---
# Agent Instructions
This documentation is published with GitBook. GitBook is the documentation platform designed so that both humans and AI agents can read, navigate, and reason over technical content effectively. Learn more at gitbook.com.
## Querying This Documentation
If you need additional information that is not directly available in this page, you can query the documentation by asking a question.
Perform an HTTP GET request on the following URL with the `ask` and `goal` query parameters:
```
GET https://doc.anytype.io/anytype/create/editor.md?ask=&goal=
```
`ask` is the immediate question: it should be specific, self-contained, and written in natural language.
`goal` is what the user is ultimately trying to achieve, the reason they need the answer. Sharing it helps GitBook give you a better, more relevant answer. A goal is most helpful when it describes the outcome the user wants rather than restating the question. For example, with `ask=how do I create an API token`, a goal like `automate deployments from our CI pipeline` lets GitBook tailor the answer to that use case.
The response will contain a direct answer to the question and relevant excerpts and sources from the documentation.
Use this mechanism when the answer is not explicitly present in the current page, you need clarification or additional context, or you want to retrieve related documentation sections.
.jpg?alt=media)